Table of Contents
Advertisement
Quick Links
Download this manual
See also:
User Manual
Advertisement
Table of Contents

Subscribe to Our Youtube Channel
Related Manuals for Kodak PixPro SP360


Summary of Contents for Kodak PixPro SP360
- Page 1 SP360 Action Cam User Manual...
-
Page 2: Before You Start
All trademarks mentioned in this manual are used for identification purposes only and are properties of their respective owners. This manual provides you with instructions on how to use your new KODAK PIXPRO Action Cam. Every effort has been made to ensure that the contents of this manual are accurate;... - Page 3 Radiation Exposure Statement: This product complies with the Canadian portable RF exposure limit set forth for an uncontrolled environment and is safe for intended operation as described in this manual. Additional RF exposure reduction can be achieved if the product can be kept as far as possible from the user body or set the device to lower output power if such function is available.
- Page 4 Electromagnetic compatibility and Radio Spectrum Matters (ERM); Electro Magnetic Compatibility (EMC) standard for radio equipment and services; Part 1: Common technical requirements. - EN 301 489-17 V2.2.1:2012 Electromagnetic compatibility and Radio spectrum Matters (ERM); Electro Magnetic Compatibility (EMC) standard for radio equipment and services; Part 17: Specific conditions for 2.4 GHz wideband transmission systems and 5 GHz high performance RLAN equipment.
-
Page 5: Safety Notes
Safety Notes P roduct Notes: • Do not disassemble or repair the product by yourself. • Do not heavily drop or knock this product. Improper handling may damage this product. • Avoid touching the lens element, please use professional lens cleaning paper together with lens cleaning agents to wipe the lens and keep the lens clean. • Do not use corrosive, alcoholic or organic-solvent-containing cleaners to wipe this product. • Do not use or store this product in high temperature environment. • Do not expose the lens to strong light sources (e.g. daylight, etc.) for extended periods of time. • Do not use or store the product in a strong magnetic field environment. • If the product is quickly transferred from a low temperature environment to a high temperature environment, water condensation may occur in the product due to physical changes. In this case, it is recommended to wait until the product returns to room temperature before you turn it on. • If a photo or video cannot be played back due to human-caused improper operation, the Company shall assume no liability or responsibility for compensation. - Page 6 that are not taken using the product in these folders in case that the files cannot be normally recognized in playback. • Not recommended that directly edit the data on the memory card. Copy the data to your computer disk before editing. • Please turn the product off before removing the memory card. Otherwise, the memory card could be damaged. • When the product is stored for a long period of time, please backup the data on the memory card and remove the memory card for storage. Other Notes: • Do not disconnect the power or turn the product off during the update process. Doing so may cause incorrect data to be written and the product may not power on later. • When using your product on an airplane, observe the relevant rules specified by the airline. • Due to the limitations of manufacturing technology, the LCD may have a few dead or bright pixels. These pixels do no affect the quality of the photos or video. • If the LCD is damaged, pay particular attention to the liquid crystal in the screen. If any of the following situations arise, take the recommended immediate action indicated below: 1.
-
Page 7: Table Of Contents
Contents Before You Start .................................1 Safety Notes ................................4 Contents ..................................6 Getting Ready ................................8 Accessories Included ................................... 8 Action Cam View ................................... 9 Installing and Dismantling the Lens Cover ........................10 Installing Battery ..................................11 Installing Memory Card ................................12 Charging ......................................13 Operation Method ..............................15 Introduction of the Main Screen ............................15 Turn On / Off .................................... - Page 8 Movie Settings ....................................................21 Still Settings ........................................23 Operational Applications .............................24 Connect with Smart Device ..............................24 Connect with Computer ................................25 Action Cam operations when in Wi-Fi mode ........................26 Use an interface ..............................27 Micro USB interface ...................................27 Charging ............................................27 Using an external power supply ..................................27 Data transmission........................................27 Micro HDMI interface ................................28 Appendices ................................29...
-
Page 9: Getting Ready
Getting Ready Accessories Included Your product box should contain the product you purchased along with the following accessories. If anything is missing or appears to be damaged, please contact your retailer. (The AC Adapter may be different in shape than what is pictured below. This is due to different power requirements across countries or regions.) Rechargeable Li-ion battery Battery charger... -
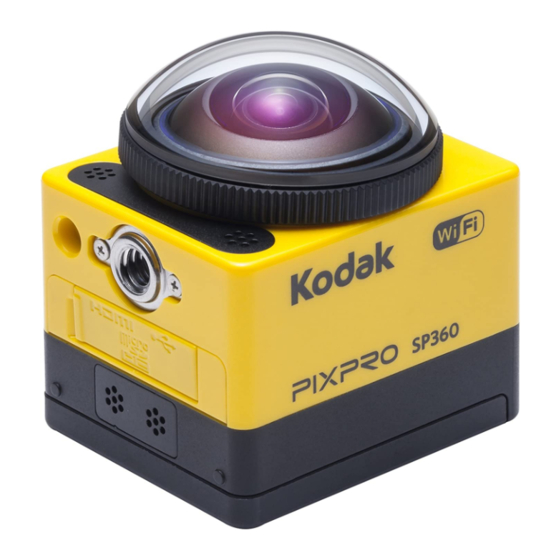
Page 10: Action Cam View
Action Cam View Glass lens cover Status indicator Video recording button / Shooting button / OK button NFC mark Menu button / Direction button (lower) Power button / Mode button / Direction button (upper) Microphone Tripod socket Buzzer Side cover Location hole Battery cover Battery cover lock... -
Page 11: Installing And Dismantling The Lens Cover
Installing and Dismantling the Lens Cover Dismantling the lens cover: Installing the lens cover Turn the lens cover according to the illustrated direction until it separates Turn and firmly tighten the lens cover according to the illustrated direction. from the product. The lens cover plays an important role in protecting the product (dustproof, shockproof and waterproof). -
Page 12: Installing Battery
Installing Battery 1. Open the battery cover 2. Insert the battery Push the battery cover lock from "LOCK" to "OPEN" along the direction of Insert the battery into the battery compartment along the direction of arrow arrow ① , push the battery cover along the direction of arrow ② , and open ④ (note the location of the + and - symbols) the battery cover along the direction of arrow ③... -
Page 13: Installing Memory Card
Installing Memory Card Open the side cover, then insert the memory card into the card slot (note the direction of the memory card gap), push the bottom end of the memory card with a fingertip into the slot completely, and then close the side cover. A memory card (microSD / microSDHC) is optional and is not included in the product package. -
Page 14: Charging
Charging Please use the battery charger or AC adapter to charge the battery in an ambient temperature ranging from 0 ˚C to 40 ˚C. Charging the battery with a battery charger: 1. Place the battery into the battery charger according to the direction illustrated. Use a Micro USB cable to connect the battery charger and the AC adapter, and then plug the AC adapter into an electrical outlet. 2. - Page 15 AC adapter (or an external power supply). The Action Cam will automatically start up and start recording. (For example: when the Action Cam is connected to a vehicle power supply, it will start and record automatically when the automobile starts. And stop recording after the automobile shuts down, the Action Cam will shut down automatically after saving the recorded files.) Charging the Action Cam with a computer: 1.
-
Page 16: Operation Method
Operation Method Introduction of the Main Screen Main screen displays under Wi-Fi mode Main screen displays under other modes 1. Mode 4. Battery status Movie mode 5. Motion detection (Open) Loop recording mode 6. Remaining recording time: hh:mm / mm:ss / none Time Lapse mode Number of remaining shots:... -
Page 17: Turn On / Off
Turn On / Off Turn on: When the power is off, press and hold the button for more than 2 seconds to turn on the product Turn off: When the power is on, press and hold the button for more than 2 seconds to turn off the product. If the product cannot be turned on / off normally, you can remove the battery for forced power cut. -
Page 18: Introduction Of The Modes
Introduction of the Modes In the main screen,press the button to switch the mode. There are 4 modes: W i-Fi mode , Movie mode , Shooting mode , Loop recording mode , Time Lapse mode Burst shot mode 。 Wi-Fi mode The Action Cam can be Wi-Fi connected with your smart device or PC.( Movie mode Suitable for recording in the general environment. - Page 19 When the remaining space on the memory card is insufficient to record 2 files, recording will be unavailable. Loop recording mode can only be used when a memory card is inserted. Time Lapse mode Time Lapse enables the recording of an interval of time, and splices the frames together to present a condensed video which usually requires a long period of time to complete.
-
Page 20: Introduction Of The Menu
Introduction of the Menu 1. In the main screen (except for Wi-Fi mode),press the button to enter the first-level menu interface, press the button to select the item, and press the button to enter the corresponding secondary level menu interface. In Movie mode/Loop recording mode / Time lapse mode can enter Movie Settings and General Settings.
Need help?
Do you have a question about the PixPro SP360 and is the answer not in the manual?
Questions and answers