Table of Contents
Advertisement
Advertisement
Table of Contents

Related Manuals for Pioneer AVH-5450DVD


Summary of Contents for Pioneer AVH-5450DVD
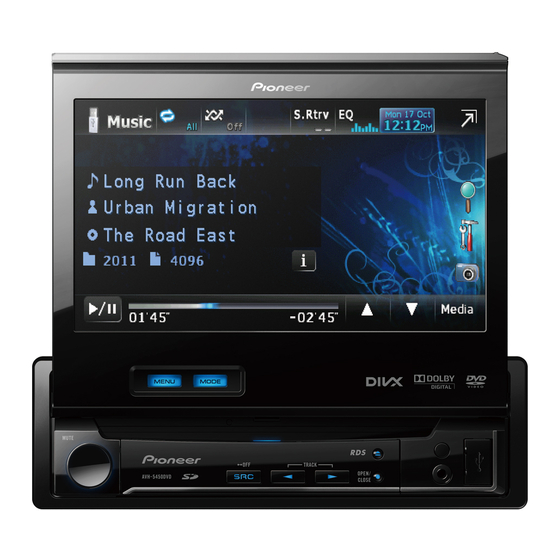
- Page 1 Owner’s Manual DVD RDS AV RECEIVER AVH-5450DVD English...
-
Page 2: Table Of Contents
Contents Thank you for purchasing this PIONEER product. To ensure proper use, please read through this manual before using this product. It is especially important that you read and observe WARNINGs and CAUTIONs in this manual. Please keep the manual in a safe and accessible place for future refer- ence. - Page 3 Contents Changing the wide screen mode 25 Menu operations Introduction of menu operations 27 Audio Adjustments 28 Setting up the DVD player 31 System settings 35 Entertainment settings 40 Customizing menus 41 Other Functions Changing the picture adjustment 42 Adjusting the response positions of the touch panels (Touch Panel Calibration) 42 Using an AUX source 43...
-
Page 4: Precautions
Section Precautions IMPORTANT SAFEGUARDS WARNING Please read all of these instructions regarding Do not attempt to install or service your dis- your display and retain them for future refer- play by yourself. Installation or servicing of ence. the display by persons without training and 1 Read this manual fully and carefully be- experience in electronic equipment and auto- fore operating your display. -
Page 5: To Avoid Battery Exhaustion
Section Precautions Parking brake interlock backing up. Do not use for entertainment pur- poses. Certain functions (Video viewing and certain ! Please note that the edges of the rear view touch panel keys) offered by this unit could be camera images may differ slightly according dangerous and/or unlawful if used while driv- to whether full screen images are displayed ing. -
Page 6: Dvd Video Disc Region Numbers
In case of trouble qualified personnel. Should this product fail to operate properly, please contact your dealer or nearest author- ized Pioneer Service Station. CAUTION—CLASS 1M VISIBLE AND INVISIBLE Protecting your unit from LASER RADIATION WHEN OPEN, DO NOT VIEW DIRECTLY WITH OPTICAL INSTRUMENTS. -
Page 7: Resetting The Microprocessor
Section Before you start Press RESET with a pen tip or other pointed instrument. Re-attaching the front panel RESET button Slide the front panel to the left. Note The front panel and the head unit are con- Switch your engine ON or set the ignition switch nected on the left side. -
Page 8: Using The Remote Control
Section Before you start WARNING ! Keep the battery out of the reach of children. Should the battery be swallowed, consult a doctor immediately. ! Batteries (battery pack or batteries installed) must not be exposed to excessive heat such as sunshine, fire or the like. CAUTION ! Use one CR2025 (3 V) lithium battery. -
Page 9: What's What
Section What’s what Head unit CAUTION ! Use an optional Pioneer USB cable (CD-U50E) to connect the USB audio player/USB mem- ory as any device connected directly to the unit will protrude out from the unit and may be dangerous. -
Page 10: Remote Control
Section What’s what Remote control Part Operation Press to select the tuner band when tuner is selected as a source. Also used to cancel the control mode of functions. Press to switch be- BAND/ESC tween modes when playing discs with compressed audio and audio data (CD- DA) such as CD-... -
Page 11: Basic Operations
Section Basic operations Basic operations of this unit Selecting a source using the buttons 1 Press SRC/OFF to cycle through the sources listed below: Selecting a source using the touch panel keys 1 Touch the source icon and then touch the desired Wed 28 May 12:45 source name. -
Page 12: Activating The Touch Panel Keys
Section Basic operations 1 Scroll icon Activating the touch panel Appears when selectable items are hidden. keys 2 Scrubber bar Appears when the playback point can be spe- cified or set by dragging. Viewing the hidden items Wed 28 May 12:45 1 Touch the scroll icon or drag the scrubber bar to view any hidden items. -
Page 13: Opening And Closing The Lcd Panel
Section Basic operations especially cautious of children’s hands and fin- Displaying still images as a slide gers. show when listening to another source. % Press OPEN/CLOSE to open the LCD Viewing slide shows. panel. Refer to Introduction of still image # To close the LCD panel, press OPEN/CLOSE playback operations on page 19. -
Page 14: Tuner
Section Tuner Introduction of tuner operations Local Wed 28 may Radio 12:45 Abcdeabc 87.50 P.CH 2 Band: 87.50 MHz Touch panel keys Turning local seek tuning on and off. Refer to Tuning in to strong signals on page 21. Switching the equalizer curves. -
Page 15: Operations
Section Playing moving images Introduction of video Switching the equalizer curves. playback operations Refer to Using the equalizer on page 28. You can view DVD/DVD-R/DVD-RW/CD/CD-R/ Touch and hold for more CD-RW/USB/SD. than two seconds to turn the auto-equalizer on or off. DVD video Refer to Using the auto- equalizer on page 29. - Page 16 Section Playing moving images Stopping playback. Playing back videos 1 Insert the disc into the disc loading slot with the Stopping playback at the point set in Resume play- label side up. back. Playback will automatically start. Touch one more time to stop ! If you are playing a DVD or Video CD, a menu playback completely when may appear.
-
Page 17: Playing Audio
Section Playing audio Introduction of sound Displaying a list of track titles to select songs on a playback operations Refer to Selecting tracks You can listen to DVD-R/DVD-RW/CD/CD-R/ from the track title list on CD-RW/USB/SD sound files. page 24. Displaying the file name Audio CD list to select the files. - Page 18 Section Playing audio ! If the characters recorded on the disc are not compatible with this unit, those characters will not be displayed. ! Disconnect the USB portable audio player/ USB memory when you are done using it. ! When you select Clock or Speana on Select- ing the background display on page 41, the art- work is not displayed.
-
Page 19: Playing Still Images
Section Playing still images Introduction of still image Starting or pausing the sli- playback operations deshow. You can view still images saved in CD-R/CD- Rotating the displayed pic- RW/USB/SD. ture 90° clockwise. Capturing an image in 1 2 3 JPEG files. Refer to Capture an image Wed 28 May Photo... -
Page 20: Operations
Section Playing still images Introduction of still image Rotating the displayed pic- playback as a slideshow ture 90° clockwise. operations Capturing an image in JPEG files. You can view still images saved in CD-R/CD- Refer to Capture an image RW/USB/SD as a slideshow when listening to in JPEG files on page 25. -
Page 21: Detailed Instructions
Section Detailed instructions Storing and recalling stations Switching the media file type You can easily store up to six stations for each When playing a disc containing a mixture of band as presets. various media file types, such as DivX and ! Six stations for each band can be stored in MP3, you can switch between media file types memory. -
Page 22: Random Play
Section Detailed instructions If you select USB or SD source, the repeat Returning to the normal DVD video play range changes to All. display. ! If you perform track search or fast forward/ reverse during File, the repeat play range changes to Folder. -
Page 23: Searching For The Part You Want To Play
Section Detailed instructions ! Depending on the setting, the video may not Searching for the part you be played back with the audio system used to want to play record the DVD. ! You will return to normal playback if you You can use the search function to find the change the Audio during fast forward/fast re- part you want to play. -
Page 24: Selecting Audio Output
Section Detailed instructions Selecting tracks from the This function cannot be used if a specified scene has not been preprogrammed on the track title list DVD disc. You can select tracks to playback using the track title list which is a list of the tracks re- Selecting audio output corded on a disc. -
Page 25: Playing Divxâ Vod Content
Section Detailed instructions Playing DivX VOD content Capture the image. â Refer to Introduction of still image playback op- Some DivX VOD (video on demand) content erations on page 19. may only be playable a fixed number of times. Refer to Introduction of still image playback as When you load a disc containing this type of a slideshow operations on page 20. - Page 26 Section Detailed instructions Zoom (zoom) The 4:3 picture is enlarged in the same proportion both vertically and horizontally; ideal for a cinema sized picture (wide screen picture). Normal (normal) The 4:3 picture is displayed as it is, giving you no sense of disparity since its proportions are the same as that of the normal picture.
-
Page 27: Menu Operations
Section Menu operations ! You cannot display the Audio function menu Introduction of menu when the mute function is on or a JPEG file is operations playing. Audio Fader/Balance F/R 0 L/R 0 Graphic EQ Super Bass Auto EQ Sonic Center Control L/R 0 Loudness High... -
Page 28: Audio Adjustments
Section Menu operations Audio Adjustments Display Equalizer curve Note Vocal Vocal When selecting FM as the source, you cannot Custom1 Custom 1 switch to Source Level Adjuster. Custom2 Custom 2 Flat Flat Using fader/balance adjustment Super Bass Super bass You can change the fader/balance setting to provide an ideal listening environment for all ! The equalizer curves for Custom1 and of the occupied seats. -
Page 29: Adjusting Loudness
Section Menu operations Touch Graphic EQ on the audio function Adjusting loudness menu. Loudness compensates for deficiencies in the low- and high-frequency ranges at low volume. Touch c or d to select the desired item. Powerful—Natural—Vocal—Custom1— Display the audio function menu. Custom2—Flat—Super Bass Refer to Introduction of menu operations on page 27. -
Page 30: Boosting The Bass
Section Menu operations Boosting the bass Touch Source Level Adjuster on the audio function menu. You can boost the bass level. Touch a or b to adjust the source vo- Display the audio function menu. lume. Refer to Introduction of menu operations on Range: +4 to –4 page 27. -
Page 31: Setting Up The Dvd Player
Section Menu operations Setting up the DVD player Display the Video Setup menu. Refer to Introduction of menu operations on Setting the subtitle language page 27. You can set a desired subtitle language. When Touch Audio Language on the Video available, the subtitles will be displayed in the Setup menu. -
Page 32: Setting The Slide Show Interval
Section Menu operations Setting the multi-angle DVD Pan Scan setting. Confirm whether the disc package bears the mark. display 16 : 9 LB ! The TV aspect ratio cannot be changed for The angle icon can be set so it appears on some discs. -
Page 33: Setting The Divx Subtitle File
Section Menu operations Setting the code number and level Changing the level A code number must be registered in order to You can change the set parental lock level. play back discs with parental lock. Display the Video Setup menu. Display the Video Setup menu. -
Page 34: Automatic Playback Of Dvds
Section Menu operations Touch DivX Subtitle on the Video Setup Touch DivX VOD on the Video Setup menu to select the desired subtitle setting. menu. ! Original – Display the DivX subtitles Touch Deregistration Code. ! Custom – Display the DivX external subti- # To cancel deregistration, touch Cancel. -
Page 35: System Settings
Section Menu operations System settings Display the system menu. Refer to Introduction of menu operations on Switching the auxiliary setting page 27. Activate this setting when using an auxiliary Touch Rear Speaker on the system device connected to this unit. menu. -
Page 36: Setting The Automatic Open Function
Section Menu operations Switching sound muting/ Display the system menu. Refer to Introduction of menu operations on attenuation page 27. Sound from this system is automatically Touch System Language on the system muted or attenuated when a signal from menu to select the desired language. equipment with a mute function is received. -
Page 37: Switching The Warning Tone
# To turn the warning tone off, touch DT.WARNING again. Setting the rear view camera (back up camera) CAUTION Pioneer recommends the use of a camera which outputs mirror-reversed images. Otherwise, the screen image will appear re- Display the system menu. versed. -
Page 38: Setting The Video Signal
Section Menu operations ! When the Camera Polarity is on, press Setting the video signal and hold MUTE to watch the rear view When you connect this unit to an AV equip- camera video. ment to this unit, select the suitable video sig- ! To stop watching the rear view camera nal setting. - Page 39 Section Menu operations — A speaker is connected to a power amp de- — The fader/balance settings return to the livering output higher than the speaker’s center position. (Refer to Using fader/ maximum input power capability. balance adjustment on page 28.) ! If the microphone is placed in an unsuitable —...
-
Page 40: Entertainment Settings
Section Menu operations Plug the microphone into the micro- Entertainment settings phone input jack on this unit. Selecting the illumination color This unit is equipped with multiple-color illu- mination. Direct selection from preset illumination colors You can select an illumination color from the color list. -
Page 41: Customizing Menus
Section Menu operations Customizing menus The customized color has been stored in the memory. Display menu columns to register. The set color will be recalled from the memory Refer to Introduction of menu operations on the next time you touch the same icon. page 27. -
Page 42: Other Functions
! Temperature – Adjusts the color tempera- ! If the touch panel cannot be adjusted prop- ture, resulting in a better white balance erly, consult your local Pioneer dealer. ! Black Level – Emphasizes the dark portions of images making the difference between Turn the unit off. -
Page 43: Using An Aux Source
Section Other Functions Press and hold MENU to start Touch Mini pin plug cable (AUX) Panel Calibration. When connecting an auxiliary device using a The 4-point touch panel adjustment screen ap- mini plug cable pears. A portable audio/video players can be con- nected to this unit via mini plug cable. -
Page 44: Installation
The ground wire CAUTION of the power amp and the one of this unit or ! PIONEER does not recommend that you in- any other device must be connected to the car separately with different screws. If the screw stall or service your display unit yourself. - Page 45 Section Installation ! To prevent a short-circuit, overheating or mal- function, be sure to follow the directions below. — Disconnect the negative terminal of the battery before installation. — Secure the wiring with cable clamps or ad- hesive tape. Wrap adhesive tape around wiring that comes into contact with metal parts to protect the wiring.
-
Page 46: Connecting The Power Cord
Section Installation Connecting the power cord This product Fuse (10 A) Yellow Connect to the constant 12 V supply terminal. Orange/white Fuse resistor Connect to lighting switch terminal. Fuse resistor Connect to terminal controlled by ignition switch (12 V DC). Black (chassis ground) Connect to a clean, paint-free metal location. - Page 47 Section Installation Antenna input Fuse resistor Violet/white Of the two lead wires connected to the back lamp, connect the one in which the voltage changes when the gear shift is in the REVERSE (R) position. This connection enables the unit to sense whether the car is moving forwards or backwards. Yellow/black If you use an equipment with Mute function, wire this lead to the Audio Mute lead on that equipment.
-
Page 48: When Connecting To Separately Sold Power Amp
Section Installation When connecting to separately sold power amp Rear output or subwoofer output (REAR OUTPUT or SUBWOOFER OUTPUT) 13 cm To rear output or 13 cm Front output subwoofer (FRONT OUTPUT) output To front output Power amp (sold separately) Power amp Connect with RCA cables (sold separately) -
Page 49: When Connecting The External Video Component And The Display
Section Installation When connecting the external video component and the display Rear monitor output RCA cables (sold separately) (REAR MONITOR OUTPUT) To video input Display with RCA 17 cm input jacks (sold separately) This product RCA cables (sold separately) Video input (VIDEO INPUT) To video output External video 17 cm... -
Page 50: When Connecting With A Rear View Camera
Section Installation When connecting with a rear This product view camera When this product is used with a rear view camera, it is possible to automatically switch from the video to rear view image when the gear shift is moved to REVERSE (R). Rear view camera input (REAR VIEW CAMERA IN) WARNING... -
Page 51: Installation
Section Installation ! The cords must not cover up the area shown Installation in the figure below. This is necessary to allow Notes the amplifiers to radiate freely. ! Check all connections and systems before final installation. ! Do not use unauthorized parts as this may cause malfunctions. - Page 52 Section Installation 1 Side bracket (small) Tighten two screws on each side. 2 Flush surface screw (5 mm × 6 mm) Use any of binding screws (4 mm × 3 mm), binding screws (5 mm × 6 mm) or flush sur- Install the unit into the dashboard.
-
Page 53: Additional Information
Appendix Additional Information Troubleshooting Symptom Cause Action (Refer- ence page) Common There is no The parking Connect the park- Symptom Cause Action (Refer- image dis- brake cable is ing brake cable, ence page) played. not connected. and apply the park- ing brake. - Page 54 Appendix Additional Information Symptom Cause Action (Refer- Symptom Cause Action (Refer- ence page) ence page) Nothing is dis- The rear view Connect a rear Dialog lan- The DVD being The language can- camera is not view camera. guage (and played does not not be switched if played.
-
Page 55: Error Messages
Select a file that pired. contains expired can be played. When you contact your dealer or your nearest DivX VOD con- Pioneer Service Center, be sure to note the tent. error message. Video resolu- The inserted disc Select a file that... - Page 56 Appendix Additional Information Message Cause Action Message Cause Action Format Read Sometimes there Wait until the mes- Incompatible The USB device Connect a USB is a delay be- sage disappears connected to is portable audio and you hear not supported by player or USB tween the start of memory that is...
-
Page 57: Understanding Auto Eq Error Messages
This type of file is Select a file that Messages Translation not sup- not supported on can be played. Pioneer recommends ported. this unit. the use of a camera which outputs mirror- Screen image may ap- reversed images. pear reversed. -
Page 58: Indicator List
Appendix Additional Information Indicator list Shows which viewing angle has been selected. Area 1 Area 2 Shows which audio output has been selected. Area 2 Shows the disc title of the CD text disc currently being played. Shows the track title of the track cur- rently being played for CD text discs. -
Page 59: Handling Guidelines
Appendix Additional Information Handling guidelines Read the precautions for discs before using them. Certain functions may not be available for some DVD Discs and player video discs. Use only discs featuring any of following logos. It may not be possible to play back some DVD video discs. -
Page 60: Sd Memory Card
Appendix Additional Information CD-R/CD-RW discs Depending on the kind of USB portable audio player/ USB memory you use, the device may not be recog- When CD-R/CD-RW discs are used, playback is possi- nized or audio files may not be played back properly. ble only for discs which have been finalized. -
Page 61: Compressed Audio Compatibility (Disc, Usb, Sd)
Appendix Additional Information DivX video files Depending on the composition of the file information, File extension: .mp3 such as the number of audio streams or file size, Bit rate: 8 kbps to 320 kbps there may be a slight delay when playing back discs. Sampling frequency: 8 kHz to 48 kHz (32 kHz, 44.1 kHz, Some special operations may be prohibited due to 48 kHz for emphasis) -
Page 62: Sequence Of Audio Files
CAUTION back sequence. ! Pioneer accepts no responsibility for data lost For USB portable audio players, the sequence is different and depends on the player. on the USB memory/USB portable audio player/SD memory card even if that data is lost while using this unit. -
Page 63: Using The Display Correctly
! Small black dots or white dots (bright dots) PIONEER Service Station. Do not use the unit may appear on the LCD screen. These are in this condition because doing so may result due to the characteristics of the LCD in fire, electric shock, or other failure. -
Page 64: Copyright And Trademark
Appendix Additional Information Copyright and trademark DivX â â DivX , DivX Certified and associated logos This item incorporates copy protection tech- are trademarks of DivX, Inc. and are used nology that is protected by U.S. patents and under license. other intellectual property rights of Rovi â... -
Page 65: Language Code Chart For Dvd
Appendix Additional Information Language code chart for DVD Language (code), input code Japanese (ja), 1001 Dzongkha (dz), 0426 Kurdish (ku), 1121 Kinyarwanda (rw), 1823 English (en), 0514 Ewe (ee), 0505 Komi (kv), 1122 Sanskrit (sa), 1901 French (fr), 0618 Esperanto (eo), 0515 Cornish (kw), 1123 Sardinian (sc), 1903 Spanish (es), 0519... -
Page 66: Specifications
Appendix Additional Information Specifications Bass boost: Gain ........+12 dB to 0 dB General DVD Player Rated power source ....14.4 V DC System .......... DVD video, Video CD, CD, (allowable voltage range: WMA, MP3, AAC, DivX, 12.0 V to 14.4 V DC) JPEG system Grounding system .... - Page 67 Appendix Additional Information WMA decoding format ..Ver. 7, 7.1, 8, 9, 10, 11, 12 (2 ch audio) (Windows Media Player) AAC decoding format .... MPEG-4 AAC (iTunes en- coded only) (Ver. 9.0.3 and earlier) DivX decoding format .... Home Theater Ver. 3, 4, 5.2, 6 (.avi, .divx) FM tuner Frequency range ......
- Page 68 TEL: (03) 9586-6300 PIONEER ELECTRONICS OF CANADA, INC. 300 Allstate Parkway, Markham, Ontario L3R 0P2, Canada TEL: 1-877-283-5901 TEL: 905-479-4411 PIONEER ELECTRONICS DE MEXICO, S.A. de C.V. Blvd.Manuel Avila Camacho 138 10 piso Col.Lomas de Chapultepec, Mexico, D.F. 11000 TEL: 55-9178-4270 先鋒股份有限公司...
Need help?
Do you have a question about the AVH-5450DVD and is the answer not in the manual?
Questions and answers