Table of Contents
Advertisement
Advertisement
Table of Contents

Related Manuals for Pioneer AVH3850DVD


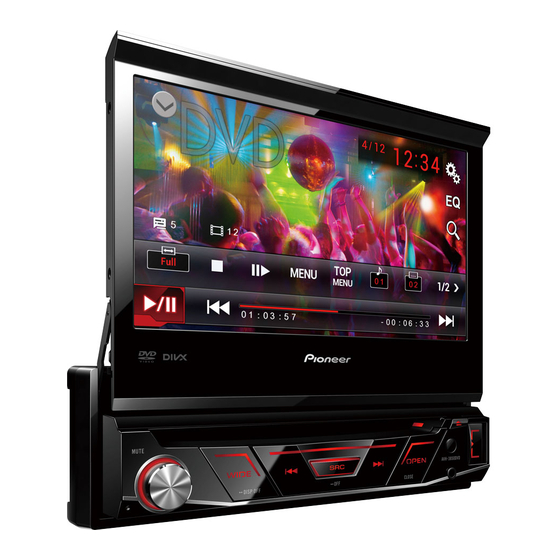
Summary of Contents for Pioneer AVH3850DVD
- Page 1 AVH-3850DVD DVD AV RECEIVER Owner's Manual...
-
Page 2: Table Of Contents
Contents ■ Precaution ........4 Setting the FM tuning step .........8 Setting the AM tuning step.........8 • IMPORTANT SAFEGUARDS ........4 ■ Disc ........... 9 • To ensure safe driving ..........4 DVD title/chapter select ..........9 • About this unit ............4 VCD track select ............9 • DVD video disc region numbers ......4 CD track select ............9 ■... - Page 3 Contents Displaying the DivX® VOD registration code ..16 Supplemental information ........24 Displaying the deregistration code ......16 Disc ................24 External storage device (USB) ........24 ■ Connection/Installation ....17 Sequence of audio files ...........24 • Connecting the unit ..........17 Using the display correctly ........24 Notes of connection ..........17 Handling the display ..........24 Wiring diagram............18 Liquid crystal display (LCD) screen ......24...
-
Page 4: Precaution
Precaution WARNING • T o avoid the risk of damage and injury and the potential violation Thank you for purchasing this PIONEER product. Do not use with vehicles that do not feature an ACC position. of applicable laws, this unit is not for use with video that is visible To ensure proper use, please read through this manual before to the driver. -
Page 5: Basic Operation
Basic operation Head Unit Remote control Press to return to the previous track (chapter). Press to go to the next track (chapter). Press to stop playback. If you resume playback, playback will start from the point where you stopped. Touch the key again to stop playback completely. FOLDER/P.CH Press to select the next or previous disc or folder. -
Page 6: Use And Care Of The Remote Control
Basic operation Use and care of the remote Adjusting the LCD panel angle Inserting/ejecting/connecting control media CAUTION Using the remote control Keep hands and fingers clear of the unit when opening, closing, Insert a disc or adjusting the display. Be especially cautious of children's Point the remote control in the direction of the front panel to 1. -
Page 7: How To Use The Screens
Basic operation How to Use the screens Press SRC button to display Top menu screen. Time and date setting screen Switching to clock adjustment display. Select the Month or Date. • Touch to set the correct time. Select the time format. • Touch 12Hour or 24Hour to set the correct time. -
Page 8: Radio
Radio Select radio as playing source Storing the strongest stations Setting the FM tuning step BSM (best stations memory) automatically stores the six You can switch the seek tuning step for FM band. Touch [Radio] on the source menu to the radio mode. strongest stations in the order of their signal strength. -
Page 9: Disc
Disc DVD title/chapter select Frame-by-frame playback key (DVD/VCD) To return to normal playback, touch [ Slow-motion playback key (DVD/VCD) 1. Touch and hold down the [ ] to start the slow motion playback. 2. Each time you touch [ ] it changes the speed in six steps in the following order: x1/2 x1/3 x1/4 x1/5 x1/6 x1/7. - Page 10 Disc Playback/Pause Repeat Audio output select (DVD/VCD) 1. When a disc is inserted, display shows “Format read”. During playback, press icon on the screen to select Touch [ ] to select audio channel to listen (Left, For MP3/WMA or disc with mixed files, reading time repeat playback, as below: Right, Mix, L+R).
-
Page 11: Compressed Files
Compressed files Selecting a folder Playing audio files Touch [ ] to enter the folder list (if there are folders in the disc/USB storage device), touch it to select. album album Playback information (artist name/ album name/ folder name/track name) Notes: Selecting file • I f there are audio files supported in the disc/USB stick, the Playback/Pause system will enter the audio files menu automatically. -
Page 12: Playing Video Files
Compressed files Playing video files Playing photo files 03:27 Track information Slow-motion playback key Previous/next folder (the function same to the DVD) Zoom Track information Playback/pause Stop playback entirely Previous/next file Changing the wide-screen mode (the function same to the DVD) Random Playback/pause Repeat Elapsed time/Remaining time of the file : Repeat one Previous/next file : Repeat folder : Repeat all... -
Page 13: Other Source
Other source AUX source Camera You can connect an external audio/video device to the unit. This unit is "camera ready". Before accessing any camera • C onnect the external audio/video device to the AUX input features, you must purchase and install a rear video camera. jack. -
Page 14: Settings
Settings Setting menu Radio Touch Panel Calibration Refer to Radio on page 8. settings Calibrate the touch panel screen. When it is set to "On", recorded On the source menu, touch [ ] to enter setting menu. When the touch operation is not sensitive or valid, you should text information scrolls The unit could not enter the setting menu when the system is Ever Scroll... -
Page 15: Steering Wheel Control
Settings Select Preset Equalizer Steering Wheel Control Adjust Audio settings 1. Enter the EQ setup mode 1. Touch [Steering Wheel Control], the SWC menu will display. Touch the [Graphic EQ] in Audio setting menu and the EQ 1. Touch [ setup interface will display on the screen. -
Page 16: Setting Parental Lock
Settings 3. Touch [ ] set the parental lock level while the input Subtitle Language Select DVD subtitle/audio/menu number is displayed. Audio Language language. Options available depending on DVD disc. Menu Language Notes: Turns the multi- • W e recommend that you keep a record of your code number in On (default) angle setting on case you forget it. -
Page 17: Connection/Installation
12V. R efer all installation and servicing of your display unit to authorized • R eplacing a new fuse with 10A rating when the old one is Pioneer service personnel. ACC position No ACC position broken, using no fuse or fuse with improper rating may cause • S ecure all wiring with cable clamps or electrical tape. Do not allow... -
Page 18: Wiring Diagram
Connection/Installation Wiring diagram WHITE FRONT OUTPUT WHITE REAR OUTPUT BLUE SUBWOOFER OUTPUT YELLOW REAR MONITOR OUTPUT YELLOW REAR VIEW CAMERA IN LIGHT GREEN PARKING PARKING BRAKE BRAKE BLACK BLACK ANTENNA WIRED REMOTE INPUT YELLOW VIDEO INPUT 16PIN POWER AUDIO INPUT WHITE 10A FUSE YELLOW... -
Page 19: Control Cables
Connection/Installation Control Cables Reverse Driving Cable Connections Auto Brightness Control To avoid the display being too bright at night time, if the headlight cable is connected to ILLUMI, turning on the headlight will dim the backlight of the TFT LCD and vice versa. Telephone Mute Violet/White If the MUTE cable is connected to a car phone, other audio... -
Page 20: Installation
Connection/Installation Installation Uninstall Dashboard Disassemble trim ring Notes of installation 1. Push the trim ring upward and pull out the upper part. • B efore installation, please make sure proper connections Mounting Bracket M2 X 2 are conducted and the unit operates normally. Improper connection may result in damage to the unit. -
Page 21: Appendix
Noise and/or other Error messages factors are causing the Press RESET. built-in microprocessor When you contact your dealer or your nearest Pioneer Service to operate incorrectly. Center, be sure to note the error message. Operation with the remote control is not... -
Page 22: Handling Guidelines
Appendix Road shocks may interrupt disc playback. Depending on the application settings and the Handling guidelines environment, playback of discs recorded on a personal Certain functions may not be available for some DVD video computer may not be possible. (For details, contact the discs. -
Page 23: Divx Video Files
Stream/Stream with video: Not compatible LPCM: Not compatible CAUTION Pioneer accepts no responsibility for data lost on the USB memory/ Bit rate: 16 kbps to 320 kbps (CBR), VBR USB portable audio player even if that data is lost while using this unit. -
Page 24: Supplemental Information
• W hen wiping the screen, take care not to scratch. Do not use • I f liquid or foreign matter should get inside this unit, turn off Playable folders: up to 300 the power immediately and consult your dealer or the nearest harsh or abrasive chemical cleaners. authorized PIONEER Service Station. Do not use the unit in this condition because doing so may result in fire, electric shock, or Playable files: up to 2 000 LED (light-emitting diode) backlight other failure. • I f you notice smoke, a strange noise or smell, or any other... -
Page 25: Copyright And Trademark
Dolby Digital projected. In such cases, please consult your dealer or the Manufactured under license from Dolby Laboratories. “Dolby” nearest authorized PIONEER Service Station. and the double-D symbol are trademarks of Dolby Laboratories. Copyright and trademark This item incorporates copy protection technology that is protected by U.S. -
Page 26: Specifications
Appendix Specifications General Subwoofer (mono): Frequency........ 80 Hz/120 Hz/160 Hz Rated power source ..... 14.4 V DC (allowable voltage range: 10.8 V to 15.1 V DC) Gain ......... -79 dB to 0 dB Preout maximum output level ..2 V Maximum current consumption ..10.0 A Dimensions (W ×... - Page 27 2015. P/N:127075006446...
Need help?
Do you have a question about the AVH3850DVD and is the answer not in the manual?
Questions and answers