
Related Manuals for Fast Forward Video NDT 200

Summary of Contents for Fast Forward Video NDT 200
- Page 1 NDT 200 ™ Digital Video Recorder User’s Manual Revision 1.4 October 2006 Fast Forward Video 18200 West McDurmott, Suite B, Irvine, CA 92614, USA Phone: (949)852-8404 FAX: (949)852-1226...
- Page 2 The design of the NDT 200™ is proprietary. No part of the NDT 200™ manual may be copied or modified without the written consent of Fast Forward Video, Inc. Printed in the U.S.A. NDT 200™ Manual, Fast Forward Video, Inc.
-
Page 3: Table Of Contents
OPTIONAL FEATURE DESCRIPTION ..........................11 REAR AND SIDE PANEL CONNECTIONS .......................... 12 LED OPERATION..................................13 USB OPERATION ..................................13 FIRMWARE UPDATE PROCEDURE............................ 14 SPECIFICATIONS ..................................15 MAINTENANCE..................................16 LIMITED WARRANTY................................17 REVISION HISTORY ................................17 NDT 200™ Manual, Fast Forward Video, Inc. - Page 4 (This page intentionally blank) NDT 200™ Manual, Fast Forward Video, Inc.
-
Page 5: Overview
USB 2.0 port and is powered by the supplied 9V power supply. The NDT 200™ is designed to develop and evolve as the industry changes. New features are implemented regularly, most of which can be easily implemented by updating the DVR’s firmware, downloadable via the support page of FFV’s Web site,... -
Page 6: Speedy Get-Started Manual
The hardware installer needs to be directed to install the driver from this location. Connect the NDT 200™ USB port to the computer USB port. Once the hardware installer has completed (it will go through the process twice). Enter the Setup screen, scroll to the Connect Disk to PC setting. Press the OK soft button. -
Page 7: Front Bezel Buttons And Functions
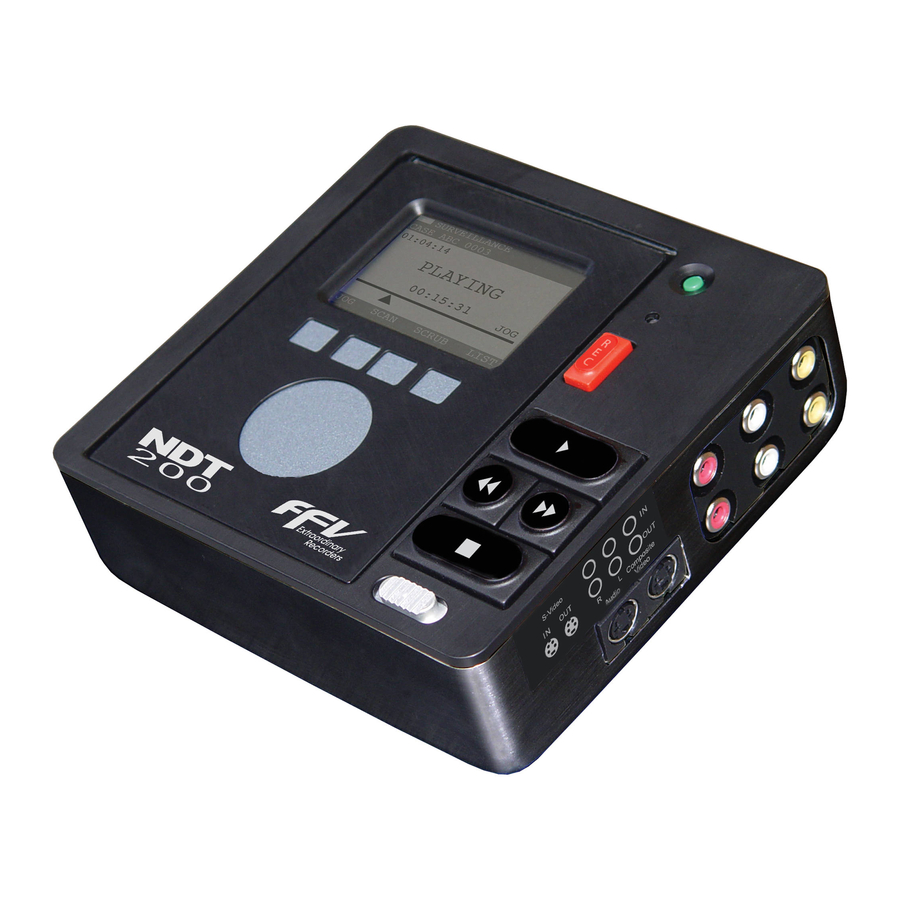
Front Bezel Buttons and Functions POWER Switch: The green pushbutton is the power button, press and release to start the NDT 200™. When the unit is “On”, pressing the power button for 5 seconds will turn the unit “Off”. PASS-THRU: The LED below the power switch will flash red once per second indicating that it is in digital pass-thru mode, which indicates the D.V.R. -
Page 8: Lcd / Touch Panel Operation
LCD / Touch Panel Operation The NDT 200™ LCD and Touch panel provide user interface to enable feedback from the unit during operation, unit configuration, and clip management. System Status Screen – This screen comes up at power-up. It shows Folder and Clip information, Motion State and Time Code of the unit, Audio levels, Disk Space remaining and Compression Ratio. - Page 9 Time and Date – Set unit Time and Date for Real Time Clock and File Date/Time stamp. SELECT to enter screen; INCR - Increment, DECR - Decrement, SET, EXIT Scroll to change between fields. SET when finished with all fields. NDT 200™ Manual, Fast Forward Video, Inc.
- Page 10 Remove power input when complete. LIST or Video Clip Management – When LIST is pressed, NDT 200™ shows a list of the clips recorded, in the reverse order recorded (last recorded is first in the list) and a “Play All Clips” option. Soft buttons are INFO, LOAD, and EXIT.
-
Page 11: Optional Feature Description
To play the video without losing the disk placement for recording, change the setting to Play and allow the NDT 200 to read the disk and build the list, play video as desired. To continue Recording additional clips without clearing the disk, change setting back to Record. -
Page 12: Rear And Side Panel Connections
Audio – Right Channel - In (Top)/ Out (Bottom) – Standard RCA connectors Y/C Video – In (Left)/ Out (Right) – Standard S-VHS connectors Trigger Input – 3.5mm Stereo jack - Tip = Record Trigger; Ring = LED output; Shank = GND. NDT 200™ Manual, Fast Forward Video, Inc. -
Page 13: Led Operation
Remote Control / Configuration requires the user to load a driver for the USB to Serial IC. Following this installation, DVR Master software connects to the NDT 200™ via a USB port to allow the user to configure and control the unit using the computer. User can write control code using Serial Protocol. -
Page 14: Firmware Update Procedure
Firmware Update Procedure New firmware for the NDT 200™ is posted to our website as it becomes available. Our customers have access to this firmware for the lifetime of the product. Please check this site regularly to implement the newest changes. -
Page 15: Specifications
4 watts not including Codec: Zoran storage device(s). Method: JPEG (Joint Photographic Experts Input Voltage: 12V DC Adapter Group) Warranty: 1 year Compression Ratio: Variable - 4:1 to 30:1 Specifications subject to change without notice NDT 200™ Manual, Fast Forward Video, Inc. -
Page 16: Maintenance
Operation and Storage Environment Precautions The NDT 200™ DVR has been built to meet the demands of a professional environment, however, the hardware is subject to the same dangers from static as any other electronic device. Use care when connecting or disconnecting cables. -
Page 17: Limited Warranty
1 year from the date of purchase, If a defect covered by this warranty occurs during this 1 year period, Fast Forward Video, Inc. will repair or replace the defective product or component, at its option, free of charge.
Need help?
Do you have a question about the NDT 200 and is the answer not in the manual?
Questions and answers