
Subscribe to Our Youtube Channel
Related Manuals for Mobi Technologies DXR Touch

Summary of Contents for Mobi Technologies DXR Touch
- Page 1 70208 Complete Complete Complete Operating Operating Operating Instructions Instructions Instructions IMPORTANT: Keep instructions for future reference.
-
Page 2: Table Of Contents
TABLE OF CONTENTS Introduction Radio Interferece Parameters Package Contents Monitor/Receiver Camera/Transmitter To Start Charging/Powering On Locking the Screen Set to Another Language Pairing Camera and Monitor Main Menu Touch Navigation Volume/Display Lullabys Night Light Record Play Quad and Channel View (Voice Activation) Settings Monitor Settings... -
Page 3: Introduction
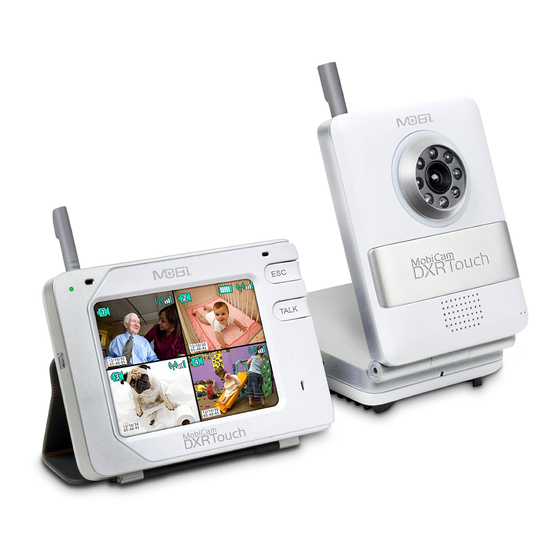
INTRODUCTION Congratulations on the purchase of this MobiCam® DXR Touch Monitoring System, which incorporates the latest advanced technology. To fully maximi- ze and benefit from this product’s avanced features we hightly recommend you review these instructions. This 2.4 GHz Digital monitor enables you to... -
Page 4: Package Contents
PACKAGE CONTENTS • 1 Monitor/Receiver • 1 Camera/Transmitter • 2 AC/DC Adaptors 5V 800mAh • 1 Li-Ion Rechargeable Battery (for monitor only) • 1 Attachable Strap Mount • 1 Door/Drawer Attachable Hook • 1 Wall Anchor Mount with Screw • 1 USB to Mini USB Data Cord •... - Page 5 CAMERA Camera Lens Night Vision Retractable IR LEDs Antenna Focus Ring PAIR (Note: See Button Addendum on page 21 ON / OFF for focusing Button instructions) Power ON Night LED Indicator Light DC Power Input Battery Compartment Microphone Strap Mount (underneath) 2-Way Talk / Ridge-Grip...
-
Page 6: To Start
TO SET TO ANOTHER LANGUAGE: The monitor is set to English by default. The MobiCam® DXR Touch can also display in French, German, Portuguese, Spanish, or Italian. To change the language follow this sequence: press the ESC Button touch Setting icon... - Page 7 PAIRING: The monitor and camera are paired (wirelessly linked) by the manufacturer at the fac- tory. If you ever need to relink the camera, or you want to pair Additional Cameras (sold separately) you need to pair each following this sequence: NOTE: Before pairing be sure the camera and monitor are both turned on and both are within 10 feet of each other.
-
Page 8: Volume/Display
MAIN MENU ... touch the ESC Button to open the Main Menu on screen IMPORTANT: Use ONLY a fingertip or other NON-SHARP object to select touch screen options. Using sharp objects can damage the screen and void the warranty. Touch the appropriate icon to access all Settings and Options. VOLUME / DISPLAY LULLABYS NIGHT LIGHT... - Page 9 TOUCH NAVIGATION ... touch the ESC Button to start at Main Menu from Main Menu ..to These Screens ..to Do This ... – VOLUME / DISPLAY touch icons to adjust... Monitor Volume Screen Contrast Screen Brightness select a Camera...
-
Page 10: Record
TOUCH NAVIGATION ... touch the ESC Button to start at Main Menu from Main Menu ..to These Screens ..to Do This ... touch one of four functions... RECORD Photo goes to camera view and you can take a photo of the scene by touch- ing this Still... -
Page 11: Play
TOUCH NAVIGATION ... touch the ESC Button to start at Main Menu from Main Menu ..to These Screens ..to Do This ... touch to select one of two options... PLAY Video or Picture select Video or Picture select a folder for the Date of the Recording (year/month/day) select a Video or Picture File to... -
Page 12: Vox (Voice Activation)
TOUCH NAVIGATION ... touch the ESC Button to start at Main Menu from Main Menu ..to These Screens ..to Do This ... choose from these options... QUAD / CHANNEL Single Camera View select a Camera icon (1- 4, which will be shown in color and active if paired)to be your constant channel if choosing Single Camera View... -
Page 13: Settings
TOUCH NAVIGATION ... touch the ESC Button to start at Main Menu from Main Menu ..to These Screens ..to Do This ... Monitor Setting SETTINGS on the Setting Screen, simply touch the System Setting icon (at the top) to access monitor functions... - Page 14 TOUCH NAVIGATION ... touch the ESC Button to start at Main Menu from Main Menu ..to These Screens ..to Do This ... SETTINGS Monitor Setting (cont.) (cont.) the Monitor Setting list... select TV Out Format choose either PAL or NTSC video format (US standard is NTSC) touch OK to set the Monitor Setting list...
- Page 15 TOUCH NAVIGATION ... touch the ESC Button to start at Main Menu from Main Menu ..to These Screens ..to Do This ... SETTINGS Monitor Setting (cont.) (cont.) the Monitor Setting list... touch Video Off Timeout touch the timer icon to choose between non-active (X) or active (no X) Timeout Mode –...
-
Page 16: Monitor Settings
TOUCH NAVIGATION ... touch the ESC Button to start at Main Menu from Main Menu ..to These Screens ..to Do This ... Monitor Setting SETTINGS (cont.) (cont.) the Monitor Setting list... NOTE: Though shown here for refer- ence, this function to be used ONLY for Updating System Firmware, to Language... -
Page 17: Camera Settings
TOUCH NAVIGATION ... touch the ESC Button to start at Main Menu from Main Menu ..to These Screens ..to Do This ... Camera Settings SETTINGS (cont.) on the Setting Screen, simply touch the Camera icon (on the bottom line) for the one you wish to control the settings for... - Page 18 INDIVIDUAL CAMERA and CONVENIENCE ICONS IMPORTANT: Use ONLY a fingertip or other NON-SHARP object to select touch screen options. Using sharp objects can damage the screen and void the warranty. Specific small icons are created for each paired camera at the top edge of the screen which relate to that individual camera (except Battery Level, which is for the monitor only).
- Page 19 3. wait for your computer to automatically recognize and install the appropriate drivers and you receive a Successful Installation message. 4. once you have installed the device driver, your MobiCam® DXR Touch can be utilized as a wireless webcam. 5. once the picture from the monitor is displayed on your computer screen, pressing the ESC Button on the monitor toggles between Single and Quad View modes.
-
Page 20: Audio/Video Out
AUDIO/VIDEO OUT You can hear and see audio/video output on a TV or other AV device directly from your DXR Touch monitor. Simply connect the AV OUT Cord (included) to the AV OUT jack on the right side of the monitor and connect the other ends (three RCA connectors) to the Audio and Video Input jacks on your TV, DVR, or Camcorder, and select the appropriate input setting on that AV device. -
Page 21: Factory Default Settings
FACTORY DEFAULT SETTINGS Item Default value Range Monitor setting value Volume Contrast Brightness 2011/09/01,08:00 Date & Time Alarm Time Off, 09:00 On , Off Date Time Stamp On , Off Auto Switch time 5s,10s,30s,1min On , Off Recording schedule Start Time : 12:00:00 Final Time: 12:11:00 Zoom 1.0 to 3.0... -
Page 22: Battery Replacement
BATTERY REPLACEMENT Monitor Battery (included) Camera Battery (not included, sold separately, Mobi part Li-Ion 3,7V 1200 mAh # 70216) Li-Ion 3,7V 1500 mAh PRODUCT SAFETY This product is not intended to be used as a medical monitor and its use should not replace adult supervision. CAUTION •... -
Page 23: Proper Disposal
PROPER DISPOSAL If you eventually dispose of the DXR Touch Monitor, Camera, Batteries, or AC Adapters, do so in accordance with current federal, state and local regulations. As a consumer, you may be obligated by law to recycle used batteries. - Page 24 Toll Free 877.662.4462 Be sure to register this product on the Mobi website to receive firmware updates. www.getmobi.com Mobi, MobiCam, and DXR Touch are registered trademarks of Mobi Technologies, Inc. SD is a trademark of SD Association. Skype®, Windows Messenger®, Google Talk®...
Need help?
Do you have a question about the DXR Touch and is the answer not in the manual?
Questions and answers