Table of Contents
Advertisement
Quick Links
Download this manual
See also:
User Manual
Advertisement
Table of Contents

Related Manuals for LENCO XEMIO-950


Summary of Contents for LENCO XEMIO-950
- Page 1 XEMIO-950 MP5 PLAYER / 4GB MEMORY / TOUCH SCREEN For information and support, www.lenco.eu...
-
Page 2: To The Customer
Thank you for purchasing this MP5 player. When opening the box for the first time, please check whether all the accessories are present. Before you start using the unit, please carefully read the user manual. Lenco suggest keeping it for future reference. -
Page 3: Table Of Contents
Table of contents: To the customer: ....................2 List of Accessories ..................... 2 Warnings: ......................4 Button locations and functions: ................ 5 Basic Operation ....................5 Charging the built-in rechargeable battery ................5 Battery status indicator ......................5 Power ON/OFF/LOCK the unit ....................6 Main menu .......................... -
Page 4: Warnings
Lenco suggests retaining the packaging in case for future transport of the product. If at any time in the future you should need to dispose of this product please note that: All batteries and accumulators need to be removed from this product (Removal of Waste Batteries and Accumulators). -
Page 5: Button Locations And Functions
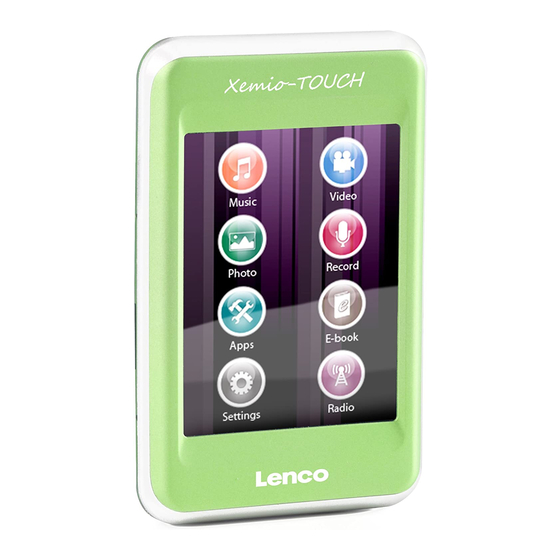
Button locations and functions: 1. Earphone Jack 2. ON/OFF/LOCK switch 3. USB Port 4. Touch Pen 5. Speaker 6. Reset Button 7. Micro SD Card Slot 8. Microphone Basic Operation Charging the built-in rechargeable battery Make sure that the unit is turned off, see chapter “Power on/off/lock the unit for instructions”. -
Page 6: Power On/Off/Lock The Unit
Power ON/OFF/LOCK the unit ON/OFF Slide the ON/OFF/LOCK (2) switch to the ON position and hold it for 3 seconds to turn the unit ON or OFF. Slide the ON/OFF/LOCK (2) switch to the LOCK position to key-lock the unit. HOLD Main menu Once the MP5 player has been turned on you will enter the main menu. -
Page 7: Music Mode
Light mode, Choose the light mode. When “all dark” is set and the light time is over the screen will turn black (backlight is off). When “Penumbra” is set and the light time is over the screen will enter a energy saving mode, it is still possible to read the screen. -
Page 8: Current Play
Play music Click on the “play” button to start the playback, press again to pause the playback. Volume Click on the “vol+ / vol-” button to adjust the volume level. Previous / next text Click on the “previous” button to play the previous track. Click on the “next” button to play the next track. -
Page 9: Artist
It is possible to create a favorites list. To create this list select the desired song. Press to open the pull-down menu. Press “add favorite” to add the song to the favorites list or press “exit” to close the pull-down menu. Artist Double click on “artist”... -
Page 10: Display Symbol Index In Video Mode
Display symbol index in video mode Picture size adjustment / zoom Volume + Volume - Return to previous screen Resume last playback Play / Pause Previous or hold to rewind Next or hold to fast forward Movie player interface Whenever a movie will be played the Movie player interface will be displayed. Time bar Volume level Movie display... -
Page 11: Supported Video Formats
When you have left video mode and you want to resume the movie you where playing last time. Select the same video and start playback. Press and the unit will jump to the part where you have stopped the last time. Play / pause Press to pause / resume the playback. -
Page 12: Photo Viewer Mode
Photo viewer mode Touch the “photo ” icon on the screen. You will now enter the photo viewer mode. Select the desired photo you wish to view as you can see below. Once selected the unit will automatically show the selected file. Display symbol index in photo viewer mode </ Previous photo or file... -
Page 13: Record Mode (Voice Recorder)
Record mode (voice recorder) Touch the “record ” icon on the screen. You will now enter record mode. Display symbol index in record mode Record button pause stop Pull-down menu Return to previous screen </> No function Record mode interface Whenever in record mode below interface will be shown. -
Page 14: Apps Mode
Apps mode Touch the “apps ” icon on the screen. You will now enter apps mode. Display symbols in apps mode </> select next or previous app / folder / file Enter Return to previous screen Delete selected file Operation explorer app When opened explorer mode a list of all files and folders will be displayed. -
Page 15: Radio Mode
Set color: • Set the color of the text, 1 = white, 2 = purple, 3 = turquoise. Browser mode: • Select auto mode, when selected this the pages will flip automatically after a preset time. Or select manual mode to flip the pages manually by pressing <... - Page 16 Channel search Press for manual search. Press and hold for auto-search. Press to open the pull-down menu. Here you can set the following: Search by hand • Use this function to search the channels by hand as explain above (channel search). Enter this mode by pressing search by hand and >. Auto search •...
-
Page 17: Microsd Card Slot
MicroSD Card slot It is possible to add extra memory by inserting a MicroSD card into the card-slot (max 8 GB). Follow below instructions to insert a MicroSD card. Note: if you insert the MicroSD card incorrectly this may damage the card or unit. Technical Specifications Flash Memory 4 GB...
Need help?
Do you have a question about the XEMIO-950 and is the answer not in the manual?
Questions and answers