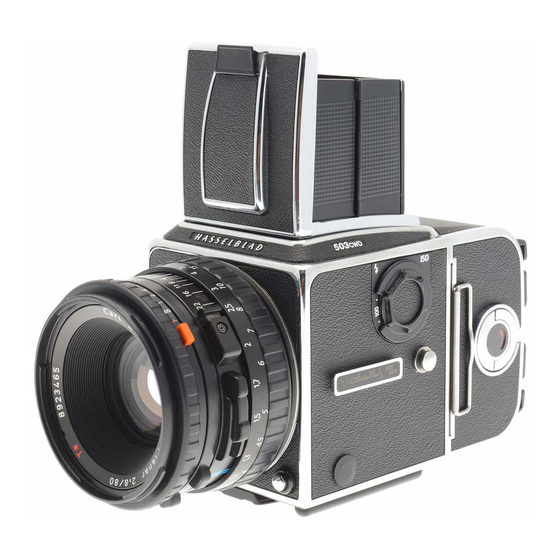
Hasselblad 503CW User Manual

Hasselblad 503CW User Manual

Camera hasselblad
Hide thumbs Also See for 503CW:
Table of Contents

Advertisement

User Manual
503CW/503CWD/CFV/CFVII/CFV-39/CFV-50
Version 10

Advertisement

Table of Contents
loading
Need help?

Need help?

Do you have a question about the 503CW and is the answer not in the manual?

Questions and answers

Subscribe to Our Youtube Channel

Summary of Contents for Hasselblad 503CW

  • Page 1 User Manual 503CW/503CWD/CFV/CFVII/CFV-39/CFV-50 Version 10...
  • Page 2 Welcome to Hasselblad 503CW 503CWD...
  • Page 3: Table Of Contents

    Not all the images in this manual were taken with a Hasselblad 503CW/CFV. They are used for illustrative purposes only and are not intended to represent the image quality produced by a Hasselblad product. © Jens Karlsson, David Jeffery and Ove Bengtson.
  • Page 4 Altogether, a winning combination for professional or dedicated amateur use. The Lenses You have access to the whole range of Hasselblad ‘C’ series lenses both old and new. Lenses are specially manufactured for Hasselblad by Carl Zeiss of Germany − the indisputable leader in camera optics.
  • Page 5: Instant Approval Architecture

    This file format includes lossless image compression, which reduces the required storage space by 33%. The 3FR file defines the colors in the Hasselblad RBG color space with its out-of-the-box quality, and used in conjunction with Phocus it removes both the need for experimenting with different color profiles to obtain optimal colors and the need for selective color corrections.
  • Page 6: General Information

    General Information Photo: Joao Carlos / Hasselblad Masters...
  • Page 7: Par Ts & Components

    Parts & Components 1. Lock safety button 14. Drive shaft 2. Lock button 15. Exposure value index 3. Sensor (covered by glass IR filter) 16. Exposure value scale 4. CF card cover 17. Shutter speed and aperture interlock button 5. Sync socket (for use with Winder CW and EL-type cameras) 18.
  • Page 8 28. Focusing hood magnifier 44. Battery contacts 29. Magazine hook 45. Battery (not supplied) 30. Auxiliary shutter 46. Ready light indicator 31. Film speed selector 47. Navigation button 32. Strap lug 48. Busy light indicator 33. Accessory rail 49. Instant Approval button 34.
  • Page 9: Camera Body

    Check that the winding crank on the right hand side of the camera is locked thus ensuring that the camera is fully wound. If the crank is not locked, rotate it clockwise until it does lock, thereby winding the camera. Photo: Bang Peng / Hasselblad Masters...
  • Page 10: Rear Cover Multicontrol

    (see “Changing the magnifier”). Focusing screen and viewfinder image The 503CW/503CWD is fitted with an Acute-Matte D focusing screen for unrivalled bright- ness and sharpness. The markings on the screen indicate the format of the sensor in the case of the 503CWD for correct composition with digital capture. The screen can easily be exchanged for others specially designed for various applications (see “Changing the...
  • Page 11: Winding Crank

    Winding crank 6, 7 The winding crank can be removed. Push the catch lever downwards while rotating the crank counter-clockwise and pull the crank straight out from the shaft. To attach it, align the small triangular index mark against the red dot on the camera body. Keep the crank pushed against the camera while turning it clockwise until the larger triangular mark is aligned with the red dot where it will click into position.
  • Page 12: Lenses

    Lenses The 503CW/503CWD is compatible with lenses that have an integral leaf shutter, namely, all C series lenses. CFi/CFE lenses are the latest developments and are mentioned and illus- trated here as the conventional choice. C, CF and CB lenses,...
  • Page 13: Shut Ter Speed And Aper Ture

    1/60 second at f/11. The orange ‘F’ setting is used only when the lens is attached to a Hasselblad camera in the 200 or 2000 series with a focal plane shutter. The operation of the diaphragm is not affected.
  • Page 14: Removing The Lens

    Removing the lens Depress the lens release button and rotate the lens counter-clockwise until it stops and lift it out of the mount. Exposure As a general rule for all shutter speed settings except B, you should keep the release button depressed until the lens shutter has opened and closed fully.
  • Page 15: Depth Of F Ield Preview

    PC flash/strobe terminal. Suitable electronic flash/strobe units can be used at all shutter speeds from 1s to 1/500s as well as B. Please see under ‘Flash’ the sections on the use of a Hasselblad Flash adapter SCA 390.
  • Page 16 Viewfinder System The 503CW/503CWD is supplied with a light, compact and foldable viewfinder, providing a through-the-lens laterally reversed image. It is easily interchangeable with alternative viewfinders including the prism finders, which produce a laterally corrected image. Please see ‘Accessories’ for further details about prism finders.
  • Page 17: Changing The Focusing Hood Or View F Inder

    The focusing hood on the standard viewfinder has a built-in 4.5x magnifier for accurate focusing and this can easily be changed to suit individual eyesight. The 503CW is equipped with an Acute- Matte D focusing screen which produces an exceptionally bright and sharp image. The markings in- dicate the format of the sensor for correct composition with digital capture.
  • Page 18: Film Magazines

    Film Magazines A number of different film magazines were produced over the years to accommodate various film types and formats. The film magazine described here is the most recent and common version. Photo: Claudio Napolitan / Hasselblad Masters...
  • Page 19: Par Ts & Components

    ‘A12’ film magazines accept all 120 size films and produce a 6 x 6cm image. They are easy to use and can be pre-loaded for rapid workflow. They provide the opportunity to vary the type of film used and can be quickly and easily switched mid-film without losing any frames. There are a number of reasons why using film might either be preferable or even necessary for digi- tal photographers too.
  • Page 20: Magazine Status Indicator

    (A) to the right. Release the button when the magazine has made contact with the camera body, and then push the button to the left to ensure that it has reached the locked position. Remove the slide to positively lock the magazine to the camera body. Removing the magazine Removing the magazine is simply the reverse of the attaching procedure.
  • Page 21: Film Tab Holder

    Removing film from the magazine When the last frame has been exposed and wound on, the magazine blocks the camera for further release. Wind off the film by folding out the film winding crank, and rotate it clockwise until you can feel the film leaving the supply spool.
  • Page 22: Flash / Strobe With F Ilm

    Changing to a faster ISO setting on the CFV is also a possibility. See appropriate manuals for connection details regarding the various units and adapters. Attaching a Hasselblad flash adaptor SCA 390 For use with hand-held flash/strobe units. • The 6-pole contact from the spiral cord is connected to the camera’s dedicated flash connector.
  • Page 23: Infrared F Ilm

    Using infrared film Infrared (IR) rays (wavelengths longer than 800 nm) form an image on a plane further away from the lens than the image plane for visible light. To compensate for this difference you have to align the chosen distance against the red IR index and not the normal central index. Proceed as follows: 1.
  • Page 24: Accessories

    Accessories Some accessories are still currently available for the 503CW to expand your system and tailor it to suit your needs. Photo: Stephan Zirwes / Hasselblad Masters...
  • Page 25: Rear Cover Multicontrol

    Optional accessories As the 503CW / 503CWD models are further developments of previous models, they feature improve- ments and some differences in design. This means that certain older and now discontinued acces- sories cannot be used and any forced attempt at mounting them may damage your equipment, so please check carefully before trying.
  • Page 26 The coupling plate on the bottom of the camera body has both a 1/4 in. and a 3/8 in. tripod thread. It also fits the useful and reliable Hasselblad Tripod Quick-Coupling (3043326). This facilitates rapid and repeatedly accurate attachment and removal of the camera from a tripod or support.
  • Page 27: Technical Specif Ications

    Troubleshooting — 503CW Hasselblad equipment is built to give long and trouble-free service, especially when you follow the maintenance and care advice at the end of this manual. If however you encounter any operating difficulties because you are not familiar with the camera system, the following table may help to resolve them. If the problem persists and the cam- era is still under guarantee, you should contact your Hasselblad dealer.
  • Page 28: Overview

    Overview Photo: Claudio Napolitan / Hasselblad Masters...
  • Page 29: Introduc Tion

    In keeping with Hasselblad’s modular design philosophy, the CFV is an independent com- ponent. In this way it can be used with view/large format cameras to optimize its use (see later section for details ).
  • Page 30: Computer System Requirements

    FireWire port on the computer is capable of supplying power. The 503CWD and CFV save images as 3FR files which are Hasselblad raw digital-camera capture standards. From Phocus, you can optimize and then export the files to 3F, DNG, TIFF, PSD, JPEG formats etc.
  • Page 31: Before You Star T

    Please see below for items included with delivery. An informational DVD is also included which contains, amongst other things, a copy of Phocus. If anything is missing or seems faulty in any way then you should contact your Hasselblad dealer immediately.
  • Page 32: Parts, Components & Control Panel Buttons

    Parts, components & control panel buttons The interface buttons are used for browsing images and navigating the menu system to make settings. Two of the buttons, located at the bottom-right and -left of the screen, are given an on-screen label that changes according to the current context. For example, the Approval button sets the approval rating when browsing images, but becomes an OK button to confirm settings.
  • Page 33: Power Indicator

    Also acts as a selection button when viewing avail- able image batches, media and value setting on the menu. Winder / EL terminal Terminal for connection to a Hasselblad CW winder or Hasselblad EL model camera body. Requires the camera sync cable (supplied). Zoom-out button / SELECTION (– button)
  • Page 34: Battery

    The Battery Pack F-570 CFV (3051094) is the recommended power source for the Hasselblad 503CWD and Hasselblad CFV (all models). It is a rechargeable and environmentally approved Li-ion type. Battery Charger 8.4V CFV The Battery Charger 8.4V CFV (3051092) is designed for use with...
  • Page 35 • A slight temporary loss of battery performance might be noticed at very high or low temperat u res. Take the appropriate measures if this is the case. • If you do not intend to use the battery for a while, it is best to store it in a cool place (in a domestic refrigerator is ideal). • The battery should have a usable service life of around 300 recharge/discharge cycles. Battery Pack F-570 CFV – precautions • Connect the battery to the CFV correctly. • Do not use the battery for anything other than Hasselblad CFV digital backs. • Do not immerse the battery in liquids. • Do not incinerate the battery. Please recycle or discard in an environmentally approved manner. • To charge, do not use any other charger than the Battery Charger 8.4V CFV. Battery Charger 8.4V CFV – precautions • Read the instructions before using the charger. • Use indoors only (protect against moisture).
  • Page 36: At Taching And Removing

    With a fully charged battery fitted, keep the ON/OFF button depressed for at least two seconds. (This time delay helps prevent unintentionally turning the CFV on.) A Hasselblad logo splash screen will appear on the display followed by an audible signal. This signifies that the CFV has beeen activated.
  • Page 37: Flash/Strobe

    See the chart on the following page for details. CFV and 503CWD or 503CW+CFV combination A 503CWD or 503CW+CFV combination offers TTL flash control with some slight adjust- ments. As the reflective characteristics of the digital sensor are different to film surface characteristics (for which the TTL function was originally designed), this function has to be slightly ‘tricked’...
  • Page 38 TCC / 205 FCC with F type type lenses (C-mode setting). lenses and CF type lenses at FlexBody, ArcBody. Any view SWC / SWC/M, 903 SWC, F-mode setting. camera with Hasselblad V 905 SWC system adapter. Flash input sync cable FireWire cable FireWire cable...
  • Page 39 Simple introductory overview of menu access, navigation and settings choice. The menu is structured in a manner similar to cell phones and similar electronic devices. Various branches within the tree system are accessed by press- ing the navigation button until you reach the point where a choice has to be made.
  • Page 40: White Balance

    By using the buttons on the control panel you can navigate down through the various levels Overview in the menu. It provides the source of infor- mation about image files and also provides of menu a way of making custom settings so the CFV suits your way of working. structure Below is a simple overview of what is avail- able and where it is situated on the menu.
  • Page 41 Storage and Settings menu structure overview (This screen will vary according to model – see later section for details) Here you can see where some of the main screens are situated with regard to each other. Accessing them is just a matter of tracing along the paths using the Navigation button.
  • Page 42: Getting Started

    Getting Started Photo: Mark Holthusen / Hasselblad Masters...
  • Page 43: File Storage

    3FR information requires further computing power (typically by way of Phocus) to obtain complete develop- ment. If developed in Phocus, 3FR files become Hasselblad 3F files – denoted by each file now bearing the suffix “.fff”. If developed by other RAW processors, the 3FR files are not converted to 3F but can be exported directly to TIFF, PSD etc according to requirements.
  • Page 44 ImageBank-II (discontinued product) The Hasselblad ImageBank-II is a portable 100MB hard disk that provides high-speed image-file storage for use with Hasselblad digital backs. Though discontinued, some units are still currently available (new and used) from various sources. As the item is no longer produced, there is limited provision for it in the current firmware update for the latest CFV models.
  • Page 45: Cf Cards

    Using compact flash memory cards When shooting to a compact-flash card, the CFV is completely self-contained. No additional wires or connectors need to be attached. Lossless compression is applied to the images, so the actual size of each capture can vary, thereby affecting the total number of shots you can fit on a card.
  • Page 46: Tethered To A Computer

    (not all computers supply power, notably PC laptops. See under ‘General Information’ for details). When using a 503CWD or 503CW+CFV and initiating a shot from Phocus, the computer sends a signal to the CFV, which triggers the Winder CW which in turn triggers the shutter and flash/strobe lights (if any).
  • Page 47: Initial Set Tings

    INITIAL SETTINGS The initial general setting is language choice. This choice is re- tained but can be changed at any time. You can choose between: English, German, French, Italian, Spanish, Japanese and Chinese. Before each shoot an ISO and a white balance setting should be made (white balance is for your convenience regarding the ap- pearance of the image on the display though;...
  • Page 48: White Balance

    Regular menu checks ISO, White Balance, Media and Browse settings should be checked before each session. They are therefore placed at the top level of the menu for quick and easy access. They are also shown on-screen in most preview modes, so you can easily keep an eye on them as you work.
  • Page 49: Media

    To make a manual white balance setting: 1. Select the MENU > White Bal > Manual item. There are seven ‘White Balance’ settings to choose from. 2. Use the  button to call up the ‘Manual White Balance’ screen. 3. Here, you can adjust the color temperature to a specific numeral setting in degrees K with the buttons.
  • Page 50: Browse

    Browse Browse allows you to filter capture previews according to their IAA rating when viewing captures. To start with it might be easier to select ALL until you get into the habit of rating individual captures. See later section for full details about IAA rating To select a Browse setting: 1.
  • Page 51 Previews Photo: Mark Zibert / Hasselblad Masters...
  • Page 52: Preview Modes

    Preview ISO setting The standard preview display is the one shown Display when you first turn on the camera and is prob- White balance ably the view you will use most often. It features a Current storage medium preview of your most recent shot and basic infor- mation about the settings and the image itself.
  • Page 53 • Battery saver: Turns off the screen, but you can still use the menus and take pictures. • Full-screen preview: Shows the preview only, with no frame or settings information. N o t e The histogram is only an indicator Regardless of the current mode, if you zoom in on the image or zoom out to the thumbnails, that should be interpreted—there are the display reverts to showing the “standard”...
  • Page 54: Overexposure Indicator

    Full-screen mode In full-screen mode, you can browse your images at standard preview resolution without any distracting data surrounding them. Because the current approval setting is not shown in full-screen mode, the approval button has no effect. This will prevent you from accidentally assigning the wrong status without realizing it.
  • Page 55: Batches & Browsing

    Batches & Browsing Photo: Bang Peng / Hasselblad Masters...
  • Page 56: Batches

    Batches When working untethered, captures are stored in named and dated folders called batches on a CF card. They help you to organize your shots as you work and function exactly as folders on a computer. Batches have the following properties: • When you create a new batch, you assign a name to it.
  • Page 57 Batch and Media screen overview The BATCH screen. Batch name Date the batch was created The blue frame around a folder tells you that it is the Current Batch. Current batch capacity The MEDIA screen. Medium-type icon (Compact Flash) Displays information about the Current Medium Medium name Current remaining capacity on medium Creating new batches...
  • Page 58: Creating A New Batch

    Creating a new batch 1. Press the MENU button. 2. Press  to navigate down and select the Storage dialog.  Press  and then  to navigate down and select Batch. 3 Press  to open the Batch dialog. The new batch name will always begin with a three-digit number, which automatically increments by one with each new batch.
  • Page 59: Basic Image Browsing

    Basic image browsing The display enables you to inspect your shots while you are still on-location. It offers full-screen previews, high- magnification zoom, two levels of thumbnails and analysis tools including a full histogram and camera settings. When you first turn on the camera, the display opens in standard browse mode, showing the last capture taken (if any) for the current batch.
  • Page 60: Navigating Batches

    Browsing batches When you browse using the navigator button, you will only see images from the current batch (folder) on the current medium. To view another batch, you must navigate to it by zooming out to the batch level and then zooming in on the appropriate folder. Selecting another batch to browse: 1.
  • Page 61 Instant Approval Architecture Photo: Lyle Owerko / Hasselblad Masters...
  • Page 62: Using Instant Approval Architec Ture

    Using Instant Approval Architecture The Instant Approval Architecture system helps you to evaluate your images as quickly as you take them. It works by supplying immediate audio feedback, which tells you instantly whether each new capture is exposed correctly or likely to be rated as over- or underex- posed.
  • Page 63 3. If no problem is detected, then the image is saved with the chosen default approval status. N o t e 4. When you are browsing through your shots, keep an eye on the approval status of each and consider whether you should promote or demote each shot based on its When the CF card is full, red-status appearance on the preview screen.
  • Page 64: Default Approval Status

    Default approval status By default, the system assigns an initial approval status for each new shot based on an analysis of the distribution of exposure levels. However, you might choose instead to override this system and have all new shots assigned either as green or yellow, regardless of the exposure analysis results.
  • Page 65: Browsing By Approval Status

    Browsing by approval status You can set the camera to browse by approval status, which means, Show all for example, that you will see only green-status images as you browse (brackets on all) a batch (or both green and yellow, or only red, etc.). The current filter setting is indicated on-screen, as illustrated.
  • Page 66: Delete, Format, Copy

    Delete Format Copy Photo: Joao Carlos / Hasselblad Masters...
  • Page 67: Deleting Single Images

    The Storage menu provides items for working with storage management and file deletion. Copy only appears with 16 & 39 Mpix models Copy only appears with 16 & 39 Mpix models Deleting single images – 1. Use the button to go to the nine-thumbnail (in this case) view to make an initial search.
  • Page 68: Deleting By Approval Status

    Menus for deleting several images by Approval Level from the CURRENT BATCH. Deleting by Approval status To delete several images at the same time using Approval status. 1. Starting at the single-image preview display, Select MENU > STORAGE > Delete. 2. Use  to enter the Delete submenu or use shortcut. –...
  • Page 69: Deleting Several Images From A Batch

    Menus for deleting selected images by Approval Level from a SELECTED BATCH. Deleting several images from a batch To delete several images at the same time from a selected batch: – 1. From a single-image preview display, repeatedly press the button until you reach the Batch list.
  • Page 70: Deleting Several Images From A Cf Card

    Menus for deleting selected images by Approval Level from ALL batches on a CARD Deleting several images from a CF card To delete several images at the same time: – 1. Starting at the single-image preview display, press the button repeatedly until you reach the CF card on the Media screen.
  • Page 71: Copy

    FORMAT The CFV is only able to read and write to media that have been formatted. However, new cards or disks sometimes arrive without any format- ting, or you might want to convert media that are currently using a format that the camera cannot read. To format media: 1.
  • Page 72: Settings

    Settings Photo: Nina Berman / Hasselblad Masters...
  • Page 73 Navigating the USER INTERFACE settings...
  • Page 74: User Inter Face

    MENU > SETTINGS > User Interface By altering the User Interface settings, you can control the way the CFV interacts to suit you and your preferred way of working. It also includes date and time settings. USER INTERFACE menu items The user interface menu includes both items and sub-menus. The following items are available here: • Language: The menu system can be displayed in any of seven languages.
  • Page 75: Camera

    6. Press the EXIT button again to save the new settings and close the menu. MENU > SETTINGS > Camera All Hasselblad V-system cameras can communicate with the CFV without the need for extra cable connections except: • U nmodified 200 series models using CF lenses in C-mode and the FlexBody accessory.
  • Page 76 500/553 ELX Exposure cable 503 CW 503 CW + ‘Exposure’ required for Phocus control Winder CW cable required of 503CW + Winder CW. for control from Phocus (NOTE: only these cam- Exposure Cable EL required eras/combinations can be for Phocus control of EL/ELM...
  • Page 77 Model setting variations Look in the list below for the camera model you are using and make the appropriate set- tings change. Don’t forget to change the setting if you change camera model! Hasselblad 503CW plus winder CW Winder CW For use with 503 CW models: Adapter EL • Make a Winder CW setting.
  • Page 78: Shutter Delay

    Flash sync For use with un-modified 200 series models (together with C-lenses in C-mode), a N o t e FlexBody or view cameras fitted with a Hasselblad adapter. Although the 903SWC and 905SWC • Make a Flash sync setting. models work in conjunction with a CFV, • A Flash sync input cable should be used. the combination is not recommended • All exposures times, including the B setting, function correctly without having to alter the for critical work.
  • Page 79 Setting CAMERA model and options Proceed as follows: 1. Press the menu (MENU) button to open the menu. 2. Use  and  to select the SETTINGS sub-menu. 3. Press  to open the SETTINGS menu. 4. Use  and  to select CAMERA. 5.
  • Page 80 Setting EXPOSURE TIME and CAPTURE SEQUENCE Proceed as follows: 1. Press the menu (MENU) button to open the menu. 2. Use  and  to select the SETTINGS sub-menu. 3. Press  to open the SETTINGS menu. 4. Use  and  to select CAMERA. 5.
  • Page 81 button to make an INITIAL DELAY 11. Press either the setting. This setting controls the amount of time that elapses before the first exposure in the sequence. 12. Press  to select DELAY. 13. Press either to make a DELAY setting. This setting controls the amount of time between each exposure in the sequence.
  • Page 82: About

    Occasionally, Hasselblad releases updates to the internal software (“firmware”) of the CFV. These updates may fix small errors and/or add new features. If you need assistance from Hasselblad technical support it facilitates the situation to know the serial number and current firmware vision of the unit.
  • Page 83: Custom Options

    Custom Options for 16, 39 & 50 Mpix models 16 Mpix model choices 39 Mpix model choices Custom Options selected (all models) 50 Mpix model choices MENU > SETTINGS > Custom Options Custom Options allow you to make individual settings for the dif- ferent models: ...
  • Page 84: Tilt Sensor (39/50 Mpix Only)

    Tilt sensor (39/50 Mpix only) The tilt sensor tags image files according to the orientation of the Square Crop icon as camera at the time of capture to ensure correct orientation on the it appears on the CFV display and in Phocus. There may be occasions when this is not display.
  • Page 85: Cleaning

    Cleaning Photo: Dirk Rees / Hasselblad Masters...
  • Page 86 IR filter or on the CCD N o t e itself. This can only be removed at the Hasselblad factory. Contact your Hasselblad dealer for assistance. WARNING ! 6.
  • Page 87: Appendix

    Appendix Photo: Mark Holthusen / Hasselblad Masters...
  • Page 88: Technical Specif Ications

    530 g (excluding battery and CF card) / 91 x 90 x 61 mm (W x H x D) Camera support All Hasselblad V System cameras manufactured since 1957. 2000 cameras and 201F with C lenses only. 202FA / 203FE and 205FCC camera types need a minor camera modification to use F/FE lenses. The ArcBody is not compatible. SWC/M and newer can be used but has limitations on image quality due to lens design not being suitable for digital capture. All other cameras with Hasselblad V interface.
  • Page 89: Equipment Care And Ser Vice

    DISPOSAL • Take particular care when working with strobe / studio flash units to prevent If you need to dispose of a 503CW, CFV or batteries, please do so in an damage to equipment and personal injury. environmentally friendly manner at the local waste plant/ recycling centre • Do not attempt to open the CFV.
  • Page 90 Quick Index Pre -release and cable release Accessor y rail Rear cover MultiControl Aper ture Removing the lens Attaching the lens Shutter speed Attaching the magazine Strap attachment and removal Built-in magnif ier Technical specif ications Changing the focusing hood or view f inder Troubleshooting Changing the focusing screen View f inder indicator...
  • Page 91 Victor Hasselblad AB & Hasselblad A/S. Not all the images in this manual were taken with a Hasselblad 503CW or CFV. They are used for illustrative purposes only and are not intended to represent the image quality produced by a Hasselblad 503CW or CFV.
  • Page 92 Hasselblad A/S Hejrevej 30, DK - 2400 Copenhagen, Denmark Victor Hasselblad AB Box 220, SE - 401 23 Göteborg, Sweden 11.11 - UK - v10...

This manual is also suitable for:

CfviiCfvCfv-50Cfv-39503cwd

Table of Contents

Save PDF