
Related Manuals for GE WSXH208A Series


Summary of Contents for GE WSXH208A Series
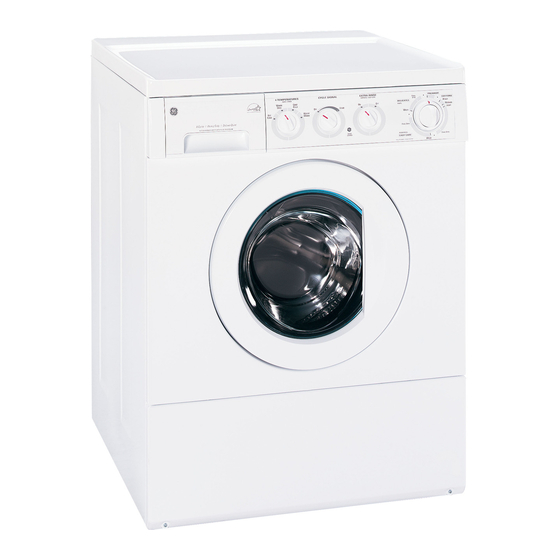
- Page 1 GE Consumer Home Services Training TECHNICAL SERVICE GUIDE Front-Load Washer MODEL SERIES: WSXH208A PUB # 31-9060 08/00...
- Page 2 If grounding wires, screws, straps, clips, nuts, or washers used to complete a path to ground are removed for service, they must be returned to their original position and properly fastened. GE Consumer Home Services Training Technical Service Guide Copyright © 2000 All rights reserved.
-
Page 3: Table Of Contents
Table of Contents Table of Contents Introduction ........... . . 2 Functional Part Changes . -
Page 4: Introduction
Introduction GE introduced its Horizontial Axis Front-Load changes are listed below and covered in this Washer in 1998. The manual, Pub #31-9005, supplement. A detailed method for servicing the provided service information for that product. The bellows is also included to assist you. -
Page 5: Functional Part Changes
Functional Part Changes 1998 Model NEW Model Door Lock Assembly and Strike New Door Lock Assembly and Strike Automatic Dispenser New Automatic Dispenser New Motor Speed Control Motor Speed Control – 3 –... - Page 6 1998 Model NEW Model Timer New Timer Drive Motor New Drive Motor – 4 –...
- Page 7 Notes – 5 –...
-
Page 8: Door Lock Assembly
Door Lock Assembly The new door lock assembly consists of a coil, wax motor and spin lock arm are used to prevent door switch, switch actuator, locking fork, wax the door from being opened while the drum is still motor, and spin lock arm. When the timer line spinning. -
Page 9: Automatic Dispenser
Automatic Dispenser solenoids. When water enters the washer, water The Automatic Dispenser has been changed from flows through the tube directing water into the tub a mechanical to an electrical operation. When the and through the soap section to the dispenser. water valve is activated, all the water entering the When it is time for either the bleach or the softener washer must pass through the tube at the rear of... -
Page 10: Motor Speed Control
Motor Speed Control The motor speed control now provides all func- and D and zero on terminals C, E, and F, this tells tional control to the washer. the board to allow the washer to fill, tumble at 52 RPM for 107 seconds, then close the contact The board controls: that connects the neutral side of the timer motor so it advances and gives the next code. -
Page 11: Timer
Timer The timer functions have been reduced to a line switch that turns electrical power ON and OFF to the washer, applying codes to the speed control board. The line switch also applies electrical power to the dispenser valves, the water valve, the drain pump, the wax motor, and the end-of-cycle buzzer at the proper time. -
Page 12: Resistance Chart
Resistance Chart Drain Pump Motor 15 Ohms +/- 7% Dispenser Valves Solenoids 1100 Ohms +/- 7% Drive Motor Windings Terminals 1 to 2 2.6 Ohms +/- 7% Terminals 1 to 3 2.6 Ohms +/- 7% Terminals 2 to 3 2.6 Ohms +/- 7% Drive Motor Tachogenerator 184 Ohms +/- 7% Timer Motor... -
Page 13: Troubleshooting
Troubleshooting Attached to the inside of the service panel is the is the first step in the timer, that timer contacts 0C Tech Sheet with a timer flowchart and a wiring to 0T, 1C to 1B, 5C to 5B, and 12C to 12B are schematic, which is invaluable when troubleshoot- closed, and the speed board will not advance the ing the washer. - Page 14 Troubleshooting WATER Possible Causes What To Do Water leaks Fill hoses or drain hose is • Make sure hose connections are tight at washer and improperly connected faucets and make sure end of drain hose is correctly inserted in and secured to drain facility. •...
- Page 15 Troubleshooting OPERATION Possible Causes What To Do Washer pauses in cycle The washer normally pauses between washing steps Washer won’t operate Washer is unplugged • Make sure cord is plugged securely into a working outlet. • Turn both hot and cold faucets fully on. Water supply is turned off •...
- Page 16 Troubleshooting (cont.) PERFORMANCE Possible Causes What To Do Clothes too wet • Add one to two similar items. Load is too small • Redistribute load. Load is out of balance Pilling • While this is not caused by the washer, you can slow the Result of normal wear on poly-cotton blends and pilling process by washing garments inside out.
-
Page 17: Timer Flowchart Example
Timer Flowchart Example TERM. HEAVY NORMAL WASH ELECTRONIC - DELAY TO START WASH 8 HR 6 HR 4 HR CIRCUIT QUICK WASH DETENT MACHINE POWER CODE A DISPENSER V2 CODE CODE DISPENSER V1 CODE TM DIRECT CODE WASH WATER MAIN RINSE WATER MAIN RINSE WATER TEMP WASH WATER TEMP... -
Page 18: Special Troubleshooting And Access Tips
Special Troubleshooting and Access Tips The front panel can be removed to give you The tachogenerator resistance is also read from access to the motor and motor connectors for the front. The leads are located on the right upper resistance readings. This prevents moving the and center of the block. - Page 19 The reed switch connector can be accessed, with To remove the timer, first remove the knob and the the top removed. Separate the connector and the dial indicator. Then, while supporting the timer from the back, remove two screws and pull the reed switch pins.
-
Page 20: Wiring Diagram
Wiring Diagram WARNING: POWER MUST BE DISCONNECTED BEFORE SERVICING THE APPLIANCE. Wiring Diagram – 18 –... -
Page 21: Motor Movement
Motor Movement (motor will not run) • Note: Not all pins are used on motor xxxconnector. -
Page 22: Timer Flowchart
Timer Flowchart – 20 –... -
Page 23: Schematic
Schematic – 21 –... -
Page 24: Diagnostics Flowcharts
Diagnostics Flowcharts Washer Inoperative Washer Inoperative Washer Inoperative (Power ON) With timer knob pulled out and door closed, does door lamp glow? Disconnect power, gain Can you open the access to reed switch door? connector, disconnect. Take continuity two pin Defective door lock Defective door lock connector leading to... - Page 25 Drive Motor Spins but Does Not Tumble Drive Motor Spins but does not Tumble If any other readings If between pin 5 to pins 2,6, beside 120 VAC between and 10 read 120 VAC and pin 5 to pins 2,6, and 10 between pin 5 to pins 2 &...
- Page 26 Drive Motor Inoperative Drive Motor Inoperative Disconnect power, remove lower panel. Read windings and Tacogenerator resistances from front Are resistances okay? Replace Motor, also Reconnect power. check fuse on control Advance Timer to main board. If open replace wash. Does it draw motor and speed water? Advance to control board.
- Page 27 Timer Does Not Advance Timer Does Not Advance Remove power, remove timer, check timer motor resistance (see schematic) Are resistances okay? Timer facing you, shaft to the Reads open, replace right, upper rack, 4th terminal timer. from the left, (white lead) and center terminal exactly below it, (yellow/black lead) attach and Ohm probe to each terminal (Use...
- Page 28 Drive Motor Tumbles Slowly Drive motor tumbles very slowly in any timer position Readings other than Remove lower front panel. 184 Ohms +/-7% 184 Ohms +/-7% Check motor and tachogenerator resistances. (see schematic) Defective Defective Speed Control Drive Motor Board GEA00594 Bleach Dispenser Does Not Operate NOTE: Always check wiring...
-
Page 29: Parts Catalog
Parts Catalog i r c i t p . y t i r c i t p . y t i r c i t p . y t " 0 I F / & & – 27 –... -
Page 30: Warranty Information
Any part of the washer which fails due to a defect in materials or From the date of the workmanship. During this full one-year warranty, GE will also original purchase provide, free of charge, all labor and in-home service to replace the defective part. -
Page 31: Quiz
Quiz 1. Drive motor is inoperative, you need to check 6. The new wax motor (switch lock circuit) is energized: winding resistance. Where do you go? a) Pull the washer out, remove the back a) Any time unit is in operation. cover, disconnect terminal block, and take b) Only during the wash cycle. - Page 32 – 30 –...