
Related Manuals for Minelab Explorer


Summary of Contents for Minelab Explorer
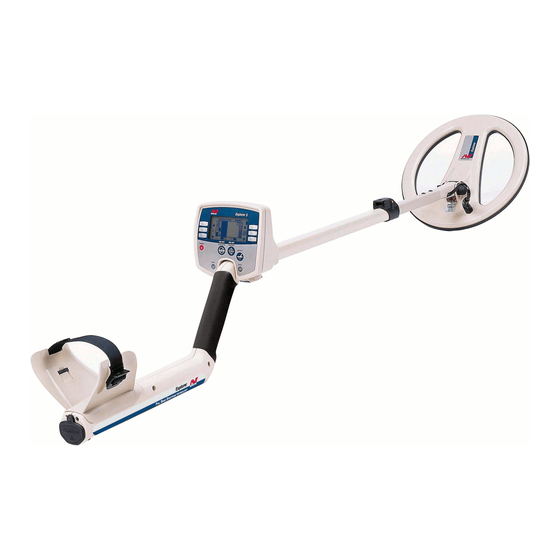
- Page 1 THE MINELAB EXPLORER Minelab Explorer ™ 4901-0033 Rev 1.3 4901-0033 Rev 1.2...
-
Page 2: Table Of Contents
There are differences in features and functions between the Power and Backlight buttons ........................ 31 Explorer S and Explorer XS models. Please refer to the Explorer Menu and Back buttons ........................32 Model Features table included in Chapter 7: User Info to check Shortcut buttons ............................ - Page 3 THE MINELAB EXPLORER THE MINELAB EXPLORER www.minelab.com contents contents TABLE OF CONTENTS TABLE OF CONTENTS QUICKSTART ........................37 ADVANCED USE ........................ 67 Getting started ............................38 Advanced mode’s Main Menu [easy reference] ................68 Beginner use ............................39 Starting in Advanced mode ........................69 Quickstart display [easy reference] .......................
-
Page 4: Introduction
Troubleshooting ............................98 Service repair form ..........................99 Warranty ............................... 101 The Explorer is the most technologically Technical specifications for the Minelab Explorer ................102 Explorer model features ........................103 advanced detector ever produced. Glossary of terms ..........................104 Detector care and safety ........................108... -
Page 5: About This Manual
Metal Hydride (NiMH) battery pack. This chapter provides details on 7. USER INFO If you have any questions or comments regarding the Explorer or any other Minelab product, battery installation, use and This chapter provides a glossary of please feel free to contact us via your local Authorized Minelab dealer, or write to us: performance. -
Page 6: Minelab's Unique Technology
Once you are familiar with the feel and functions of the detector, it is Smartfind display The Explorer is the first of a new generation of detectors from Minelab. Its sleek, sturdy a simple matter to move into Advanced mode. This will enable you to... - Page 7 • enhanced detection of desired targets amidst iron trash; different types of ground. The Explorer uses a sophisticated approach to the elimination of On the other hand, higher • adjustments to improve operation for searching salt-water ground mineralisation.
-
Page 8: Assembly
THE MINELAB EXPLORER THE MINELAB EXPLORER www.minelab.com Assembly This chapter provides details and instructions on assembling and adjusting the Explorer. -
Page 9: Unpacking Your Explorer [Easy Reference]
UNPACKING YOUR EXPLORER List of Parts The box in which the Explorer is shipped should contain the items illustrated on the facing page. Please check that all of these items are in the box. If any of these components are missing, contact your Minelab dealer immediately. -
Page 10: Assembling The Detector
Figure 2.1 Connecting the search coil to the lower shaft Connecting the search coil to the lower shaft Please follow these instructions to assemble the Explorer. Refer to the drawings to identify parts and how they are positioned. The Figure 2.1–2.3 detector’s components are organized into three categories:... -
Page 11: The Shaft Assembly
THE MINELAB EXPLORER THE MINELAB EXPLORER www.minelab.com Check the orientation of the search coil and shaft ensuring STEP 3 THE SHAFT ASSEMBLY that the rivets are visible on the top of the shaft. The shaft assembly is made up of the upper and lower shafts connected by the shaft (Figure 2.2). -
Page 12: Connecting The Shaft Assembly
THE MINELAB EXPLORER THE MINELAB EXPLORER www.minelab.com Secure upper shaft in position by locking the control box CONNECTING THE SHAFT ASSEMBLY STEP 5 camlock. (Figure 2.9) Adjust shaft to the desired length and then lock Connecting the shaft assembly to the handle STEP 6 with shaft camlock lever. -
Page 13: The Handle Assembly
THE MINELAB EXPLORER THE MINELAB EXPLORER www.minelab.com Fitting the armrest strap THE HANDLE ASSEMBLY Figure 2.11–2.13 The handle assembly is made up of the armrest, straps and the control box. It is To fit and adjust the armrest strap: connected to the shaft assembly by the control box camlock. -
Page 14: Headphones
REPLACING AND FITTING THE SEARCH COIL Attaching headphones Figure 2.14 The use of headphones when treasure hunting with the Explorer will avoid disturbing others in the area. The reduced power demands of the headphones will extend the detector’s battery life. -
Page 15: Batteries
6 inches (150mm) of cable between the coil yoke and the search coil. This is the slack necessary to allow adjustment to The Explorer is powered by alkaline the angle of the search coil. batteries or a rechargeable Nickel Metal... -
Page 16: The Battery Pack
THE BATTERY PACK Figure 3.3 The Explorer XS is supplied with a sealed rechargeable Nickel Metal Hydride (NiMH) The Explorer XS is provided with a sealed Nickel Metal Hydride battery pack and a battery pack designed to accept alkaline AA batteries. Removal (NiMH) battery pack and a charger which plugs into a instructions apply to both types of pack. -
Page 17: Battery Performance
Recharging NiMH battery pack with the car charger Recharging BATTERY PERFORMANCE The Explorer XS is provided with a car charger that boosts the voltage of the car battery (usually about 12V) to a voltage Battery life indications sufficiently high to charge the NiMH battery pack. -
Page 18: Control Panel
THE MINELAB EXPLORER THE MINELAB EXPLORER www.minelab.com Control Panel It is important to familiarize yourself with the features of the Explorer control panel. A few minutes spent reading this chapter will be a worthwhile preliminary to basic or advanced detecting. -
Page 19: The Control Panel
THE CONTROL PANEL POWER AND BACKLIGHT BUTTONS The Power button offers you the option of operating the Explorer with its factory settings or in the most recent manual setting. The backlight provides greater screen As the control panel provides user access to all Explorer functions, the clarity in dim conditions. -
Page 20: Menu And Back Buttons
SHORTCUT BUTTONS The Menu and Back buttons are likely to be the most frequently used of all the control The Explorer’s shortcut buttons are intended to offer quick access to the functions and panel functions in both Quickstart and Advanced modes. -
Page 21: Shift Buttons
SHIFT BUTTONS Figure 4.7 The six buttons at either side of the Explorer display screen perform several functions. The IRON MASK shortcut button allows you to quickly switch Menu items may be selected, help screens displayed or adjustments made to display and between two detection modes: Discrim and Iron Mask. -
Page 22: Quickstart
THE MINELAB EXPLORER THE MINELAB EXPLORER www.minelab.com CONTROL BUTTON FUNCTIONS ... INCLUDE? Quickstart However experienced you are at using a metal detector, it is important that you read this chapter to understand how to use the Explorer in Quickstart mode. -
Page 23: Advanced Use
Sweeping the coil Figure 5.1 Quickstart’s opening screen settings. The Explorer will perform at its best when the coil is kept in close proximity to the ground. This will increase detection depth and Regardless of your level of experience with metal detecting, Figure 5.2 Sweeping the coil... - Page 24 QUICKSTART DISPLAY QUICKSTART DISPLAY The Quickstart display visually represents everything from target details to the Explorer’s operating settings. Quickstart’s Smartfind display (pictured below) and alternate Digital display share many common elements. Sensitivity level. The sensitivity bar and Smartfind display. The shaded and unshaded numbers indicate how responsive the detector is areas of the screen are Smartfind’s preset...
- Page 25 • Objects with high conductivity (e.g. large silver coins, copper crosshair on the Smartfind screen is based on Minelab's unique against unwanted targets in two-dimensional scale of discrimination. An understanding of this items) will cause the target crosshair to appear at the top of Figure 5.3 Smartfind display with preset...
- Page 26 Preset Level Figure 5.4 Figure 5.5 Adjusting the Iron Mask The Explorer's Iron Mask is set at a rating of -6. This is suitable When you begin in Quickstart, you will see a Smartfind display when detecting non-ferrous metals. resembling Figure 5.4. This display shows that the detector is Detecting more ferrous objects ready to operate in its preset Coins Discrim function.
- Page 27 However, if you wish to locate specific types of objects you may three possible target classifications. need to modify the Explorer's level of ferrous rejection. This is done Although Digital mode does not display the ferrous content in its Figure 5.8 Digital as full screen display by adjusting the Iron Mask as explained previously on page 45.
-
Page 28: Modifying The Display
6. (Explorer S or XS, see page 83). but will marginally affect depth penetration and detection of small Press the DETECT shortcut button again to continue objects. -
Page 29: Adjusting Threshold
THE MINELAB EXPLORER www.minelab.com ADJUSTING THRESHOLD AUDIO RESPONSE The Explorer emits a target audio response that varies in pitch and volume depending on Threshold control what type of object it detects. The Explorer usually emits a constant tone or threshold ‘hum’ in Pitch of response the absence of a target. -
Page 30: Audio: Adjusting The Volume
As mentioned earlier in the section on Audio Response, the Figure 5.15 Volume adjustment screen move the coil across the target. Explorer emits a target signal that varies in volume and pitch depending on the object it detects. Generally, large targets or Figure 5.14 The Audio menu targets close to the ground surface emit the loudest signal. -
Page 31: Audio: Adjusting The Tone
Weak to medium strength signals will give proportional responses, but strong signals will not sound much louder than This sets the upper limit of all tones emitted by the Explorer. medium ones because the sound has reached its maximum limit Minelab recommends setting the upper limit to the highest (Figure 5.17). -
Page 32: Audio: Adjusting The Sounds
Main Menu > Audio > Sounds > CONST Selecting CONST eliminates the variation of the pitch upon detection. If selected, the Explorer will emit a consistent tone regardless of the target detected. Conductivity Main Menu > Audio > Sounds > CONDUCT Conduct is the factory preset and Minelab’s recommended option. -
Page 33: Testing Target Audio Responses [Tutorial]
STEP 2 the coil to pass between the objects. For example, Iron Mask is activated and the Explorer has detected the approximate location of a non-ferrous coin but ignored the rusty One at a time, pass the coil across the test objects. The STEP 3 nail buried nearby. -
Page 34: Recovering The Object
Using Pinpoint RECOVERING THE OBJECT Figure 5.21 Once the Explorer has found the approximate position of a target it is For this procedure you’ll need: a knife or trowel, a small necessary to locate its exact position using Pinpoint. spade and a sheet of plastic. -
Page 35: Selecting Targets
Explorer. Quickstart’s SELECT menu lists eight object types typically encountered during Select targets list treasure hunting. It is up to you to select one or more to modify the Explorer’s discrimination pattern. Figure 5.22, 5.23 As outlined earlier in this chapter, Quickstart provides the option of identifying targets based upon Smartfind’s two-dimensional... -
Page 36: Advanced Mode Option
ADVANCED MODE OPTION Once you have experimented with target options and the other features of Quickstart, it may be time to investigate the features of the Explorer available to the advanced user. This tutorial outlines how to instruct the Explorer to... - Page 37 THE MINELAB EXPLORER THE MINELAB EXPLORER www.minelab.com Advanced Use Once you are comfortable with basic detector use and Quickstart, it is time to investigate the more advanced features of the Explorer.
- Page 38 Smartfind screen. menu option is pressed and held. If you operated in Advanced mode last time you used the Explorer, DISPLAY menu. See page 70. the detector will remember this. To enter the Advanced mode when...
- Page 39 IRON MASK function is ON or OFF. accepting or rejecting learnt targets only. NOTE LEARN and EDIT are only available for Explorer XS model. See page 45. Battery life. This shaded block indicates the charge remaining installed batteries.
- Page 40 LEARNING TARGETS LEARN’S TARGET SELECTION Advanced mode’s Learn option programs the Explorer to recognize certain targets. The following pages show you how to instruct the detector to ‘learn’ a particular target and This tutorial shows you how to learn a target, make save its characteristics for later use.
- Page 41 Figure 6.6 Saving the newly-edited areas of the screen schematically represent the current use. discrimination pattern Reject or accept framed area. Instructs Explorer target discrimination characteristics. See pages 42-43 to accept the framed area on selection of the tick for basic information.
- Page 42 THE MINELAB EXPLORER THE MINELAB EXPLORER www.minelab.com tutorial EDITING PATTERNS EDITING AND SAVING TARGET PATTERNS Edit makes it possible to customize an existing discrimination pattern to match your preferred target characteristics. This tutorial builds upon what has been covered in earlier target tutorials.
- Page 43 EDITING AND SAVING TARGETS ADVANCED MODE’S SELECT MENU ... continued In Advanced mode, the Explorer allows you to define and save your own target patterns. Advanced mode’s Select menu PHASE 3: Rejecting the framed target area Figure 6.14 (Figure 6.11) To reject the area enclosed by the target STEP 7 Main Menu >...
- Page 44 When you encounter the same detecting conditions again, it is detailed on page 71. to the Save icon. possible to instruct the Explorer to detect with the memorized setting (e.g. S1) by choosing from the SELECT target list as you would COINS or JEWELRY.
- Page 45 NOTE The number associated with Noise does not denote Available on Explorer XS an increase or decrease in power. It is simply a channel model only. number which can be remembered. OPTIONS: NOISE...
- Page 46 Response can affect your ability to identify certain targets in once you are familiar with the sounds produced by the differing circumstances. Explorer in the Normal Response setting, then choose according to conditions and preference. Normal This is the factory preset of the detector in Quickstart and Advanced modes.
- Page 47 OPTIONS: RECOVERY SETTINGS MENU The Settings menu provides the advanced user the opportunity to save all user Introducing Recovery preferred settings as an alternative to preprogrammed Explorer settings. Figure 6.20 Introducing the Settings menu Main Menu > Options > RECOVERY This menu allows you to modify the way the discrimination process Figure 6.21...
-
Page 48: User Info
(settings will load in about 5 seconds). As mentioned earlier in this NOTE A table of Explorer functions with a range of values Manual, starting in factory preset and factory presets is provided in Chapter 7: User Info discards all unsaved adjustments. -
Page 49: Helpful Hints
(i.e. for headphones or speaker use, ambient noise etc.) These tips are provided to enhance your personal use of the Explorer. They are intended Adjust the threshold 'hum' to a tone you are comfortable with STEP 1 to work together with the information and instructions appearing elsewhere in the using the Main Menu >... -
Page 50: Battery Performance Comparisons
Options Recovery Deep On, Off Minelab suggests that you record your preferences using a pencil, or make photocopies of this table. *Noise channel is selected automatically by the Noise Cancel shortcut button or manually through Main Menu > Options >... -
Page 51: Control Panel Button Functions
Options Recovery Deep On, Off PINPOINT Minelab suggests that you record your preferences using a pencil, or make photocopies of this table. *Noise channel is selected automatically by the Noise Cancel shortcut button or manually through Main Menu > Options > NOISE selection. • This option cannot be saved into User A or User B. Selections not saved: Backlight status, Pinpoint. -
Page 52: Quickstart Menu Structure
THE MINELAB EXPLORER THE MINELAB EXPLORER www.minelab.com QUICKSTART MENU STRUCTURE ADVANCED MENU STRUCTURE Note: some functions are only available on Explorer XS model QUICKSTART MENU STRUCTURE ADVANCED MENU STRUCTURE... -
Page 53: Troubleshooting
THE MINELAB EXPLORER THE MINELAB EXPLORER www.minelab.com SERVICE REPAIR FORM TROUBLESHOOTING FAULT SOLUTION Today’s Date ____________________________________________________________________________ Detector does not • Check the state of the batteries and battery connections. start at all • Ensure battery pack lid is completely closed. -
Page 54: Warranty
There is a two-year parts and labour warranty for the electronic Description of Fault: _____________________________________________________________________ Repairs control box of the Explorer S and Explorer XS. The search coil has ______________________________________________________________________________________ a one year parts and labour warranty. Refer to the supplier or Minelab for service, either in or out of warranty. -
Page 55: Technical Specifications For The Minelab Explorer
Selectable (Fast & Deep) Selectable (Fast & Deep) Discrimination Smartfind™ Two-Dimensional Discrimination * The Explorer S is Minelab’s base model Explorer detector Visual display 64 x 128 pixel liquid crystal display (LCD) control panel Batteries 8 x 1.5V AA Alkaline cells (not included) -
Page 56: Glossary Of Terms
Explorer’s upper and lower shafts are connected by the shaft camlock. This shaft assembly is connected to the control box by the Edit One of Explorer’s Advanced displays. Edit allows the user to control box camlock. customize an existing discrimination pattern to match preferred target characteristics. - Page 57 GLOSSARY OF TERMS GLOSSARY OF TERMS Iron Mask One of the Explorer’s Smartfind displays. The Iron Mask function Sensitivity The detector’s level of response to a target in the presence of rejects objects with ferrous properties. This level of ferrous rejection ground noise and/or electromagnetic disturbance.
-
Page 58: Detector Care And Safety
• Do not leave the battery pack in the Explorer handle when the detector is not in use for extended periods of time. Damage caused by leaking batteries could be severe and would void the warranty through user negligence.
Need help?
Do you have a question about the Explorer and is the answer not in the manual?
Questions and answers