Table of Contents
Advertisement
Operating Instructions
UHF5500 80 Channel UHF
Citizen Band Radio
Downloaded from www.cbradio.nl
Keep this user guide for future reference.
Always retain your proof of purchase in case of
warranty service and register your product on line at:
AUSTRALIA: www.oricom.com.au
NEW ZEALAND: www.oricom.co.nz
Advertisement
Table of Contents

Related Manuals for Oricom UHF5500


Summary of Contents for Oricom UHF5500
-
Page 1: Operating Instructions
Operating Instructions UHF5500 80 Channel UHF Citizen Band Radio Downloaded from www.cbradio.nl Keep this user guide for future reference. Always retain your proof of purchase in case of warranty service and register your product on line at: AUSTRALIA: www.oricom.com.au NEW ZEALAND: www.oricom.co.nz... - Page 2 During this time wideband channel use will be gradually phased out as users upgrade their existing radio’s. This means that the new Oricom narrowband radio you have purchased will have more channels than older wideband radios. Some of these channels are locked and cannot be used, (see the channel chart for more information).
-
Page 3: Table Of Contents
UHF CB channels and frequencies ....26 Customer Support ..........31 Warranty Information ........32 Need Help? If you need assistance setting up or using your Oricom product now or in the future, call Oricom Support. Australia 1300 889 785 or (02) 4574 8888 www.oricom.com.au... -
Page 4: Safety Information And Warnings
The Lithium-ion Battery pack contained in this equipment may explode if disposed of in a fire. Information on Safe Operation Read This Information Before Using Your Oricom Radio. The operation of your UHF radio in Australia and New Zealand is subject to conditions in the following licenses:... -
Page 5: Potentially Explosive Atmospheres
Off near electrical blasting caps or in a "blasting area" or in areas posted: "Turn off two way radios." Obey all signs and instructions. Exposure to Radio Frequency Energy Your Oricom two-way radio complies with Australian Communication Authority Radio communications (Electromagnetic Radiation-Human Exposure) Standard,2003. -
Page 6: Transmit And Receive Procedure
Safety Information and Warnings To assure optimal radio performance and make sure human exposure to radio frequency electromagnetic energy is within the guidelines set out in the above standards always adhere to the following procedures. WARNING Transmit and Receive Procedure Your two-way radio contains a transmitter and a receiver. - Page 7 Safety Information and Warnings To avoid the possibility of electromagnetic interference and/ or compatibility conflicts, turn off your radio in any location where posted notices instruct you to do so such as health care facilities. WARNING Aircraft When instructed to do so, turn off your radio when onboard an aircraft.
-
Page 8: Introduction
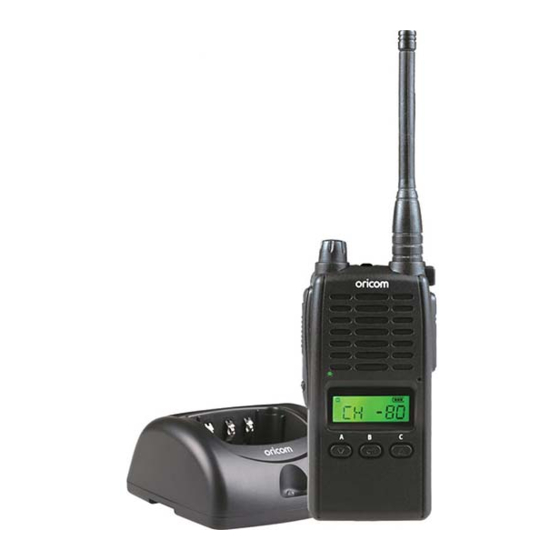
Introdution Introduction Thank you for choosing the Oricom UHF5500 5 watt Handheld Radio. Key Features 5/1 watt RF power Fast charger POD supplied with 240v and 12v adaptors 3 Programmable instant channel buttons Die cast metal chassis 80 Narrowband Channels*... - Page 9 Introdution Customized multi menu function 1. Digital Squelch setting (15 levels) 2. User selectable 38 CTCSS and 104 DCS codes 3. Memory, Priority and Instant channel Scan 4. TX power Hi/Lo 5. Vox Sensitivity (15 levels) 6. Vox release TX Delay Time 7.
-
Page 10: Pack Contents
Pack contents The following Items are included in your UHF5500 single pack. If you have purchased a twin pack you will have two items of each. Lithium-ion Battery UHF5500 Radio pack with belt clip AC/DC Adaptor Charger Pod 12volt charger... -
Page 11: Installation
If left unused, your transceiver’s battery pack will discharge itself within a few months. If you have not used your UHF5500 for some time, you will need to recharge the battery pack before use. Warning: Use only the supplied charger pod. The use of other types... - Page 12 It will take approximately 3 hours to fully charge the battery with the radio turned off. Do not transmit when the UHF5500 is in the charger pod. The Belt Clip 1. Place the belt clip into the slot on the back of the radio.
-
Page 13: Controls And Indicators
Controls and Indicator Basic Control 1. Power On/Off and volume adjust 2. Push to talk (PTT) 3. RX/TX LED indicator 4. Monitor On/ Monitor Lock 5. Channel down 6. Scan and Menu 7. Channel up and melody call 8. LCD 9. -
Page 14: Lcd Display
Controls and Indicator LCD Display A. Memory on G. Battery level indicator B. Low RF power H. CTCSS C. Duplex transmit I. DCS D. Vox J. Open scan E. Roger beep tone K. Priority scan F. Key lock L. Channel Battery Level Display The battery icon in the top right hand corner of the LCD shows the current battery level at all times. -
Page 15: Operations
Operations Power On/Off To turn on the transceiver, turn the volume knob clockwise until you hear a click. To turn off the transceiver, turn the volume knob fully counter- clockwise. Volume Rotate the Volume knob until you reach the desired level. Channel Selection Press the channel up or down buttons until you select the desired channel. - Page 16 Operations Instant channel The Transceiver has 3 instant channel recall and memory function. Instant recall 1. Press the Instant button, The letters “MR INST” will be appear on the LCD. The 3 instant channels are pre programmed as bellow. Button Default CH 2.
- Page 17 CH02 on duplex mode will receive on CH02 but transmit on CH32. If you transmit on CH01 duplex mode, you are actually transmitting on CH31. The repeater station down converts your signal and retransmits on CH01. Your UHF5500 allows you to pre-select Duplex operation individually on each channel.
-
Page 18: Menu Function
Operations Simplex mode Transmit/ Duplex Mode Transmit/ Receiver Receiver CH and number Frequency (MHz) Frequency(MHz) 476.425 477.175 CH31 476.450 477.200 CH32 476.475 477.225 CH33 476.500 477.250 CH34 476.525 477.275 CH35 476.550 477.300 CH36 476.575 477.325 CH37 476.600 477.350 CH38 476.4375 477.1875 CH71 476.4625 477.2125 CH72... - Page 19 Operations To access the Menu functions. 1. Press and hold the Menu button, the first menu function is displayed. 2. Briefly press the menu button to cycle through each available function. After the last function has been selected, the cycle returns to the beginning.
- Page 20 Operations * Please see below menu modes Control Functions Step Display Default SQ level Off to 15 TSQ 38 CTCSS or DCS DCS 104 Open or Priority Scan High TX RF power VOX Sensitivity Off to 15 level MENU VOX TX delay Off to 15 time One CH...
-
Page 21: Squelch Level
38 CTCSS codes. CTCSS 1-38, followed by DCS 1-104. Scanning The UHF5500 has two types of scanning: Open scanning (OS) and priority scanning (GS). Scanning allows you to search for active channels programmed in the memory. - Page 22 The priority channel will be checked after every 4th channel scanned. PRIORITY SCAN ..Transmit RF Power Control The maximum RF transmit power of UHF5500 is 5 watts. To switch to low power, select low power in menu mode. Low indicator will appear in the display. VOX Sensitivity Level Setting In VOX mode, the radio will transmit a signal only when it is activated by your voice or other sound around you.
-
Page 23: Key Beep
VOX Delay Time Set The UHF5500 has 15 levels VOX PTT release off delay time. You can set the delay time from 1 to 15. Level 1 is shortest time. Priority Channel Set To store a Priority Channel, select the required channel in menu mode. -
Page 24: Busy Channel Lock
Operations Busy Channel Lock If the channel is already in use, you can prevent the UHF CB radio from transmitting. This is particularly important when using CTCSS/DCS. Squelch Tail Squelch Tail is the noise heard after the transmitting party releases PTT and is heard by the receiving party. -
Page 25: Key Lock
Operations Scan Resume Time If 5,10,or 15 sec is selected, signal will start again after 5,10, or 15 second pause even though a signal is still present. If P5 is selected, SCAN will stop as long as a signal is present and will resume SCAN again 5 seconds later. -
Page 26: Uhf Cb Channels And Frequencies
UHF CB channels and frequencies Channel Frequency Table Radiocommunications (Citizen Band Radio Stations) Class Licence 2002 No licence is required to own or operate this radio in Australia and New Zealand. The Radiocommunications (Citizen Band Radio Stations) Class Licence 2002 contains the technical parameters, operating requirements, conditions of licence and relevant standards for Citizen Band (CB) radios. - Page 27 UHF CB channels and frequencies 476.6125 477.1125 477.1125 476.6250 476.6250 477.1250 477.1250 476.6375 476.6375 477.1375 477.1375 476.6500 476.6500 477.1500 477.1500 476.6625 476.6625 477.1625 477.1625 476.6750 476.6750 477.1750 477.1750 476.6875 476.6875 477.1875 477.2000 476.7000 476.7000 477.2000 476.7125 476.7125 477.2125 477.2250 476.7250 476.7250 477.2250 476.7375...
- Page 28 UHF CB channels and frequencies CTCSS and DCS will not operate on channels 5 and 35. A list of currently authorised channels can be obtained from the ACMA website in Australia and the MED website in New Zealand. Channel 11 is a calling channel generally used to call others and channel 40 is the customary road vehicle channel.
- Page 29 UHF CB channels and frequencies 114.8 233.6 118.8 241.8 123.0 250.3 127.3 DCS codes table DCS Code DCS Code DCS Code Code No. Code No. Code No. (Octal) (Octal) (Octal)
- Page 30 UHF CB channels and frequencies 100(do0) 101(do1) 102(do2) 103(do3) 104(do4)
-
Page 31: Customer Support
Troubleshooting section of this user guide as well as “Frequently Asked Questions” on our website www. oricom.com.au. If you have further questions about using the product after reviewing the resources above or would like to purchase replacement parts or accessories please call our Customer Support Team. - Page 32 Please note that if a Customer Support Team member advises that your product does not qualify for return, this warranty does not apply to your product. Products that are authorised to be returned to Oricom in Australia must include all of the following: A completed Return Authorisation form A copy of your Proof of Purchase (please keep your original copy) The faulty product, including all accessories.
-
Page 33: Warranty Information
Warranty Information (Australia) This Warranty is provided by Oricom International Pty Ltd ABN 46 086 116 369, Unit 1, 4 Sovereign Place, South Windsor NSW 2756, herein after referred to as “Oricom”. - Page 34 No change to the conditions of this Warranty is valid unless it is made in writing and signed by an authorised representative of Oricom. Oricom will not be in breach of a warranty expressly set out in this User Guide or under the Competition and Consumer Act 2010 and excludes...
- Page 35 Warranty Oricom will not be liable for any damages caused by the product or the failure of the product to perform, including any lost profits or savings or special, incidental or consequential damages. Oricom is not liable for any claim made by a third party or made by you on behalf of a third party.
- Page 36 Phone: 1300 889 785 or (02) 4574 8888 (Monday to Friday 8am to 6pm AEST) Web: www.oricom.com.au Fax: (02) 4574 8898 Contact details for Oricom support and warranty claims in New Zealand Email: support@oricom.co.nz Phone: 0800 674 266 (Monday to Friday 10am to 8pm NZST) Web: www.oricom.co.nz...
Need help?
Do you have a question about the UHF5500 and is the answer not in the manual?
Questions and answers