Table of Contents

Related Manuals for Oricom UHF400R


Summary of Contents for Oricom UHF400R
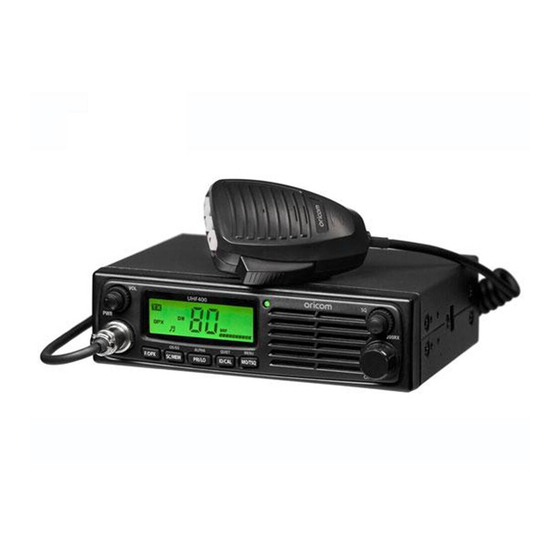
- Page 1 User Guide For UHF400R 80 Channel UHF 2-WAY Citizen Band Radio Keep this user guide for future reference. Always retain your proof of purchase in case of warranty service and register your product on line at: AUSTRALIA: www.oricom.com.au...
- Page 2 During this time wideband channel use will be gradually phased out as users upgrade their existing radio’s. This means that the new Oricom narrowband radio you have purchased will have more channels than older wideband radios. Some of these channels are locked and cannot be used, (see the attached channel chart for more information).
-
Page 3: Table Of Contents
UHF channels and frequencies ............26 UHF400R Technical Specification ..........29 Warranty ..................31 Need Help? If you need assistance setting up or using your Oricom product now or in the future, call Oricom Support. Australia 1300 889 785 or (02) 4574 8888 www.oricom.com.au... -
Page 4: Safety Information And Warnings
Safety Information and Warnings Please read before installing or operating your Oricom Radio The operation of your UHF radio in Australia and New Zealand is subject to conditions in the following licenses: In Australia the ACMA Radio communications (Citizen Band Radio Stations) and in New Zealand by MED the General User Radio License for Citizen Band Radio. -
Page 5: Controls And Connectors
Controls and Connectors Controls and Connectors Front View UHF400R 200RX MENU OS/GS QUIET ALPHA F/DPX MO/TSQ SC/MEM ID/CAL PRI/LO Rotary On / Off Switch and Volume Control LCD Display Rotary squelch control 200 RX Channel RX Selector switch Microphone connector Function button by short push &... -
Page 6: Rear View
Controls and Connectors Rear View Antenna Connection 3.5mm external jack for optional 8 ohm speaker Power Supply Connection Rear microphone jack Microphone Push to talk switch (PTT) Select Up Select Down Instant Channel... - Page 7 Controls and Connectors Rear Microphone Socket The UHF400R has been fitted with an additional microphone socket on the rear panel of the radio. To use this socket you must purchase the extension microphone cable. Removable label The socket has been covered with a label to stop dust and other partials entering the radio.
- Page 8 Controls and Connectors LCD Icons & Indicators 3 4 5 1. Transmitter Indicator 11. Function 12. Open Scan 2. RX or TX Signal strength 3. Quiet mode 13. Priority Scan 4. Priority On/Off 14. Channel Busy 5. Call Alarm 15. Selective call Receiving “FROM” 6.
-
Page 9: Installation
Auto electrician. When installing the radio, avoid mounting it close to heaters or air conditioners. Never press the PTT or CALL button before connecting the antenna to radio. Using the DIN Kit The UHF400R comes complete with a DIN kit for mounting in a vehicle dash board... -
Page 10: Antenna Information
Installation Automatic indicator of High Voltage support The radio has a high voltage input detection system, to inform you of high voltage use. Eg. : If the power supply voltage exceeeds 18volts DC, The 24v icon display will appear on the LCD when the unit is turned on. A. -
Page 11: Operations
Operations Operation Multi-Function buttons To use the primary function (F, SC, PRI, ID, MO) press the required button. To use the secondary function (DPX, MEM, LO, CAL, TSQ) press and hold the button for 2 seconds. To use the third function (OS/GS, ALPHA, QUIET, MENU), press F/DPX and press the required button. -
Page 12: Priority Channel
Operations Transmitting NOTE: Before transmitting on any channel, listen to check the channel is not already in use. Transmitting Select the desired channel. Press the PTT button on the microphone and speak normally into the microphone. Hold it approx. 7cm from your mouth. Release the PTT button to end the transmission and listen for a reply. -
Page 13: Monitoring The Channel
Operations CTCSS CTCSS (Continuous Tone Coded Squelch System) CTCSS uses a sub-audible tone to open and close the squelch on your radio. This will allow a number of users to share the same channel without disturbing one another. OS / GS ALPHA QUIET MENU... -
Page 14: Priority Scan
Operations Scanning The radio SCAN function has the ability to allow programmable channels to be scanned for groups of users. Channels can be scanned (40 channels per 5 seconds). When a signal is found, scanning will stop at that channel to allow the signal to be heard, then resume scanning when the channel is clear again. - Page 15 Operations PRIORITY SCAN OS / GS ALPHA QUIET MENU F/ DPX SC / MEM PRI / LO ID / CAL MO / TSQ Allows you to monitor a Priority Channel while scanning other channels in memory. Memory On/Off Push and hold the SC/MEM button for 2 seconds, "M" will appear above the selected channel.
- Page 16 Operations Selcall Identification Name In addition to the Selcall ID number, each Selcall ID can be named using a 5 character ALPHA name. The ALPHA name is stored in memory along with the ID code. When an incoming Selcall is received and the Selcall matches one of those in your radio's memory, the name can be displayed instead of the Selcall ID number.
-
Page 17: Receiving Selcalls
Operations (a) Press and hold the F/DPX button until the radio beeps. The right hand character will flash. Rotate the Channel knob to select the required letter or number in the flashing character position. OS / GS ALPHA QUIET MENU F/ DPX SC / MEM PRI / LO... - Page 18 Operations Group Calling The Group Calling function allows you to transmit an “ALERT” tone to all members of a group at the same time. To setup Group Calling you must arrange your group ID codes in a certain format. Example: If one group consists of 8 vehicles the Group ID codes are arranged as follows: 12340 12341...
- Page 19 Operations 1234 1234 1234 UP TO UP TO 1234 QUIET Mode (Q) Puts the receiver in the Q mode. When activated, the radio prevents any unwanted conversations in the channels from being heard unless the call is specifically directed to you and the Selective call ID required to open the Q mode condition has been received.
-
Page 20: Menu Functions
Operations • Automatically responds to the caller by transmitting Acknowledge tones. • Informs you that a caller is on the channel by emitting CALL Alarm and displays FROM icon. Menu Functions The MENU feature provides a convenient method of customizing some of the radio’s functions. - Page 21 The Beep tone emits a tone when you press any of the buttons on the Microphone (except PTT switch). Busy Channel Lock If the BCL feature is turned 'On' on the UHF400R, you will be prevented from accidentally transmitting while the channel is in use. Scan stop control The scan resume condition can be set as a pause(p5) or time scan (5/10/15).
-
Page 22: Duplex Operation
Operations Duplex Operation General Your radio has a Repeater Access function to allow use of local Repeater stations (if available in your area). Repeaters are shared radio system installed by interested parties (clubs, local business etc.) that pick transmissions on specific channels and re-transmit (or repeat) the received signal to another channel. -
Page 23: Key Lock
If you transmit on CH01 duplex mode, you are actually transmitting on CH31 the repeater station down converts your signal and retransmits on CH01. Your UHF400R allows you to pre-select Duplex operation individually on each channel. Push and hold the F/DPX button for 2 seconds, "DPXON" should appear on the LCD. - Page 24 Operations 200 RX channels The UHF Radio has a wideband search feature which will allow you to search frequencies ranging from 400-512MHz in 12.5KHz steps. You may search the full range or you may search one of 4 smaller bands separately. 200 RX Turn power on.
-
Page 25: Manual Programming
Operations Manual programming If you want to store the frequency of 403.0250 at 03 channel with 40-42 small range (40-42). 1. Press the 200RX button 2. press "PRI/LO" button until "40-42"is briefly displayed 3. Rotary channel select to "03" channel. 4. -
Page 26: Uhf Channels And Frequencies
UHF channels and frequencies Channel Frequency Table Radiocommunications (Citizen Band Radio Stations) Class Licence 2002 No licence is required to own or operate this radio in Australia and New Zealand. The Radiocommunications (Citizen Band Radio Stations) Class Licence 2002 contains the technical parameters, operating requirements, conditions of licence and relevant standards for Citizen Band (CB) radios. - Page 27 476.6125 477.1125 477.1125 476.6250 476.6250 477.1250 477.1250 476.6375 476.6375 477.1375 477.1375 UHF channels and frequencies 476.6500 476.6500 477.1500 477.1500 476.6625 476.6625 477.1625 477.1625 476.6750 476.6750 477.1750 477.1750 476.6875 476.6875 477.1875 476.7000 476.7000 477.2000 477.2000 476.7125 476.7125 477.2125 476.7250 476.7250 477.2250 477.2250 476.7375 476.7375...
- Page 28 UHF channels and frequencies 38 CTCSS CODE LIST CODE Frequency(Hz) CODE Frequency(Hz) 131.8 67.0 136.5 71.9 141.3 74.4 146.2 77.0 151.4 79.7 156.7 82.5 162.2 85.4 167.9 88.5 173.8 91.5 179.9 94.8 186.2 97.4 192.8 100.0 203.5 103.5 210.7 107.2 218.1 110.9 225.7...
-
Page 29: Uhf400R Technical Specification
UHF400R Technical Specification UHF400R Technical Specification Compliance AS/NZS 4365:2011 Frequency Range TX 476.425 - 477.4125 MHz Frequency Range RX 400 - 512MHz Number of TX/RX Channels 75 UHF CB Number of user programmable RX only Channels Channel Spacing TX/RX 12.5KHz... - Page 30 UHF400R Technical Specification Intermodulation Immunity > 70dB Spurious Immunity > 70dB Audio Output Power 3 Watts Maximum RX Audio de-emphasis -6dB/octave 300Hz to 3kHz Audio frequency response 300Hz to 3kHz External speaker jacks For optional 8 Ohm mono speaker (3.5mm jack.)
-
Page 31: Warranty
Express Warranty Express Warranty (Australia) This Express Warranty is provided by Oricom International Pty Ltd ABN 46 086 116 369, Unit 1, 4 Sovereign Place, South Windsor NSW 2756, herein after referred to as “Oricom”. Oricom products come with guarantees that cannot be excluded under the Australian Consumer Law. - Page 32 Oricom. Oricom will not be liable under this Express Warranty, and to the extent permitted by law will not be liable for any defect, loss, damage or injury arising out of or in connection with a: 1.
- Page 33 Please note that if a Customer Support Team member advises that your product does not qualify for return, this warranty does not apply to your product. Products that are authorised to be returned to Oricom in Australia must include all of the following: •...
-
Page 34: Important Information
Express Warranty Important Information Repair Notice Please be aware that the repair of your goods may result in the loss of any user- generated data (such as stored telephone numbers, text messages and contact information). Please ensure that you have made a copy of any data saved on your goods before sending for repair. -
Page 36: New Zealand 0800 67 42
Oricom Support - Australia For all product enquiries, troubleshooting or to discuss the range of Oricom products, feel free to contact Oricom or visit our website for answers to frequently asked questions. 1300 889 785 Monday - Friday 8am – 6pm AEST Email: support@oricom.com.au...
Need help?
Do you have a question about the UHF400R and is the answer not in the manual?
Questions and answers