
Subscribe to Our Youtube Channel
Related Manuals for HighPoint RocketCache 3240X8


Summary of Contents for HighPoint RocketCache 3240X8
- Page 1 RocketCache 3240X8 6Gb/s SATA/SAS Host Adapter with SSD Cache Technology User’s Guide v1.1 ...
-
Page 2: Table Of Contents
Contents HighPoint RocketCache 3240X8…….................3 Kit Content……......................3 Hardware Installation.....................4 RocketCache 3240X8 Adapter BIOS…………………………..........4 Using the RocketCache 3240X8 BIOS...............4 Driver Installation (Windows 7, Vista, 2008)............5 Using RocketCache software utility…….…………………..........6 RocketCache Software installation ………………..........6 RocketCache Management Software Overview ………………......7 Build RocketCache………………......………………...... 8 Caching Model Selection ………………......……......9 Manage RocketCache ………………......…………….......10 Delete RocketCache / Logical Device ………………..........14 View Event log ………………......……………….......15 Customer Support…………………………………..............16 FCC Part 15 Class B Radio Frequency Interference statement........17 1 ... -
Page 3: Highpoint Rocketcache 3240X8
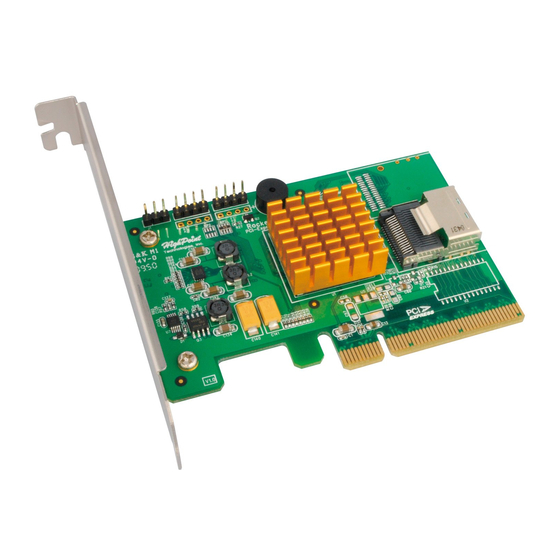
HighPoint RocketCache 3240X8 – 4‐Port SATA/SAS 6Gb/s PCI‐E 2.0 x8 HBA with HighPoint SSD Caching technology The RocketCache 3240X8 HBA is a high‐performance 4‐Port PCI‐Express 2.0 x8 SAT/SAS 6Gb/s HBA and is designed specifically for SSD Caching Storage Applications. Combine your hard disks and SSD’s into a single, high‐performance RocketCache Drive using one of four specialized Caching Methods. The easy to use RocketCache Software Interface allows you tailor Caching configurations that are best suited to your specific applications and storage requirements. Kit contents RocketCache 3240X8 controller Software CD Mini‐SAS (SFF‐8087) to SATA cable Quick Installation Guide Low profile bracket 2 ... -
Page 4: Hardware Installation
Hardware Installation Installing the RocketCache 3240X8 Host Adapter Note: Make sure the system is powered‐off before installing the RocketCache 3240X8 host adapter. 1) Open the system chassis and locate an unused PCI‐E (2.0 or 1.0) ×8 or x16 slot. 2) Remove the PCI‐E slot cover. 3) Gently insert the RocketCache 3240X8 host adapter into the PCI‐E slot, and secure the bracket to the system chassis. 4) After installing the adapter, attach the hard disks or disk enclosure to the RocketCache 3240X8 host adapter using the Mini‐SAS cable. 5) Close and secure the system chassis. RocketCache 3240X8 BIOS After installing the RocketCache 3240X8 host adapter, and power on the system, the BIOS should post. Verify the BIOS information to check if the host adapter is installed and detected correctly: 3 ... -
Page 5: Driver Installation (Windows 7, Vista, 2008)
Driver Installation (Windows 7, Vista, 2008) 1. After installing the RocketCache 3240X8 host adapter, boot to the Windows operating system. 2. Windows should automatically detect the host adapter, and displays the “Found New Hardware Wizard”. Select “Locate and install driver software”. When Windows asks: “Windows needs your permission to continue”, select “Continue”. 3. When asked to search online select “Don’t Search Online”. 4. Select “I don’t have disc, show me other options”. 5. Select “Browse my computer for driver software”. 6. Browse to the location of the driver and click “Next”. Driver location (RocketCache Software CD): / RC3240X8/ Driver/Windows 7. Select the driver folder. 8. When asked: “Would you like to install this driver software?” select “Install”. 9. Reboot the system when prompted. The RocketCache 3240X8 host adapter will be ready for use after Windows reboots. 4 ... -
Page 6: Using Rocketcache Software Utility
Using RocketCache software utility Installation 1. RocketCache Software installation Follow below steps to install the RocketCache management utility: Browse to the location of the software utility : Driver location (RocketCache Software CD): / RC3240X8/ Utility/Windows Double click and run the “Setup” program to start installation. Follow the instruction of the software installation wizard. After the installation finished, double click the shortcut on the desktop to start the RocketCache software: 5 ... -
Page 7: Rocketcache Management Software Overview
2. RocketCache Management Software Overview RocketCache Management Software is a web based software utility. After starting the software it will switch to the “Overview” tab. This tab will show all the Single Drives’ informant and the RocketCache HBA’s information. HBA’s BIOS can also be flashed from this tab. Browse to the BIOS binary file and click Submit to flash the BIOS: 6 ... -
Page 8: Build Rocketcache
3. Build RocketCache Click the “Build RocketCache” button to start create RocketCache virtual disk. RocketCache 3240X8 provide four Caching Models for different applications. To build RocketCache: Chose and Select the Caching Model. Check and Select the HDD and SSD. Click Create button to complete the RocketCache Building. Note: If the HDD/SSD status is “Legacy” mode, it cannot be used to build RocketCache. Try “Initialize Devices” from the “Overview” tab before building RocketCache. 7 ... -
Page 9: Caching Model Selection
4. Caching Model Selection Maximum Performance ‐ This caching mode optimizes the SSD and HDD devices for maximum read and write performance. Maximum Performance Requirements: 1 or more HDD(s) + 1 or more SSD(s) High Performance with Cache Protection ‐ This caching mode combines ultra‐fast data access with write protection. Your cache files are written directly to disk. High Performance with Cache Protection Requirements: 1 or more HDD(s) + 1 or more SSD(s) High Protection and Cache Performance ‐ This mode provides high‐level of data protection with improved access speeds. Multiple copies of each file are permanently stored on the hard disks. High Protection with Cache Performance Requirements: 2 HDD(s) + 1 or more SSD(s) Maximum Protection ‐ This caching mode provides the maximum data protection. Multiple copies of each file are written directly to disk. Maximum Protection Requirements: 2 HDD(s) + 1 or more SSD(s) 8 ... -
Page 10: Manage Rocketcache
5. Manage RocketCache RocketCache Status and maintenance: RocketCache Virtual Device statuses: Normal status– RocketCache is under standard normal situation: Non‐Cache‐ The SSD Member of the RocketCache virtual disk has been removed or lost. The SSD cache of the RocketCache can be removed if needed. Add / Remove SSD cache: To add the SSD cache to a non‐Cache mode RocketCache virtual disk: Switch to the “Manage RocketCache” tab. Chose the cache mode. iii. Check to select the SSD, then click the” add” button to add SSD cache: 9 ... - Page 11 To remove the SSD cache from a RocketCache virtual disk, switch to the “Manage RocketCache” tab and click the “Remove Cache” button. Once the SSD cache is removed the RocketCache virtual disk mode will change to Non‐Cache mode. Note: The RocketCache with Cache Protection mode will be Non‐Cache mode If SSD unexpected lost or off‐line. Critical status‐ RocketCache lost one HDD member. If the High Protection and Maximum Protection model RocketCache content two HDDs, the two HDDs will be set as mirrored mode as the member of the RocketCache. If one of the mirrored HDD lost or off‐line the RocketCache will be at Critical status. Critical status is a degrade status of protection mode; it is strongly suggest to rebuild the RocketCache at this situation. 10 ...
- Page 12 To Rebuild the Critical RocketCache Install a new HDD to replace the off‐lined HDD/port of the RocketCache 3240X8. The RocketCache management software will automatic detect the new HDD. The new HDD will list under the Overview table‐ Single disk as Legacy mode. Click Initialize button to initialize the disk. Switch to the Manage RocketCache tab and click the Maintenance link follow the RocketCache disk. Click the Add disk button from the pop‐up windows. Select the new disk and start rebuilding RocketCache. 11 ...
- Page 13 Rebuilding status‐ RocketCache is reconstruction and synchronizing data of the RocketCache’s mirrored HDDs member. The rebuilding percentage can be checked under the “Overview” tab of the RocketCache software. Disabled status‐ High Performance model and Cache Performance model RocketCache lost the SSD unexpected. Or the High Performance model RocketCache lost HDD member. Note: Once the RocketCache be “Disabled” status all the data will be lost. 12 ...
-
Page 14: Delete Rocketcache / Logical Device
6. Delete RocketCache / Logical Device To delete the RocketCache or Logical Device Switch to the Manage RocketCache tab. Click the “Maintenance” link follow the RocketCache or Logical Device. It will of the pop‐up the “Management Information” window. Click the “Delete” button to delete the Device. Note: All the data will be lost after delete the RocketCache or Logical Device. 13 ... -
Page 15: View Event Log
7. View Event log Switch to the “Log” tab of the RocketCache Management software to View the all Event: 14 ... -
Page 16: Customer Support
Customer Support If you encounter any problems while utilizing the Rocket series host adapter, or have any questions about this or any other HighPoint Technologies, Inc. product, feel free to contact our Customer Support Department. Web Support: http://www.highpoint‐tech.com/websupport/ HighPoint Technologies, Inc. websites: http://www.highpoint‐tech.com 15 ... -
Page 17: Fcc Part 15 Class B Radio Frequency Interference Statement
FCC Part 15 Class B Radio Frequency Interference statement This equipment has been tested and found to comply with the limits for a Class B digital device, pursuant to part 15 of the FCC Rules. These limits are designed to provide reasonable protection against harmful interference in a residential installation. This equipment generates uses and can radiate radio frequency energy and, if not installed and used in accordance with the instructions, may cause harmful interference to radio communications. However, there is no guarantee that interference will not occur in a particular installation. If this equipment does cause harmful interference to radio or television reception, which ...
Need help?
Do you have a question about the RocketCache 3240X8 and is the answer not in the manual?
Questions and answers