Audiovox VODEXL10 Installation Manual
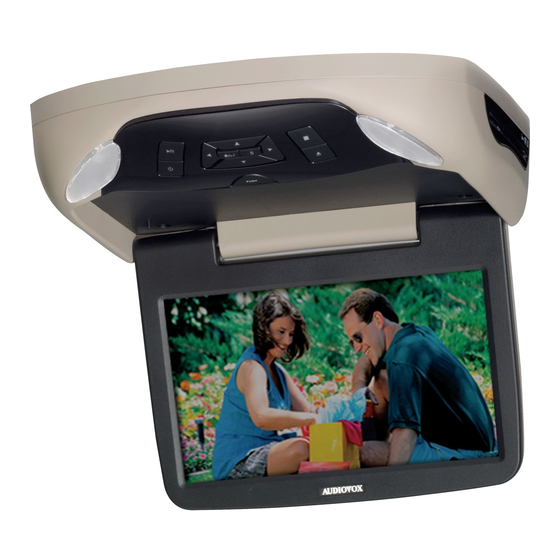
10.1” overhead led backlit lcd monitor with dvd player
Hide thumbs
Also See for VODEXL10:
- Owner's manual (36 pages) ,
- Installation manual (24 pages) ,
- Owner's manual (36 pages)
Table of Contents
Advertisement
Quick Links
Download this manual
See also:
Owner's Manual
Advertisement
Chapters
Table of Contents
Troubleshooting

Subscribe to Our Youtube Channel
Related Manuals for Audiovox VODEXL10


Summary of Contents for Audiovox VODEXL10
- Page 1 VODEXL10 10.1” OVERHEAD LED BACKLIT LCD MONITOR WITH DVD PLAYER INSTALLATION GUIDE...
-
Page 2: Table Of Contents
INSTALLING THE MOUNTING BRACKET ....................................12 INSTALLING THE VODEXL10 VIDEO SYSTEM - WIRING DIAGRAM ........................... 13 INSTALLING THE VODEXL10 VIDEO SYSTEM - MOUNTING THE UNIT ..........................14 APPENDIX A REMOVING THE TRIM RING, SNAP-ON SHROUD AND SCREEN COVER ....................15 APPENDIX B INSTALLING THE OPTIONAL THICK TRIM RING ............................ -
Page 3: Important Notices
Enjoy your operator of the motor vehicle. AUDIOVOX entertainment system but remember that the safety of all *** Important Notices*** passengers remains the number one priority. -
Page 4: General System Configurations (Ir Transmit And Receive Modes M1 Or M2)
DVD Player: The VODEXL10 has an option that allows the user to select from two IR transmit and receive codes (M1 or M2). This feature can be used when using two VODEXL10 units in the same installation or if the vehicle has an RSA (Rear Seat Audio) that uses an “A” channel headset. The VODEXL10 comes factory set to M1. -
Page 5: Materials Included In This Package
MATERIALS INCLUDED IN THIS PACKAGE 1. 10.1” TFT LCD Overhead Monitor with DVD Player - (1 pc) 2. Hardware Package (P/N 150-1832) - (1 pkg) M3 x 8mm Phillips Screws (P/N 100-2427) - (8 pcs) #8 x 3/8” Self Drilling Screws (P/N 100-2397) - (4 pcs) #2 x 1/4”... -
Page 6: Installing The Unit In A Vehicle
Place the unit on a soft surface to avoid damaging the plastic. Installing the Snap On Covers The VODEXL10 is supplied with black, shale and pewter plastics to allow for a custom installation. Choose the desired color and install as follows. Slide Knob... -
Page 7: Installing The Snap-On Shroud And Screen Cover
INSTALLING THE SNAP-ON SHROUD AND SCREEN COVER Installing the Shroud *NOTE: Work on a soft surface to avoid damaging the plastic. Remove the double sided tape backing from the two strips on the center section of the shroud. Hook the shroud over the dome light and align the shroud tabs 1 with the eight openings around the rim of DVD player 2 . -
Page 8: Installing The Trim Ring
There are two Trim Ring options for mounting the VODEXL10, one is to use the supplied Trim Ring for all vehicles with flat headliner mounting areas (no contour) or a thick Trim Ring (not supplied) that can be cut to fit the contour of a headliner that is not flat (see Appendix B of this manual). -
Page 9: General Vehicle Installation Approach
GENERAL VEHICLE INSTALLATION APPROACH Decide upon system configuration and options that will be installed (i.e.: what components, Video Game, external amp). Review all manuals to become familiar with electrical requirements and connections. Decide upon mounting locations of all components and method of mounting. Prep the vehicle by removing any interior trim necessary to gain access to vehicle’s wiring as well as all areas where interconnecting wire harnesses will need to be located. -
Page 10: Vehicle Preparation
NOTE: Always fuse the ACC +12V at the source where it is connected to the vehicle. The mounting method and location will vary from vehicle to vehicle, the only focus of this manual is the installation of the VODEXL10. Generally, the best location for the video monitor is where the vehicle’s factory dome light is installed. The monitor should be located in such a manner that it can be comfortably viewed by rear seat passengers. -
Page 11: Connecting The Dome Lights
CONNECTING THE DOME LIGHTS The dome lights in the video monitor require three connections to the vehicle’s wiring. There are two common types of dome light circuits used, positive switched systems or negative switched systems. Positive switched systems supply voltage to the interior lights to turn ON; negative switched systems apply ground to illuminate the bulbs. - Page 12 CONNECTING THE DOME LIGHTS Positive Switched Dome Lighting Negative Switched Dome Lighting Red/Black-Lamp on To 3 pin Red/Black-Lamp ON To 3 pin Black/Red-Lamp common connector constant connector Black/Red-Lamp Common Purple/Brown-Lamp Auto +12 VDC on Monitor Purple/Brown-Lamp Auto Fused constant +12 VDC Fused Factory Dome Light Circuit constant...
-
Page 13: Installing The Mounting Bracket
INSTALLING THE MOUNTING BRACKET Installing the Mounting Bracket Once all the pre-wiring is complete, locate: NOTE: The headliner may need to be cut to install the bracket. When Mounting Bracket cutting the headliner, make sure no wires above the headliner are cut. (4) #8 x 3/8”... -
Page 14: Installing The Vodexl10 Video System - Wiring Diagram
INSTALLING THE VODEXL10 VIDEO SYSTEM - WIRING DIAGRAM Connect the dome light wires as shown on pages 10 and 11 of this If connecting to an external source, plug in the 12 pin AV Input install manual. Harness (P/N 112-4094) in the location shown. Connect RCA cables (not supplied) to the external source’s AV Output. -
Page 15: Installing The Vodexl10 Video System - Mounting The Unit
Installing the VODEXL10 System Make all electrical connections. Attach the VODEXL10 unit to the mounting bracket using four M5 screws. CAUTION: The M5 screws are supplied in three different lengths (10mm, 20mm and 40mm) to facilitate proper installation. Use extreme caution when using these screws to avoid damage to vehicle roof or other components, wiring, etc. -
Page 16: Appendix A Removing The Trim Ring, Snap-On Shroud And Screen Cover
APPENDIX A REMOVING THE TRIM RING, SNAP-ON SHROUD AND SCREEN COVER This section is intended for situations where the color of the Shroud, Screen Cover and Trim Ring need to be changed after the unit is setup for installation. NOTE: Work on a soft surface to avoid damaging the plastic. Removing the Screen Back Cover Starting from the back of the unit, carefully insert the supplied pry tool between the Housing and Screen Back Cover... - Page 17 APPENDIX B INSTALLING THE OPTIONAL THICK TRIM RING This section covers only special installation considerations for the optional thick trim ring installation. If the video monitor is to be installed in a vehicle with the thick trim ring, it may need to be trimmed to fit the contour of the vehicle Headliner. Important NOTES before installing the thick trim ring: There should be a gap between the headliner and the outer flange of the video monitor.
- Page 18 INSTALLING THE OPTIONAL GAME MODULE (MVGP1) This section is intended as an installation guide to connect the MVGP1 Game Module to the VODEXL10 video system. NOTE: The MVGP1 Game Module is sold separately and is supplied with its own instruction manual.
-
Page 19: Troubleshooting
TROUBLESHOOTING SYMPTOM: REMEDY: No power at video monitor Verify +12 VDC on the Red wire at 2 Pin Power Harness behind the video monitor. Verify a ground connection with a continuity test from a known good ground to the black wire at the 2 Pin Power Harness. Power but no video or sound Verify that the correct source is selected (DVD, USB, HDMI1, HDMI2, Media, AV, AUX, DTV, Game). - Page 20 Check if radio is ON and in FM mode. Check that radio is tuned to the same frequency as the unit is set to. Select another FM channel. Reposition the VODEXL10 Wireless FM antenna for better reception. Install an FMDIRB (ordered separately). Remote Control does not work Check if the battery is installed correctly.
-
Page 21: Notes
NOTES... - Page 22 2013 AUDIOVOX,150 Marcus Blvd. Hauppauge, NY 11788 128-9230a...
- Page 23 VODEXL10 10.1" OVERHEAD LED BACKLIT LCD MONITOR WITH DVD PLAYER PUSH OPERATION MANUAL...
- Page 24 Controls and Indicators Diagram (Front View) ....6 Playing DVDS ..............27 Controls and Indicators Diagram (Side Views) ....7 Playing MP3 Discs ............27 VODEXL10 Monitor Mode Settings ........8 DVD Basics ............... 29 Remote Control Operation ..........9 Overhead Dome Lights ........... 30 Remote Control Functions ..........
-
Page 25: Fcc Statement
FCC Statement This device complies with Part 15 of the FCC Rules. Operation is subject to the following two conditions: (1) This device may not cause harmful interference, and (2) this device must accept any interference received, including interference that may cause undesired operation. This equipment has been tested and found to comply with the limits for a Class B digital device, pursuant to Part 15 of the FCC Rules. -
Page 26: Important Notice
If you have any questions regarding wire routing in a vehicle, please contact Audiovox Technical Support at 1-800-225-6074. -
Page 27: Congratulations
• 10.1” TFT (Thin Film Transistor) Active Matrix LCD (Liquid Crystal Congratulations on your purchase of the AUDIOVOX VODEXL10 DVD Player Display) Monitor with drop-down video / monitor. The VODEXL10 has been designed to give you and your family many years of video entertainment in the mobile • LED Backlighting environment. -
Page 28: Controls And Indicators Diagram (Front View)
CONTROLS AND INDICATORS DIAGRAM (FRONT VIEW) 4. HOME/MENU Select Button This button is used to display and select options on the system menu. 2 3 4 5 6 7 Press and hold for 3 seconds to access the System Menu. 5. -
Page 29: Controls And Indicators Diagram (Side Views)
CONTROLS AND INDICATORS DIAGRAM (SIDE VIEWS) 1. DVD Disc Insertion Slot For loading and removing discs. When a disc is inserted, the unit will automatically turn ON and switch to DVD source. Insert a disc with label side facing up. Note: The disc slot indicator is red when a disc is inserted and green when the disc slot is empty. -
Page 30: Vodexl10 Monitor Mode Settings
VODEXL10 MONITOR MODE SETTINGS The VODEXL10 System has an option that allows the user to select from two IR transmit and receive codes (M1 or M2). This feature can be used when using two VODEXL10 systems in the same installation or if the vehicle has RSA (Rear Seat Audio) that uses an “A” channel headset. The VODEXL10 system comes factory set to M1. -
Page 31: Remote Control Operation
REMOTE CONTROL FUNCTIONS REMOTE CONTROL OPERATION Initial Use When purchased, the remote control has a battery installed with a Pull Tab to prevent battery discharge. Remove the Pull Tab before attempting to use the remote control. CR2025 Battery Replacement 1. Remove the battery holder. 2. - Page 32 Function control is available on the unit and the Remote Control. ** Function not available in this model. 1. POWER* Press this button to turn the unit ON and OFF. 2. SOURCE* Press to display the Source OSD for DVD, USB, HDMI 1, HDMI 2, Media, AV, AUX, DTV and Game. 3.
- Page 33 10. SYSTEM MENU Allows the user to access the system menu. Press the cursor buttons to select PICTURE, WFMM (FM Modulator) and SETTING. 11. CURSOR ( Use the cursor buttons to access menu selections on the screen. 12. DISPLAY When in DVD mode, press to display the current disc information while the disc is playing. Use the cursor buttons to select the Title or Chapter.
- Page 34 18. NUMBERS Allows the user to enter the numbers 0-9 for selection of the tracks, titles, chapters or password setting. 19. ZOOM Press this button to enlarge the picture when playing a DVD disc. Press ZOOM button DVD player Once Q1- Enlarges the picture twice the original size Twice Q2- Enlarges the picture 3 times the original size...
- Page 35 PIX ( Picture Select No function on this model. 25. VOLUME DOWN (-) or UP (+)** No function on this model. 26. MUTE Press this button to mute the audio for the wireless FM Modulator, IR headphones and audio output. Pressing the button again restores the audio to the previously set level.
-
Page 36: Turning The Unit On Or Off
TURNING THE UNIT ON OR OFF 1. Push in the Screen Release button to unlock the LCD screen. The screen will drop down slightly. 2. Pivot the screen downward until a comfortable viewing angle is reached. The hinge friction will hold the screen in position while the system is in use. 3. -
Page 37: Source Feature
SOURCE FEATURE The VODEXL10 System is capable of accessing nine source inputs. To select or change a source, press the source, S, button on the front panel or the SRC button on the remote control. The source OSD will appear on the screen as shown in the figure below. Use the... - Page 38 MEDIA The Media source allows for the user to connect an Apple device (e.g. iPod, iPhone, iPad) to the VODEXL10 System to play audio and video content. A special Apple adapter is required for this connection. See your Apple or electronics dealer for the specific adapter required. Connect the adapter to the Apple device, and connect the Audio, Video, and USB connectors into the VODEXL10 System.
-
Page 39: Picture Control Select
PICTURE CONTROL SELECT When watching a program, the picture quality can be adjusted to the user’s preferences. 1. Press the System Menu button on the remote control (or press and hold the Home/System menu button on the front panel for 3 seconds) and the Picture Control Menu will be displayed. -
Page 40: Fm Modulator
FM MODULATOR The FM Modulator allows the user to listen to audio through the vehicle’s radio. - Turns the wireless FM Modulator on if audio playback through your vehicle’s radio is preferred. - Turns the wireless FM Modulator off. FREQUENCY - Allows the user to select the wireless FM Modulator frequency. The unit has a 100 channel built-in wireless FM Modulator. The FM Modulator can be set from 88.1 MHz to 107.9 MHz in 0.2 MHz steps, i.e. -
Page 41: Default Dvd
DEFAULT DVD This allows the user to set the system default source to DVD on or off. If source default PICTURE WFMM SETTING is set to ON, every time the unit is turned off then on, the unit will power up and automatically switch the source to DVD. -
Page 42: Monitor Mode
MONITOR MODE This allows the user to set the system monitor code to M1 or M2. PICTURE WFMM SETTING 1. Press the System Menu button on the remote control to change the DEFAULT DVD monitor code from M1 to M2. SCREEN MODE 16:9 2. -
Page 43: Language
LANGUAGE This allows the user to return the on-screen display language. The user can PICTURE WFMM SETTING select English, Spanish, French, or German for the on-screen display language. To select the screen aspect ratio format: DEFAULT DVD 1. Press the System Menu button. SCREEN MODE 16:9 2. -
Page 44: Dvd Setup Menu Setting And Adjustments
DVD SETUP MENU SETTINGS AND ADJUSTMENTS The DVD Setup Menu contains features and options that allow the user customize the DVD player. For example, the user can set a language for the on- screen display or prevent children from viewing DVD playback of adult DVD Titles. Using the Setup Menu Press the DVD button and then the SETUP button on the remote control. -
Page 45: Dvd Subtitle Setup
DVD SUBTITLE SETUP The Subtitle Menu allows the user to select the language for the on-screen display subtitles. Language Language 1. Press the SETUP button on the remote to enter the Setup Menu. English French 2. Use the cursor buttons to select the Language menu option. Video Subtitle Spanish... -
Page 46: Dvd Tv Display
DVD TV DISPLAY The TV display setup allows the user to set the screen aspect ratio. TV display Language - This displays the wide picture with black bands on the upper and lower portions of the screen. 16:9 16:9 - This displays a wide picture with black bands on the upper and lower portion of the screen. TV type Video The bandwidth will vary, depending on the aspect ratio of the disc. -
Page 47: Dvd Rating Setup
DVD RATING SETUP Parental Language This feature allows the user to limit the content of movie playback from G to Adult. The lower the value, the Parental : 6.Adult more strict the control. Video Change Password 1. G Rating 2. PG Misc 3. -
Page 48: Load Factory
Load Factory Language Load Factory This option allows the user to reset all options to factory settings. Screen Saver : On Video 1. Press the SETUP button on the remote to enter the Setup Menu. 2. Use the cursor buttons to select the Misc menu option. Rating 3. -
Page 49: Playing Dvds
PLAYING DVDS 1. Press the DVD button and then the DISPLAY button on the remote control to display the status banner. The banner includes title, chapter, angle, audio, subtitle, and time. 2. Title Selection Press the numeric (0~9) buttons to initiate a change of title selection. Then press OK to implement the selection. 3. - Page 50 Repeat: play repetitively 00:00:01 The Repeat function has four playing options: Off, Single, Folder, and All. Move the cursor to the Repeat function 1/12 and press OK. Each time OK is pressed the unit will cycle through the available options. Off/Single/Folder/All are Flat Mode Repeat : Off displayed in that order.
-
Page 51: Dvd Basics
DVD BASICS To get the optimum use out of the DVD Player, make sure this section is read completely. DVD Region Code The DVD player is preset to a region code at the factory depending on where the DVD player is sold. A DVD from a different region cannot be played in this unit and the unit will display "WRONG REGION”. -
Page 52: Overhead Dome Lights
Types of Discs the DVD System will play The VODEXL10 DVD system will play the following types of discs: • DVD* disc - DVD discs which contain MPEG2 video. • Audio disc - Audio CDs contain musical or sound content only. -
Page 53: Accessories
WIRELESS HEADPHONES The VODEXL10 includes a built-in infrared transmitter for use with the supplied wireless headphones. The headphone volume is adjusted using the controls on each headset. Any number of wireless headphones may be used but they must be used within a line of sight from the transmitter, as infrared transmissions, like visible light, travel only in a straight line. -
Page 54: Troubleshooting
TROUBLESHOOTING Problem Solution IR remote is inoperative. • Verify that the batteries in the remote are fresh. • Verify that the remote sensor eye is not obstructed. • If the monitor is set to M1, press the M1 button on the remote control. If the monitor is set to M2, press the M2 button on the remote control. - Page 55 Problem Solution Picture is distorted. • The disc might be damaged, try another disc. • It is normal for some distortion to appear during forward or reverse scan. No forward or reverse scan. • Some discs have sections that prohibit rapid scanning or title and chapter skip. •...
-
Page 56: Replacement Parts
REPLACEMENT PARTS SPECIFICATIONS LCD Backlighting Remote Control 136-5326 Resolution 1024 (RGB) x 600 Wireless Headphones 136-5301 Pixels 1,843,200 MVGP1 Game Module 136-5319 Operation Temperature 32 ~131º F (0 ~ 55º C) Game Controller P1 136-5320 Storage Temperature -4 ~ 158º F (-20 ~ 70º C) Game Controller P2 136-5321 Back Light Life... -
Page 57: Warranty
Applies to AUDIOVOX Mobile Video Products AUDIOVOX ELECTRONICS CORP. (the Company) warrants to the original retail purchaser of this product that should this product (excluding game controllers) under normal use and conditions, be proven defective in material or workmanship within 36 months from the date of original purchase, such defect(s) will be repaired or replaced with reconditioned product (at the Company's option) without charge for parts and repair labor. - Page 58 © 2013 Audiovox Electronics Corp, 150 Marcus Blvd. Hauppauge, NY 11788 128-9229...
Need help?
Do you have a question about the VODEXL10 and is the answer not in the manual?
Questions and answers