
Subscribe to Our Youtube Channel
Related Manuals for Pride Mobility Path rider


Summary of Contents for Pride Mobility Path rider
- Page 1 Owner’s Manual 3 and 4-wheel ® The Ultimate In Style & Performance 21 Healey Road Dandenong, 3175 Victoria, Australia ACN # 088 609 661 www.pridemobility.com...
- Page 2 088 609 661 This product is manufactured by : Pride Mobility Products Corporation 182 Susquehanna Avenue Exeter, PA 18643-2694 Copyright © 2006 Pride Mobility Products Australia Pty. Ltd. INFMANU2838/Rev C/July 2006...
-
Page 3: Table Of Contents
C O N T E N T S INTRODUCTION ........................4 SAFETY ............................5 III. SPECIFICATIONS ........................16 IV. YOUR SCOOTER ........................18 BATTERIES AND CHARGING ................... 23 VI. OPERATION ..........................27 VII. COMFORT ADJUSTMENTS ....................29 VIII.DISASSEMBLY AND ASSEMBLY ..................32 IX. -
Page 4: Introduction
I N T R O D U C T I O N SAFETY Welcome to Pride Mobility Products Australia Pty. Ltd. (Pride). The product you have purchased combines state-of-the-art components with safety, comfort, and styling in mind. We are confident the design features will provide you with the conveniences you expect during your daily activities. - Page 5 I I . S A F E T Y PRODUCT SAFETY SYMBOLS The symbols below are used on the scooter to identify warnings, mandatory actions, and prohibited actions. It is very important for you to read and understand them completely. Pinch/Crush points created during assembly.
- Page 6 I I . S A F E T Y Front-to-rear plug orientation. Do not remove anti-tip wheels. Avoid exposure to rain, snow, ice, salt, or standing water whenever possible. Maintain and store in a clean and dry condition. Removal of grounding prong can create electrical hazard. If necessary, properly install an approved 3-pronged adapter to an electrical outlet having 2-pronged plug access.
- Page 7 I I . S A F E T Y GENERAL MANDATORY! Do not operate your new scooter for the first time without completely reading and understanding this owner’s manual. Your scooter is a state-of-the-art life-enhancement device designed to increase mobility. Pride provides an extensive variety of products to best fit the individual needs of the scooter user.
- Page 8 I I . S A F E T Y PRE-RIDE SAFETY CHECK Get to know the feel of your scooter and its capabilities. Pride recommends that you perform a safety check before each use to make sure your scooter operates smoothly and safely. Perform the following inspections prior to using your scooter: ! Check for proper tyre inflation (if equipped with pneumatic tyres).
- Page 9 I I . S A F E T Y When climbing an incline, try to keep your scooter moving. If you must stop, start up again slowly and then accelerate cautiously. When driving down an incline, do so by setting the speed adjustment dial to the slowest setting and driving in the forward direction only.
- Page 10 I I . S A F E T Y When you approach an incline, it is best to lean forward. See figures 2 and 2A. This shifts the centre of gravity of you and your scooter toward the front of the scooter for improved stability. NOTE: When negotiating ramps, if the throttle control lever is released while moving forward, the powered scooter may "rollback"...
- Page 11 I I . S A F E T Y OUTDOOR DRIVING SURFACES Your scooter is designed to provide optimum stability under normal driving conditions—dry, level surfaces composed of concrete or tarmac. However, Pride recognises that there will be times when you will encoun- ter other surface types.
- Page 12 I I . S A F E T Y INCLEMENT WEATHER PRECAUTIONS Exposure of your scooter to inclement weather conditions should be avoided whenever possible. If sud- denly caught up in rain, snow, severe cold or heat while operating your scooter, proceed to shelter at the earliest opportunity.
- Page 13 I I . S A F E T Y LIFTS Modern lifts have a door edge safety mechanism that, when pushed, reopens the door(s). ! If you are in the doorway of a lift when the door(s) begin to close, push on the rubber door edge or allow the rubber door edge to contact the scooter and the door will reopen.
- Page 14 I I . S A F E T Y MOTOR VEHICLE TRANSPORT Pride recommends that you do not remain seated in your scooter while traveling in a motor vehicle. The scooter should be stowed in the boot of a car or in the back of a truck or van with the batteries removed and properly secured.
- Page 15 I I . S A F E T Y POSITIONING BELTS Your authorised Pride Provider, therapist(s), and other healthcare professionals are responsible for deter- mining your requirement for a positioning belt in order to operate your scooter safely. WARNING! If you require a positioning belt to safely operate your scooter, make sure it is fastened securely.
- Page 16 I I I . S P E C I F I C A T I O N S 39 cm 19 cm 46 cm - 51 cm 11.43 cm 119 cm 46 cm 40.5 cm 53 cm - 73.5 cm 104 cm 147 cm Turning Radius (3-wheel)
-
Page 17: Specifications
I I I . S P E C I F I C A T I O N S Model Numbers 3-wheel: SC1650AUS 4-wheel: SC1750AUS Class of Use Maximum Safe Slope See figure 1 Maximum Climbing Ability See figure 1 Maximum Obstacle Climbing Ability 5 cm Available Colours Overall Length... -
Page 18: Your Scooter
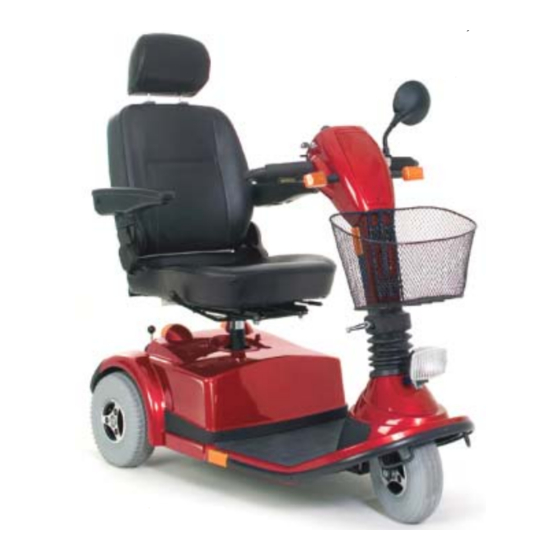
I V . Y O U R S C O O T E R Your Pathrider is an indoor/outdoor, motorized electric scooter designed to enhance your personal mobility. For easy transportation or storage, you can disassemble your scooter into seven components. See figure 5. SEAT REAR SECTION FRONT SECTION... - Page 19 I V . Y O U R S C O O T E R Speed Adjustment Dial This dial allows you to preselect and limit your maximum speed. Set the dial to one of five settings from the slowest (image of the tortoise) to the fastest (image of the hare) speed setting. Key Switch This switch enables you to power up (turn on) and power down (turn off) your scooter.
-
Page 20: Fuse Box
I V . Y O U R S C O O T E R Off-board Battery Charger Port The off-board battery charger cord plugs into this port when charging the scooter batteries. For more infor- mation on battery charging, see V. “Batteries and Charging.” Throttle Control Lever This lever allows you to control the forward speed and the reverse speed of your scooter up to the maxi- mum speed you preset with the speed adjustment dial. - Page 21 I V . Y O U R S C O O T E R REAR SECTION The batteries, electronic controller module, motor/transaxle assembly, manual freewheel lever, the anti-tip wheels, the main circuit breaker and the fuses are located on the rear section of your scooter. See figure 11. BATTERIES BATTERY HARNESSES FRONT-TO-REAR HARNESS...
- Page 22 I V . Y O U R S C O O T E R WARNING! Do not expose the electronic controller module to moisture. If it does become exposed to moisture, do not attempt to operate your scooter until it has dried thoroughly. WARNING! Your scooter is equipped with a microprocessor based, programmable controller.
-
Page 23: Batteries And Charging
B A T T E R I E S A N D C H A R G I N G Your scooter requires two long-lasting, 12-volt, deep-cycle batteries that are sealed and maintenance free. Three important points to remember are: ! Charge your batteries with the supplied off-board battery charger prior to using it for the first time. -
Page 24: Battery Replacement
B A T T E R I E S A N D C H A R G I N G WARNING! Prevent injury and/or equipment damage! If your off-board battery charger has not been tested and approved for outdoor use, then do not expose it to adverse or extreme weather conditions. - Page 25 B A T T E R I E S A N D C H A R G I N G Why do my new batteries seem weak? Deep-cycle batteries employ a different chemical technology than that used in car batteries, nickel-cad- mium batteries (nicads), or in other common battery types.
- Page 26 B A T T E R I E S A N D C H A R G I N G How can I get maximum range or distance per charge? Rarely will you have ideal driving conditions — smooth, flat, hard driving surfaces with no wind or curves. Often, you will face hills, sidewalk cracks, uneven and loosely packed surfaces, curves, and wind.
-
Page 27: Operation
V I . O P E R A T I O N PRE-RIDE ADJUSTMENTS AND CHECKS Familiarize yourself with the following checklist as some of the checks must be performed prior to getting on your Scooter. ! Have you fully charged the batteries? See V. “Batteries and Charging.” ! Is the manual freewheel lever in the drive (down) position? See IV. - Page 28 V I . O P E R A T I O N NOTE: If you do not release the throttle control lever before using the handbrake, your scooter may not come to a complete stop. GETTING OFF OF YOUR SCOOTER 1.
-
Page 29: Comfort Adjustments
V I I . C O M F O R T A D J U S T M E N T S TILLER ANGLE ADJUSTMENT Your tiller is equipped with a spring-loaded tiller adjustment lever, which allows you to lock the tiller in place as well as rotate and change its position. -
Page 30: Seat Height Adjustment
V I I . C O M F O R T A D J U S T M E N T S SEAT HEIGHT ADJUSTMENT To reposition the seat to one of three different heights: 1. Remove the seat from your scooter. Push forward and hold the seat rotation lever to unlock the seat, then SEAT POST rotate the seat and lift it off of the scooter. -
Page 31: Armrest Angle Adjustment
V I I . C O M F O R T A D J U S T M E N T S ARMREST ANGLE ADJUSTMENT There is an armrest adjustment dial on the underside of each armrest. To adjust the armrest angle while seated in your scooter turn the armrest adjustment dial to the left to ARMREST ADJUSTMENT... - Page 32 V I I I . D I S A S S E M B L Y A N D A S S E M B L Y No tools are required to disassemble your scooter. Always disassemble or assemble your scooter on a level, dry surface with sufficient room for you to work and move around your scooter.
- Page 33 V I I I . D I S A S S E M B L Y A N D A S S E M B L Y Frame Separation 1. Push back on the seat post to pivot the scooter’s rear section backwards until the rear section is stand- ing vertically on its rear bumper.
- Page 34 I X . B A S I C T R O U B L E S H O O T I N G Any electromechanical device requires occasional troubleshooting. However, most problems that arise can usually be solved with a bit of thought and common sense. Many of these problems occur because the batteries are not fully charged or because the batteries are worn down and can no longer hold a charge.
-
Page 35: Care And Maintenance
C A R E A N D M A I N T E N A N C E Your scooter requires a minimal amount of care and maintenance. If you do not feel confident in your ability to perform the maintenance listed below, you may schedule inspection and maintenance at your authorised Pride Provider. - Page 36 C A R E A N D M A I N T E N A N C E WIRING HARNESSES ! Regularly check all wiring connections. ! Regularly check all wiring insulation, including the charger power lead, for wear or damage. ! Have your authorised Pride Provider repair or replace any damaged connector, connection, or insula- tion that you find before using your scooter again.
- Page 37 C A R E A N D M A I N T E N A N C E STORING YOUR SCOOTER If you plan on not using your scooter for an extended period of time, it is best to: ! Fully charge its batteries prior to storage. ! Disconnect both battery harnesses.
-
Page 38: Warranty
X I . W A R R A N T Y TWO-YEAR LIMITED WARRANTY Structural frame components, including: platform, fork, seat post, and frame welds. Drivetrain, including: differential, motor, and brake. ONE-YEAR LIMITED WARRANTY Your Pride Scooter is fully guaranteed for twelve (12) months from the date of purchase against faults arising due to defects in manufacture or materials. - Page 39 21 Healey Road Dandenong, 3175 Victoria, Australia www.pridemobility.com *INFMANU2838*...
Need help?
Do you have a question about the Path rider and is the answer not in the manual?
Questions and answers