Table of Contents
Advertisement
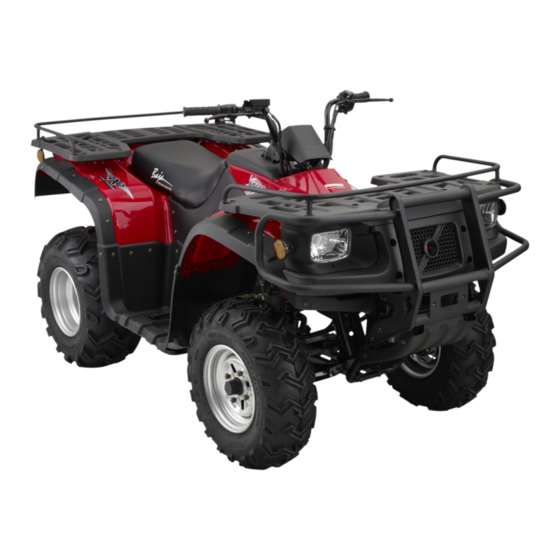
WD250UR / WD250U ATV
Read this manual carefully. It contains important safety information.
No one under the age of 16 should operate this ATV
OWNER'S MANUAL
Minimum Age Requirement 16
WD250UR
RED
Always wear a helmet; It could save your Life!
Do not remove this operator's manual from this vehicle.
Please obtain, review, and follow provincial / municipal government acts and
regulations pertaining to owning and operating an off-road vehicle.
WD250U
CAMO
REV. B
022108
Advertisement
Table of Contents

Related Manuals for Baja motorsports WD250UR


Summary of Contents for Baja motorsports WD250UR
- Page 1 WD250UR / WD250U ATV Read this manual carefully. It contains important safety information. No one under the age of 16 should operate this ATV OWNER’S MANUAL Minimum Age Requirement 16 WD250UR WD250U CAMO REV. B 022108 Always wear a helmet; It could save your Life! Do not remove this operator’s manual from this vehicle.
- Page 2 Should you experience a problem or need to return your Baja Motorsports 250cc ATV for repair, please call the BAJA MOTORSPORTS customer service department TOLL FREE at 1-866-250-7155 between the house of 7am and 5pm Monday thru Friday PST.
- Page 3 WARNING This manual should be considered as a permanent part of the vehicle and should remain with the vehicle when resold or otherwise transferred to a new user or operator. The manual contains important safety information and instructions which should be read carefully before operating the vehicle.
-
Page 4: Table Of Contents
Table of Contents IMPORTANT ........................2 FOREWORD ........................3 NOTICE TO THE USER ..................... 3 BAJA WD250UR / WD250U ATV ..................7 FUEL AND OIL ........................8 LOCATION OF LABELS ....................9 INDICATOR LIGHTS AND MAIN KEY SWITCH ASSEM.(W/ Speedometer) ....11 HANDLEBAR &... -
Page 5: Important
Table of Contents VEHICLE WEIGHT LIMITS ....................41 INSPECTION AND MAINTENANCE ................. 42 TOOLS ........................44 SPARK PLUG ......................44 BATTERY INSTALLATION ..................46 FUSE REPLACEMENT ..................... 50 HEADLIGHT/TAILLIGHT REPLACEMENT .............. 50 THROTTLE LEVER ADJUSTMENT ................. 51 IDLE SPEED ADJUSTMENT ..................52 FUEL HOSE ...................... -
Page 6: Foreword
Please read this manual and follow all instructions carefully. To emphasize the special information, the symbol and the words WARNING or CAUTION have some special meanings. Pay great attention to the messages. WARNING Indicates a potential hazard that could result in death or injury. CAUTION Indicates a potential hazard that could result in vehicle damage. - Page 7 We believe in conservation and protection of the earth’s natural resources. We encourage every vehicle owner and operator to do the same by obeying posted signs and riding only in areas designated and approved for off-road recreational use. NOTICE TO USERS THIS ATV IS NOT A TOY.
- Page 8 · Never operate this ATV at excessive speeds. Always operate at a speed that is proper for the terrain, visibility, operating conditions, and the operator’s skill / experience. · Never attempt wheelies, jumps, or other stunts. · Always inspect the ATV each time before use to ensure it is in a safe operating condition.
- Page 9 · Always use proper procedures if you stall or roll backwards when climbing a hill. To avoid stalling, maintain a steady speed when climbing a hill. If you stall or roll backwards, follow the special procedure for braking described in this manual. Dismount on the uphill side or to a side if pointed straight to uphill.
-
Page 10: Baja Wd250Ur / Wd250U Atv
WD250UR / WD250U Mirrors Front rack Drive select lever Rear rack Taillight Front wheel Rear wheel Gear shift lever Manual pull start LEFT Gas cap Seat Control panel Front shocks Rear shock Foot brake Oill fill cap/dipstick RIGHT... -
Page 11: Fuel And Oil
FUEL AND OIL FUEL Proper fuel is very important for the engine. Ensure there is no dust, dirt, or water which has mixed in the fuel. Use regular unleaded gasoline. ENGINE OIL Your 250cc ATV has a four-stroke engine. Please use oil as described in the chart below. -
Page 12: Location Of Warning Labels
Read and follow all of the warnings labels on your ATV. Make sure you understand all the labels. Keep the labels on the ATV. Do not remove them for any reason. If a label comes off or becomes difficult to read, you should get a replacement by contacting Baja Motorsports. WARNING WARNING... - Page 13 WARNING WARNING LOAD LIMIT NEVER sit here 30kg (66lbs) IMPROPER TIRE PRESSURE OR OVERLOADING CAN CAUSE LOSS OF CONTROL. WARNING LOAD LIMIT LOSS OF CONTROL CAN RESULT IN SEVERE INJURY OR DEATH. NEVER sit here 45kg (99lbs) COLD TIRE PRESSURE: Recommended: Minimum Front: 17kpa (2.5psi) Maximum Front: 23kpa (3.3psi) WARNING...
-
Page 14: Indicator Lights And Main Key Switch Assem.(W/ Speedometer)
SPEEDOMETER, INDICATOR LIGHTS AND MAIN KEY SWITCH Speedometer Indicates speed of ATV Odometer Indicates total mileage driven. Reverse indicator Illuminates when ATV is in reverse. Km/h indicator Illuminates when speedometer is in Km/h High beam indicator Illuminates when high beam is on. Lights indicator Illuminates when headlights or taillights are on. -
Page 15: Handlebar & Switch
LEFT HANDLEBAR SWITCHES: REAR BRAKE LEVER AND PARKING BRAKE LOCK Choke lever Engine Stop Switch With the Engine stop switch in the “OFF” position the engine cannot be started. With the Engine stop in the “RUN” position the engine can be started. Rear brake lever Rear brake is applied by squeezing the rear brake lever towards the grip. -
Page 16: Right Handlebar
RIGHT HANDLEBAR: FRONT BRAKE LEVER AND THUMB THROTTLE Throttle lever Controls engine and ATV speed. Operate this lever with your thumb. Push it forward to increase engine and ATV speed. Release it to decrease engine and ATV speed. Front brake lever Squeeze lever toward hand grip to apply front brakes. -
Page 17: Fuel Valve
FUEL VALVE This vehicle has one manually operated fuel valve. There are 3 positions “ON” “OFF” “RESERVE” “ON” position In this position, fuel is allowed to flow into the carburetor when the engine is running or being started. “OFF” position In this position the fuel is shut off from the carburetor. -
Page 18: Seat Lock
WARNING Overfilling the fuel tank could be hazardous. If you overfill the fuel tank, fuel may overflow when it expands. Expanding is due to heat from engine or sun. Overheated fuel could easily catch fire. Stop adding fuel when the fuel level reaches the bottom of the filler neck. WARNING Improper fueling of the ATV could be hazardous. -
Page 19: 12V Utility Socket
12V Utility Socket CAUTION Using Accessories with wattage requirements over 100 watts could damage Using Accessories with wattage requirements over 100 watts could cause wiring and electrical components to overheat causing failure. Check accessory wattage requirements before plugging in to 12V electrical socket. -
Page 20: Riding Your Atv
RIDING YOUR ATV WHAT YOU SHOULD KNOW BEFORE RIDING Before riding, you should read all the following information carefully. If you are properly prepared, you will have a more enjoyable ride. Before riding, you should find a good place to practice the skills. Find a flat, open area with enough space to practice the new skills. -
Page 21: Inspection Before Riding
INSPECTION BEFORE RIDING ITEM TO CHECK CONTENT Steering Smoothness; No restriction of movement; No play or looseness Brakes Proper brake lever free play; enough brake force; Parking brake effectiveness Tires Proper air pressure; Enough tread depth; No cracks, rips, or other damages Fuel Enough fuel for the intended trip;... - Page 22 WARNING Overloading could be hazardous. Overloading could cause changes in vehicle handling and could lead to an accident. Never exceed the stated load capacity for this ATV. Refer to the ACCESSORY USE AND VEHICLE LOADING section in this manual. WARNING Operating this ATV with improper modifications could be hazardous.
-
Page 23: Safety Gear
SAFETY GEAR A DOT approved motorcycle helmet is the most important part of you safety gear. A DOT approved motorcycle helmet can help prevent a serious head injury. Choose a helmet that fits snugly. Motorcycle dealers can help in selecting a good quality helmet which fits properly. WARNING Operating this ATV without wearing an approved DOT motorcycle helmet, eye protection, and protective clothing could be hazardous. -
Page 24: Break-In
BREAK-IN The first month is the most important in the life of your vehicle. Proper operation during this break-in period will be helpful for assuring maximum life and performance of your new vehicle. The following guidelines explain proper break-in procedures. Maximum Throttle Opening Recommendation During the first 10 hours of operation, you should always use less than ½... -
Page 25: Starting The Engine
STARTING THE ENGINE Before attempting to start the engine, make sure to follow these steps. 1. Turn the fuel valve to the “ON” position Turn the key switch to the “ON” position. Set the engine stop switch to the “RUN“ position. 4. - Page 26 WARNING Operating this ATV on paved surfaces, including sidewalks, paths, parking lots, driveways and streets could be hazardous. ATV tires are designed for off-road use. Paved surfaces may seriously affect handling and control of the ATV, and may cause the vehicle to lose control.
- Page 27 WARNING Attempting wheelies, jumps, and other stunts could be hazardous. Stunt riding increases the chance of an accident, including an overturn. Never attempt stunts, such as wheelies or jumps. Don’t try to show off. WARNING Removing your hands from the handlebar or feet from the footrests during operation could be hazardous.
- Page 28 WARNING Failing to use extra care when operating on excessively rough, slippery, or loose terrain could be hazardous. Failing to use extra care could cause loss of traction. This could result in an accident, including an overturn. Do not operate under these conditions until you have learned and practiced the skills necessary to control the ATV on such terrain.
-
Page 29: Starting Off
WARNING The ATV may start moving as soon as you release the parking brake. Unexpected movement could cause you to lose control of the ATV. Parking brake Throttle When you are sure that the engine is warm release parking brake. Release brake lever and open the throttle gradually to move forward. -
Page 30: Shifting
SHIFTING: This ATV has a 5 speed transmission with a centrifugal automatic clutch. To shift vehicle in neutral while driving, repeatedly depress the gear shift lever. The green indicator light will illuminate when in neutral. To shift the vehicle through gears 1-5 1. - Page 31 WARNING Not looking behind vehicle before and while going in reverse could be hazardous. Failure to look behind while backing could cause the ATV to run into an obstacle or person resulting in an injury and/or property damage. Before going in reverse and while backing, look behind the vehicle for any obstacles or people to avoid.
-
Page 32: Braking
BRAKING Rear foot brake Front hand brake Rear hand brake To stop the ATV, first release the throttle lever. And then apply the rear and front brakes smoothly. WARNING Braking while turning the ATV could be hazardous. Use of the brake when turning could cause the ATV to slide or roll over. Use the brake to slow down before you begin to turn. -
Page 33: Turning
TURNING To turn the ATV, the rider must use the proper technique. Because this vehicle has a solid rear axle, both rear wheels always turn at the same speed. This means that if the rear wheels are getting equal traction, the vehicle will tend to move straight ahead. -
Page 34: Skidding Or Sliding
SKIDDING OR SLIDING You may experience skidding or sliding when you are not braking. You may be able to overcome it by using the techniques listed below. If your front wheel skids: Gain front wheel traction by reducing the throttle opening and leaning your body slightly forward. -
Page 35: Climbing A Hill
CLIMBING A HILL WARNING Climbing hills improperly could be hazardous. Climbing hills improperly could cause loss of control or cause the ATV to overturn. Always follow the proper procedures for climbing hills as described in this section. Always check the terrain carefully before you start up any hill. Never climb hills with excessively slippery or loose surfaces. - Page 36 WARNING Stalling, rolling backwards or improperly dismounting the ATV while climbing a hill could be hazardous. The ATV could overturn if you do not climb a hill properly. Maintain a steady speed when climbing the hill. Always follow the proper procedures for climbing hills as described in this section.
-
Page 37: Descending A Hill
DESCENDING A HILL WARNING Going down a hill improperly could be hazardous. Going down a hill improperly could cause loss of control or cause the ATV to overturn. Always follow the proper procedures for going down hills as described in this section. -
Page 38: Riding Over Obstacles
TRAVERSING A SLOPE WARNING Crossing hills or turning on hills improperly could be hazardous. Crossing hills or turning on hills improperly could cause loss of control or overturn. Never attempt to turn the ATV around on any hill until you have mastered the turning technique as described in the CLIMBING A HILL section. -
Page 39: Riding Through Water
RIDING THROUGH WATER You can ride the ATV through shallow water. Make sure it is not more than 10cm (4 inches) deep and is not moving fast. Choose a good place to cross before you ride through the water. Look for a spot where the banks are gently sloped on both sides and the bottom of the stream is hard. -
Page 40: Riding In Cold Weather
RIDING IN COLD WEATHER Pre-ride Inspection Check that the throttle and all control levers move freely. Make sure that the footrests are free of ice or snow. Move the ATV forward and backward to check that the wheels roll freely. If you cannot move the ATV, the tires may be frozen to the ground, or the brakes may be frozen to the wheels. -
Page 41: Dressing For Cold Weather Riding
DRESSING FOR COLD WEATHER RIDING WARNING Operating your ATV in cold weather without proper clothing could be hazardous. Continued exposure in the cold weather could lead to hypothermia. Hypothermia is a condition where your body’s inner temperature drops low enough to cause injury or death. Always dress for the worst weather conditions you might encounter. -
Page 42: Riding On Snow Or Ice
RIDING YOUR ATV ON SNOW AND ICE WARNING Riding on snow-covered terrain, even with care, could be hazardous. The snow may be covering rocks, holes, ice or other hazards that can cause loss of control. Severe injury or death could occur if you lose control of the ATV. -
Page 43: Accessory Use And Vehicle Loading
ATV. Install and use them according to their instructions. If you have any questions, contact your retailer or Baja Motorsports. Accessory Use and Vehicle Loading Guidelines The combined weight of the rider, tools, and any accessories or cargo plus the vertical weight on trailer hitch must never exceed the vehicle’s load capacity of... -
Page 44: Vehicle Weight Limits
WD250UR / WD250U WEIGHT LIMITS Never exceed the weight limits shown 1. Total weight limit is 165 Kg (364 lbs); this limit includes rider, accessories, vertical weight on trailer hitch and cargo. 2. Front rack - 30 Kg (66 lbs.) 3. -
Page 45: Inspection And Maintenance
INSPECTION AND MAINTENANCE It is very important to inspect and maintain your ATV regularly. Follow the guidelines in the chart. The intervals between periodic services in months are shown. At the end of each interval be sure to perform the maintenance listed. MAINTENANCE SCHEDULE Item Initial... - Page 46 If you are not sure how to do the maintenance ask your authorized service or call Baja Motorsports. CAUTION If you use your ATV under severe conditions, it will need maintenance more often than shown in the chart.
-
Page 47: Tools
A white or dark insulator indicates that the engine may need adjustment, or another plug type may be needed. Consult your authorized dealer or Baja Motorsports if your plug insulator is not a light brown color. CAUTION Failing to use the proper spark plug could damage your ATV. - Page 48 NOTE: This ATV uses resistor-type spark plug to avoid jamming electronic parts. Improper spark plug selection may cause electronic interference with your ATVs ignition system, resulting in the vehicle performance problems. Use recommended spark plugs. To install a spark plug turn it in as far as possible with your fingers, then tighten it with a wrench.
-
Page 49: Battery Installation
BATTERY INSTALLATION INITIAL SERVICE AND INSTALLATION OF BATTERY: WARNING The following procedure is very dangerous and should be performed with utmost care and attention. Wear protective eye wear, rubber gloves, and have water available should electrolyte come in contact with skin or eyes. KEEP ALL CHILDREN AWAY FROM THE AREA WHILE THIS PROCEDURE IS BEING PERFORMED. - Page 50 Note: The following page is for vehicles with battery’s containing separate electrolyte pack. Most battery’s will come with the electrolyte already sealed into the battery. Preparing the battery: · Place battery on level surface. Remove sealing tape from top. (see figure 20) ·...
- Page 51 How to Initially Charge the battery: Connect the red positive (+) cable to the red positive (+) pole of the battery. (see figure 23) Connect the black negative (-) cable to the black negative (-) pole of the battery. (see figure 24) Figure 23 Note: The red positive (+) cable has a larger...
-
Page 52: Battery Replacement
Battery Replacement: · Remove old battery from under seat. The battery bracket will need to be removed (see figure 28). Mark which cable is connected to the positive terminal (+) and which cable is connected to the negative (-) terminal. ·... -
Page 53: Fuse Replacement
FUSE REPLACEMENT Fuse Fuse cap Fuse box Good Fuse may be bad if there is no spark while trying to start the ATV. The fuse box is located under the seat directly in front of the battery. To check fuse follow the instructions •... -
Page 54: Throttle Lever Adjustment
THE ADJUSTMENT OF THROTTLE LEVER Adjuster cover Measure the throttle lever play. 3.0~5.0mm Throttle lever 3.0~5.0mm (0.12~0.20in) as shown (0.12~0.20in) lock nut Adjustment nut To adjust the throttle lever play: Remove the adjuster cover (slide back on cable). Loosen the throttle lever lock nut. Turn the large adjustment nut in or out to obtain the correct play. -
Page 55: Idle Speed Adjustment
IDLE SPEED ADJUSTMENT To adjust the idle speed properly, you need a tachometer. If you do not have one, ask your authorized service center to perform this adjustment. Engine Idle adjustment Screw To adjust the idle speed: Start the engine and warm it up. Turn the engine idle screw in or out so that the engine idle speed is at 1450~1550 r/min. -
Page 56: Engine Oil/Oil Strainer/Oil Filter
ENGINE OIL To check oil level: 1. Park vehicle on level ground. Oil cap and dipstick Minimum Maximum Dipstick 2. Remove dip stick and wipe off with a clean rag. Insert the dipstick in the filler hole. 3. Remove the dipstick and inspect the oil level. 4. - Page 57 4. Remove oil filter cap 5. Remove oil filter Oil filter Rubber O Ring Oil filter cap 6. Clean oil strainer and oil filter with solvent. 7. Inspect rubber O-ring on the oil filter cap and replace if damaged. 8. Reinstall oil filter, O-ring and oil filter cover. 9.
-
Page 58: Air Filter
AIR FILTER The air filter element must be kept clean to provide good engine power. If you use your vehicle under normal, low-tension conditions, you should service the air filter at the intervals specified. If you ride in dusty, wet, or muddy conditions, you will need to inspect the air filter element much more frequently. - Page 59 AIR FILTER REMOVAL AND CLEANING Air Filter Cover Locate Air Filter Box under seat and remove cover. 2. Remove air filter. 3. Remove foam cover from Air filter element. Foam cover 4. Tap the Air filter element gently to Air filter element remove most of the dust and dirt.
-
Page 60: Clutch Adjustment
CAUTION A torn air filter could damage your ATV. Dirt and dust may get inside of the engine if the element is torn. Examine carefully the element for tears before and after cleaning it. Replace the element with a new one if it is torn. WARNING Oil and solvent could be hazardous. -
Page 61: Rear Gear Case Lubrication
REAR GEAR CASE LUBRICATION To check rear gear case oil: Fill cap 1. Place vehicle on level ground 2. Remove gear case fill cap. 3. Inspect oil level. Oil level should be up to the brim of the hole. 4. If oil is low, add specified oil (SAE 80 API G- 4 Hypoid gear oil). -
Page 62: Tires
TIRES The ATV is equipped with low pressure tubeless tires of the size and type listed below: Front Rear Size AT22 x 8 - 10 AT22x11-10 WARNING Operating this ATV with improper tires, or even improper tire air pressure could be hazardous. If you use improper tires or improper tire air pressure, you may lose control of the ATV. - Page 63 WARNING Overfilling the tires with air could be hazardous. If you put too much air into the tire, the tire may burst causing severe injury. Check the air pressure from time to time while gradually inflating the tire, until the specified air pressure is obtained. Tire Replacement Your ATV has low-pressure tubeless tires.
-
Page 64: Brakes
BRAKING The ATV has two front disk brakes and one rear drum brake. WARNING Failing to inspect and maintain your ATV’s brake system properly could be hazardous. Improper maintenance of the brake increases your chance of having an accident. Be sure to inspect the brake before riding according to the INSPECTION BEFORE RIDING section. -
Page 65: Rear Drum Brake
FRONT HYDRAULIC DISK BRAKE INSPECTION Brake fluid reservoir Front disk brake caliper Lower mark Brake fluid cap Brake hose Brake fluid level Brake disk Brake hose 1. Inspect the front disk brake caliper and brake fluid reservoir for leakage. If brake fluid leaks, the safety of riding could be affected. 2. -
Page 66: Brake Adjustment
REAR HAND AND FOOT BRAKE ADJUSTMENT Try to move the vehicle backward and forward when the rear hand brake is applied. If the rear wheels can turn, adjust the brake to lock the wheels securely. Measure the amount of free play in the rear hand brake lever. -
Page 67: Muffler/ Spark Arrester
WARNING Failing to maintain the brake shoes, the brake pads and the calipers could be hazardous. Riding with worn brake shoes or pads, will increase your chance of having an accident. If you need to replace brake shoe or pads, have your authorized service center do the work. - Page 68 WARNING The hot exhaust muffler could burn you. The muffler will be hot enough to burn you after stopping the engine. Wait until the exhaust muffler cools to remove the dowel. WARNING Running the engine indoors or in a garage could be hazardous. Exhaust gas contains carbon monoxide that is colorless and odorless.
-
Page 69: General Lubrication
GENERAL LUBRICATION Proper lubrication is important for safe, smooth operation and long life of your vehicle. Be sure that all lubrication is performed during periodic maintenance on the vehicle. Increase number of intervals when you use your ATV in severe conditions. -
Page 70: Troubleshooting
Failing to troubleshoot a problem correctly would damage your ATV. Improper repairs or adjustments may damage the vehicle. Such damage may not be covered under warranty. If you are not sure about the proper action, consult your authorized service center or Baja Motorsports about the problem. Fuel Supplying Check Make sure there is adequate fuel in the fuel tank. -
Page 71: Ignition System Check
Ignition System Check Remove the spark plug and reattach it to the spark plug lead. Apply the rear brake lever to make sure the rear wheels are locked. Turn ignition key to the “ON” position. Slide the engine stop switch to the “RUN”... -
Page 72: Transporting
TRANSPORTING It is best to transport the ATV in the normal position. Le bouchon de vidange du carburateur se trouve à la partie inferieure du carburateur. Before transporting the ATV drain the fuel from the carburetor as follows: Drain fuel from carburetor into an empty container by loosening the carburetor drain screw. -
Page 73: Cleaning Procedure
CLEANING PROCEDURE A thorough cleaning of your ATV is a necessary part of maintenance. It will help keep your ATV looking and performing best. Proper cleaning can also extend the life of your ATV. It is important to clean and inspect your ATV after every ride, especially if it is used in mud, brush, grass, water, salt water, or very dusty conditions The build-up of mud, brush, grass, etc. -
Page 74: Washing Your Atv
WASHING YOUR ATV With some care, your ATV can be washed in a similar manner to washing an automobile. NOTE: Avoid spraying or allowing water to flow over the following places: • Ignition switch • Spark plug • Fuel tank cap •... -
Page 75: Storage Procedure
STORAGE PROCEDURE If you do not use your ATV for a long time, it will need special service requiring appropriate materials, equipment and skill. For this reason, we recommend that you trust this maintenance work to your authorized service center. If you wish to service the machine for storage yourself, follow the general guidelines below: VEHICLE Place the vehicle on level ground and wash the entire vehicle. -
Page 76: Serial Number Location
You need to know the frame and engine serial numbers to get title documents for your ATV. You also need these numbers to help your authorized service center or Baja Motorsports order parts. The frame/VIN number is stamped on the front of the ATV frame as shown in the photograph. -
Page 77: Specifications
SPECIFICATIONS WD250UR / WD250U DIMENSIONS AND DRY MASS Overall length................1940mm (76.38 in) Overall width................1050mm (41.34 in) Overall height................1160mm (45.67 in) Wheelbase.................1160mm (45.67in) Ground clearance..............155mm (6.10 in) Minumum turning radius............2913mm (114.17 in) Seat height810mm ..............(31.89 in) Dry weight 220Kg ..............(485 lbs) ENGINE Type....................four stroke,... - Page 78 ELECTRICAL Ignition type................CDI Generator system...............A.C. Magneto Battery type, voltage, capacity..........12N14-BS/12V,14AH Headlight..................12V, 30w/30w x 2 Taillight..................12V, 21w/15w x 1 Neutral indicator.................12V, 3w x 1 Reverse indicator...............12V, 3w x 1 High beam indicator..............12V, 3w x 1 Periodic engine oil change............53 oz (1.5L) with oil filter replacement............56 oz (1.6L) Total amount of engine oil............63 oz (1.8L) Total amount of gear oil.............9 oz (0.266L)
-
Page 79: Emission Control Cyctem Warranty
BAJA INC. – EMISSION CONTROL SYSTEM WARRANTY YOUR WARRANTY RIGHTS AND OBLIGATIONS The emission control system warranty period for this vehicle begins on the date the vehicle is delivered to the first purchaser other than an authorized dealer, or the date it is first used as a demonstrator, lease, or company vehicle, whichever comes first and continues for 60 months after that date, or 5,000km, whichever comes first, provided there has been no abuse, neglect or improper maintenance of your vehicle. - Page 80 Your emission control system warranty covers components whose failure would increase an engine’s emission, including electronic controls, fuel injection system, carburetor, the ignition system, catalytic converter, or any other system utilized in this vehicle to control emission if it is originally equipped. Also included may be hoses, connectors and other emission-related assemblies.
- Page 81 6. Physical damage, corrosion, or defects caused by fire, explosions or similar causes beyond the control of the Distributor. 7. Failures not caused by a defect in material or workmanship. Use of the vehicle in any type of competitive racing or related events immediately and completely voids this and all other warranties.
- Page 82 Baja INC. P.O. Box 61150 Phoenix, AZ. 85082 Toll Free: 866-250-7155 Service Center Line: 866-401-2252...
Need help?
Do you have a question about the WD250UR and is the answer not in the manual?
Questions and answers