Table of Contents
Advertisement
Advertisement
Table of Contents

Related Manuals for Inspiration Pursuit Exercise Cycle

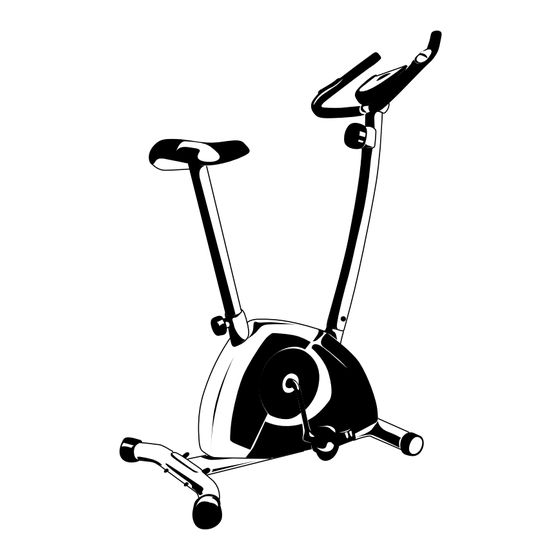
Summary of Contents for Inspiration Pursuit Exercise Cycle
- Page 1 OWNER’S GUIDE Pursuit Exercise Cycle JAN13/2010...
- Page 2 Congratulations on purchasing a fitness equipment from Inspiration Fitness You have chosen a high quality, safe and innovative piece of equipment as your training partner and we are certain it will keep you motivated on the way to achieving your personal fitness goals.
-
Page 3: Table Of Contents
TABLE OF CONTENTS Contents Safety Information Customer Support Assembly Instructions Operational Instructions • Quick start ..............10 • Computer instructions ........10 • Adjusting the resistance ........10 • Adjusting the seat height ......... 11 • Leveling your cycle ..........11 • Battery replacement instructions .... -
Page 4: Safety Information
SAFETY INFORMATION Please read this information manual before • Injuries to health may result from incorrect or excessive training. you begin assembly. Great care has been • Parents and others in charge of children should be aware taken to design these instructions and of their responsibility, because the natural play instinct following them will help you with quicker and the fondness of experimenting of children can... -
Page 5: Customer Support
CUSTOMER SUppORT Care & Maintenance Contact Us • Always place the equipment in a dry environment. ENGLAND York Way, Daventry, Northants, England NN11 4YB • Use a warm, damp cloth to keep the product clean. Tel: (01327) 701800 • No wet cleaning of electrical components. Unplug before Helpdesk Tel: (01327) 701824 any care and maintenance. -
Page 6: Assembly Instructions
ASSEMBLY INSTRUCTIONS If you suspect you may have some parts Before you start missing, please contact us before going 1. Prepare your work area - It is important you assemble the product in a clean and back to your retailer. Refer to the Customer uncluttered space. - Page 7 ASSEMBLY INSTRUCTIONS Step 1. Attach the stabilizers 1. Attach the front and rear stabilizers with the nuts, bolts and washers as shown in the diagram. 2. Be sure to fit the parts in the same order as the diagram. Part No. 16 x 4 Part No.
- Page 8 ASSEMBLY INSTRUCTIONS Step 3. Attach the handlebars 1. Slide the computer wires through the hole on the handlebar fixing bracket as shown. 2. Secure in place using bolt & screws as shown and be sure Part No. 10 x 1 Part No.
- Page 9 ASSEMBLY INSTRUCTIONS Step 5. Attach the seat and seat post 1. Attach the seat to the bracket of the seat post as shown. NOTE: Nuts & washers are located on the underside of the seat. 2. Slide the seat post into the seat post mounting tube and secure in position with the hand wheel.
-
Page 10: Operational Instructions
OpERATIONAL INSTRUCTIONS Quick Start • Simply start pedaling and way you go! • The value of time, distance and calories will start counting upwards. • Adjust the resistance level with the large dial control knob. Computer Instructions USING THE METER DESCRIPTION POWER ON • Pedal movement or push the MODE button. -
Page 11: Adjusting The Seat Height
OpERATIONAL INSTRUCTIONS Adjusting the seat height 1. Unscrew the hand wheel. 2. Adjust the seat up or down to your required height. To line it up correctly, make sure the number and line is visible at the top of the seat post mounting tube. 3. -
Page 12: Maintenance
MAINTENANCE Storage Keep the equipment in a dry place with as little temperature variation as possible. Try to protect from dust and always unplug when not in use. (if applicable) Cleaning Use a warm, damp cloth to wipe the surfaces. Mild detergent may be used if necessary. WARNING: Never remove the protective casing. -
Page 13: Warranty
This warranty does not extend to any product that has been damaged or rendered defective: (a) as a result of accident, misuse, abuse or lack of reasonable care; (b) by the use of parts not manufactured by Inspiration Fitness or sold by Inspiration Fitness;... -
Page 14: Fitness Guide
FITNESS GUIDE Starting And Finishing Your Workout Begin and end each workout with a Warm Up / Down session - a few minutes of stretching to help prevent strains, pulls and cramps. Correct Cycling Form • Sit on the cycle, with your feet on the pedals and inside the pedal straps. • Ensure that the seat height is adjusted correctly - you should be stable and balanced whilst on the saddle. -
Page 15: Suggested Stretches
FITNESS GUIDE Suggested Stretches The correct form for several basic stretches is shown at the right. Move slowly as you stretch—never bounce. 1. Hamstring Stretch Sit with one leg extended. Bring the sole of the opposite foot toward you and rest it against the inner thigh of your extended leg. -
Page 16: Exploded Drawing / Part List
ExpLODED DRAWING... -
Page 17: Part List
pART LIST PART NO. DESCRIPTION YKA00278s2 Main Frame (C) YKA00279s2 Saddle Post YKA00280s2 Front Post YKA00281s2 Handlebar YKF60251q22 Computer YKF20430b5 Round Internal Top Hat End Cap YKF30068b5 Foam Hand Grip (ID25.4MM x 480MM L) YKF10473z1 Round Phillips Head Machine Screw (M5 x 15MM) YKF10474z1 Round Phillips Head Machine Screw (M6 x 8MM) YKF10475b6... - Page 18 NOTES...
- Page 19 NOTES...
Need help?
Do you have a question about the Pursuit Exercise Cycle and is the answer not in the manual?
Questions and answers