PROEL HP-X series User Manual
Hp-x series power amplifiers
Hide thumbs
Also See for HP-X series:
- User manual (47 pages) ,
- Service manual (20 pages) ,
- Service manual (24 pages)
Table of Contents
Advertisement
Available languages
Available languages
Advertisement
Table of Contents

Related Manuals for PROEL HP-X series


Summary of Contents for PROEL HP-X series
- Page 1 USER’S MANUAL MANUALE UTENTE www.proel.com...
-
Page 2: Fcc Compliance Notice
PROEL. PROEL reserves the right to make any aesthetic, functional or design modifi cation to any of its products without any prior notice. -
Page 3: Table Of Contents
INDEX INDICE FCC COMPLIANCE NOTICE ......2 SPECIFICHE TECNICHE ......3 TECHNICAL SPECIFICATIONS . -
Page 4: Setup And Rack Mounting (Fig. 1 / 2)
2 wires Fire-resistant 4 wires Fire-resistant HPC624 HPC644 HPC624FR 17.5 HPC620 HPC640 HPC520 HPC540 HPC610 HPC510 HPC605 this is a short extraction of the wide assortment of cables available from PROEL, please visit our website at www.proelgroup.com FIG. 1 / 2... -
Page 5: Connections
BLACK positive / red / rosso n.c. SPEAKER POWER OUTPUTS POWER OUTPUT - uscite altoparlanti PROEL code - NL4FX BINDING POST speaker output Codice PROEL - NL4FX uscite altoparlanti BINDING POST Neutrik NL4 Speakon Cable Connector Connettore per cavo tipo Speakon Neutrik NL4... -
Page 6: Control Panel (Fig.4)
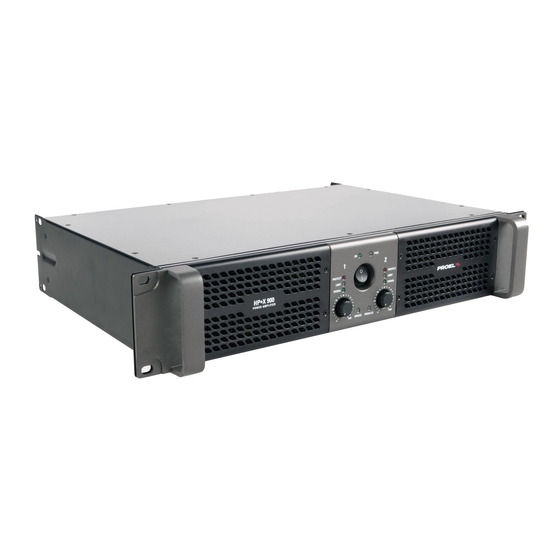
CONTROL PANEL (FIG.4) PANNELLO DI CONTROLLO (FIG.4) REAR PANEL (FIG.5) PANNELLO POSTERIORE (FIG.5) HPX900 HPX1200 HPX2400 HPX2800 FIG. 3 / 4... -
Page 7: Configuration Examples (Fig.6/7/8)
CONFIGURATION EXAMPLES (FIG.6/7/8) ESEMPI CONFIGURAZIONI (FIG.6/7/8) STEREO STANDARD SETUP FIG.6 4 or 8 ohm loudspeakers BRIDGE SETUP FIG.7 8 ohm or 4 ohm * loudspeaker SUB-SYSTEM FULL RANGE SETUP 8 ohm FIG.8 satellite 4 ohm system sub+sat 8 ohm subwoofer FIG. -
Page 8: Safety And Precautions
SAFETY AND PRECAUTIONS • CAUTION: Before using this product read carefully the following safety instructions. Take a look of this manual entirely and preserve it for future reference. When using any electric product, basic precautions should always be taken, including the following: –... -
Page 9: Ce Conformity
This warranty does not extend to damage resulting from improper installation, misuse, neglect or abuse. Proel S.p.A. will verify damage on returned units, and when the unit has been properly used and warranty is still valid, then the unit will be replaced or repaired. Proel S.p.A. is not responsible for any "direct damage"... -
Page 10: General Information
Therefore we suggest to use only rack stands with front and back cover completely removed (Proel KR10AD as example for fi xed installation or Proel CR series for touring use). In this case amplifi ers may be stacked directly on top of each other (no space needed between units), starting from the bottom of the rack. -
Page 11: Rear Panel (Fig.5)
signal is not attenuated in any way, so is fed to the amplifi er channel at the same level at which it arrives on input). 7. Channel 1 SIGNAL indicator Green LED illuminates to indicate the presence of the signal at the amplifi er channel 1 output. 8. - Page 12 20. Channel 2 XLR input Same as above but for channel 2 input. It operates only in STEREO mode. 21. Channel 1 JACK input This is a JACK female connector, which accepts a JACK plug from almost any type of equipment with a balanced or unbalanced line level outputs.
-
Page 13: Advanced Features
This is the amplifi ed output of the signal applied to channel 2 input if the amplifi er is set in STEREO mode or the signal applied to channel 1 input if the amplifi er is set in PARALLEL mode. Always connect a loudspeaker with a minumum impedance of 2 ohm or more. -
Page 14: Avvertenze Per La Sicurezza
– Il prodotto non funziona normalmente esibendo una marcato cambio di prestazioni. – Il prodotto perde sostanze liquide o gassose o ha l’involucro danneggiato. • Non intervenire sul prodotto. Rivolgersi a un centro di assistenza autorizzato Proel. PROBLEMATICHE COMUNI Assenza di alimentazione •... -
Page 15: Conformità Ce
• Controllare periodicamente che le aperture di raffredamento non siano ostruite da accumuli di polvere, provvedere alla rimozione della polvere mediante un pennello o aria compressa. • Gli amplifi catori della Proel sono costruiti in CLASSE I e prevedono sempre il collegamento mediante presa di corrente con terminale di terra di protezione (terzo terminale di terra). -
Page 16: Informazioni Generali
(per esempio i Proel KR10AD per le installazioni fi sse o i Proel serie CR per l'uso in tour): in questo caso gli amplifi catori possono essere impilati direttamente l'uno sopra l'altro senza spazi liberi, partendo dal basso del rack. -
Page 17: Pannello Posteriore
dell'amplifi catore, in modalità BRIDGE non ha alcun effetto. L' attenuazione varia tra completamente chiuso “∞” a completamente aperto “0” o livello nominale (il segnale non è attenuato in nessun modo, viene inviato al canale dell'amplifi catore allo stesso livello con cui arriva all'ingresso). 7. - Page 18 NOTA: Qualora possibile, usare sempre cavi bilanciati. Cavi sbilanciati possono essere ugualmente usati ma potrebbero dare problemi di rumore se molto lunghi. In ogni caso, evitate di usare un cavo bilanciato per un canale e uno sbilanciato per l’altro, o un cavo bilanciato per l'ingresso e uno sbilanciato per un rilancio "LINK", poiché otterreste una sensibile differenza di livello tra un canale e l’altro.
-
Page 19: Funzioni Avanzate
• PIN 2+ PIN 2- non collegati; Questa è l'uscita amplifi cata del segnale applicato all'ingresso del canale 2, se in modalità STEREO, o del segnale applicato all'ingresso del canale 1, se in modalità PARALLEL. Collegare sempre un altoparlante con un'impedenza minima di 2 ohm o superiore. 30. - Page 20 PROEL S.p.A. (World Headquarters - Factory) Via alla Ruenia, 37/43 64027 Sant’Omero (TE) - ITALY Tel. +39 0861 81241 Fax +39 0861 887862 REV. 25/11 CODE 96MAN0048 www.proel.com...
Need help?
Do you have a question about the HP-X series and is the answer not in the manual?
Questions and answers