
Related Manuals for Pentair SandShark


Summary of Contents for Pentair SandShark
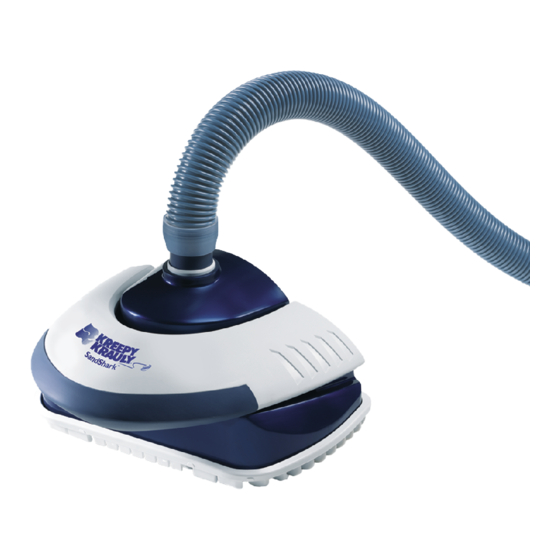
- Page 1 Suction-Side Inground Pool Cleaner Installation and User's Guide IMPORTANT SAFETY INSTRUCTIONS READ AND FOLLOW ALL INSTRUCTIONS SAVE THESE INSTRUCTIONS...
- Page 2 1620 Hawkins Ave., Sanford, NC 27330 • (800) 831-7133 • (919) 566-8000 10951 West Los Angeles Ave., Moorpark, CA 93021 • (800) 831-7133 • (805) 553-5000 293 Wright St., Delavan, WI 53115 • (262) 728-5551 Trademarks and Disclaimers: SandShark ™ , Kreepy Krauly ®...
-
Page 3: Table Of Contents
You will also need to record this serial number on the SandShark Warranty Registration Card. Complete and return the card to activate the SandShark’s limited warranty. The registration card is self-addressed and postage- paid for your convenience. Please thoroughly review the warranty card and additional warranty information in this Installation and Operation Manual so you are familiar with the terms of your warranty coverage. -
Page 4: Important Safety Precautions
Failure to follow safety warnings and instructions can result in severe injury, death, or property damage. Call (800) 831-7133 for additional free copies of these instructions. Consumer Information and Safety The SandShark ™ pool cleaners are designed and manufactured to provide many years of safe and reliable service when installed, operated and maintained according to the information in this manual. -
Page 5: General Installation Information
Pentair Water Pool and Spa, Inc. is not responsible for any pattern removal, abrasions or markings on vinyl liners. ™ SandShark Installation and User’s Guide... -
Page 6: Warranty Information
™ with, age, an imbalance in pool water chemistry, improper installation and other factors. An automatic pool cleaner, such as SandShark will not remove or cause wear on “good” pool plaster. In fact, the opposite is true–pool plaster will eventually cause wear on the cleaner. -
Page 7: Section 1: Pool Preparation
Section 1 Pool Preparation ™ The following general information describes how to set-up your new SandShark automatic pool cleaner. NOTE: Before setting up this product, read and follow all warning notices and instructions starting on page ii. Preparation of your pool ™... -
Page 8: Sandshark ™ Hose Assembly
"Connect to Cleaner" hose length, plus the leader hose, (see Figure 6). Figure 4. Figure 5. Figure 6. Add one hose weight to the third cuff from the Cleaner ™ SandShark Installation and User’s Guide... -
Page 9: Section 2: Installation
Section 2 Installation ™ This section describes how to install your new pool cleaner. The SandShark is designed to work in a wide variety of swimming pools. Both the standard in-skimmer installation and optional vac port installation are covered in these Instructions. If your pool configuration is unlike any of the examples, contact your Pentair Water Pool and Spa dealer for assistance, or call our toll-free Customer Helpline at 1-800-831-7133. -
Page 10: Adjust Flow
2. Fill the cleaner with water and let it sink to the bottom, (see Figure 14). 3. Verify hose connections as shown in Figure 15. Figure 13. SandShark cleaner The hose must equal the longest distance from the suction connection to the furthest point in the pool, plus one hose section length, plus the 12 in. -
Page 11: Optional Installation
(“vac port”) for vacuuming or for an automatic pool cleaner, it must be covered when not in use. Vac Port Installation with Vacuum Regulator in Skimmer ™ If your pool has a dedicated wall fitting “vac port”, (see Figure 16), you can install the SandShark using the Optional Installation. - Page 12 2. Fill the cleaner with water and let it sink to the bottom, (see Figure 24). 3. Verify hose connections as shown in Figure 25. Figure 23. SandShark cleaner The hose must equal the longest distance from the suction connection to the furthest point in the pool, plus one hose section length, plus the 12 in.
-
Page 13: Section 3: Adjustments
SandShark in the pool by moving it about with your pool pole and brush.) SandShark’s hose should be long enough to reach the end of the pool, plus one hose section, plus the 12 in. leader hose. If necessary, remove extra hose sections from the center portion of the hose. -
Page 14: Fine-Tuning Valves And Connections
If the cleaner is still not moving, your pump may not be strong enough to operate the cleaner. Please refer to the “Troubleshooting Section” on page ™ SandShark Installation and User’s Guide... -
Page 15: Return Line Adjustments
SandShark’s coverage. It may cause the SandShark to steer away from the end of ™ the pool where the return line is located, or it may cause the SandShark to remain in one section of the pool. ™... -
Page 16: In-Line Leaf Canisters
(P/N R211084 or R211086), see Figure 31. A leaf canister will provide more debris-loading capacity and also provides a water by-pass when the canister is full. It is very important that the pump will not starve for water! Figure 31. ™ SandShark Installation and User’s Guide... -
Page 17: Section 4: Maintenance
Section 4 Maintenance ™ This section describes the service and maintenance of your SandShark cleaner. WARNING — Hazardous suction. Suction through the cleaner can entrap bathers, causing severe injuries or ™ drowning. Do not operate the SandShark cleaner while people are using the swimming pool. Do ™... - Page 18 Use a pair of Pliers to pull the Flex Snaps from the Bumper Figure 35. Reassembly To reassemble the SandShark ™ , reverse the steps above. NOTE: The notch on the center disk of the Figure 41.
-
Page 19: Section 5: Troubleshooting
(see above “To install the eyeball diverter”). Check the SandShark’s hose to be sure that it has not become bent or kinked. Do not coil the hose, as it will retain the coiled shape and reduce the cleaning coverage. -
Page 20: Section 6: Replacement Parts
Section 6 Replacement Parts ™ SandShark 7900 Model ™ SandShark Installation and User’s Guide... - Page 21 ™ Replacement Parts List for the SandShark 7900 Model Item Description Qty. Steering Kit (Incl. Item Nº's 2, 3, 4 & 22) GW7910 Swivel Housing Swivel Swivel Sprocket Clutch Clip Clutch Kit (Incl. Item Nº's 5, 8 & 21) GW7503...
- Page 22 NOTES ™ SandShark Installation and User’s Guide...
- Page 23 SandShark ™...
- Page 24 P/N 39503-6300 Rev. A 10/27/08...
Need help?
Do you have a question about the SandShark and is the answer not in the manual?
Questions and answers