Table of Contents
Advertisement
Quick Links
Advertisement
Table of Contents

Related Manuals for BenQ DC P1410


Summary of Contents for BenQ DC P1410
- Page 1 DC P1410 Digital Camera User Manual Welcome...
- Page 2 BenQ ecoFACTS BenQ has been dedicated to the design and development of greener product as part of its aspiration to realize the ideal of the "Bringing Enjoyment 'N Quality to Life" corporate vision with the ultimate goal to achieve a low- carbon society.
- Page 3 Further, BenQ Corporation reserves the right to revise this publication and to make changes from time to time in the contents hereof without obligation of this company to notify any person of such revision or changes.
-
Page 4: Fcc Statement
CE Regulatory Notice Name: BenQ Europe B.V. Address: Ekkersrijt 4130, 5692 DC Son, the Netherlands TEL/Fax: +31 (499) 750 500 /+31 (499) 750-599 is herewith confirmed to comply with the requirements set out in the Council Directives on the Approximation of the Laws of the Member States relating Electromagnetic Compatibility (2004/108/EC);... - Page 5 Safety warning and notice Before operating the camera, please make sure that you read and fully understand the content in this section. If you ignore and violate all safety warning notices indicated in this section, the camera warranty may be void. Meanwhile, not only the camera but also you and all other people and things around you may be severely damaged, injured, or even placed in danger of death.
-
Page 6: Operating Environment
• If the lens cannot retract into the camera, please replace the batteries first (usually this is because of drained batteries). Then the lens should retract automatically. If the lens still cannot retract, please contact your dealer. • Under no circumstances should you push the lens back manually as this may damage the camera. •... - Page 7 Do not hold the camera by excessive To avoid accidental falling, please attach force. Plus, be sure to protect the the hand strap to the camera and always camera from strong impacts. hold the camera by keeping the hand strap around your wrist. If the battery suddenly depleted and When the camera is not in use, always caused the lens fail to retract, please...
-
Page 8: Table Of Contents
CONTENTS INTRODUCTION 27 Protecting Images Overview 28 Removing Red-eye Package Contents 28 Erasing Images 29 DPOF Settings 10 GETTING TO KNOW YOUR CAMERA 30 MENU OPTIONS 10 Front View 30 Capture Menu 10 Rear View 33 Video Menu 11 LCD Monitor Display 34 Playback Menu 36 Setup Menu 13 GETTING STARTED... -
Page 9: Introduction
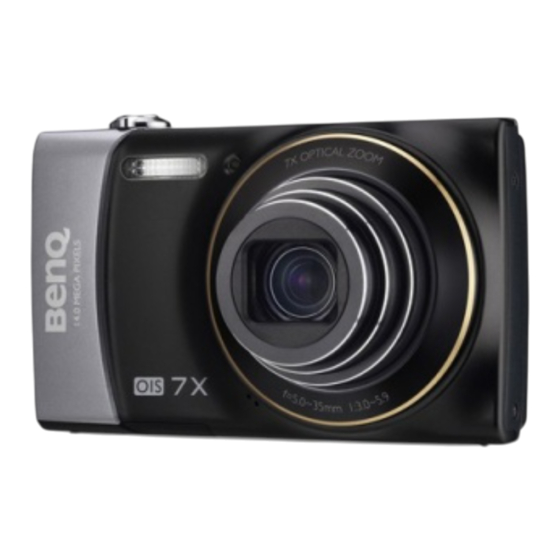
INTRODUCTION Overview Congratulations on your purchase of the new digital camera. Capturing high-quality digital images is fast and easy with this state-of-the-art smart camera. Equipped with a 14.0-megapixel CCD, this camera is capable of capturing images with a resolution of up to 4288 x 3216 pixels. Package Contents Carefully unpack your camera and ensure that you have the following items: Common Product Components:... -
Page 10: Getting To Know Your Camera
GETTING TO KNOW YOUR CAMERA Front View 1. Zoom lever 2. Flash 3. ON/OFF Power button 4. Status LED 5. Self-timer LED 6. Microphone 7. Lens Rear View A. LCD monitor B. USB and AV OUT terminal C. Strap holder D. -
Page 11: Lcd Monitor Display
LCD Monitor Display Capture mode Flash mode 00214 Auto Flash On Flash Off Red-eye Slow Sync Pre-flash Focus setting Auto AF Tracking Face Detect Macro Super Macro Infinity 18. Capture mode icon Self-timer & Self-portrait icon Single Continuous Self-portrait AEB (Auto Exposure Bracketing) 2 sec. - Page 12 Video mode 1. Flash off 2. Focus setting 3. Self-timer icon 4. Audio off 5. Zoom status 6. Storage media 7. Video resolution 8. Video quality 9. Elapsed time / Available recording time 10. Main focus area 11. Date and time 12.
-
Page 13: Getting Started
GETTING STARTED Preparation 1. Attach the camera strap. 2. Open the battery/memory card cover. 3. Insert the supplied battery with correct orientation as shown. 4. Insert an SD/SDHC memory card (Optional). The camera has 32MB internal memory(23MB available for image storage), but you can load an SD/SDHC memory card to expand the camera’s memory capacity. -
Page 14: Turn The Camera On By Pressing Playback Button
Turn the Camera On by Pressing Playback Button 1. Press the 7 button for about 3 seconds to turn the camera on and begin playback. Lens do not zooms out/in in this playback preview. The camera will turn off automatically if no operations are performed for the length of time selected in the Auto off menu. -
Page 15: Initial Settings
Initial Settings The language & date/time needs to be set if and when: The camera is turned on for the first time. The camera is turned on after leaving the camera without the battery for an extended period of time. 1. -
Page 16: Choosing The Language
Choosing the Language Specify in which language menus and messages are to be displayed on the LCD monitor. 1. Press the MODE button, and set the camera mode to [ ] or [ ]; or press the 7 button. 2. Press the MENU button. 3. -
Page 17: Capture Mode
CAPTURE MODE Capturing Images Your camera is equipped with a 3.0” full color TFT LCD monitor to help you compose images, playback recorded images/video clips or adjust menu settings. 1. Press the ON/OFF button to turn the power on. 2. Press the MODE button, and set the camera mode to [ 3. -
Page 18: Setting The Scene Mode
Setting the Scene Mode By simply selecting one of the available scene modes, you can capture the image with the most appropriate settings. 1. Press the MODE button, and set the camera mode to [ ], and press the SET button. - Page 19 Scene mode Description Select this mode when you want the camera to reduce obvious De-blemish blemishes and big spots on faces. Select this mode when you want the camera to reduce artifacts on Skin Soften faces. Select this mode when you want to capture an image that makes a Portrait Man man stand out against a blurred background.
-
Page 20: Taking Images With Intelligent Scene Mode
Taking Images with Intelligent Scene mode In this Intelligent Scene mode, the camera can sense the ambient conditions and automatically select the ideal shooting mode. 1. Press the MODE button, and set the camera mode to [ ], and press the SET button. -
Page 21: Taking And Combining Panoramic Pictures
Taking and Combining Panoramic Pictures Pictures are manually shot, and the camera automatically combines pictures in the camera. 1. Press the button, and set the camera mode to [ ], and press the MODE button. 2. Select [Panorama PanCapture] with the buttons, and press the button. -
Page 22: Find Blur Function
Find Blur Function With the camera’s new “Find Blur” function, this camera finds the blurry photo when capture under Continuous. 1. Press the MODE button, and set the camera mode to [ 2. Press the MENU button, and select [Find Blur] icon with the buttons. -
Page 23: Self-Portrait Function
Self-portrait Function Use this function to take pictures of yourself or include yourself in pictures. 1. Press the button, and set the camera mode to [ MODE 2. Press the button, and select [ ] icon with the buttons. Press the button. -
Page 24: Video Mode
VIDEO MODE Recording Video Clips This mode allows you to record video clips at a resolution of 320 x 240 / 640 x 480 / 720p pixels. 1. Press the MODE button, and set the camera mode to [ 2. Compose the image. 3. -
Page 25: Playback Mode
PLAYBACK MODE Playing Back Still Images You can play back the still images on the LCD monitor. 1. Press the 7 button. The last image appears on the screen. 2. The images can be displayed in forward or reverse sequence with the buttons. -
Page 26: Attaching Voice Memos
Attaching Voice Memos A maximum of 30 seconds of audio can be recorded as a memo for captured still images. 1. Press the 7 button. The last image appears on the screen. 2. Select the image to which you want to attach the voice memo with the buttons. -
Page 27: Protecting Images
Protecting Images Set the data to read-only to prevent images from being erased by mistake. 1. Press the 7 button. Setup The last image appears on the screen. 2. Select the image that you want to protect with the Date/Time buttons. -
Page 28: Removing Red-Eye
Removing Red-eye You can use this function to remove the red-eye effect after an image is taken. 1. Press the 7 button. The last image appears on the screen. 2. Select the image that you want to edit with the buttons. -
Page 29: Dpof Settings
DPOF Settings DPOF is the abbreviation for Digital Print Order Format, which allows you to embed printing information on your memory card. You can select the images to be printed and how many prints to make with the DPOF menu in the camera and insert the memory card to the card compatible printer. -
Page 30: Menu Options
MENU OPTIONS Capture Menu This menu is for the basic settings to be used when capturing still images. AUTO MENU MENU 1. Press the ON/OFF button to turn the power on. 2. Press the SET button, and set the camera mode to any scene mode. 3. - Page 31 Color This sets the color of the image that will be captured. * Standard / Vivid / Color Accent (Red) / Color Accent (Green) / Color Accent (Blue) / Sepia / B&W / Red / Green / Blue Saturation This sets the saturation of the image that will be captured. * High / Standard / Low Metering This sets the metering method for calculating the exposure.
- Page 32 * Burst 30fps: Permits continuous capture of up to 30 images in the resolution 640 x480 within 1 second. * Interval capture: Captures continuous images at a preselected time interval. Quick Shot If this function is set to “On”, the camera takes a quick shot without focusing. * On / Off Digi.
-
Page 33: Video Menu
Video Menu This menu is for the basic settings to be used when recording video clips. MENU MENU 1. Press the MODE button, and set the camera mode to [ 2. Press the MENU button to enter the [Video] menu. 3. -
Page 34: Playback Menu
Playback Menu In the [7] mode, choose which settings are to be used for playback. MENU MENU 1. Press the 7 button. 2. Press the MENU button. 3. Select the desired option item with the buttons, and press the SET button to enter its respective menu. - Page 35 Qual. Change Changes the quality (compression) of a recorded image. Compress images down to half of their size or less, overwrite old size images with newly compressed images. It is only possible to reduce the image quality/size, never to increase it. Copy to Card Allows you to copy your files from the camera’s internal memory to an SD/SDHC memory card.
-
Page 36: Setup Menu
Setup Menu Set your camera’s operating environment. MENU MENU 1. Press the MODE button, and set the camera mode to [ ] or [ ]; or press the 7 button. 2. Press the MENU button. 3. Select the [Setup] at the end of the Menu with the buttons, and press the SET button. - Page 37 Video Out This sets your camera to match the system of the equipment that you are going to connect to the camera. * NTSC / PAL Fr. No. Reset This creates a new folder. The captured images are recorded to the newly created folder from number 0001.
-
Page 38: Transferring Files To Your Computer
TRANSFERRING FILES TO YOUR COMPUTER System Requirement Windows Macintosh Pentium III 1GHz or equivalent PowerPC G3/G4/G5 Windows 7/XP/Vista OS 10.3.9 or later 512MB RAM 256MB RAM (512 MB recommended) 150MB available hard disk space 128MB available hard disk space CD-ROM drive CD-ROM drive Available USB port Available USB port... -
Page 39: Editing Software Installation
EDITING SOFTWARE INSTALLATION Softwares are included on the CD-ROM: ArcSoft MediaImpression™ - Easily, creatively, and productively manage your multimedia files. Create your own movies or photo slide shows, and share your photo, video and music files easily through simple email attachments or popular photo printing and video sharing websites. -
Page 40: Specifications
SPECIFICATIONS Item Description Sensor Panasonic 14 Mega Pixels, 1/2.33 inch CCD Optical: 7X Wide Angle Zoom Digital: Up to 6X(Preview) / Up to 4X(Playback) f = 5 ( W ) ~ 35 ( T ) mm Lens F= 3 (W) ~ 5.9 (T) (f = 28~196mm, 35mm equivalent) Normal: W=60cm ~ Infinity ;... -
Page 41: Appendix
APPENDIX Possible Number of Shots Possible number of shots (still image) The table shows the approximate shots that you can capture at each setting based on the capacity of the internal memory and the SD/SDHC memory card. SD/SDHC memory card capacity Internal Size Quality... -
Page 42: Connecting To A Pictbridge Compliant Printer
Connecting to a PictBridge Compliant Printer If a printer that supports PictBridge is available, images can be printed by connecting the digital still camera directly to the PictBridge-compatible printer without using a computer. Connecting the camera to the printer 1. Connect one end of the USB cable to your camera. - Page 43 3. If you select [Single] in the previous step, the figure shown on the right hand side will appear. Select the image that you want to print with the buttons. Select the print number (up to 99) with the buttons. After selecting the desired image and printing number, press the button to confirm.
-
Page 44: Troubleshooting And Service Information
Troubleshooting and service information If your camera cannot operate normally, see the frequently encountered problems and solutions listed below. If the problem persists, contact your nearest service center or technical support. Problem Cause Solution There is no battery or the battery is not inserted Insert the battery correctly. -
Page 45: Technical Support
PictBridge-compliant is powered off. and then select Printer. printers. Technical support For technical assistance, free driver updates, product information, and news releases, visit the following web site: http://www.BenQ.com EN-45...
Need help?
Do you have a question about the DC P1410 and is the answer not in the manual?
Questions and answers