
Related Manuals for AirTap ATI50

Summary of Contents for AirTap ATI50
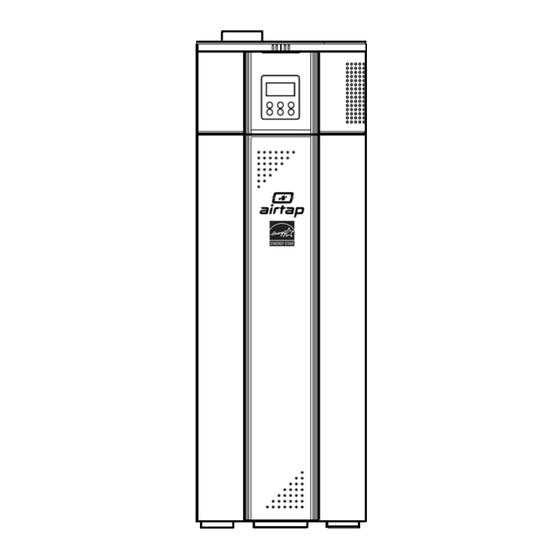
- Page 1 Owner’s Manual & Installation Instructions AirTap™ Hybrid Water Heater ATI50 & ATI66 AGATI0811 - RD...
-
Page 3: Table Of Contents
TABLE OF CONTENT Safety Information………………….….4, 5 Installation Instructions……………..6-11 Operating Instructions……………….12-17 Maintenance……………………………..18-21 Consumer Support…………………….22-24 Notes…………………………………………25 Model # Serial # Keep the model and serial number here. You can find them on the front side of your water heater. Save this Manual with your Model Number and Serial Number for our records. -
Page 4: Safety Information
SAFETY INFORMATION WARNING! For your safety, the information in this manual must be followed to minimize the risk of fire or explosion, electric shock, or to prevent property damage, personal injury, or loss of life. Be sure to read and understand the entire Owner’ s Manual before attempting to install or operate this water heater. It may save you time and cost. - Page 5 SAFETY INFORMATION WARNING! Gasoline, as well as other flammable materials and liquids (adhesives, solvents, etc.), and the vapors they produce, are extremely dangerous. DO NOT handle, use or store gasoline or other flammable or combustible materials anywhere near or in the vicinity of a water heater. Be sure to read and follow the warning label pictured below and other labels on the water heater, as well as the warnings printed in this manual.
-
Page 6: Installation Instructions
INSTALLATION INSTRUCTIONS A. LOCATION REQUIREMENTS CAUTION: This unit is to be installed indoors only. Install unit in a clean, unobstructed, flat and dry area. Ensure hot water lines are insulated to minimize energy waste. Ensure that the unit and water lines are protected from corrosive conditions and freezing temperatures. WARNING: This unit should not be located in an area where water leakage can damage adjacent area or lower floors of the structure. - Page 7 INSTALLATION INSTRUCTIONS B. DIMENSION, SPACE REQUIREMENT AND VENTILATION 2’ 2’ 2’ ATI50 ATI66 Height (H) 58.3” 69.3” Diameter (D) 25.6” 25.6” Weight (lbs) Fig. 1 Fig. 2 Please check dimensions for the model you intend to install and ensure that you have at least 2 feet of clearance around the unit as well as on top of the unit.
- Page 8 INSTALLATION INSTRUCTIONS D. ELECTRICAL REQUIREMENTS (CONT.) A separate branch circuit with copper conductors, overcurrent protective device and suitable disconnecting means must be provided by a qualified electrician. All wiring must conform to local codes or latest edition of National Electrical Code ANSI/NFPA 70. The branch circuit wiring should include either: 1.
- Page 9 INSTALLATION INSTRUCTIONS I. CONDENSATE DRAIN TUBES The unit has two condensate drains – primary and overflow. The overflow drain is pre-attached with a hose. A flexible hose for the primary drain is included with the unit. Attach one end of the hose to the primary condensate drain and the other end to a drain on the floor.
- Page 10 INSTALLATION INSTRUCTIONS J. THERMAL EXPANSION WARNING: The water heater should not be installed in a space where liquids which give off flammable vapors are to be used or stored. Determine if a check valve exists in the inlet water line. It may have been installed in the cold water line as a separate backflow preventer, or it may be part of a pressure-reducing valve, water meter or water softener.
-
Page 11: Installation Instructions
INSTALLATION INSTRUCTIONS L. WARRANTY DISCLAIMER The manufacturer’s warranty does not cover any damage or defect caused by installation, attachment or use of any type of energy-saving or other unapproved devices (other than those authorized by the manufacturer) into, onto or in conjunction with the water heater. -
Page 12: Operating Instructions
Safety Controls The AirTap™ Hybrid Water Heater is equipped with a temperature-limiting control (TCO) that is located above the primary heating element in contact with the tank surface. If for any reason the water temperature becomes excessively high, the temperature-limiting control (TCO) breaks the power circuit to the heating element. - Page 13 OPERATING INSTRUCTIONS A. GETTING STARTED How do I turn on the unit? IMPORTANT: Before attempting to turn on the unit, please ensure the following: 1. Unit is connected to a dedicated 240V/60Hz single phase power outlet rated for at least 30 amperes. Confirm that this power outlet is not being shared with another appliance.
- Page 14 OPERATING INSTRUCTIONS C. SETTING WATER TEMPERATURE What water temperature setting is right for me? How can I change the temperature setting? The maximum temperature setting on the unit is 135 degrees. Recommended water temperature setting range is 120-125 degrees – this is both to maximize efficiency and contain hot water scald risk. AirGenerate™...
- Page 15 OPERATING INSTRUCTIONS E. COLD CLIMATE OPERATION Does the heat pump work efficiently in cold climate? Do I need to switch modes based on seasonal changes? The heat pump is designed to operate even in sub freezing temperatures. Heat pump efficiency and hot recovery rate are affected by ambient temperature. If you are running the unit in Econ mode and find that the unit is not able to cope with hot water demand during winters switch to Auto mode during winters and revert to Econ mode during summers.
- Page 16 OPERATING INSTRUCTIONS Fig. 5 F. CONTROL PANEL 1. DISPLAY 2. ON / OFF MODE: Use this button to choose any of the three operating modes in the unit ECON (Heat pump active) AUTO (Heat pump and Electric element active) HEATER (Electric element active) CLOCK: Press the CLOCK button and use ARROW PADS to set the time in 24 hour HH:MM format.
- Page 17 OPERATING INSTRUCTIONS Fig. 6 G. DISPLAY PANEL 1. UNIT OFF INDICATOR 2. ACTIVE MODE INDICATOR HEAT PUMP STATUS INDICATOR HTG: Heat Pump On DEF: Defrost Cycle On WARM: Heat Pump Idle HEAT PUMP TIME INDICATOR: P1, P2, P3: Active Timer Period WATER TEMPERATURE INDICATORS: Set Temp: Water Temperature Setting Water: Actual Water Temperature (Lower Sensor) Press ‘UP’...
-
Page 18: Maintenance
MAINTENANCE WARNING: RISK OF ELECTRIC SHOCK MAKE SURE THE UNIT IS COMPLETELY SHUT OFF AND UNPLUGGED FROM POWER SOURCE. A. T&P / RELIEF VALVE The relief valve is an important safety feature and should be checked at least once a year. You may lift the lever handle to release water from the unit and ensure that the valve is operating normally. - Page 19 MAINTENANCE F. EXTENDED SHUTDOWN If you will not be using the unit for an extended period of time, shut off the power and water supply to the unit. It is recommended that the unit and water piping be drained completely. Drainage is necessary if the unit is exposed to freezing temperatures.
- Page 20 MAINTENANCE I. ACCESS TO CRITICAL PARTS Please follow the steps below to gain access to heat pump components (including filter), anode rod, temperature limiting reset button and electric heating elements (primary and back-up). Fig. 7 1. Slide the control panel upwards to expose control panel docking connector Remove connector and slide out the control panel completely Unfasten decorative panel screw Unfasten metal bracket...
-
Page 21: Maintenance
MAINTENANCE J. EXPLODED VIEW Fig. 8 Supporting Frame Heat Pump Cover Control Panel Overflow Drain Electric Box Condensate Drain Compressor Ventilation Fan Evaporator Host Chassis Anode Port Chassis Base Front Panel Hot Water Outlet High Temp Limit T&P Relief Valve Protective Cover Tank Cover Primary Electric Element... -
Page 22: Consumer Support
CONSUMER SUPPORT A. WARRANTY AirTap™ Hybrid Water Heater purchased in the United States and Canada comes with a limited lifetime warranty. All warranty services must be serviced by our Certified Servicer or approved and authorized by AirGenerate™ Support Department. Any servicing done by other than our Certified Serviers or approved by AirGenerate™ Support Department will VOID all warranty. - Page 23 EXCLUSION MAY NOT APPLY TO YOU. The limited warranty on Airtap™ Hybrid Water Heater begins on the date of the packing slip or invoice. The limited warranty will be VOID if the original unit is not registered with the manufacturer with the correct serial number within 30 days of the purchase of the unit. Unit(s) can be registered at www.airgenerate.com or by phone.
- Page 24 CONSUMER SUPPORT B. CUSTOMER SUPPORT Please contact AirGenerate™ Support Department for any technical assistance or questions. AirGenerate™ 8500 Commerce Park Dr. Suite 105 Houston, TX 77036 Phone: 1(713) 574-6729 Fax: 1(281) 520-3987 Email: support@airgenerate.com, for support or to query about a new purchase. www.airgenerate.com...
-
Page 25: Notes
NOTES...
Need help?
Do you have a question about the ATI50 and is the answer not in the manual?
Questions and answers