
Related Manuals for Guardian 4721


Summary of Contents for Guardian 4721
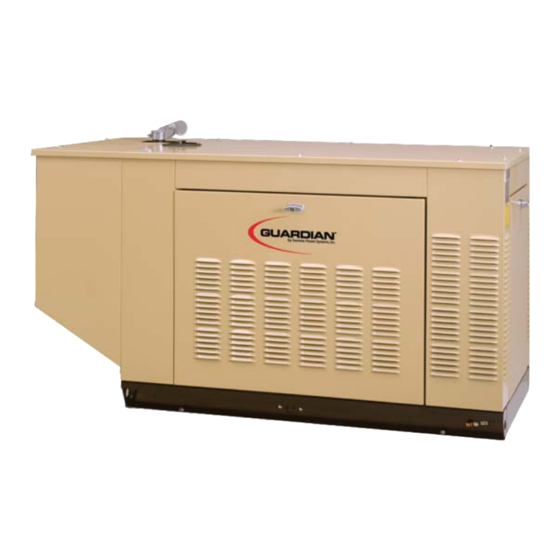
- Page 1 LIQUID-COOLED DIAGNOSTIC REPAIR MANUAL www.guardiangenerators.com 1.5L HOME STANDBY GENERATORS Models: 4721, 4722, 4723, 4724, 4725, 4726...
- Page 2 Important Safety Notice Proper service and repair is important to the safe, economical and reliable operation of all standby electric power systems. The troubleshooting, testing and servicing procedures recom- mended by Generac and described in this manual are effective methods of performing such operations.
-
Page 3: Electrical Hazards
GENERAL HAZARDS • For safety reasons, Generac recommends that this equipment be installed, serviced and repaired by an authorized service dealer or other competent, qualified electrician or installation technician who is familiar with applicable codes, standards and regulations. The operator also must comply with all such codes, standards and regulations. -
Page 4: Fire Hazards
• The National Electrical Code (NEC), Article 250 requires the frame and external electrically conductive parts of the generator to be connected to an approved earth ground and/or grounding rods. This grounding will help prevent dangerous electrical shock that might be caused by a ground fault condi- tion in the generator set or by static electricity. -
Page 5: Part
TABLE OF CONTENTS PART TITLE PAGE SPECIFICATIONS General Information DIAGNOSTIC Prepackaged Liquid Cooled AC Generators V-Type Prepackaged Transfer Switches REPAIR MANUAL DC Control- Units with Liquid-Cooled Engine Operational Tests and Adjustments Electrical Data 1.5 LITER PREPACKAGED HOME STANDBY GENERATORS Page 1... -
Page 6: Specifications
SPECIFICATIONS GENERATOR SPECIFICATIONS sumption obtained may vary depending on such variables as applied load, ambient temperature, Phase ............Single engine conditions and other environmental factors. Rated Max. Cont. AC Power Output (kW) ..15* Fuel pressure for a natural gas set up should be five Rated Voltage (volts) ......... -
Page 7: Table Of Contents
TABLE OF CONTENTS PART TITLE PAGE Generator Identification PART 1 Prepackaged Installation Basics Preparation Before Use GENERAL 1.4 Testing, Cleaning and Drying Engine-Generator Protective Devices INFORMATION Operating Instructions Automatic Operating Parameters 1.5 LITER PREPACKAGED HOME STANDBY GENERATORS Page 3... -
Page 8: Generator Identification
SECTION 1.1 PART 1 GENERAL INFORMATION GENERATOR IDENTIFICATION STARTER DATA PLATE CONTROL PANEL HOURMETER 15 AMP FUSE FAULT INDICATOR FUSE FAULT HOURMETER 15-A INDICATOR CIRCUIT BREAKER AUTO EXERCISE TIME MANUAL SET EXERCISE SWITCH AUTO-OFF-MANUAL SWITCH ALTERNATOR DISTRIBUTOR MUFFLER CARBURETOR RADIATOR ENGINE FUEL REGULATOR BATTERY... -
Page 9: Prepackaged
SECTION 1.1 PART 1 GENERAL INFORMATION GENERATOR IDENTIFICATION INTRODUCTION UNITS WITH LIQUID COOLED ENGINE This Diagnostic Repair Manual has been prepared A typical prepackaged generator with liquid cooled especially for the purpose of familiarizing service per- engine is shown on Page 4 at front of this manual. sonnel with the testing, troubleshooting and repair of A DATA PLATE, affixed to the unit, contains impor- prepackaged home standby generator systems. -
Page 10: Prepackaged Installation Basics
SECTION 1.2 PART 1 GENERAL INFORMATION PREPACKAGED INSTALLATION BASICS INTRODUCTION GROUNDING THE GENERATOR Information in this section is provided so that the ser- The National Electric Code requires that the frame vice technician will have a basic knowledge of instal- and external electrically conductive parts of the gen- lation requirements for prepackaged home standby erator be property connected to an approved earth... -
Page 11: Prepackaged
SECTION 1.2 PART 1 GENERAL INFORMATION PREPACKAGED INSTALLATION BASICS 11 inches water column for LP gas (6.38 ounces per BLE FUEL GAS CODES. DO NOT USE square inch), and 5 inches water column for natural FLAME OR ANY SOURCE OF HEAT TO TEST gas (2.89 ounces per square inch). -
Page 12: Home Standby
SECTION 1.2 PART 1 GENERAL INFORMATION PREPACKAGED INSTALLATION BASICS THE TRANSFER SWITCH minals: (a) utility 1, (b) utility 2, (c) load 1, (d) load 2, (e) 23, and (f) 194. Prepackaged transfer switches A transfer switch is required by electrical code, to pre- house an identically marked terminal board. -
Page 13: Preparation Before Use
SECTION 1.3 PART 1 GENERAL INFORMATION PREPARATION BEFORE USE GENERAL ENGINE OIL RECOMMENDATIONS The installer must ensure that the home standby gen- For prepackaged generators with liquid cooled erator has been properly installed. The system must engine, use a high quality detergent oil that meets or be inspected carefully following installation. -
Page 14: Testing, Cleaning And Drying
SECTION 1.4 PART 1 GENERAL INFORMATION TESTING, CLEANING AND DRYING VISUAL INSPECTION AND LEADS WHILE THE GENERATOR IS SHUT DOWN OR WHEN THE POWER SUP- When it becomes necessary to test or troubleshoot a PLY TO SUCH LEADS AND TERMINALS IS generator, it is a good practice to complete a thor- TURNED OFF. -
Page 15: Liquid-Cooled
SECTION 1.4 PART 1 GENERAL INFORMATION TESTING, CLEANING AND DRYING MEGGERS: TEST ALL WINDINGS TO GROUND: 1.Disconnect and isolate Stator Leads 11, 22, 33, 44, The normal resistance of generator winding insulation 2 and 6. is on the order of millions of ohms. This high resis- tance can be measured with a device called a "meg- 2.Connect terminal ends of all stator leads together. - Page 16 SECTION 1.4 PART 1 GENERAL INFORMATION TESTING, CLEANING AND DRYING If the breakdown lamp turned on during any one (1) second test, the stator should be cleaned and dried. RED TEST LEAD After cleaning and drying, repeat the test. If the break- down lamp turns on during the second test, replace the stator assembly.
-
Page 17: Engine-Generator Protective Devices
SECTION 1.5 PART 1 GENERAL INFORMATION ENGINE-GENERATOR PROTECTIVE DEVICES LOW COOLANT HIGH COOLANT LEVEL SWITCH TEMPERATURE SWITCH OVERCRANK AND OVERSPEED SHUTDOWN ARE CONTROLLED BY THE CIRCUIT BOARD LOW OIL PRESSURE SWITCH Figure 1. Protective Devices on Liquid Cooled Engine GENERAL against such operating faults as (a) low engine oil pressure, (b) high temperature, (c) overspeed, and (d) Standby electric power generators will often run unat-... - Page 18 SECTION 1.5 PART 1 GENERAL INFORMATION ENGINE-GENERATOR PROTECTIVE DEVICES HIGH COOLANT TEMPERATURE SHUTDOWN: OVERCRANK SHUTDOWN: The engine is equipped with a coolant temperature Automatic engine cranking and startup normally switch. Should engine coolant temperature exceed occurs when the control board senses that utility approximately 284°...
-
Page 19: Operating Instructions
SECTION 1.6 PART 1 GENERAL INFORMATION OPERATING INSTRUCTIONS CONTROL PANEL FAULT INDICATOR LAMP: The fault indicator lamp will turn on in the event that any one or more of the following engine fault condi- GENERAL: tions should occur: (a) low oil pressure, (b) high See Figure 1 (Page 16). -
Page 20: Prepackaged
SECTION 1.6 PART 1 GENERAL INFORMATION OPERATING INSTRUCTIONS as follows: 3.Set the generator’s AUTO-OFF-MANUAL switch to OFF. Wait for the engine to come to a complete 1.On the generator panel, set the AUTO-OFF-MANU- stop. AL switch to OFF. 4.Turn OFF the “Utility” power supply to the transfer 2.On the generator, set the main line circuit breaker switch using whatever means provided (such as a to it’s OFF or "Open"... -
Page 21: Automatic Operating Parameters
SECTION 1.7 PART 1 GENERAL INFORMATION AUTOMATIC OPERATING PARAMETERS INTRODUCTION PHASE 4 - ENGINE STARTUP AND RUNNING: The control board senses that the engine is running When the prepackaged generator is installed in con- by receiving a voltage/frequency signal from the gen- junction with a prepackaged transfer switch, either erator stator windings. - Page 22 SECTION 1.7 PART 1 GENERAL INFORMATION AUTOMATIC OPERATING PARAMETERS AUTOMATIC OPERATING SEQUENCES CHART SEQ. CONDITION ACTION SENSOR, TIMER OR OTHER “Utility” source voltage is No action Voltage Dropout Sensor on control available. circuit board. “Utility” voltage dropout below A 6-second timer on control Voltage Dropout Sensor and 6 60% of rated voltage occurs.
-
Page 23: Liquid-Cooled
TABLE OF CONTENTS PART TITLE PAGE PART 2 Description and Major Components AC Output Operational Analysis PREPACKAGED AC Output Troubleshooting Flow Charts 26 Problem 1 - Generator Produces ZeroVoltage or LIQUID-COOLED ResidualVoltage Problem 2 - Generator Produces LowVoltage at No-Load AC GENERATORS Problem 3 - Generator Produces High Voltage at No-Load... -
Page 24: Description And Major Components
SECTION 2.1 PREPACKAGED LIQUID PART 2 COOLED AC GENERATORS DESCRIPTION AND MAJOR COMPONENTS INTRODUCTION The combination of slip rings and brushes allow rotor excitation current to be transmitted from stationary This section covers the major components of the AC components into the rotating rotor windings. The posi- tive (+) slip ring is the one nearest the rotor bearing. -
Page 25: Ac Generators
SECTION 2.1 PREPACKAGED LIQUID PART 2 COOLED AC GENERATORS DESCRIPTION AND MAJOR COMPONENTS ROTOR FAN AND RING GEAR ASSEMBLY FLEXIBLE DISK To Engine Crankshaft BRUSH HOLDERS AND BRUSHES To Blower Housing BLOWER HOUSING STATOR REAR BEARING CARRIER REAR BEARING CARRIER PLATE Figure 1. -
Page 26: Generators
SECTION 2.1 PREPACKAGED LIQUID PART 2 COOLED AC GENERATORS DESCRIPTION AND MAJOR COMPONENTS The thermal protector is self-resetting. That is, when internal stator temperatures drop to a safe value, its contacts will re-close and normal DPE output to the regulator will resume. Wire No. -
Page 27: Prepackaged
SECTION 2.1 PREPACKAGED LIQUID PART 2 COOLED AC GENERATORS DESCRIPTION AND MAJOR COMPONENTS • An increase in excitation current flow through the rotor windings will increase the concentration of “magnetic flux” lines around the rotor which, in turn, will increase the AC voltage induced into the stator AC power windings. -
Page 28: Prepackaged
SECTION 2.2 PREPACKAGED LIQUID PART 2 COOLED AC GENERATORS OPERATIONAL ANALYSIS ROTOR RESIDUAL MAGNETISM Field boost voltage is reduced from that of battery voltage by the resistor action and, when read with a The generator revolving field (rotor) may be consid- DC voltmeter, will be approximately 9 or 10 volts DC. -
Page 29: Prepackaged
SECTION 2.2 PREPACKAGED LIQUID PART 2 COOLED AC GENERATORS OPERATIONAL ANALYSIS OPERATION The greater the current flow through the rotor wind- ings, the more concentrated the lines of flux around the rotor become. STARTUP: The more concentrated the lines of flux around the When the engine is started, residual plus field boost rotor that cut across the stationary stator windings, magnetism from the rotor induces a voltage into the... -
Page 30: Problem 1 - Generator Produces Zerovoltage Or Residualvoltage
SECTION 2.3 PREPACKAGED LIQUID PART 2 COOLED AC GENERATORS TROUBLESHOOTING FLOW CHARTS Use the “Flow Charts” in conjunction with the detailed The first step in using the flow charts is to correctly instructions in Section 2.4. Test numbers used in the identify the problem. -
Page 31: Prepackaged
SECTION 2.3 PREPACKAGED LIQUID PART 2 COOLED AC GENERATORS TROUBLESHOOTING FLOW CHARTS Problem 1 - Generator Produces Zero Voltage or Residual Voltage (Continued) TEST 5 - PERFORM FIXED EXCITATION / ROTOR AMP DRAW TEST 7 - TEST STATOR GOOD TEST 11 - TEST ROTOR ASSEMBLY PERFORM STATOR... -
Page 32: Problem 2 - Generator Produces Lowvoltage At No-Load
SECTION 2.3 PREPACKAGED LIQUID PART 2 COOLED AC GENERATORS TROUBLESHOOTING FLOW CHARTS Problem 2 - Generator Produces Low Voltage at No-Load TEST 13 - CHECK AND TEST 2 - CHECK TEST 12 - CHECK FREQUENCY AND ADJUST GOVERNOR AC OUTPUT AC OUTPUT VOLTAGE O.K. -
Page 33: Problem 4 -Voltage And Frequency Drop Excessivelywhen Loads Are Applied
SECTION 2.3 PREPACKAGED LIQUID PART 2 COOLED AC GENERATORS TROUBLESHOOTING FLOW CHARTS Problem 4 - Voltage and Frequency Drop Excessively When Loads Are Applied TEST 15 - CHECK TEST 13 - CHECK AND TEST 16 - CHECK BOTH VOL TAGE AND NOT OVERLOADED ADJUST GOVERNOR FOR OVERLAOD... -
Page 34: Check Main Circuit Breaker
SECTION 2.4 PREPACKAGED LIQUID PART 2 COOLED AC GENERATORS DIAGNOSTIC TESTS INTRODUCTION PROCEDURE: The generator main circuit breaker is located on the This section is provided to familiarize the service control panel. If loads are not receiving power, make technician with acceptable procedures for the testing sure the breaker is set to ON or “Closed”. -
Page 35: Check Ac Output Voltage
SECTION 2.4 PREPACKAGED LIQUID PART 2 COOLED AC GENERATORS DIAGNOSTIC TESTS TEST 2- CHECK AC OUTPUT VOLTAGE generator. If a unit is supplying residual voltage only, either excitation current is not reaching the rotor or the rotor windings are open and the exci- DISCUSSION: tation current cannot pass. -
Page 36: Test Thermal Protector
SECTION 2.4 PREPACKAGED LIQUID PART 2 COOLED AC GENERATORS DIAGNOSTIC TESTS TEST 4 - TEST THERMAL PROTECTOR TEST 5 - FIXED EXCITATION TEST /ROTOR AMP DRAW TEST DISCUSSION: DISCUSSION: An open thermal protector will result in loss of excita- tion. Generator AC output voltage will then drop to a Supplying a fixed DC current to the rotor will induce a residual voltage. -
Page 37: Wire Continuity
SECTION 2.4 PREPACKAGED LIQUID PART 2 COOLED AC GENERATORS DIAGNOSTIC TESTS TEST 5 RESULTS - FIXED EXCITATION TEST/ROTOR AMP DRAW TEST Results: Voltage Results Above Above Below Zero or Below Below Above Below Wire 2 & 6 60 VAC 60 VAC 60 VAC Residual Volts 60 VAC... -
Page 38: Testing The Ststor With A Vom
SECTION 2.4 PREPACKAGED LIQUID PART 2 COOLED AC GENERATORS DIAGNOSTIC TESTS PROCEDURE: TEST 8 - TESTING THE STATOR WITH A VOM 1. Locate Wire 4 that is routed from the circuit board and connects to the voltage regulator terminal, third from the DISCUSSION: top (see Figure 3). -
Page 39: Resistance Check Of Rotor Circuit
SECTION 2.4 PREPACKAGED LIQUID PART 2 COOLED AC GENERATORS DIAGNOSTIC TESTS f. With the meter still set to a. high resistance rent to the rotor. scale, check for a shorted condition between parallel windings as follows: (1) Connect one meter test probe to stator lead 11. -
Page 40: Check Ac Output Frequency
SECTION 2.4 PREPACKAGED LIQUID PART 2 COOLED AC GENERATORS DIAGNOSTIC TESTS 3. Connect the positive (+) VOM test lead to the positive PROCEDURE: (+) rotor slip ring (nearest the rotor bearing); and the 1. Connect an accurate AC frequency meter across the common (-) test lead to the negative (-) slip ring. - Page 41 SECTION 2.4 PREPACKAGED LIQUID PART 2 COOLED AC GENERATORS DIAGNOSTIC TESTS TEST PROCEDURES: TEST 13C TEST 13A, TEST 13B, TEST 13C, TEST 13D, check (Check connections between Control Module and position of the frequency switch. Stepper Motor) There are two “Plug-In” connectors housed inside the TEST 13A connection boxes in the harness between the control module and the stepper motor.
-
Page 42: Voltage Regulator
SECTION 2.4 PREPACKAGED LIQUID PART 2 COOLED AC GENERATORS DIAGNOSTIC TESTS TEST 14 - CHECK AND ADJUST PROCEDURE: VOLTAGE REGULATOR 1. Connect an accurate AC frequency meter and an AC voltmeter across the stator AC power winding leads. DISCUSSION: 2. Start the engine, let it stabilize and warm-up. For additional information, refer to description and 3. - Page 43 TABLE OF CONTENTS PART 3 PART TITLE PAGE Description and Components “V-TYPE” Operational Analysis Troubleshooting Flow Charts PREPACKAGED Problem 1 - In Automatic Mode, No Transfer to Standby TRANSFER Problem 2 - In Automatic Mode, No Transfer Back to Utility Problem 3 - In Automatic Mode, Generator Starts SWITCHES and Transfer to Standby Occurs When...
- Page 44 SECTION 3.1 “V-TYPE” PREPACKAGED PART 3 TRANSFER SWITCHES DESCRIPTION & COMPONENTS GENERAL TRANSFER SWITCH MAJOR COMPONENTS The prepackaged, “V-Type” transfer switch is rated Figure 1, below, shows the transfer switch compo- 100 amps at 250 volts maximum. It is available in 2- nents.
- Page 45 SECTION 3.1 “V-TYPE” PREPACKAGED PART 3 TRANSFER SWITCHES DESCRIPTION & COMPONENTS TRANSFER MECHANISM The 2-pole transfer mechanism consists of a pair of moveable LOAD contacts, a pair of stationary UTILI- STANDBY UTILITY TY contacts, and a pair of stationary STANDBY con- tacts.
- Page 46 SECTION 3.1 “V-TYPE” PREPACKAGED PART 3 TRANSFER SWITCHES DESCRIPTION & COMPONENTS TRANSFER RELAY a. The transfer relay will de-energize, its normally- closed contacts will close and its normally-open Transfer relay operation is controlled by a control circuit contacts will open. board mounted on the standby generator set.
- Page 47 SECTION 3.1 “V-TYPE” PREPACKAGED PART 3 TRANSFER SWITCHES DESCRIPTION & COMPONENTS LOAD 1 AND 2: The control board is equipped with a “7-Day Exerciser” circuit which will start the generator and let it “exercise” once every seven (7) days on a prese- lected day and at a preselected time of day.
-
Page 48: Operational Analysis
SECTION 3.2 “V-TYPE” PREPACKAGED PART 3 TRANSFER SWITCHES OPERATIONAL ANALYSIS UTILITY SOURCE VOLTAGE AVAILABLE Figure 1 is a schematic representation of the transfer switch with utility source power available. The circuit condi- tion may be briefly described as follows: • Utility source voltage is available to Terminal Lugs N1 and N2 of the transfer mechanism. •... -
Page 49: Transfer To Standby
SECTION 3.2 “V-TYPE” PREPACKAGED PART 3 TRANSFER SWITCHES OPERATIONAL ANALYSIS UTILITY SOURCE VOLTAGE DROPOUT If utility source voltage should drop below a preset value, the generator’s control board will sense the dropout. That circuit board will then initiate generator cranking and startup after a time delay circuit times out. TRANSFER TO STANDBY The generator’s control board delivers 12 volts DC to the transfer relay, via terminal 194 and back to the circuit board via terminal 23. - Page 50 SECTION 3.2 “V-TYPE” PREPACKAGED PART 3 TRANSFER SWITCHES OPERATIONAL ANALYSIS RETRANSFER BACK TO UTILITY On restoration of utility source voltage above a preset value, the generator’s control board “senses” that voltage via terminals N1 and N2. UTILITY SOURCE UTILITY 1 —...
- Page 51 SECTION 3.2 “V-TYPE” PREPACKAGED PART 3 TRANSFER SWITCHES OPERATIONAL ANALYSIS TRANSFER TO UTILITY COMPLETE After a preset time interval, that circuit board opens the terminal 23 circuit to ground. The transfer relay de-ener- gizes, it’s normally-closed contacts close, and utility source voltage is delivered to utility closing coil (C1), via Wires N1A and N2A, closed transfer relay (TR) contacts, limit switch XA1, and a bridge rectifier.
- Page 52 SECTION 3.3 “V-TYPE” PREPACKAGED PART 3 TRANSFER SWITCHES TROUBLESHOOTING FLOW CHARTS INTRODUCTION TO TROUBLESHOOTING The first step in troubleshooting is to correctly identify the problem. Once that is done, the cause of the problem can be found by performing the tests in the appropriate flow chart. Test numbers assigned in the flow charts are identical to test numbers in Section 3.4, “Diagnostic Tests.”...
- Page 53 SECTION 3.3 “V-TYPE” PREPACKAGED PART 3 TRANSFER SWITCHES TROUBLESHOOTING FLOW CHARTS Problem 2 - In Automatic Mode, No Retransfer Back to Utility TEST 7 - CHECK TEST 8 - CHECK TEST 9 - CHECK VOLTAGE AT VOLTAGE AT VOLTAGE AT GOOD GOOD TERMINAL LUGS...
-
Page 54: Check Voltage At Terminal Lugs E1, E2
SECTION 3.4 “V-TYPE” PREPACKAGED PART 3 TRANSFER SWITCHES DIAGNOSTIC TESTS GENERAL d. Actuate the generator’s main line circuit breaker to its ON or “Closed” position. The “Utility” Test numbers in this section correspond to the num- power supply to the transfer switch must be bered tests in Section 3.3, “Troubleshooting Flow turned OFF. -
Page 55: Test Transfer Relay Tr
SECTION 3.4 “V-TYPE” PREPACKAGED PART 3 TRANSFER SWITCHES DIAGNOSTIC TESTS current (AC) is changed to direct current (DC) by a 5. Now, connect the VOM test leads across Relay Terminals bridge rectifier before reaching the closing coil. This 1 and 7. test will determine if standby voltage is available to a. -
Page 56: Test Limit Switch Xb1
SECTION 3.4 “V-TYPE” PREPACKAGED PART 3 TRANSFER SWITCHES DIAGNOSTIC TESTS LOAD CONNECTED TO LOAD CONNECTED TO UTILITY POWER SOURCE STANDBY POWER SOURCE TRANSFER SWITCH OPERATING LEVER MANUAL TRANSFER MANUAL HANDLE TRANSFER HANDLE TRANSFER SWITCH OPERATING LEVER Figure 3. Manual Transfer Switch Operation PROCEDURE: 6. -
Page 57: Check Wiring And Wiring Connections
SECTION 3.4 “V-TYPE” PREPACKAGED PART 3 TRANSFER SWITCHES DIAGNOSTIC TESTS PROCEDURE: nals, or is not available. It is the first test in a series of tests that should be accomplished when (a) retransfer With the generator shut down and with the “Utility” back to “Utility”... -
Page 58: Check Voltage At Utility Closing Coil C1
SECTION 3.4 “V-TYPE” PREPACKAGED PART 3 TRANSFER SWITCHES DIAGNOSTIC TESTS board. If voltage at the terminals is zero or low, stand- 7. When you are certain that transfer to “Standby” has by generator startup and transfer to the “Standby” occurred, turn ON the utility power supply to the transfer source will occur automatically as controlled by the switch. -
Page 59: Test Limit Switch Xa1
SECTION 3.4 “V-TYPE” PREPACKAGED PART 3 TRANSFER SWITCHES DIAGNOSTIC TESTS PROCEDURE: PROCEDURE: 1. On the generator panel, set the AUTO-OFF-MANUAL 1. With the standby generator shut down, set the AUTO- switch to OFF. OFF-MANUAL switch to OFF. 2. Turn OFF the utility power supply to the transfer switch, 2. - Page 60 SECTION 3.4 “V-TYPE” PREPACKAGED PART 3 TRANSFER SWITCHES DIAGNOSTIC TESTS Page 56...
- Page 61 TABLE OF CONTENTS PART 4 PART TITLE PAGE Description and Components DC CONTROL Operational Analysis Troubleshooting Flow Charts LIQUID COOLED Problem 1 - Engine Will Not Crank When Utility Power Failure Occurs ENGINE Problem 2 - EngineWill Not CrankWhen AUTO-OFF- MANUAL Switch is Set to“MANUAL”...
- Page 62 SECTION 4.1 DC CONTROL PART 4 LIQUID COOLED DESCRIPTION AND COMPONENTS ENGINE UNITS GENERAL 2. This “Load” voltage power is used by the control board to operate a “7-day exercise” clock or Information in this section is provided to familiarize timer circuit.
-
Page 63: Description And Components
SECTION 4.1 DC CONTROL PART 4 LIQUID COOLED DESCRIPTION AND COMPONENTS ENGINE UNITS • The board delivers “field boost” current to the gen- CONTROL CONSOLE COMPONENTS erator rotor via Connector Pin 1 and Wire 4. Also see Section 2.2, “Field Boost”. TERMINAL BOARD TB1: •... - Page 64 SECTION 4.1 DC CONTROL PART 4 LIQUID COOLED DESCRIPTION AND COMPONENTS ENGINE UNITS TERMINAL BOARD TS2: BATTERY AND BATTERY CHARGE SYSTEM: This 2-position terminal board (terminals 178 and See Figure 7. An alternator delivers a charging volt- 183) must be used when the standby generator is age to the battery during engine operation.
- Page 65 SECTION 4.1 DC CONTROL PART 4 LIQUID COOLED DESCRIPTION AND COMPONENTS ENGINE UNITS ature condition and the engine would continue to run. CONTROL CONTACTOR To prevent this occurrence, a low coolant level sensor is provided. The sensor is immersed in cooling sys- tem liquid.
- Page 66 SECTION 4.2 DC CONTROL PART 4 LIQUID COOLED OPERATIONAL ANALYSIS ENGINE UNITS INTRODUCTION The schematic diagram on this and the following pages shows the DC control system in three (3) major areas, i.e., the standby generator area, the engine, and the prepackaged transfer switch. CIRCUIT CONDITION - UTILITY SOURCE VOLTAGE AVAILABLE •...
- Page 67 SECTION 4.2 DC CONTROL PART 4 LIQUID COOLED OPERATIONAL ANALYSIS ENGINE UNITS BLACK BLACK BLUE BLUE Page 63...
- Page 68 SECTION 4.2 DC CONTROL PART 4 LIQUID COOLED OPERATIONAL ANALYSIS ENGINE UNITS CIRCUIT CONDITION- INITIAL UTILITY VOLTAGE DROPOUT • Line-to-line “Utility” current is delivered to the sensing transformer. Transformer action reduces the line-to-line voltage to approximately 14 volts AC. The reduced voltage is delivered to the control board as “Utility” sensing voltage.
- Page 69 SECTION 4.2 DC CONTROL PART 4 LIQUID COOLED OPERATIONAL ANALYSIS ENGINE UNITS BLACK BLACK BLUE BLUE Page 65...
- Page 70 SECTION 4.2 DC CONTROL PART 4 LIQUID COOLED OPERATIONAL ANALYSIS ENGINE UNITS CIRCUIT CONDITION- CRANKING AND INITIAL STARTUP • The control board’s 15-second timer will time for 15 seconds. If “Utility” source voltage is still low after 15 sec- onds, a crank relay (K1) and a run relay (K2) on the circuit board will energize simultaneously. •...
- Page 71 SECTION 4.2 DC CONTROL PART 4 LIQUID COOLED OPERATIONAL ANALYSIS ENGINE UNITS BLACK BLACK BLUE BLUE Page 67...
- Page 72 SECTION 4.2 DC CONTROL PART 4 LIQUID COOLED OPERATIONAL ANALYSIS ENGINE UNITS CIRCUIT CONDITION- INITIAL TRANSFER TO STANDBY • The “engine warm-up timer” will run for approximately 15 seconds. The “minimum run timer” will run for about 13 minutes. Engine cannot be shut down in automatic mode until the “minimum run timer” has finished timing (prevents shutdown of a cold engine).
- Page 73 SECTION 4.2 DC CONTROL PART 4 LIQUID COOLED OPERATIONAL ANALYSIS ENGINE UNITS BLACK BLACK BLUE BLUE Page 69...
- Page 74 SECTION 4.2 DC CONTROL PART 4 LIQUID COOLED OPERATIONAL ANALYSIS ENGINE UNITS CIRCUIT CONDITION- FINAL TRANSFER TO STANDBY • When the transfer mechanism’s main load carrying contacts reach “Neutral” position (disconnected from both power sources), a mechanical interlock opens limit switch LS3. This opens the circuit to actuating coil (C) and the coil de-energizes.
- Page 75 SECTION 4.2 DC CONTROL PART 4 LIQUID COOLED OPERATIONAL ANALYSIS ENGINE UNITS BLACK BLACK BLUE BLUE Page 71...
- Page 76 SECTION 4.2 DC CONTROL PART 4 LIQUID COOLED OPERATIONAL ANALYSIS ENGINE UNITS CIRCUIT CONDITION- UTILITY VOLTAGE RESTORED • Utility source line-to-line voltage is delivered directly to the sensing transformer’s primary winding. A resultant sensing voltage is then delivered from the transformer’s secondary winding to the control board. It the “Utility” sensing voltage is above about 80 percent of the nominal rated voltage, the control board will react.
- Page 77 SECTION 4.2 DC CONTROL PART 4 LIQUID COOLED OPERATIONAL ANALYSIS ENGINE UNITS BLACK BLACK BLUE BLUE Page 73...
- Page 78 SECTION 4.2 DC CONTROL PART 4 LIQUID COOLED OPERATIONAL ANALYSIS ENGINE UNITS CIRCUIT CONDITION- INITIAL RETRANSFER BACK TO UTILITY • When the “return to utility timer” times out (about 10 seconds), control board action will open the Wire 23 circuit to ground.
- Page 79 SECTION 4.2 DC CONTROL PART 4 LIQUID COOLED OPERATIONAL ANALYSIS ENGINE UNITS BLACK BLACK BLUE BLUE Page 75...
- Page 80 SECTION 4.2 DC CONTROL PART 4 LIQUID COOLED OPERATIONAL ANALYSIS ENGINE UNITS CIRCUIT CONDITION- FINAL RETRANSFER TO UTILITY • When the transfer mechanism’s main contacts reach “Neutral” position (“Load” disconnected from both power sources), limit switch XA1 is opened by a mechanical interlock. This opens the circuit to actuating coil (C). Coil (C) de-energizes.
- Page 81 SECTION 4.2 DC CONTROL PART 4 LIQUID COOLED OPERATIONAL ANALYSIS ENGINE UNITS BLACK BLACK BLUE BLUE Page 77...
- Page 82 SECTION 4.2 DC CONTROL PART 4 LIQUID COOLED OPERATIONAL ANALYSIS ENGINE UNITS CIRCUIT CONDITION- GENERATOR SHUTDOWN • When the “engine cool down timer” has finished timing (about 1 minute) and providing the “minimum run timer” (about 13 minutes) has also timed out, control board action will de-energize the board’s run relay. •...
- Page 83 SECTION 4.2 DC CONTROL PART 4 LIQUID COOLED OPERATIONAL ANALYSIS ENGINE UNITS BLACK BLACK BLUE BLUE Page 79...
- Page 84 SECTION 4.3 DC CONTROL PART 4 LIQUID COOLED TROUBLESHOOTING FLOW CHARTS ENGINE UNITS Problem 1 - Engine Will Not Crank When Utility Power Failure Occurs TEST 3 - TEST TEST 1 - CHECK SWITCH IS STARTS TEST 2 - TRY A IN “AUTO”...
- Page 85 SECTION 4.3 DC CONTROL PART 4 LIQUID COOLED TROUBLESHOOTING FLOW CHARTS ENGINE UNITS Problem 3 - Engine Cranks but Won’t Start TEST 11 - CHECK TEST 12 - CHECK WIRE TEST 18 - CHECK REPLACE GOOD FUEL SUPPLY 14 OUTPUT TO IGNITION DC VOLTS AT CONTROL AND PRESSURE...
-
Page 86: Check Auto-Off-Manual Switch Position
SECTION 4.4 DC CONTROL PART 4 LIQUID COOLED DIAGNOSTIC TESTS ENGINE UNITS GENERAL “Utility” power source outage should result in engine cranking and startup. If that power source fails and Perform the tests in this section in conjunction with the engine does not crank, the first step in trou- bleshooting should be to see if a manual startup can the “Troubleshooting Flow Charts”... -
Page 87: Inspect Auto-Off-Manual
SECTION 4.4 DC CONTROL PART 4 LIQUID COOLED DIAGNOSTIC TESTS ENGINE UNITS CONNECT TEST 4 - INSPECT AUTO-OFF-MANUAL ACROSS SWITCH METER SWITCH TO CONTROL BOARD WIRING TERMINALS POSITION READING 1 and 2 AUTO Continuity DISCUSSION: MANUAL Infinity Infinity Any open or disconnected wiring between the switch and the control board, or between the switch and 1 and 3 AUTO... -
Page 88: Test Control Contactor Cc
SECTION 4.4 DC CONTROL PART 4 LIQUID COOLED DIAGNOSTIC TESTS ENGINE UNITS 3. Install battery cables, making sure all cable PROCEDURE: clamps are tight. The red battery cable (from Use a DC voltmeter (or VOM) to test control contactor control contactor (CC) must be securely (CC) operation, as follows: attached to the positive (+) battery post;... -
Page 89: Test Starter Motor (Sm)
SECTION 4.4 DC CONTROL PART 4 LIQUID COOLED DIAGNOSTIC TESTS ENGINE UNITS lead to frame ground. Set the AUTO-OFF-MANUAL RESULTS: switch to MANUAL. The meter should read battery volt- 1. Repair or replace bad starter motor. age and engine should crank. 2. -
Page 90: Check For Mechanical Damage
SECTION 4.4 DC CONTROL PART 4 LIQUID COOLED DIAGNOSTIC TESTS ENGINE UNITS TEST 10- CHECK FOR MECHANICAL DAMAGE DISCUSSION: If the engine will not crank when MANUAL position is selected, the problem is most likely to be an electrical fault. However, the possibility that engine or genera- tor damage is preventing the unit from cranking can- not be overlooked. -
Page 91: Check Wire 14 Output To Distributor
SECTION 4.4 DC CONTROL PART 4 LIQUID COOLED DIAGNOSTIC TESTS ENGINE UNITS GAS CARBURETOR 5-14 INCHES WATER COLUMN OPTIMUM APPROVED FLEX LINE (CAUTION! — KEEP FLEX FUEL LINE STRAIGHT) NATURAL GAS GENERATOR PRIMARY DEMAND REGULATOR REGULATOR GENERATOR BASE MANUAL SHUTOFF VALVE Figure 8. -
Page 92: Benchmark Testing, Distributor Internal Components
SECTION 4.4 DC CONTROL PART 4 LIQUID COOLED DIAGNOSTIC TESTS ENGINE UNITS 2. If meter indicates battery voltage while cranking, but volt- age drops to zero and shutdown occurs when cranking 24 kΩ terminates, go to Test 21. 24 kΩ TEST 13 - BENCHMARK TESTING, DISTRIBUTOR INTERNAL COMPONENTS DISCUSSION:... -
Page 93: Check Spark Plugs
SECTION 4.4 DC CONTROL PART 4 LIQUID COOLED DIAGNOSTIC TESTS ENGINE UNITS RESULTS: PROCEDURE: 1. Replace distributor cap and rotor, if defective. Check high tension ignition wires for damage, cracks, burned terminals, proper fit. Measure the resistance 2. If inspection reveals the cap and rotor are good, go on to of each wire. -
Page 94: Check Dc Volts At Terminal 14 Of Tb1
SECTION 4.4 DC CONTROL PART 4 LIQUID COOLED DIAGNOSTIC TESTS ENGINE UNITS TEST 18 - CHECK DC VOLTS AT TERMINAL 14 PROCEDURE: OF TB1 1. Connect a DC voltmeter (or VOM) across Wire 14 at the fuel solenoid and frame ground. DISCUSSION: 2. -
Page 95: Check Generator Main Line Circuit Breaker
SECTION 4.4 DC CONTROL PART 4 LIQUID COOLED DIAGNOSTIC TESTS ENGINE UNITS TEST 21 - CHECK GENERATOR MAIN LINE 2. Turn OFF both the “Utility” and “Standby” power supplies CIRCUIT BREAKER to the transfer switch. 3. If necessary, manually actuate the transfer switch main DISCUSSION: contacts to their “Utility”... -
Page 96: Check Voltage At Terminal Lugs E1 & E2
SECTION 4.4 DC CONTROL PART 4 LIQUID COOLED DIAGNOSTIC TESTS ENGINE UNITS 2. Turn OFF both the “Utility” and “Standby” power supplies PROCEDURE: to the transfer switch using whatever means provided. 1. Start the generator engine manually, let it stabilize and warm-up. -
Page 97: Test Sensing Transformer
SECTION 4.4 DC CONTROL PART 4 LIQUID COOLED DIAGNOSTIC TESTS ENGINE UNITS PROCEDURE: RESULTS: With “Utility” source power available to the transfer 1. If normal “Utility” source voltage is indicated in Step 1, switch, connect the test leads of an AC voltmeter but not in Step 2, replace the control board transformer. - Page 98 SECTION 4.4 DC CONTROL PART 4 LIQUID COOLED DIAGNOSTIC TESTS ENGINE UNITS Page 94...
- Page 99 TABLE OF CONTENTS PART 5 PART TITLE PAGE System Functional Tests OPERATIONAL Adjustments — Liquid Cooled Units TESTS ADJUSTMENTS 1.5 LITER PREPACKAGED HOME STANDBY GENERATORS Page 95...
-
Page 100: System Functional Tests
SECTION 5.1 OPERATIONAL TESTS PART 5 AND ADJUSTMENTS SYSTEM FUNCTIONAL TESTS INTRODUCTION DANGER: BE SURE TO TURN OFF ALL POWER VOLTAGE SUPPLIES TO THE Following standby electric system installation and TRANSFER SWITCH BEFORE ATTEMPTING periodically thereafter, the system should be tested. MANUAL OPERATION. - Page 101 SECTION 5.1 OPERATIONAL TESTS PART 5 AND ADJUSTMENTS SYSTEM FUNCTIONAL TESTS SYSTEM VOLTAGE TESTS high or low, the AC voltage regulator may require adjustment. 1. Turn ON the “Utility” power supply to the transfer switch using whatever means provided (such as a “Utility” main GENERATOR TESTS UNDER LOAD line circuit breaker).
- Page 102 SECTION 5.1 OPERATIONAL TESTS PART 5 AND ADJUSTMENTS SYSTEM FUNCTIONAL TESTS 2. Turn OFF both the “Utility” and “Standby” power supplies to the transfer switch. 3. If necessary, manually actuate the transfer switch main contacts to their UTILITY position, i.e., “Load” connected to the “Utility”...
- Page 103 SECTION 5.2 OPERATIONAL TESTS PART 5 AND ADJUSTMENTS ADJUSTMENTS — LIQUID COOLED UNITS SETTING WEEKLY EXERCISE CYCLE The generator will start and exercise once every seven (7) days, on a day and at a time of day select- ed by the installer or operator. The unit will run for approximately 13-15 minutes during this “exercise”...
- Page 104 SECTION 5.2 OPERATIONAL TESTS PART 5 AND ADJUSTMENTS ADJUSTMENTS — LIQUID COOLED UNITS OPERATIONAL ANALYSIS Frequency and direction switches are integrated only at engine start. Changing switch settings while engine During the engine start-up and run, +12 volts DC is is running will have no effect until the engine is stopped and restarted.
-
Page 105: Electrical Data
TABLE OF CONTENTS DWG # TITLE PAGE “V-Type” Transfer Switch 0E6093-B PART 6 100 Amp, 2-Pole “V-Type” Transfer Switch 0F0015-A ELECTRICAL 100/200 Amp, 2-Pole DATA Wiring Diagram 0E0345 1-Phase Liquid Cooled Generator Schematic 0E1525 1-Phase Liquid Cooled Generator Wiring Diagram 0E0343-B 1.5 Liter Liquid Cooled Engine Schematic... -
Page 106: V-Type" Transfer Switch
“V-TYPE” TRANSFER SWITCH PART 9 ELECTRICAL DATA 100 AMP, 2-POLE DRAWING #0E6093-B UTILITY 1 LOAD 1 LOAD 2 UTILITY 2 NEUTRAL * (OPTIONAL) * - NOT USED WITH PREPACKAGED STANDBY GENERATORS LEGEND TRANSFER SWITCH CONTACTOR SOLENOID COIL (UTILITY CLOSING) SOLENOID COIL (STANDBY CLOSING) RELAY, TRANSFER NOTE: TERMINAL STRIP (CUSTOMER CONNECTION) - Page 107 “V-TYPE” TRANSFER SWITCH PART 9 ELECTRICAL DATA 100 AMP, 2-POLE DRAWING #0E6093-B (C1) (C2) NEUTRAL BLOCK NOTE:IF THERE ARE NO MATCHING TERMINAL CONNECTIONS FOR LOAD 1(T1) AND LOAD 2(T2)IN THE GENERATOR CONTROL PANEL, DO NOT CONNECT THESE WIRES. FAILURE OF THE CONTROL BOARD WILL OCCUR IF CONNECTED.
-
Page 108: V-Type" Transfer Switch 100/200 Amp, 2-Pole
“V-TYPE” TRANSFER SWITCH PART 9 ELECTRICAL DATA 100/200 AMP, 2-POLE DRAWING #0F0015-A 1 of 2 Page 104... - Page 109 “V-TYPE” TRANSFER SWITCH PART 9 ELECTRICAL DATA 100/200 AMP, 2-POLE DRAWING #0F0015-A 2 of 2 Page 105...
-
Page 110: Wiring Diagram 1-Phase Liquid Cooled Generator
WIRING DIAGRAM PART 9 ELECTRICAL DATA 1-PHASE LIQUID COOLED GENERATOR DRAWING #0E0345 Page 106... -
Page 111: Schematic
SCHEMATIC PART 9 ELECTRICAL DATA 1-PHASE LIQUID COOLED GENERATOR DRAWING #0E1525 BLACK BLACK BLUE BLUE Page 107... -
Page 112: Wiring Diagram
WIRING DIAGRAM PART 9 ELECTRICAL DATA 1.5 LITER LIQUID COOLED ENGINE DRAWING #0E0343-B Page 108... -
Page 113: Schematic
SCHEMATIC PART 9 ELECTRICAL DATA 1.5 LITER LIQUID COOLED ENGINE DRAWING #0A7182-C DC-A 12V BATTERY BLACK LEGEND CC - CONTROL CONTACTOR DCA - DC ALTERNATOR EH - ENGINE HEATER FS - FUEL SOLENOID ACTUATOR GRD - GROUND CONNECTOR ISC - IGNITION SYSTEM CONTACT LOS - LOW OIL SWITCH SM - STARTER MOTOR BLACK... -
Page 114: Electrical Formulas
ELECTRICAL FORMULAS PART 9 ELECTRICAL DATA TO FIND KNOWN VALUES 1-PHASE 3-PHASE KILOWATTS (kW) Volts, Current, Power Factor E x I E x I x 1.73 x PF 1000 1000 Volts, Current E x I E x I x 1.73 1000 1000 AMPERES... - Page 115 PO BOX 297 WHITEWATER, WI 53190 www.guardiangenerators.com P/N 0F7698 Rev. 0 / Printed in the USA / 8.05...
Need help?
Do you have a question about the 4721 and is the answer not in the manual?
Questions and answers