Heatilator ECO-ADV-PS35 Owner's Manual
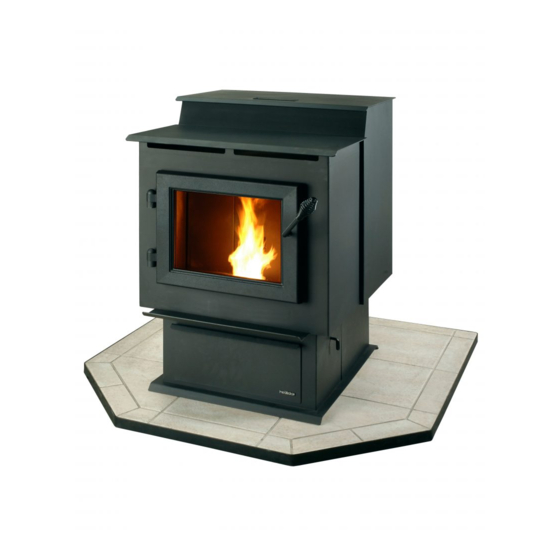
Pellet burning stove
Hide thumbs
Also See for ECO-ADV-PS35:
- Owner's manual installation and operation (56 pages) ,
- Owner's manual (48 pages) ,
- Installation manual (28 pages)
Table of Contents
Advertisement
Models:
ECO-ADV-PS35
ECO-ADV-PS50
ECO-CAB50
Pellet Burning Stove
• Important operating and
maintenance instruc-
tions included.
If the information in these instruc-
tions is not followed exactly, a
fire may result causing property
damage, personal injury, or death.
• Do not store or use gasoline or other flam-
mable vapors and liquids in the vicinity of
this or any other appliance.
• Do not over fire - If heater or chimney
connector glows, you are over firing. Over
firing will void your warranty.
• Comply with all minimum clearances to
combustibles as specified. Failure to
comply may cause house fire.
WARNING
Fire Risk.
Tested and approved for wood pellets.
Burning of any other type of fuel will void
your warranty.
www.heatilatorecochoice.com
Consumer Care 1-877-427-3316 - Prior to calling, please have the model and serial number of the unit you are calling
about. This information can be found at the rear of the unit.
ECO-ADV-PS35
CAUTION
DO NOT DISCARD THIS MANUAL
Read, understand and
•
follow these instruc-
tions for safe installa-
tion and operation.
WARNING
ECO-ADV-PS50
Leave this manual with
•
party responsible for use
and operation.
Hot glass will cause burns.
• Do not touch glass until it is cooled
• NEVER allow children to touch glass
• Keep children away
• CAREFULLY SUPERVISE children in same room as
fireplace.
• Alert children and adults to hazards of high
temperatures.
High temperatures may ignite clothing or other
flammable materials.
• Keep clothing, furniture, draperies and other flammable
materials away.
Check building codes prior to installation.
• Installation MUST comply with local, regional, state and national
codes and regulations.
• Consult local building, fire officials or authorities having jurisdic-
tion about restrictions, installation inspection, and permits.
7058-142F• June 23, 2011
Owner's Manual
Installation and Operation
ECO-CAB50
WARNING
HOT SURFACES!
Glass and other surfaces are
hot during operation AND
cool down.
CAUTION
1
Advertisement
Table of Contents
Troubleshooting

Related Manuals for Heatilator ECO-ADV-PS35


Summary of Contents for Heatilator ECO-ADV-PS35
- Page 1 Owner’s Manual Installation and Operation Models: ECO-ADV-PS35 ECO-ADV-PS50 ECO-CAB50 Pellet Burning Stove ECO-ADV-PS35 ECO-ADV-PS50 ECO-CAB50 CAUTION DO NOT DISCARD THIS MANUAL Read, understand and Leave this manual with • Important operating and • • follow these instruc- party responsible for use maintenance instruc- tions for safe installa- and operation. tions included. tion and operation.
-
Page 2: Congratulations
Read this manual before installing or operating this appliance. Please retain this owner’s manual for future reference. Congratulations! Congratulations on selecting a Heatilator pellet burning This owner’s manual should be retained for future refer- appliance. The pellet burning appliance you have selected ence. We suggest you keep it with your other important is designed to provide the utmost in safety, reliability and documents and product manuals. efficiency. Your new pellet burning appliance will give you years of As the owner of a new pellet burning appliance, you’ll want durable use and trouble-free enjoyment. Welcome to the to read and carefully follow all of the instructions contained Heatilator family of pellet burning products! in this owner’s manual. Pay special attention to all cautions and warnings. CAUTION SAMPLE: CLEARANCE... -
Page 3: Table Of Contents
Safety Alert Key: • DANGER! Indicates a hazardous situation which, if not avoided will result in death or serious injury. • WARNING! Indicates a hazardous situation which, if not avoided could result in death or serious injury. • CAUTION! Indicates a hazardous situation which, if not avoided, could result in minor or moderate injury. • NOTICE: Indicates practices which may cause damage to the fireplace or to property. TABLE OF CONTENTS Congratulations ...............2 Section 5: Getting Started (Cont’d) Sample of Safety/Serial Number Label ......2 D. Thermostat Location .........24 Safety Alert Key ...............3 E. Locating your Appliance & Chimney ....24 Warranty................4-5 Tools & Supplies Needed........25 Inspect Appliance and Components ....25 Section 1: Listing and Code Approvals A. Appliance Certifications........6 Section 6: Dimensions &... -
Page 4: Warranty
HEATILATOR ECO-CHOICE WARRANTY Hearth & Home Technologies Inc., on behalf of its hearth brands (“HHT”), extends the following warranty for ECO- CHOICE by heatilator wood and pellet hearth appliances that are purchased from an HHT authorized dealer. WARRANTY COVERAGE: HHT warrantes to the original owner of the HHT appliance at the site of installation, and to any transferree taking own- ership of the appliance at the site of installation within two years following the date of original purchase, that the HHT Hearth &... -
Page 5: Warranty
WARRANTY COVERAGE: • This warranty only covers HHT appliances that are purchased through an HHT authorized dealer or distributor. A list of HHT authorized dealers is available on th HHT branded websites. • This warranty is only valid while the HHT appliance remains at the site of original installation. •... -
Page 6: Section 1: Listing And Code Approvals
Listing and Code Approvals E. BTU & Efficiency Specifications A. Appliance Certification *BTU input will vary, depending on the brand of fuel you use in your stove. Consult your dealer for best Models: ECO-ADV-PS35, ECO-ADV-PS50 results. and ECO-CAB50 Laboratory: Intertek MODEL: PS35 Report No. 3198406 Particulate Emissions 0.9 grams / hr Rating: Type: Solid Fuel Room Heater/Pellet Fuel Burning Type *BTU Input: 13,000 - 35,000 / hr Standard: ASTM E1509-04 and ULC Heating Capacity: 750 to 1450 sq. ft. depending... -
Page 7: Section 2: Operating Instructions
User Guide Operating Instructions WARNING HOT SURFACES! Glass and other surfaces are hot during operation AND cool down. Hot glass will cause burns. • DO NOT touch glass until it is cooled • NEVER allow children to touch glass • Keep children away • CAREFULLY SUPERVISE children in same room as appliance. • Alert children and adults to hazards of high temperatures. High temperatures may ignite clothing or other flammable materials. • Keep clothing, furniture, draperies and other flammable materials away. NOTICE: If you expect that children may come into contact with this appliance, we recom- mend a barrier such as a decorative screen. See your dealer for suggestions. -
Page 8: Fire Safety
B. Fire Safety Clinkers To provide reasonable fire safety, the following should be Minerals and other non-combustible materials such as sand given serious consideration: will turn into a hard, glass-like substance called a clinker when • Install at least one smoke detector on each floor of your heated in the firepot. home. Trees from different areas will vary in mineral content. That • Locate smoke detector away from the heating appliance is why some fuels produce more clinkers than others. and close to the sleeping areas. Moisture • Follow the smoke detector manufacturer’s placement and Always burn dry fuel. Burning fuel with high moisture content installation instructions and maintain regularly. takes heat from the fuel and tends to cool the appliance, • Conveniently locate a Class A fire extinguisher to contend robbing heat from your home. Damp pellet fuel can clog the with small fires. -
Page 9: General Operation Information
E. General Operating Information F. Before Your First Fire 1. First, make sure your appliance has been properly 1. Thermostat Calls For Heat installed and that all safety requirements have been met. The appliance is like most modern furnaces; when the Pay particular attention to the fire protection, venting and thermostat calls for heat, your appliance will automatically thermostat installation instructions. light and deliver heat. 2. Double check that the ash drawer and firebox are When the room is up to temperature and the thermostat empty! is satisfied, the red call light will go off and the appliance... -
Page 10: Starting Your First Fire
H. Starting Your First Fire I. Fire Characteristics 1. A thermostat is required for proper operation of this A properly adjusted fire with the heat output control switch set appliance. If you have to adjust the feed rate after you on “high” has a short active flame pattern that extends out of have started the fire, most of the pellets in the hopper will the firepot approximately 4 to 8 inches (102 to 203mm). need to be removed so start out with filling the hopper If the fire has tall flames with black tails and seems somewhat approximately 1/4 full at this time. Set the thermostat to lazy, the feed rate will need to be reduced. This is done by its lowest setting and plug the power cord into nearby sliding the fuel adjustment control rod down, which will reduce outlet. the feed. Figure 10.3. 2. The exhaust blower will stay on for approximately 18 If the fire is not 4 to 8 inches (102 to 203mm) tall, slide the minutes even though the thermostat is not calling for fuel adjustment control rod up to increase the feed. A medium... -
Page 11: Ignition Cycles
K. Ignition Cycles L. Clear Space 1. At the beginning of each ignition cycle, it is normal to see WARNING! RISK OF FIRE! Do NOT place combustible some smoke in the firebox. The smoke will stop once objects in front or to the sides of the appliance. High tem- the fire starts. peratures may ignite clothing, furniture or draperies. 2. The convection blower will automatically turn on after Mantel: Avoid placing candles and other heat-sensitive your appliance has been burning for approximately 10 objects on mantel or hearth. Heat may damage these minutes. -
Page 12: Proper Shutdown Procedures
Maintaining & Servicing Your Appliance C. General Maintenance A. Proper Shutdown Procedure 1. Types of Fuel CAUTION Depending on the type of fuel you are burning will dictate how often you have to clean your firepot. Shock and Smoke Hazard If the fuel you are burning has a high dirt or ash content, it may • Turn down thermostat, let appliance completely be necessary to clean the firepot more than once a day. cool and exhaust blower must be off. Now you can unplug appliance before servicing. Dirty fuel will cause clinkers to form in the firepot. A clinker • Smoke spillage into room can occur if appliance is formed when dirt, ash or a non-burnable substance is is not cool before unplugging. - Page 13 3. Ash Removal from Firebox WARNING • Frequency: Weekly or more frequently depending on ash build-up. Fire Risk • By: Homeowner • NEVER pull firepot cleaning rod out when appliance is operating. a. There must not be any hot ashes in the firebox during • Cleaning Rod MUST be complelety pushed in cleaning so allow the appliance to completely cool. The before operating appliance. firebox ash should be removed every time the exhaust path •. Hot pellets may fall into ashpan and start a fire is cleaned. Frequent cleaning of the ash in the firebox will or mis-starts due to lack of vacuum. help slow down the build-up of ash in the exhaust blower and vent system. 2.
- Page 14 7. Cleaning the Hopper 5. Disposal of Ashes • Frequency: Monthly or after burning 50 bags of fuel • Frequency: As needed • By: Homeowner • By: Homeowner After burning approximately 50 bags of fuel you will Ashes should be placed in a metal container with a need to clean the hopper to prevent sawdust build-up. tight-fitting lid. The closed container of ashes should A combination of sawdust and pellets on the bottom be placed on a non-combustible floor or on the ground, end of the auger reduces the amount of fuel supply to well away from all combustible materials, pending final...
- Page 15 12. Cleaning Convection Blower - Requires No 10. Cleaning the Glass Lubrication • Frequency: When clear view of the firepot becomes • Frequency: Yearly or more frequently depending on obscure Dust/Dirt build-up • By: Homeowner • By: Homeowner or Qualified Service Technician a. Appliance must be completely cool before cleaning a. Be sure the appliance is allowed to cool and has been glass. unplugged. b. Vacuum fly ash from glass and door rope. b. Follow the directions on page 18 for direct access to c. Use a damp paper towel or any non-abrasive glass the convection blower. cleaner. Wipe off with dry towel. c.Sweep or vacuum out any build-up. Use a brush or compressed air to loosen dirt if needed.
-
Page 16: High Ash Fuel Content Maintenance
D. High Ash Fuel Content Maintenance • Frequency: As needed • By: Homeowner Pellets Back-up in Feed Tube Poor quality pellet fuel, or lack of maintenance, can create conditions that make the firepot fill quickly with ashes and clinkers. Firepot Overfills This condition makes the appliance susceptible to overfilling the firepot with pellets which may result in smoking, sooting and possible hopper fires. Figure 16.1 shows an example where the firepot overfills, pellets back up into the feed tube and ash has accumulated in the firebox. Ash build-up in Firebox An inefficient and non-economical method of burning of fuel caused by poor quality pellet fuel is shown in Figure 16.2. -
Page 17: Frequently Asked Questions
E. Frequently Asked Questions What causes my glass to become dirty? manual for details. If the glass has white ash build up it is normal and the glass should be cleaned. If it is a black soot build up airflow thru What is the metal object with the bend in it for that came inside the plastic bag? the unit may be restricted. -
Page 18: Section 4: Replacement Parts
Figure 18.2 out of the slots on the appliance. Figure 18.2. 6. Release blower wires from the nylon wire retainer if applicable. Model ECO-ADV-PS35 has 2 black wires and Model ECO-ADV-PS50 and ECO-CAB50 has 1 black and 1 white wire coming from the blower. 7. Remove the wing bolt and move the blower and hold-down bracket toward the back of the appli- ance to release the locating tab. -
Page 19: Exhaust Blower
B. Exhaust Blower Replacement 1. Turn down the thermostat, let appliance completely cool and then unplug appliance before servicing. 2. Remove both upper and lower right side curtains. Figure 18.2. on page 18. 3. Disconnect 2 white wires from the white and blue wires of the exhaust blower. 4. There is a removable plate on the exhaust blower. Depending on the model, use a 1/4 inch socket, or 1/4 inch Nut Driver or #2 Phillips Head screw driver to loosen the 6 screws in the keyhole shaped holes and rotate the plate. It is only necessary to loosen screws. Figure 19.1. 5. Remove the exhaust blower and gasket. 6. Check for degradation on the gasket and replace if nec- essary using the gasket included in the kit. 7. Re-install in reverse order. Exhaust Blower Figure 19.1... -
Page 20: Snap Disc #1, #2, & #3T Replacement
. Snap Disc Replacements Snap Disc #1 - Convection Blower 1. Turn down thermostat, let appliance cool completely if Snap Disc #3 running. Then unplug appliance before servicing. 2. Using #2 Phillips screwdriver, 3/8” wrench, or 3/8” socket loosen the three screws that hold the right upper and lower side panels in place. You do not need to remove the screws. Remove side panels by lifting up and out. -
Page 21: Igniter Replacement
D. Igniter Replacement Firepot 1. Shut down the appliance by turning down the thermostat Thermocouple & Thermocouple Cover and let the appliance completely cool down. After the appliance has cooled down, unplug it and remove the ash drawer. 2. The wire leads to the igniter are connected to the wire harness with 1/4 inch male / female spade connectors. Follow the directions on page 18 to remove the upper Igniter and lower right side panels to expose the spade Chamber connectors. -
Page 22: Glass Assembly
F. Glass Replacement WARNING • Glass is 5mm thick high temperature heat- resistant ceramic glass. • DO NOT REPLACE with any other material. • Alternate material may shatter and cause injury. 1. Open the door from the appliance by lifting door off of hinge pins and lay on a flat surface face down. 2. Using a Phillips Head screw driver, remove the 4 brackets and set aside. Figure 22.1. 3. Remove old glass and replace with the new glass. 4. Re-install the brackets using the same screws. Glass Assembly Remove the 4 brackets outlined in the diagram Figure 22.1... -
Page 23: Installer's Guide
Getting Started A. Design, Installation & Location Considerations B. Draft (Cont’d) NOTICE: Check building codes prior to installation. Minimum Vacuum MODEL • Installation MUST comply with local, regional, state and Requirements national codes and regulations. ECO-ADV-PS35 .065 inches W.C. • Consult insurance carrier, local building inspector, fire ECO-ADV-PS50 .075 inches W.C. officials or authorities having jurisdiction over restrictions, ECO-CAB50 .075 inches W.C. installation inspection and permits. -
Page 24: C. Negative Pressure
C. Negative Pressure (Cont’d) D. Thermostat Location - Duct leaks The thermostat’s location will have some affect on the appliance’s operation. To minimize the effects of negative air pressure: When the thermostat is located close to the appliance, it may • Install the outside air kit with the intake facing prevailing require a slightly higher temperature setting to keep the rest winds during the heating season of the house comfortable. • Ensure adequate outdoor air for all combustion appliances and exhaust equipment If the thermostat location is in an adjacent room or on a different floor level, you will notice higher temperatures near • Ensure furnace and air conditioning return vents are not the appliance. -
Page 25: Tools & Supplies Needed
G. Inspect Appliance & Components F. Tools And Supplies Needed • Remove appliance and components from packaging Tools and building supplies normally required and inspect for damage. for installation, unless installing into an existing • Report to your dealer any parts damaged in shipment. masonry fireplace: • Read all the instructions before starting the instal- Gloves Reciprocating Saw lation. -
Page 26: Appliance Dimensions
Dimensions and Clearances MODEL: ECO-ADV-PS35 A. Appliance Dimensions 22-1/4 in. (565mm) 8-3/4 in. 2-3/8 in. (223mm) (60mm) 31-3/4 in. (806mm) 22-15/16 in . 28 in. (583mm) (711mm) 24-13/16 in. (630mm) 20-1/4 in. (514mm) Figure 26.1 - Top View Figure 26.2- Front View... - Page 27 MODEL: ECO-ADV-PS50 A. Appliance Dimensions (Cont’d) 24-1/4 in. (616mm) 9-3/4 in. 2-3/8 in. (248mm) (60mm) 35-3/4 in. (908mm) 32 in. 26-7/16 in. (813mm) (672mm) 28-5/16 in. (719mm) 20-1/4 in. (514mm) Figure 27.1 - Top View Figure 27.2- Front View 4-3/8 in (111mm) 3-1/8 in (79mm) 31-7/8 in (810mm)
-
Page 28: A. Appliance Dimensions
MODEL: ECO-CAB50 A. Appliance Dimensions (Cont’d) 2-3/8 in 23-3/4 in [603 mm] [60 mm] 36-1/2 in [927 mm] 24-1/2 in [622 mm] Figure 28.1 - Top View Figure 28.2- Front View 25-7/8 in [657 mm] 4-3/8 in [111 mm] 3-1/8 in [79 mm] 30-1/8 in [765 mm] 28 in... -
Page 29: Clearances To Combustibles
B. Clearances to Combustibles (UL and ULC) Installations Into Alcove All minimums listed are to a combustible surface. Minimum Maximum Model: PS35 Inches Millimeters Inches Millimeters Height 51-3/4 1314 Width 50-1/4 1276 Depth 1219 Side Wall Straight Back Against Wall Inches Millimeters Mantle Depth Back Wall to Appliance Side Wall to Appliance Minimum Maximum Corner Installation... -
Page 30: Alcove
C. Alcove Mantel Figure 30.1 All minimums listed are to a combustible surface. Minimum Maximum Minimum Maximum Model: PS35 Model: CAB50 Inches Millimeters Inches Millimeters Inches Millimeters Inches Millimeters Height 51-3/4 1314 Height 56-3/4 1441 Width 50-1/4 1276 Width 1346 Depth 1219 Depth 1219 Side Wall Side Wall Mantel Depth Mantel Depth NOTE: • Illustrations reflect typical installations and are FOR... -
Page 31: Hearth Pad Requirements
D. Hearth Pad Requirements (UL and ULC) Use a non-combustible floor protector, extending beneath appliance and to the front, sides and rear as indicated. Measure front distance “M” from the surface of the glass door. Must extend 2 inches (51mm) beyond each side of pipe (shaded area) Figure 31.2 Figure 31.1 *L Exception for Horizontal Installations: CANADA INSTALLATIONS: A non combustible floor pro- tections extending beneath the flue pipe is required with USA Hearth Pad Requirements... -
Page 32: Section 7: Vent Information
Vent Information B. Venting Termination Requirements A. Chimney and Exhaust Connection CAUTION Do not terminate vent in any enclosed or semi-enclosed Chimney & Connector: Use 3 or 4 inch (76-102mm) diameter type "L" or "PL" venting system. It can be vented area such as a carport, garage, attic, crawl space, under a vertically or horizontally. sun deck or porch, narrow walkway or closely fenced area, or any location that can build up a concentration of fumes 2. Mobile Home: Approved for all Listed pellet vent. If using such as a stairwell, covered breezeway, etc. the 3 inch (76mm) vertical Top Vent Adapter Kit or the 3 to 6 inch (76-152mm) Top Vent Offset Adapter, use Listed . Termination must exhaust above air inlet elevation. It is double wall flue connector. An authorized Outside Air Kit strongly recommended that at least 60 inches (1.5m) must be used with manufactured home installations. -
Page 33: Pellet Venting Charts
C. Pellet Venting Charts WARNING The maximum horizontal venting allowed with no vertical vent- Fire Risk. ing attached is 48 inches (1219mm) including one 90° elbow or two 45° elbows. This is our recommended horizontal vent- • Only LISTED venting components may be ing installation. Addition of any horizontal venting beyond 48 used. inches (1219mm) requires a minimum 60 inches (1524mm) of • NO OTHER vent components may be used. additional vertical vent. Horizontal sections of vent pipe should Substitute or damaged vent components may have a 1/4 inch (6.35mm) rise per foot. -
Page 34: Section 8: Venting Systems
Venting Systems B. Through The Wall & Vertical - External A. Vertical - Interior - Typical Installation PREFERRED METHOD #2 PREFERRED METHOD #1 Rain Cap Rain Cap 12 in. Flashing (305mm) 12 in. Flashing Minimum (305mm) Minimum Firestop 2 in. (51mm) Minimum Support Bracket 6 in. -
Page 35: Masonry
WARNING WARNING Fire Risk Improper installation, adjustment, alteration, service or Inspection of Chimney: maintenance can cause injury or property damage. Refer • Masonry chimney must be in good condition. to the owner’s information manual provided with this appli- • Meets minimum standard of NFPA 211 ance. For assistance or additional information consult a qualified installer, service agency or your dealer. • Factory-built chimney must be minimum 6 inch (152mm) UL103 HT. D. Masonry Fireclay flue Concrete Cap Liner with Airspace Flashing 1 in. (25mm) Clearance with Firestop 1 in. (25mm) Clearance 3 in. (76mm) Minimum 6 in. -
Page 36: Through The Wall
F. Through The Wall Horizontal termination cap must be a minimum of 6 inches. In Canada, where passage through a wall or partition (152mm) from the wall. Approved for mobile home instal- of combustible construction is desired, the installation lations. Must use 3 or 4 inch (76-102mm) “L” or “PL” listed shall conform to CAN/CSA-B365 pellet venting or Listed double wall pipe and an authorized Outside Air Kit in mobile homes. CAUTION NOTICE: DO NOT DOWNWARD VENT. Please note that while the minimum clearance for the The following will occur: termination cap is 6 inches (152mm) there is the pos- • The appliance will not vent properly sibly of soot build-up around the termination area. If this • Smoke spillage in the house occurs we suggest to move the termination further away • Excessive sooting from the house to prevent it. The suggested minimum is... -
Page 37: Section 9: Mobile Home Installation
Mobile Home A. Mobile Home Installation CAUTION You must use an authorized Outside Air Kit THE STRUCTURAL INTEGRITY OF THE MOBILE HOME for installation in a mobile home. FLOOR, WALL AND CEILING/ROOF MUST BE MAIN- TAINED An outside air inlet must be provided for the combustion Do NOT cut through: air and must remain clear of leaves, debris, ice and/or • Floor joist, wall, studs or ceiling trusses. snow. It must be unrestricted while the appliance is • Any supporting material that would affect the structural in use to prevent room air starvation which causes integrity. -
Page 38: Section 10: Appliance Set-Up
Appliance Set-Up A. Outside Air Kit Instructions 1. Measure distance from floor to air vent opening in appli- ance and mark location on wall. There are two Outside Air Kits that will work with this appli- ance. One kit, 811-0872 uses a 2 inch flex hose (included) Use saw to cut opening in wall. and uses hose clamps to secure the hose. The other kit, 2 inch kit: Cut a 2-1/2 to 3 inch opening on inside wall OAK-3, uses a 3 inch flex hose (not included) and uses wire and a 3 to 3-1/2 inch opening on outside of house. ties to secure the hose. 3 inch kit: Cut a 3-1/2 to 4 inch opening on inside wall Parts Included in 2 inch Kit 811-0872: 1 piece of 2 inch x and a 4 to 4-1/2 inch opening on outside of house. -
Page 39: Top Vent Adapter
B. Top Vent Adapter Installation 3 to 3 inch Top Vent Adapter 3 to 6 inch Top Vent Offset Adapter Installing the Top Vent Adapter Drill holes in back of stove and secure with 4 screws, 2 on each side 1. Put a layer of high temperature silicone on the 3 inch (76mm) exhaust outlet. -
Page 40: Thermostat Installation
D. Thermostat Installation CAUTION A low voltage thermostat is required to operate this pellet appliance. You may use the included wall mount Shock hazard. thermostat (Figure 40.2) or purchase an optional pro- • Do NOT remove grounding prong from plug. grammable thermostat or remote control. It is equipped • Plug directly into properly grounded 3 prong with an adjustable heat anticipator. The current rating is receptacle. .05 amps. The anticipator needs to be adjusted to the • Route cord away from appliance. • Do NOT route cord under or in front of appli- lowest setting available. ance. 2. When mounting a thermostat on a wall, be sure to follow your thermostat installation instructions carefully. NOTE: Thermostat must be mounted level for accu- rate readings. -
Page 41: Section 13: Troubleshooting
With proper installation, operation, and maintenance your appliance will provide years of trouble-free service. If you do experience a problem, this troubleshooting guide will Troubleshooting assist a qualified service person in the diagnosis of a problem and the corrective action to be taken. Symptom Possible Cause Corrective Action Plug in appliance - No No Power to outlet. Check circuit breaker at service panel. response. 7 amp fuse defective or blown Replace fuse. #3 snap disc tripped or defective. Reset or replace snap disc. Control box is loose or defective. Reseat or replace control box. Call light on. No fire. Out of fuel. Check hopper. Fill with fuel. No fuel in firepot. #2 snap disc may be defective or tripped. Reset or replace snap disc. Vacuum switch not closing, no vacuum. -
Page 42: Troubleshooting
Troubleshooting Symptom Possible Cause Corrective Action Slow or smoky start-up Dirty exhaust and/or venting system. Check for ash build up in unit, includ- (Cont’d) ing behind rear panels, firebox, exhaust blower and venting. Wet fuel / poor quality fuel Replace fuel Feed system fails to Out of fuel. Check hopper, fill with fuel. start #2 snap disc may be defective or tripped. Reset or replace snap disc Vacuum switch not closing. No vacuum. Check vacuum fitting on auger tube for restrictions. Check door rope and replace if necessary. Check exhaust blower is plugged in and operating. Check vacuum switch is plugged in. Check vacuum hose is in good condition, clear and connected at both ends. Check thermocouple is in good condition and plugged in properly. -
Page 43: Section 13: Troubleshooting
Troubleshooting Symptoms Possible Cause Corrective Action Convection blower fails to #1 snap disc defective. Replace snap disc. start. Blower not plugged in. Check that blower is plugged into wire har- ness. Blower is defective or object jammed in Replace blower. impeller. Control box is defective. Replace control box. Exhaust blower fails to Blower not plugged in. Check that blower is plugged into wire har- start. ness. Intermittent electrical connection. Verify fit of plug to outlet Obstruction in blower. Clean exhaust system. Replace blower. Blower is defective. Replace control box. Control box is defective. Exhaust blower does not Control box is defective. Replace control box. shut off. -
Page 44: Section 14: Reference Materials
Reference Materials A. Component Function When describing the location of a component, it is always AS YOU FACE THE FRONT OF THE 1. Control Box APPLIANCE. a. T he control box is located on the lower left side of the appliance, behind the lower left side panel and above 2. Convection Blower the junction box. The convection blower is mounted at the bottom rear of the b. There is a light located inside of the control box. The appliance. There are 2 impellers, one on each side of the internal light will turn green when the appliance has motor. The convection blower pushes heated air through the F (93 °... - Page 45 grounded and has the correct polarity. A good surge protector it. This snap disc turns the convection blower on and off as is recommended. needed. Power is always present at snap disc #1. 12. Red Call Light 17. Snap Disc #2 (Fuel Delivery Interrupt) 175°F The red call light is on the side of the junction box, below the Snap disc #2 is located on the center of the convection fuse. The function of the red call light is to indicate that the plenum above the convection blower. There is an orange thermostat is calling for heat. and a black wire connected to it. This snap disc will turn off the feed system which will turn off the appliance if an over 13.
-
Page 46: Component Locations
B. Component Locations Back of Appliance Heat Output Switch Terminal Block Center 2 Screws for Thermostat Wires Power Outlet Reset Button Figure 46.1 LOCATED BEHIND RIGHT SIDE PANELS Feed Motor LOCATED BEHIND LEFT SIDE PANELS Control Box Convection Blower Vacuum Switch Fuse Junction Box Combustion Blower... -
Page 47: Exploded Drawing - Ps35
ECO-ADV-PS35 Service Parts Beginning Manufacturing Date: Apr 2010 Free Standing Pellet Stove Ending Manufacturing Date: Active C. Exploded Drawing Part number list on following page. Figure 47.1 04/11... -
Page 48: Service Parts & Accessories - Ps35
ECO-ADV-PS35 Service Parts Beginning Manufacturing Date: Apr 2010 Ending Manufacturing Date: Active IMPORTANT: THIS IS DATED INFORMATION. When requesting service or replacement Stocked parts for your appliance please provide model number and serial number. All parts listed at Depot in this manual may be ordered from an authorized dealer. - Page 49 ECO-ADV-PS35 Service Parts Beginning Manufacturing Date: Apr 2010 Ending Manufacturing Date: Active IMPORTANT: THIS IS DATED INFORMATION. When requesting service or replacement Stocked parts for your appliance please provide model number and serial number. All parts listed in this manual may be ordered from an authorized dealer.
- Page 50 ECO-ADV-PS35 Service Parts Beginning Manufacturing Date: Apr 2010 Ending Manufacturing Date: Active IMPORTANT: THIS IS DATED INFORMATION. When requesting service or replacement Stocked parts for your appliance please provide model number and serial number. All parts listed in this manual may be ordered from an authorized dealer.
-
Page 51: Exploded Drawing - Ps50
ECO-ADV-PS50 Service Parts Beginning Manufacturing Date: Apr 2010 Free Standing Pellet Stove Ending Manufacturing Date: Active E. Exploded Drawing Part number list on following page. 04/11 Figure 51.1... -
Page 52: Service Parts & Accessories - Ps50
ECO-ADV-PS50 Service Parts Beginning Manufacturing Date: Apr 2010 Ending Manufacturing Date: Active IMPORTANT: THIS IS DATED INFORMATION. When requesting service or replacement Stocked parts for your appliance please provide model number and serial number. All parts listed at Depot in this manual may be ordered from an authorized dealer. Baffl... - Page 53 ECO-ADV-PS50 Service Parts Beginning Manufacturing Date: Apr 2010 Ending Manufacturing Date: Active IMPORTANT: THIS IS DATED INFORMATION. When requesting service or replacement Stocked parts for your appliance please provide model number and serial number. All parts listed in this manual may be ordered from an authorized dealer. at Depot Snap Disc’s (#1)
-
Page 54: Service Parts & Accessories - Ps50/Cab50
ECO-ADV-PS50/ECO-CAB50 ECO-ADV-PS50 Service Parts Beginning Manufacturing Date: Apr 2010 Free Standing Pellet Stove Ending Manufacturing Date: Active IMPORTANT: THIS IS DATED INFORMATION. When requesting service or replacement Stocked parts for your appliance please provide model number and serial number. All parts listed in this manual may be ordered from an authorized dealer. -
Page 55: Exploded Drawing - Cab50
ECO-CAB50 Service Parts Beginning Manufacturing Date: June 2011 Pellet Cabinet Style Stove Ending Manufacturing Date: Active H. Exploded Drawing Part number list on following page. Figure 55.1 04/11... -
Page 56: Service Parts & Accessories - Cab50
ECO-CAB50 Service Parts Beginning Manufacturing Date: June 2011 Ending Manufacturing Date: Active IMPORTANT: THIS IS DATED INFORMATION. When requesting service or replacement Stocked parts for your appliance please provide model number and serial number. All parts listed in this manual may be ordered from an authorized dealer. at Depot #4 Door Assembly "... - Page 57 ECO-CAB50 Service Parts Beginning Manufacturing Date: June 2011 Ending Manufacturing Date: Active IMPORTANT: THIS IS DATED INFORMATION. When requesting service or replacement Stocked parts for your appliance please provide model number and serial number. All parts listed in this manual may be ordered from an authorized dealer. at Depot c t i p i l...
-
Page 58: Service & Maintenance Log
J. Service And Maintenance Log Date of Service Performed By Description of Service... -
Page 59: Homeowner's Notes
K. Homeowner’s Notes... -
Page 60: Contact Information
Hearth & Home Technologies 1445 North Highway Colville, WA 99114 Division of HNI INDUSTRIES Please contact your Heatilator dealer with any questions or concerns. For the number of your nearest Heatilator dealer, please visit www.heatilator.com or www.heatilatorecochoice.com. For Consumer Care 1-877-427-3316 Prior to calling, please have the model and serial number of the unit you are calling about.
Need help?
Do you have a question about the ECO-ADV-PS35 and is the answer not in the manual?
Questions and answers
Where is the 7amp fuse located?
The 7amp fuse is located on the side of the junction box above the red call light in the Heatilator ECO-ADV-PS35.
This answer is automatically generated
I've replaced all three snap disc, vacuum switch, feed motor, thermocouple, igniter, control box, and the junction box with new wiring harness. And yet the feed motor still fails to run. What could possibly be the problem
The feed motor on a Heatilator ECO-ADV-PS35 may fail to run due to several possible causes:
1. Obstruction in the feed chute – Check for blockages in the feed chute and clear any obstructions.
2. Loose feed spring set screw – Ensure the set screw on the feed spring shaft at the end of the feed motor is tight.
3. Defective or unplugged feed motor – Verify the motor is properly connected; replace if defective.
4. Failed thermocouple – If the amber light blinks three times repeatedly, the thermocouple may need replacement.
5. Tripped or defective snap disc #3 – Reset or replace the snap disc if necessary.
6. No power or blown fuse – Ensure the unit is connected to power and replace any blown fuses.
7. Faulty thermostat or wiring – Check thermostat connections, temporarily jump the connection to bypass the thermostat, and replace the thermostat or wiring if defective.
These steps should help diagnose and resolve the issue.
This answer is automatically generated