Table of Contents
Advertisement
Quick Links
Advertisement
Table of Contents

Subscribe to Our Youtube Channel
Related Manuals for Planet ICA-HM127


Summary of Contents for Planet ICA-HM127
- Page 1 User’s Manual ICA-HM127 3 Mega-Pixel H.264 Box IP Camera...
- Page 2 Further, PLANET reserves the right to revise this publication and to make changes from time to time in the contents hereof without obligation to notify any person of such revision or changes.
- Page 3 Do not dispose of WEEE as unsorted municipal waste and have to collect such WEEE separately. Revision User’s Manual for PLANET 3 Mega-Pixel H.264 Box IP Camera Model: ICA-HM127 Rev: 1.0 (January. 2012) Part No. EM-ICAHM127 2 ...
-
Page 4: Table Of Contents
1.3 Package Contents......................6 2. Basic Setup ........................ 7 2.1 System Requirement ....................7 2.2 Physical Description ....................8 2.2.1 Identification of ICA-HM127 physical detail ............8 2.3 Hardware Installation....................11 2.4 Initial Utility Installation ....................14 2.5 Preparation........................14 2.5.1 Configure Network by PLANET IPFinder............ - Page 5 3.4 Client Settings......................32 4. Advanced Configuration ..................34 4.1 System ......................... 35 4.2 Security........................37 4.3 Network........................39 4.3.1 General......................... 39 4.3.2 Advanced ......................41 4.4 IP Filter......................... 43 4.5 Video ..........................45 4.5.1 Image Setting ...................... 46 4.5.2 Video Setting ....................... 48 4.5.3 Overlay Setting....................
-
Page 6: Introduction
0.5 LUX illumination. ONVIF Certified / Professional Software The ICA-HM127 follows the ONVIF v1.01 and v1.02 standard SDK for user to integration with party software. The ICA-HM127 can work with the PLANET Cam Viewer 3 Lite/Pro... -
Page 7: Package Contents
1.3 Package Contents IP Camera unit x 1 Power Adapter x 1 Quick Installation Guide x 1 User’s Manual CD x 1 6mm Lens x 1 Lens Connector x 1 Stand x 1 ... -
Page 8: Basic Setup
1. The listed information is minimum system requirements only. Actual requirement will vary depending on the nature of your environment. 2. The ICA-HM127 can be managed by PLANET Cam Viewer Three if you want NOTE: to configure more detail information and settings of camera viewer plus software please refer to the CD-ROM folder “D:\Manual\Cam Viewer 3\”,... -
Page 9: Physical Description
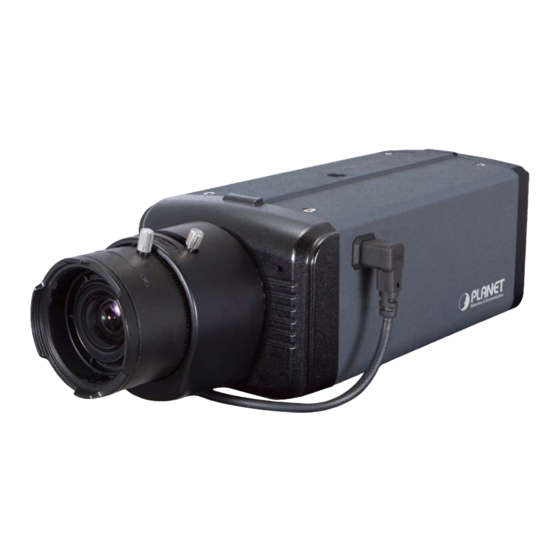
2.2 Physical Description 2.2.1 Identification of ICA-HM127 physical detail Front view Item Description 1. Lens mounting hole Lens C-mount or CS-mount hole 2. Iris control port Connects to lens set’s iris control cable Connects to tripod or pan-tilt camera cradle to secure the IP camera 3. -
Page 10: Rear View
Rear View Item Description Connects to external microphone to input audio signal to IP camera. 1. MIC IN Use 3.5mm audio cable. Connects to external audio amplifier to output voice. Use 3.5mm 2. AUDIO OUT audio cable. Inserts SD card for video recording. Maximum 32GB of SD-HD card 3. - Page 11 Terminal block for I/O connectors: Interface Description RS485 signal positive (+) RS485 signal negative (-) Signal ground Digital Output #1 Digital Input #1 Digital Input #2 AC24V- AC 24V power input negative (-) AC24V+ AC 24V power input positive (+) To insert or release a wire, press the button of the PIN you wish to insert or release.
-
Page 12: Hardware Installation
2.3 Hardware Installation Please follow the instructions below to setup your new IP camera. 1. Choose a suitable Mega pixel CS mount lens. 2. Connect the lens to IP camera. In this step, please keep lens set and camera’s CMOS sensor clean! Do not touch NOTE: lens and CMOS sensor by finger! 3. - Page 13 4. If you use an auto Iris lens, be sure to connect lens’ iris control cable to IP camera’s iris control port. Please mind there’s a notch at iris control cable; the notch must fit the iris control port on the IP camera. 5.
- Page 14 6. Connect Ethernet cable to LAN port. 7. Plug DC power adapter to power outlet on the wall. 8. Connect DC power cable to IP Camera’s DC power connector. If everything’s ok, you should see the left LED light on LAN port light up. If not, please recheck every step and try again, or ask your dealer of purchase for help.
-
Page 15: Initial Utility Installation
Please insert the bundle CD disk into your CD/DVD-ROM drive. When the welcome web page appears, please click your IP Camera name on the IP Camera list i.e. ICA-HM127. Then click on the utility IPFinder to start the program. - Page 16 3. Press ‘Discover’ button to search for all IP Cameras on your local network (make sure all IP Cameras are powered on and connect to local network first). When you find any IP Camera, you can click on it and click ‘Link’ button to connect to it by your web browser. 4.
-
Page 17: Setup Activex To Use The Internet Camera
2.6 Setup ActiveX to use the Internet Camera The Internet Camera web pages communicate with the Internet Camera using an ActiveX control. The ActiveX control must be downloaded from the Internet Camera and installed on your PC. Your Internet Explorer security settings must allow for the web page to work correctly. To use the Internet Camera, user must setup his IE browser as follows: 2.6.1 Internet Explorer 6 for Windows XP From your IE browse ... -
Page 18: Internet Explorer 7 For Windows Xp
2.6.2 Internet Explorer 7 for Windows XP From your IE browse ”Tools” ”Internet Options…” ”Security” ”Custom Level…”, please setup your “Settings” as follow. Set the first 3 items • Allow previously unused ActiveX control to run… • Allows Script lets •... -
Page 19: Internet Explorer 7 For Windows Vista
2.6.3 Internet Explorer 7 for Windows Vista From your IE browse ”Tools” ”Internet Options…” ”Security” ”Internet” ”Custom Level…”, please setup your “Settings” as follow. • Enable “Automatic prompting for ActiveX controls” • Prompt “Initialize and script active controls not marked….” From your IE browse ... -
Page 20: Internet Explorer 8 For Windows Xp
2.6.4 Internet Explorer 8 for Windows XP From your IE browse ”Tools” ”Internet Options…” ”Security” ”Custom Level…”, please setup your “Settings” as follow. Set the first some items as below. Under ActiveX ensure the following are set to enabled •... -
Page 21: Using Upnp Of Windows Xp Or Vista
2.7 Using UPnP of Windows XP or Vista 2.7.1 Windows XP UPnP™ is short for Universal Plug and Play, which is a networking architecture that provides compatibility among networking device, software, and peripherals. This device is an UPnP enabled device. If the operating system, Windows XP, of your PC is UPnP enabled, the Internet Camera will be very easy to configure. - Page 22 The following screen will appear, select “Networking Services” and click “Details” to continue 21 ...
- Page 23 The “Networking Services” will display on the screen, select “Universal Plug and Pla y” and click “OK” to continue. Please click “Next” to continue 22 ...
- Page 24 The program will start installing the UPnP automatically. You will see the below pop-up screen, please wait while Setup configures the components. Please click “Finish” to complete the UPnP installation Double-click “My Network Places” on the desktop, the “My Network Places” will display on the screen and double-click the UPnP icon with Internet Camera to view your device in an internet browser.
-
Page 25: Windows Vista
2.7.2 Windows Vista UPnP™ is short for Universal Plug and Play, which is a networking architecture that provides compatibility among networking device, software, and peripherals. This device is an UPnP enabled device. If the operating system, Windows Vista, of your PC is UPnP enabled, the Internet Camera will be very easy to configure. -
Page 26: Web-Based Management
3. Web-based Management This chapter provides setup details of the Internet Camera’s Web-based Interface. 3.1 Introduction The Internet Camera can be configured with your Web Browser. Before configure, please make sure your PC is under the same IP segment with Internet Camera. 3.2 Connecting to Internet Camera ... - Page 27 OFF until the device is allocated a new IP Address during configuration. If the User name and Password have been changed with PLANET IPFinder, NOTE: please enter the new User name and Password here.
- Page 28 Click ‘Allow access’, or IP Camera will not be able to function properly. When you’re installing Internet Explorer plugin, you may also be prompted that if you want to allow changes to be made to your computer: Click ‘Yes’ to allow changes. After ActiveX plugin is installed, you should be able to see the video stream from camera.
- Page 29 If this is the first time you use this IP Camera, you can refer to chapter 2.4 for NOTE: instructions on Setup Wizard, which will guide you to complete the software setup of your new IP Camera. 28 ...
-
Page 30: Viewing Live Video
3.3 Viewing Live Video After ActiveX control is installed, you can view IP camera’s video by web browser. Just connect to IP camera by web browser and login, and then you can see live video from IP camera: There are various controls on web page; here are descriptions of every control item: Item Description ‘Home’... - Page 31 Fit screen pixels) and fit screen (smaller size). If you want to see video in detail, switch to original size. If your computer monitor’s resolution is not enough and you want to see full image view, switch to fit screen and image size will adjust automatically.
- Page 32 That digital zoom uses computer algorithm to enlarge the video and some details may lost. If NOTE: you need to focus on detail of specific objects in video view, please use optical zoom ring on lens set of IP camera. Enable / Disable mute When mute is enabled ( ), you will not hear the voice from...
-
Page 33: Client Settings
3.4 Client Settings In ‘Client Settings’ menu, you configure basic IP camera settings like data transfer protocol and data storage folder. To access ‘Client Settings’ menu, click ‘Client Settings’ button on the left. The following screen will appear: Here are the descriptions of every setup item: 32 ... - Page 34 Item Description RTSP Select this option to use RTSP (Real-Time Streaming Protocol) to transfer video data. HTTP Select this option to use HTTP (Hyper-Text Transfer Protocol) to transfer video data. If you don’t know which one you should use, select ‘RTSP’. Folder Select a folder on your computer to save recorded video.
-
Page 35: Advanced Configuration
4. Advanced Configuration If you wish to configure IP camera’s settings, you can access IP camera’s ‘Configuration’ menu, which provides various kinds of system setting. To access configuration menu, click ‘Configuration’ button on the left. The ‘Configuration’ submenu will appear, please pick a setup item you wish to configure. 34 ... -
Page 36: System
4.1 System In this menu, you can configure basic IP camera settings like hostname and time. Here are the descriptions of every setup item: Item Description Host Name Input the IP camera’s hostname here, it can be any meaningful words or characters that will help you to identify this IP camera. You can use IP camera’s installation location as host name, and this will help you to identify IP camera when you have many IP cameras installed. - Page 37 otherwise do not check this box to keep time correct. Keep the current date Select this option and date / time setting will not be changed when you click ‘Apply’ in the page. and time You can check ‘Camera Date and Time’ item in this page to know IP camera’s current date and time setting.
-
Page 38: Security
4.2 Security In this menu, you can configure IP camera’s login account. There are three kinds of account: Administrator : Can view IP camera’s video and make changes of camera setting ‐ User : Can view IP camera’s video and see settings, but can’t make any change ‐... - Page 39 (Administrator) administrator’s password. Don’t forget administrator’s password! Or you’ll NOTE: need to reset IP camera’s all settings to get administrator’s password recovered. Account List Here lists all users existed in IP camera. If you want to remove one user, click it in the list, and then click ‘Remove’ button. If no user is existed, ‘New Account’...
-
Page 40: Network
4.3 Network 4.3.1 General In this menu, you can configure IP camera’s network setting. This IP camera supports both IPv4 and IPv6 IP address. Here are the descriptions of every setup item: Item Description Select this option to assign an IP address to LAN port (or obtain an address from DHCP server automatically). - Page 41 DHCP IPv4 / IPv6: Obtain both IPv4 and IPv6 address from DHCP ‐ server on LAN automatically. Static IPv4 / IPv6: Assign an IPv4 / IPv6 address to IP camera ‐ manually. If you don’t have a DHCP server on your local area network, you must use this option to specify an IP address.
-
Page 42: Advanced
4.3.2 Advanced In this menu, you can configure IP camera’s advance network setting. Here are the descriptions of every setup item: Item Description Multicast Enable video multicast: Multicast Group Address: Input multicast group address here, must be an address between 232.0.0.0 to 232.255.255.255. - Page 43 Multicast RCTP audio port: Input port number for RCTP audio here. Multicast TTL: Input TTL value for multicast here. Bonjour If you’re using MacOS and you have Bonjour installed, you can use it to discover this IP camera. Enable QoS to improve the data transfer priority of this IP camera (Your local area network must support QoS).
-
Page 44: Ip Filter
4.4 IP Filter When this IP camera is directly connected to Internet and not protected by firewall, this function acts like a mini built-in firewall to protect the safety of this IP camera and avoid attacks from hackers. Here are the descriptions of every setup item: Item Description Enable Filter... - Page 45 address in both field. Click ‘New’ button to add IP address into accepted IP list. Deny IP list Here lists all IP address that cannot build connections to this IP camera. If you want to remove a set of IP address from the list, click on the IP address and click ‘Remove’...
-
Page 46: Video
4.5 Video You can adjust the image of the IP camera in this menu. There are 3 sub-menus in this menu: Image Setting, Video Setting, and Overlay, which can be accessed by tabs on the top: 45 ... -
Page 47: Image Setting
4.5.1 Image Setting You can adjust the image parameters in this page. Here are the descriptions of every setup item: Item Description Control the image parameters. Click ‘ - ' to decrease value, or click ‘ + Brightness / ‘ to increase value. You can also input the value in the field directly. Contrast / Saturation / Sharpness... - Page 48 Power Line Select the frequency of power line of the place you’re using this IP Frequency camera. This will help to reduce the flicker of certain lights in the image. Condition Select the condition that you’ll be using this IP camera from dropdown menu.
-
Page 49: Video Setting
4.5.2 Video Setting You can adjust the video transfer parameters in this page. Here are the descriptions of every setup item: Item Description Select the compression of main stream: H.264 / MPEG4. H.264 /MPEG4 Video Select video resolution. Resolution H.264: ‐... - Page 50 That some video resolution is not available when video NOTE: encoder is ‘MPEG4’. When network speed is insufficient, select a lower video resolution will help. Frame Rate Select video frame rate. Please note that some frame rate is not available when video encoder is ‘H.264’.
-
Page 51: Overlay Setting
4.5.3 Overlay Setting You can adjust the video overlay parameters in this page. Here are the descriptions of every setup item: Item Description Enable Time Stamp Check this box to enable overlaying time stamp on video. Remove the Check this box to remove time stamp’s background color. You background color of may find this will help the readability of time stamp text in some the text... - Page 52 Enable Image Overlay Check this box to overlay a specific image on video, so you can show certain text / picture on the video and help people to identify this IP camera. Click ‘Browse’ button to pick a picture on your computer, then click ‘Update’...
-
Page 53: Audio
4.6 Audio You can adjust audio input / output parameters here. Here are the descriptions of every setup item: Item Description Enable Microphone Check this box to enable microphone. If you don’t want to hear voice from IP camera, you can uncheck this box to disable it. Audio Type The format is fixed as G.711 Microphone Gain... -
Page 54: Motion
4.7 Motion This IP camera is capable to detect object’s motion, so IP camera will only record when there’s motion and save disk storage space. Motion detection is performed by examine the movement of objects in rectangular motion detection area. You can define up to 3 motion detection areas. Here are the descriptions of every setup item: Item Description... - Page 55 Move: Use the mouse to drag the title text. ‐ Resize: mouse drag four corners ‐ (upper-left/right, lower-left/right) to resize it. If you only want to adjust width or height, drag the four sidebars (top, bottom, left, and right). Title Input characters in title field to change motion detection area’s title (Window 1 to text so you can identify it.
-
Page 56: Rs-485
4.8 RS-485 If you mount the IP camera on pan-tilt camera cradles that support pan-tilt control via RS-485 connection, you can use this function to control pan-tilt camera cradle so you can control the orientation of IP camera from remote place. Here are the descriptions of every setup item: Item Description... - Page 57 Baud Rate: Select data baud rate of RS-485 interface that Port Setting ‐ pan-tilt camera cradle will accept. When the length of RS-485 connection is very long (longer than 200M), it’s not recommended to use high speed connection (greater than 2400bps).
-
Page 58: Event
4.9 Event When there’s an event, you can use this setup page to define what IP camera should do, like send an Email or trigger digital output to activate external alarm. There are three setup pages: Setting: Define a new event and manage events. Media: Define what kind of media file should be saved on designate media. -
Page 59: Settings
4.9.1 Settings This page lists all existing events. You can click ‘Modify’ button to edit an existing event, or ‘Remove’ to delete an existing event. To create a new even, just click “New” button to add an Event setting. To add a new event, click ‘New’ button and the descriptions of every setup item is listed below: 58 ... - Page 60 Item Description Enable Setting Check this box to enable this event. If you just want to disable this event temporarily, you can uncheck this box to keep this event and disabling while not deleting it. Title Input any description text for this event so you can identify it quickly. You can use alphabets, numbers, and symbols include: !$-.@^_~ (no spaces allowed).
-
Page 61: Media
4.9.2 Media You can define what kind of media file should be saved on designated media. Here are the descriptions of every setup item: Item Description One Snapshot Save a picture file when event is triggered. H.264 Video Save a H.264 video clip. You can also select the recording length before and / or after the time when event is triggered in ‘Pre Event’... -
Page 62: Event Server
4.9.3 Event Server You can define the details of remote media server: FTP (File), SMTP (Email), and Samba (File). A Samba server can be any computer running windows operating system with network neighbor function enabled. Many stand-alone network file server also support samba server function. - Page 63 Here are the descriptions of every setup item: Item Description Enable FTP Check this box to enable FTP server upload. Server FTP Server: Input FTP server’s IP address or hostname. ‐ Port: Input FTP server’s port number. In most cases it should be ‐...
- Page 64 SMTP Server: Input SMTP server’s IP address or hostname. ‐ Port: Input SMTP server’s port number. In most cases it should be uld be ‐ default value ‘25’. Sender Email Address: Input the sender’s email address that will ‐ appear in the Email send by IP camera. This will help you to identify the Email sent by this IP camera, and may help when you have anti-spam software installed (you can set this Email address to ‘White List’...
- Page 65 STARTTLS: If your Email server required STARTTLS encryption, ‐ check this box. Please note that some Email server uses different port number than standard port 25 when STARTTLS encryption is used. Test SMTP: Click this button to test SMTP server settings above ‐...
-
Page 66: Recording To Sd Card
4.10 Recording to SD Card When a SD card is inserted into IP camera, you can save video files on it. 1. Be sure that the SD Card format should be FAT32. The NTFS format cannot be supported by this camera. NOTE: 2. -
Page 67: Log
4.11 Log You can check the usage log of IP camera here. In this page, you can click: First page / Final page: Jump to first / final page of log. Previous / Next: Jump to previous or next page of log. Remove: Clear log. -
Page 68: Device Info
4.12 Device Info You can check the information and network settings of this IP camera. This information is very useful when you need to repair or fix the problem of this IP camera. An example of device info page looks like this: 67 ... -
Page 69: Maintenance
4.13 Maintenance You can do some maintenance job about this IP camera here. Here are the descriptions of every setup item: Item Description Reboot Click this button to reboot the IP camera. This function is useful when you find IP camera is not working properly. Reset Clear all settings of IP camera and reset to factory default setting. -
Page 70: Language
card device card. Upgrade Upgrade IP camera’s firmware. Click ‘Browse’ button to select a firmware image file on your computer first, then click ‘Upgrade’ button. 4.14 Language You can change the display language of web interface. Click ‘Language’ button and select one language. More languages may available in latest firmware file. -
Page 71: Appendix A: Troubleshooting
Appendix A: Troubleshooting Please don’t panic when you found this IP Camera is not working properly. Before you send this IP Camera back to us, you can do some simple checks to save your time: Problem description Possible solution(s) Can’t connect to IP Camera 1) Please check the IP address of IP Camera again. -
Page 72: Appendix B: Specification
Appendix B: Specification Model ICA-HM127 Camera Specification Image Device 1/2.5" Progressive CMOS Color: 0.05 Lux @ 30 IRE Sensitivity B/W: 0 Lux @ IR ON Lens Focal Length 3.1-8mm , F1.2 Varifocal Lens Lens Mounting CS mount Auto Iris 1 x Auto Iris connector, DC Drive... - Page 73 Windows® XP, 2000, 2003, 2008 Server, Vista, Win 7 Browser IE 6.0 or latter Search & Installation PLANET IPFinder Monitor/ Recording / PLANET CV3P (4-ch Cam Viewer Three Pro Trail Version) Management PLANET CV3L (64-ch Cam Viewer Three Lite Bundle Version) 72 ...
Need help?
Do you have a question about the ICA-HM127 and is the answer not in the manual?
Questions and answers