Table of Contents
Advertisement
Instructions for use
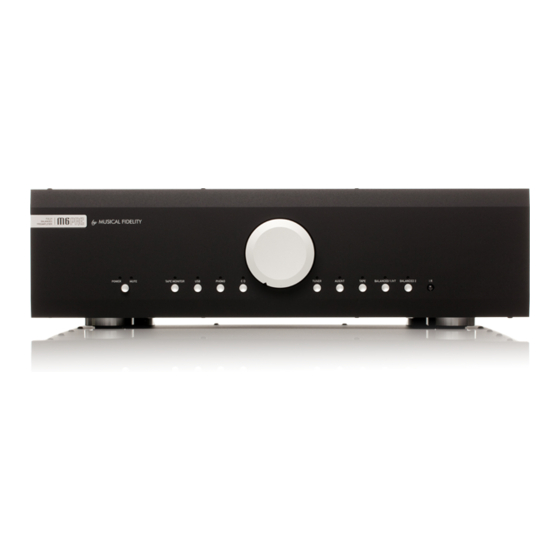
Thank you for purchasing the Musical Fidelity M6PRE fully balanced dual mono pre-amplifier.
This preamplifier is designed with high quality control and balanced sources in mind. Two FULLY balanced
inputs take care of balanced audio for the best in signal to noise, transient reproduction and dynamic range from
balanced sources. The outputs are also balanced allowing connection of balanced input power amplifiers to
realise a fully balanced system from source to speakers.
The M6PRE is designed to be partnered with present and future M6 series products or alternatively, may be
used with any other high quality hi-fi components. This combination yields one of the best high-fidelity systems
available at any price.
Used properly and carefully, it should give many years of outstanding musical reproduction.
Dust regularly with a soft duster or soft brush, but be careful when using cleaning or polishing agents - they may
harm the surface finish.
If there are any questions about the audio system, please consult the dealer who is there to help and advise.
Advertisement
Table of Contents

Summary of Contents for Musical Fidelity M6PRE
- Page 1 The M6PRE is designed to be partnered with present and future M6 series products or alternatively, may be used with any other high quality hi-fi components. This combination yields one of the best high-fidelity systems available at any price.
- Page 2 CONTENTS Section Page Safety Information – Mains plug (UK only) – Modification warning General advice – Installation precautions Disposal information – EU disposal information Installation – Introduction, cleaning, installation, power connections, audio connections Facilities and connections – Illustrations, main unit front & rear panels Remote control handset –...
-
Page 3: Issue
• If connecting to a BS1363 plug, a 13 amp fuse must be used. WARNING: MODIFICATIONS THIS PRODUCT EXPRESSLY APPROVED BY MUSICAL FIDELITY WHO IS THE PARTY RESPONSIBLE STANDARDS COMPLIANCE COULD VOID USER'S AUTHORITY TO OPERATE THIS EQUIPMENT. Issue 1... -
Page 4: General Advice
Heed all warnings shown on the back of the product. • Only connect the M6PRE to a mains outlet having the same voltage as marked at the back of the unit. • Always ensure that when disconnecting and reconnecting your audio equipment the mains supply is switched off. -
Page 5: Item Disposal Information
ITEM DISPOSAL INFORMATION DISPOSAL The crossed out wheeled bin label that appears on the back panel of the product indicates that the product must not be disposed of as normal household waste. To prevent possible harm to the environment please separate the product from other waste to ensure that it can be recycled in an environmentally safe manner. -
Page 6: Connections
Power Connections The M6PRE is supplied with a standard IEC mains cable which plugs into the IEC socket at the back of the unit (see page 7) - Page 7 FACILITIES & CONNECTIONS ON/OFF Button VOLUME control TAPE MONITOR button IR RECEIVER lens USB, PHONO, CD, TUNER, AUX/HT, TAPE BALANCED 1/HT, BALANCED 2 input selector buttons 11 12 13 PHONO MM/MC switch 13 BALANCED HT/AUX Selector for XLR balanced input 1/HT GROUND post for turntable 14 XLR BALANCED right and left inputs 1/HT PHONO inputs...
-
Page 8: Remote Control Handset
REMOTE CONTROL HANDSET The universal remote control shown below enables functions from this and related units to be operated from a convenient distance. Equivalent buttons on the remote control have the same functions as those on the front panel of the unit. Other functions are only available by remote control. -
Page 9: Starting
OPERATION Starting Once all connections are made, switch on the unit, using the POWER button front of the unit. The MUTE LED will light. Outputs are muted for about 6 seconds, so no sound will be heard from the speakers. Once the 6 seconds is up the MUTE LED goes out, indicating unit is settled, and ready for use. -
Page 10: Tape
On some 3 head tape decks there is an additional tape/source switch which should be in the 'TAPE' position for this to work. If in doubt, please consult tape deck operating manual. Note – the M6PRE volume control has no effect on the TAPE OUT signal. BALANCED 1/HT To use the BALANCED 1/HT input as a standard input, connect balanced source outputs to the BALANCED 1/HT input XLR sockets (see page 7). -
Page 11: Usb Input
Check that “USB audio device” appears under PREFERRED AUDIO DEVICE tab A second mixer will now be available which will be the default mixer whenever the M6PRE is plugged in. Use this mixer to select the source or adjust levels if required. -
Page 12: Issue
Change batteries for a new set. greatly reduced If none of these actions affect a cure, please contact the dealer, or an authorised Musical Fidelity service agent. Remember; never open the case of the M6PRE, as this will invalidate the guarantee. -
Page 13: Specifications
IEC type mains lead (10-Amp type) M6PRE remote control Batteries, LR03 or AAA, manganese alkaline type - 2 off Musical Fidelity reserves the right to make improvements which may result in specification or feature changes without notice. Issue 1 Page 13 of 14... - Page 14 MANUAL HISTORY RELEASE DATE CHANGES Issue 1 October 2009 issue Issue 1 Page 14 of 14...


Need help?
Do you have a question about the M6PRE and is the answer not in the manual?
Questions and answers