Table of Contents
Advertisement
Quick Links
OUTDOOR GRILLS
G R I L L I N G PA S S I O N . P E R F E C T E D.
NEED INFO HERE
Viking Range Corporation
111 Front Street
Greenwood, Mississippi 38730 USA
(662) 455 1200
For product information
call 1-888-VIKING1 (845-4641)
or visit the Viking website at
vikingrange.com
emerilgrills.com
Emeril is a trademark of Martha Stewart Living Omnimedia, Inc. Copyright 2011, Martha Stewart Living Omnimedia, Inc. All rights reserved.
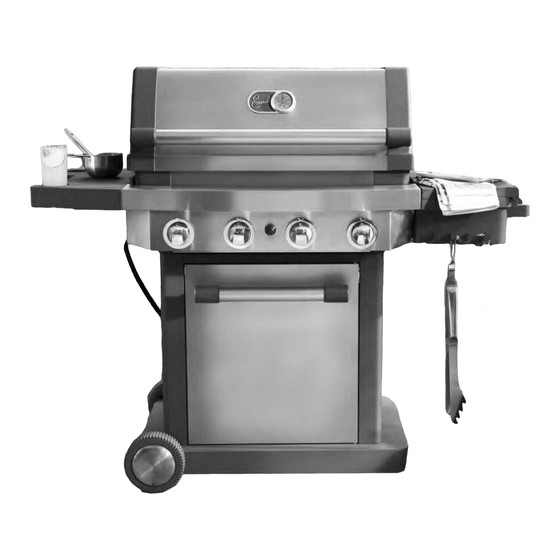
OUTDOOR GAS GRILL
G R I L L I N G PA S S I O N . P E R F E C T E D.
OWNER'S MANUAL
D E S I G N E D A N D D I S T R I B U T E D B Y
C U L I N A R Y G R O U P
Advertisement
Table of Contents

Subscribe to Our Youtube Channel
Related Manuals for Viking Emeril


Summary of Contents for Viking Emeril
- Page 1 D E S I G N E D A N D D I S T R I B U T E D B Y C U L I N A R Y G R O U P Emeril is a trademark of Martha Stewart Living Omnimedia, Inc. Copyright 2011, Martha Stewart Living Omnimedia, Inc. All rights reserved.
-
Page 2: Table Of Contents
FOR YOUR SAFETY FOR YOUR SAFETY CONTENTS NOTE: The use and installation of this product 16. Keep combustible items and surfaces at least For Your Safety ........... . . 3 must conform to local codes. -
Page 3: Foryoursafety
FORYOURSAFETY CARTPARTS ALWAYS confirm that the installation of this grill WARNING conforms with the requirements of all local codes or, PARTS in the absence of applicable local codes, with either DO NOT use this appliance under overhead Wheel a. Grease guide the National Fuel Gas Code, ANSI Z223. -
Page 4: Grill Parts
GRILL PARTS ASSEMBLY INSTRUCTIONS PARTS FOR BEST RESULTS gg. Right side table Warming rack hh. M6 x 30 bolt • Remove all contents from packaging, and make sure all parts are present before attempting to assemble. Cooking grates • Estimated assembly time: 40 to 45 minutes. M6 x 15 bolt Heating plates •... - Page 5 ASSEMBLY INSTRUCTIONS ASSEMBLY INSTRUCTIONS Cart Assembly Cart Assembly/ Continued Attach magnetic door latch (e) to bottom panel (q). Loosen pre-installed bolts on bottom panel (q). Align Attach back panel (m). Attach front header beam (f). holes on left side panel (c) with pre-installed bolts, shift panel (c) and tighten bolts.
- Page 6 ASSEMBLY INSTRUCTIONS ASSEMBLY INSTRUCTIONS Cart Assembly/ Grill Assembly/ Continued Continued Attach grease pan support (o) to right side panel (p). Attach gas tank holder (d) to left side panel (c). Attach grill body (x) to cart. Attach front support (aa) and back support (z) to left side table (y).
- Page 7 ASSEMBLY INSTRUCTIONS ASSEMBLY INSTRUCTIONS Grill Assembly/ Grill Assembly/ Continued Continued Attach right side table (gg) to grill body (x). Open the cover on right side table (gg) to insert ice cup Loosen pre-installed bolts on grease guide (a). Align holes (ff) and cutting board (ee).
-
Page 8: Using Your Grill
ASSEMBLY INSTRUCTIONS OPERATION Grill Assembly/ Continued USING YOUR GRILL DANGER CAUTION A FIRE CAUSING DEATH OR SERIOUS INJURY MAY OCCUR IF THE FOLLOWING IS NOT FOLLOWED EXACTLY: Use only the regulator provided. If a replacement is necessary, call our customer service center. The •... -
Page 9: Lighting Your Grill
OPERATION OPERATION LIGHTING YOUR GRILL USING THE LIGHTING STICK TO LIGHT of the valve out of the tank valve. DO NOT THE MAIN BURNERS obstruct flow of combustion air and ventilation air to the grill. Keep ventilation openings of 1. Insert a match into the end of lighting stick. DANGER cylinder enclosure free and clear from debris. -
Page 10: Care And Maintenance
OPERATION CARE & MAINTENANCE FLARE-UPS Re-connect regulator to the LP tank. Cooking Grates – The porcelain grates have a WARNING “Flare-ups” sometimes occur when food drippings Slowly turn the LP tank valve 1/4-turn at a glass-like composition that should be handled with fall onto hot heat distribution plate or burners and time and have valve all the way open. -
Page 11: Troubleshooting
CARE & MAINTENANCE CARE & MAINTENANCE TROUBLESHOOTING TROUBLESHOOTING PROBLEM POSSIBLE CAUSE PREVENTION/SOLUTION PROBLEM POSSIBLE CAUSE PREVENTION/SOLUTION Burner will not light using • Wires and/or electrode covered with • Clean wire and/or electrode with Flame blown out. • High or gusting winds. •... -
Page 12: Warranty
Any missing parts can be replaced at no charge within 30 days from the date of purchase with a valid proof of purchase. __________________________________________________________________________________________________________________________________________________________________________________ Limited Warranty Emeril™ Outdoor Grills hereby warrants to the ORIGINAL PURCHASER of this Emeril EG300 gas grill that it will be free __________________________________________________________________________________________________________________________________________________________________________________ of defects in material and workmanship from the date of purchase as follows: •...
Need help?
Do you have a question about the Emeril and is the answer not in the manual?
Questions and answers