Table of Contents
Advertisement
Available languages
Available languages
Quick Links
OWNER'S MANUAL
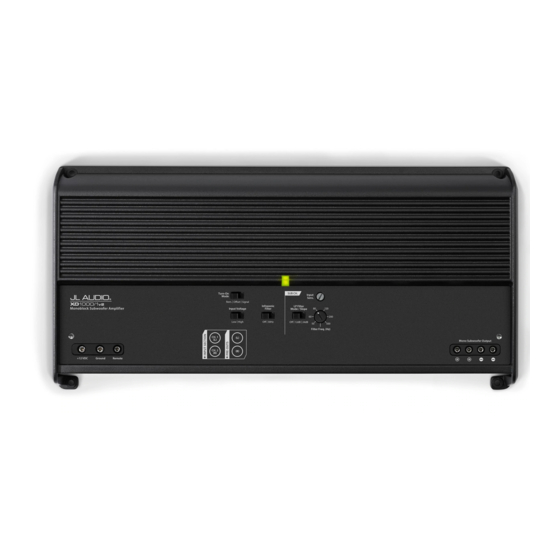
1000W Monoblock Class D Subwoofer Amplifier
Thank you for purchasing a JL Audio amplifier for
your automotive sound system.
Your amplifier has been designed and manufactured to exacting
standards in order to ensure years of musical enjoyment in your vehicle.
For maximum performance, we highly recommend that you have
your new amplifier installed by an authorized JL Audio dealer. Your
authorized dealer has the training, expertise and installation equipment
to ensure optimum performance from this product. Should you
decide to install the amplifier yourself, please take the time
to read this manual thoroughly to familiarize yourself
with its installation requirements and setup procedures.
If you have any questions regarding the instructions in this
manual or any aspect of your amplifier's operation, please contact your
authorized JL Audio dealer for assistance. If you need further assistance,
please call the JL Audio Technical Support Department
at (954) 443-1100 during business hours.
Advertisement
Table of Contents

Related Manuals for JL Audio XD1000/1V2


Summary of Contents for JL Audio XD1000/1V2
- Page 1 For maximum performance, we highly recommend that you have your new amplifier installed by an authorized JL Audio dealer. Your authorized dealer has the training, expertise and installation equipment to ensure optimum performance from this product.
-
Page 2: Protect Your Hearing
12 volt, negative-ground electrical The outer shell of your JL Audio amplifier is Your amplifier needs to be installed in a dry, the operation of this product so as not to damage systems. -
Page 3: Product Description
(use of the JL Audio ECS master the vehicle and your body during installation. piece of sheet metal in the vehicle. The The XD1000/1v2 can be operated with a wide ground lug, XB-MGLU is recommended). surface of the sheet metal should be sanded variety of source units and system configurations. -
Page 4: Turn-On Options
JL Audio ECS Speaker Wire to RCA is firmly gripped by the set screw. moving loudspeakers that are in parallel with the to overcome the loss of signal. -
Page 5: Input Sensitivity Controls
You should always listen to the system carefully to is less necessary, but can still help protect the input stage of the XD1000/1v2 for maximum the input to the amplifier. Active filters are more determine the best choice as vehicle acoustics and speaker system from excessive excursion. -
Page 6: Subwoofer Outputs
JL Audio dealer so the amplifier’s LP Filter (if the input signal is full- that it may be sent in to JL Audio for service. 3) Constant Red: lights to indicate that the range, the preamp output will be full-range). - Page 7 XD1000/1v2 Specifications Following the directions below will allow the target voltage is observed with the voltmeter. “FILTER FREQ” AMP FILTER 9) Once you have adjusted the XD1000/1v2 to installer to adjust the input sensitivity of each General Specifications: Detent Panel...
-
Page 8: Appendix D: Troubleshooting
Please refer to Appendix A (page 12) to set the input sensitivity for Check your voltage source and grounding point. The power supply maximum, low-distortion output. of the XD1000/1v2 will operate with charging system voltages down to 10V. Shutdown problems at higher volume “My amplifier doesn’t turn on.”... -
Page 9: Installation Notes
INSTALLATION NOTES: Use this diagram to document your amplifier’s switch and control positions. 16 | JL Audio - XD1200/1v2 Owner’s Manual... -
Page 10: Manual Del Propietario
All warranty returns should be sent to JL AUDIO ’s Amplifier Service Facility freight-prepaid through an authorized JL AUDIO dealer and must be accompanied by proof of purchase (a copy of the original El amplificador se ha diseñado y fabricado de acuerdo con normas rigurosas sales receipt). - Page 11 +12 V remoto de nivel remoto subwoofer izquierdo y (pág. 5) (pág. 7) (pág. 10) (pág. 11) derecho (pág. 10) Remote Level Control +12 VDC Ground Remote Inputs Preouts Mono Subwoofer Output 2 | JL Audio - XD1200/1v2 Manual del Propietario...
-
Page 12: Descripción Del Producto
XD1000/1v2. Si el • Proteja todos los cables del sistema de de JL Audio para solicitar asistencia. cable de alimentación principal con fusibles bordes metálicos afilados y desgaste. - Page 13 El corrimiento de CC. La sensibilidad de este sostiene el cable en su lugar, ajuste el tornillo de se alimenta el XD1000/1v2 con ese cable de conector de encendido “Remote” del XD1000/1v2 circuito está diseñada para señales de alto nivel fijación firmemente, con cuidado de no robar la...
- Page 14 Este tipo de circuito también de entrada del XD1000/1v2 con el fin de lograr entre altavoces de rango medio y tweeters. permite al XD1000/1v2 aceptar entradas de la salida nítida máxima.
-
Page 15: Filtro Infrasónico
Una señal mono en el amplificador producirá una señal de salida mono en la salida de bajo nivel. 10 | JL Audio - XD1200/1v2 Manual del Propietario... - Page 16 La única condición que apagará completamente correctamente, devuélvalo al distribuidor un XD1000/1v2 que no esté dañado es si el voltaje autorizado de JL Audio para que lo envíe al de la batería o el voltaje del encendido remoto servicio técnico de JL Audio.
- Page 17 02 . . . . . . . . . . . "50" . . . . . . . . . . . . 5 3 9) Una vez que haya ajustado el XD1000/1v2 al Equipos necesarios 03 .
- Page 18 Compruebe la fuente de voltaje y el punto de toma a tierra. La fuente de alimentación para una salida máxima con baja distorsión. del XD1000/1v2 funcionará con voltajes del sistema hasta 10 V como mínimo. Pueden producirse problemas de apagado a niveles “Mi amplificador no se enciende.”...
-
Page 19: Notas Sobre La Instalación
Monoblock Subwoofer Ampli er Filter Input Voltage Mode/Slope Low | High O | 30Hz O | 12dB | 24dB Filter Freq. (Hz) CH. 1 Mono Subwoofer Output CH. 2 +12 VDC Ground Remote 18 | JL Audio - XD1200/1v2 Manual del Propietario... - Page 20 Sollten Sie sich dennoch dafür entscheiden, den Verstärker selbst cliente es responsable de los cargos de transporte y seguro cuando envíe el producto a JL Audio. Los daños zu installieren, nehmen Sie sich bitte die nötige Zeit und lesen Sie das Ihnen vorliegende durante el envío para devolución no están cubiertos por la garantía.
-
Page 21: Schützen Sie Ihr Gehör
Lautstärkeregel- Mono Subwoofer- +12 V Vorverstärker- Anschluss knopf Ausgänge Stromanschluss Ausgangsbuchsen (S. 7) (S. 10) (S. 11) (S. 5) (S. 10) Remote Level Control +12 VDC Ground Remote Inputs Preouts Mono Subwoofer Output 2 | JL Audio - XD100/1v2 Benutzerhandbuch... - Page 22 Beschädigungen am Soundsystem, am Fahrzeug sonstige wichtige Teile des Fahrzeugs anbohren. entstehen kann. Diese Maßnahme muss der XD1000/1v2 das einzige Gerät ist, und schützt Sie selbst während der Installation. • Kabel dürfen nicht unter dem Fahrzeug oder unbedingt durchgeführt werden! das von der gesicherten Hauptstromleitung...
- Page 23 Kabelisolierung abziehen. Führen Sie mittleren Frequenzbereich. Dies Verhindert Kabel in der korrekten Position und ziehen Sie die der XD1000/1v2 über dieses Stromkabel betrieben anschließend das abisolierte Ende soweit in Fehlschaltungen aufgrund von Signalen, die auf Schraube Vorsichtig fest. Achten Sie darauf, die wird, sollten Sie eine 80A-Sicherung Verwenden.
- Page 24 EINGANGSTEIL EINSTELLUNG DER Der XD1000/1v2 ist mit einer symmetrischen „Low“: für Vorverstärker-Signale EINGANGSEMPFINDLICHKEIT Teil des Lautsprechersystems geschickt wird. Mit dem Drehregler „Input Sens.“ kann Audioeingangs-Technologie ausgestattet, die dem „High“: für Lautsprecher-Signale Die Aufteilung der Frequenzbereiche auf Benutzer eine sehr hohe Flexibilität bietet und die Ausgangsspannung des Steuergeräts an...
- Page 25 SUBWOOFER-AUSGÄNGE Abhängig vom angeschlossenen Subwoofer Der „Infrasonic Filter“ ist ein 24db/Oktaven des Verstärkers befindet. Mehrere XD (und Der XD1000/1v2 ist für Subwoofer mit einer und dem Fahrzeug können unterschiedliche Hochpass-Filter, mit einer fixen Cut-off-Frequenz HD) Verstärker können ganz nach Wunsch Nennimpedanz von mindestens 2 Ohm ausgelegt.
- Page 26 Da die Audio-Ausgabe Produkt bitte zu Ihrem JL Audio Fachhändler möglicherweise nur sehr kurz deaktiviert zurück, so dass es zum JL Audio Kundendienst wird, kann es bei der Audio-Ausgabe zu einem eingesandt werden kann. Der Verstärker hat keine hörbaren, wiederholten Ticken oder Klopfen Teile oder Sicherungen, die durch den Nutzer kommen.
- Page 27 02 . . . . . . . . . . . "50" . . . . . . . . . . . . 5 3 9) Nachdem Sie den XD1000/1v2 auf seinen 03 .
- Page 28 „Mein Verstärker schaltet sich manchmal ab, meistens bei höheren Lautstärken“ Bitte lesen Sie Anhang A (Seite 14), um die Eingangsempfindlichkeit auf das Überprüfen Sie Ihre Spannungsquelle und den Massepunkt. Das Netzteil des XD1000/1v2 maximale verzerrungsarme Ausgangsignal einzustellen. arbeitet mit einer Spannungsversorgung ab 10V. Falls der Verstärker bei hohen Lautstärken abschaltet, könnte die Spannungsversorgung...
- Page 29 EINBAUNOTIZEN: Benutzen Sie dieses Diagramm, um die Schalterstellungen und Reglereinstellungen zu notieren. 18 | JL Audio - XD100/1v2 Benutzerhandbuch...
-
Page 30: Internationale Garantiebedingungen
Si vous avez la moindre question relative aux instructions de ce manuel ou à tout aspect du fonctionnement de votre amplificateur, veuillez contacter votre revendeur JL Audio agréé pour obtenir de l’aide. Si vous avez besoin d’une aide supplémentaire, veuillez contacter le Service d’assistance technique de JL Audio au (954) 443-1100 aux heures de bureau. -
Page 31: Numéro De Série
à distance mono gauche et droite +12 V (pg. 5) (pg. 7) (pg. 10) (pg. 11) (pg. 11) Remote Level Control +12 VDC Ground Remote Inputs Preouts Mono Subwoofer Output 2 | JL Audio - XD1200/1v2 Manuel d’utilisation... -
Page 32: Description Du Produit
Cette étape n’est pas facultative. nécessaire si le XD1000/1v2 est le seul appareil système et du véhicule et de prévenir toute blessure ou tout autre système essentiel du véhicule. - Page 33 à ne pas marquer la tête de la vis. Si vous protégez l’amplificateur à proximité « Remote » du XD1000/1v2 est prévu pour un fil et non pas aux signaux de bas niveau (niveau La connexion de masse doit se faire à l’aide de ses connexions d’alimentation (avec une...
- Page 34 établi lors de la bas du XD1000/1v2 peut être réglé sur toute procédure décrite à l’annexe A (page 14). Cette de CC ou d’offset, vous devez utiliser l’entrée des unités sources et des petits amplificateurs.
-
Page 35: Filtre Infrasonique
Pour un protéger les systèmes du caisson de grave, sans peuvent être contrôlés avec une seule commande Les sorties du caisson de grave du XD1000/1v2 caisson de grave qui donne directement dans dégrader de façon audible la sortie des extrêmes HD-RLC en utilisant un répartiteur de ligne... - Page 36 Comme un dysfonctionnement, veuillez le retourner à la coupure peut être de très courte durée, elle votre revendeur JL Audio agréé pour qu’il soit peut se manifester par un tic-tac répétitif ou un ensuite envoyé à JL Audio pour réparation.
- Page 37 9) Lorsque vous avez réglé le XD1000/1v2 à son 01 . . . . . . . . . . . . . . . . . . . . . . . . . . . . 5 3 Nombre d’entrées : une paire stéréo...
- Page 38 « Mon amplificateur s’éteint de temps en temps, en général lorsqu’il travaille à volume élevé. » une sortie maximale, à faible distorsion. Vérifiez votre source de tension et votre point de masse. Le XD1000/1v2 peut être alimenté avec une tension de batterie rechargeable pouvant baisser jusqu’à...
- Page 39 REMARQUES D’INSTALLATION : Utilisez ce schéma pour connaître les positions des commandes et des contacteurs de votre amplificateur. 18 | JL Audio - XD1200/1v2 Manuel d’utilisation...
-
Page 40: Remarques Concernant L'installation
REMARQUES CONCERNANT L’INSTALLATION : REMARQUES CONCERNANT L’INSTALLATION : 20 | JL Audio - XD1200/1v2 Manuel d’utilisation... - Page 41 JL Audio agréé. Si une réparation s’avérait nécessaire au cours de cette période de garantie pour une raison due à un défaut de fabrication ou à un dysfonctionnement, JL Audio réparera ou remplacera le produit défectueux, à sa discrétion, par un produit neuf ou réusiné, et ce sans aucun frais. Les dommages entraînés par les éléments suivants ne sont pas couverts par cette garantie : accident, utilisation inadéquate...
Need help?
Do you have a question about the XD1000/1V2 and is the answer not in the manual?
Questions and answers