Table of Contents
Advertisement
Advertisement
Table of Contents

Related Manuals for Perlick H50IM


Summary of Contents for Perlick H50IM
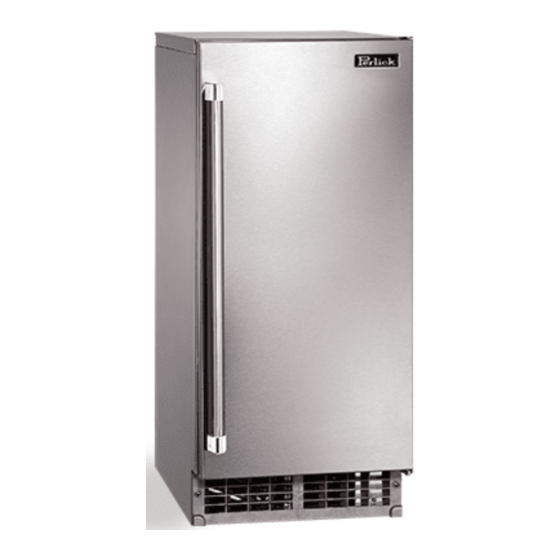
- Page 1 PERLICK SELF-CONTAINED ICE MAKER MODEL: H50IM PRODUCT MANUAL...
-
Page 2: Table Of Contents
IMPORTANT 1. This booklet is an integral and essential part of the product and should be handed over to the user. Read the warnings contained in this booklet carefully as they give important indications regarding the safety of the installation, use and maintenance. -
Page 3: General Information
I. GENERAL INFORMATION Top Panel 1. CONSTRUCTION Ice Making Mechanism Slope Control Switch Door Front Panel Magnet Catch Bin Control Thermostat Scoop Holder Door Removed for Clarity of Inner Components Louver... -
Page 4: Installation And Operating Instructions
II. INSTALLATION AND OPERATING INSTRUCTIONS 1. CHECKS BEFORE INSTALLATION * Visually inspect the exterior of the shipping container, and any severe damage noted should be reported to the carrier. WARNING Remove shipping tape(s) and packing as follows. If any are left in the Ice Maker, it will not work properly. -
Page 5: Location
2. LOCATION WARNING Normal operating ambient temperature should be within 45°F (7°C) to 100°F (38°C); Normal operating water temperature should be within 45°F (7°C) to 95°F (35°C). Operation of the Ice Maker, for extended periods, outside of these normal temperature ranges may affect production capacity. For best operating results: * The Ice Maker should not be located next to ovens, grills or other high heat producing equipment. -
Page 6: Set Up
4. SET UP 1) Unpack the Ice Maker, and remove all shipping cartons, tapes and packing BEFORE operating the unit. Be careful not to damage the exterior panels when handling the Ice Maker. 2) Position the Ice Maker in a selected site. Clean the interior with soap and water and rinse thoroughly. - Page 7 3) To build in between a unit and an open 4 7/8" space: Cabinet 15" Fig. 3 Use a cabinet or the like to support the counter Fig. 5 before building in the Ice Maker. Do not build in the Ice Maker at a corner where the Door will hit other equipment such as an oven handle or where the Ice Maker cannot 4) To build into an L-shaped kitchen:...
-
Page 8: Water Supply And Drain Connections
5. WATER SUPPLY AND DRAIN CONNECTIONS WARNING To prevent damage to the freezer mechanism, do not operate this Ice Maker when the water supply is OFF, or if the pressure is below 10 PSIG (0.7 bar), the recommended water pressure. Stop the Ice Maker until proper water pressure is resumed. -
Page 9: Installers Final Checklist
6. INSTALLER FINAL CHECK LIST 1) Is the Ice Maker level? 2) Is the Ice Maker in a site where the ambient temperature is within 45°F (7°C) to 100°F (38°C) and the water temperature within 45°F (7°C) to 95°F (35°C) all year around? 3) Have all shipping tape(s), string and packing been removed from the Ice Maker? 4) Are all components, fasteners and thumbscrews securely in place? 5) Have all electrical and piping connections been made? -
Page 10: Preparing The Icemaker For Long Storage
8. PREPARING THE ICEMAKER FOR LONG STORAGE WARNING Drain the Ice Maker to prevent damage to the water supply line at subfreezing temperatures, using air or carbon dioxide. Shut off the Ice Maker until proper air temperature is resumed. 1) Close the Water Supply Line Shut-off Valve, and open the Drain Valve. 2) Move the Control Switch to the “OFF"... -
Page 11: Maintenance And Cleaning Instructions
[a] Cleaning Solution Dilute 5 fl. oz. (148 ml) of Perlick recommended cleaner “Scale Away" or “LIME-A-WAY" (Economics Laboratory, Inc.) with 1 gallon (3.8 l) of warm water. (No more than 32% phosphoric acid) -
Page 12: [B] Cleaning Procedure
[b] Cleaning Procedure The cleaning process will remove lime deposits from the water system. 1) Remove all ice from the evaporator and the storage bin. Note: To remove cubes on the evaporator, move the control switch to the “OFF" position and move it back to the “ICE"... -
Page 13: [C] Sanitizing Solution
10) Remove the water tank, drain it, and replace it as described in 3) through 6). 11) Open the water supply line shut-off valve. 12) Move the control switch to the “WASH" position to circulate clean water for about 5 minutes. 13) Move the control switch to the “OFF"... - Page 14 Water Tank 6) Disconnect the suction tube by compressing both plastic tabs to unlock Suction Tube the joint in the direction of the black arrows and pulling the tube clear to drain the tank. Joint Drain 7) Spread out the tabs on both sides to unlock the water tank, and pull it out toward you.
- Page 15 Bracket 12) Slide in the spray assembly along the rails on Frame Pipe the right and left brackets. Refit the discharge Rail Rail tube securely on the spray assembly. A loose fitting may cause a water leak. 13) Position and lock the ice chute onto the front and rear frame pipes by pushing the chute down until it clicks onto both pipes.
- Page 16 20) Mix a new batch of the sanitizing solution and slowly pour it into the water tank. 21) Move the control switch to the “WASH" position. 22) After circulating the sanitizing solution for about 15 minutes, move the control switch to the “OFF"...
-
Page 17: Maintenance
29) Move the control switch to the “WASH" position to circulate clean water for about 5 minutes. 30) Move the control switch to the “OFF" position, then remove the water tank, drain it, and replace it as described in 23) through 26). 31) Repeat 29) and 30) two more times to rinse thoroughly. -
Page 18: Warranty
TERMS: The Perlick Warranty applies to products installed in the fifty United States, the District of Columbia or the ten provinces of Canada. All service provided by Perlick Corporation under the above warranty must be performed by authorized Perlick service representatives, unless otherwise specified by Perlick.
Need help?
Do you have a question about the H50IM and is the answer not in the manual?
Questions and answers