Silvercrest SON 90 A1 Operating Instructions Manual
Overlock sewing machine son 90 a1
Hide thumbs
Also See for SON 90 A1:
- Operating instructions manual (218 pages) ,
- Operating instructions manual (182 pages) ,
- Operating instructions manual (182 pages)

Related Manuals for Silvercrest SON 90 A1


Summary of Contents for Silvercrest SON 90 A1
- Page 1 Overlock Sewing Machine SON 90 A1 Overlock Sewing Machine Operating instructions KOMPERNASS GMBH BURGSTRASSE 21 · D-44867 BOCHUM www.kompernass.com ID-Nr.: SON 90 A1-01/11-V1 IAN: 64780...
- Page 2 SON 90 A1...
-
Page 3: Table Of Contents
INDEX PAGE Intended Usage Safety instructions Items supplied Technical Data Description of the appliance Bringing the upper blade into a rest position Needle Information Upper looper element Opening the front flap Preparation Connecting the foot pedal ..................6 Controlling the sewing speed . - Page 4 Overlock seams Roll hemmings ....................19 Binding-off and sample sewing .
-
Page 5: Intended Usage
OVERLOCK SEWING MACHINE Intended Usage This overlock sewing machine is intended ... This overlock sewing machine is not intended ... - for use as a portable machine, - to be installed at a permanent location, – for the trimming of material edges (sewing) of typical household –... -
Page 6: Items Supplied
Items supplied Overlock Sewing Machine Replacement blade (bottom) Waste container Accessory box 2 Needles Nr. 11 Operating instructions 4 Needles Nr. 14 (2 in the machine, pre-installed) 4 Bobbin caps Upper looper element Screwdriver small Screwdriver large Covering hood Tweezers Brush with integrated unstitcher The accessories are to be found in the accessory box on the side... -
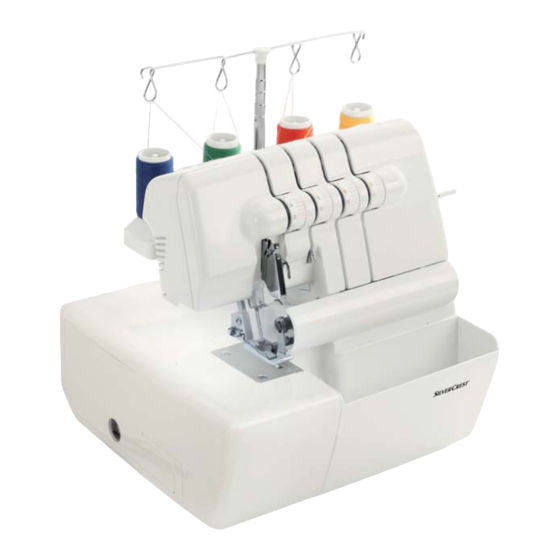
Page 7: Description Of The Appliance
Description of the appliance On the front fold-out page: On the rear fold-out page: 1 Thread tree i movable upper blade (Upper blade) 2 Spool support o Upper looper 3 Thread roll centerer p Lower looper 4 Sewing foot lever a Sewing foot 5 Adjustment wheel for stitch length s Fixed lower blade... -
Page 8: Opening The Front Flap
Opening the front flap Attention! Always switch the machine off with the power switch 8 when you open the front flap 0. Risk of Injury! • Slide the front flap 0 to the right (A) and then pull it towards you (B) (Fig. -
Page 9: Removing Needle(S)
Removing needle(s) Attention! Before exchanging the needles, remove the power plug. This prevents an unintended starting of the machine. If you do not, you run a risk of serious injury! T T i i p p ! ! An exchange of the needles is easier if you first remove the free arm cover (Fig. -
Page 10: Threading
Threading Note: On delivery, all 4 threads are already threaded. You can begin sewing im- mediately. Should you wish to change the thread, and all 4 threads are still threaded, then proceed as described in the chapter "Changing threads (binding together)“. Should you need to rethread all threads from scratch, then proceed as described in this chapter, "Threading“. - Page 11 3. Thread the yarn into the thread guide in that you pull the thread down until it slips under the thread guide (2) (Fig. 16). Fig. 16 4. Firmly hold the yarn with your fingers, guide it between and through the discs of the thread tension selector z and then pull it down (3) (Fig.
-
Page 12: Threading The Lower Looper Thread (Yellow)
Threading the lower looper thread (yellow) Attention! Before threading, ALWAYS place the power switch 8 at "O" (Off) and remove the plug from the mains power socket. This prevents an unintended starting of the machine. If you do not, you run a risk of serious injury! Figure 19 shows the thread path of the lower looper thread. -
Page 13: Threading Yarn For The Right Needle (Green)
5. Thread the yarn in the looper area as per the yellow markings (4 - 8) (Fig. 22). Fig. 22 6. Firmly hold the yarn with the tweezers about 4 cm from the thread guide (Fig. 23). 7. Now guide it lightly, from the left and with the tweezers, under the thread guide. - Page 14 2. Thread the yarn into the thread guide in that you pull the thread down until it slips under the thread guide (2) (Fig. 25). Fig. 25 3. Firmly hold the yarn with your fingers, guide it between and through the discs of the thread tension selector t and then pull it down (3) (Fig.
-
Page 15: Threading Yarn For The Left Needle (Blue)
Threading yarn for the left needle (blue) Attention! Before threading, ALWAYS place the power switch 8 at "O" (Off) and remove the plug from the mains power socket. This prevents an unintended starting of the machine. If you do not, you run a risk of serious injury! Figure 29 shows the thread path of the left needle thread. -
Page 16: Trial Run
4. Thread the yarn as per the blue markings (4 - 6) (Fig. 32/33). Fig. 32 5. Thread the yarn through the left needle (7) (Fig. 33). 6. Lay the yarn to the rear under the sewing foot a. Fig. 33 Trial run When yarn has been threaded for the first time, or after a yarn breakage it must be rethreaded, proceed as follows:... -
Page 17: Changing Threads (Binding Together)
Changing threads (binding together) Changing threads is quite simple with the following procedure: 1. Cut the yarn above the spool support 2 (Fig. 34) and place the new roll of thread on the spool support 2. Fig. 34 2. Tie the ends of the new and the old thread together (Fig. 35). Fig. -
Page 18: By Turning The Seam Width Adjustment Knob
... by turning the seam width adjustment knob By using the seam width adjustment knob f, seam width can be adjusted within the ranges indicated below. • Only the left needle is used: 5.2 - 6.7 mm • Only the right needle is used: 3.0 - 4.5 mm Setting the seam width adjustment knob Attention! -
Page 19: Differential Transport
Differential transport Manner of operation The machine has two sets of toothed rack feeders, one to the front and one to the rear. Both sets move independant of each other. Through the differential feed motion both toothed rack sets can move themselves at various speeds. With this, the fabric is stretched or gathered, depending on which transport differential has been set between the front and rear rack feeders. -
Page 20: Free Arm Sewing
Free arm sewing To work tubular-shaped fabrics, such as sleeves or trouser legs, you can remove the free arm cover. • If appropriate, remove the waste container from the machine. • Slide the free arm cover to the left and pull it off (Fig. 46).. Fig. -
Page 21: Overlock Seams
Overlock seams • Open the front flap 0. • Slide the seam width switch d to "S", so that the seam width finger is pushed forward (1) (Fig. 49). Note: The seam width switch d must be pushed until it can go no further. Otherwise, the seams will be untidy. -
Page 22: Binding-Off And Sample Sewing
Binding-off and sample sewing • Lay all yarns under the sewing foot a, to the rear, slightly to the left and over the stitch plate e. • Firmly hold the yarns under a slight tension. • Turn the handwheel 6 2 to 3 revolutions onto itself to begin empty chainstitch formation. -
Page 23: 2-Thread Overcast Chain Stitch (Overlock)
2-thread overcast chain stitch (overlock) Figure 53 shows you the stitch pattern for this stitch. This stitch with a needle and 2 threads is used for tidying the edges of Needle position light or stretchy fabrics. By changing the needle position you can obtain a narrow or a wide overcast seam. -
Page 24: 2-Thread-Overcast-Stitch
2-thread-overcast-stitch Figure 56 shows you the stitch pattern for this stitch. Needle position This stitch with a needle and 2 threads is used for tidying normal fabrics with an overcast stitch. It is also ideal for flat stitch seams (fell or butt seams) Seam width switch and blind hemming. -
Page 25: 3-Thread Chain Stitch (Overlock)
3-thread chain stitch (overlock) Needle position Figure 59 shows you the stitch pattern for this stitch. This stitch with a needle and 3 threads is used for tidying of normal fabrics with an overcast stitch. Seam width switch By changing the needle position you can obtain a narrow or a wide overcast seam. -
Page 26: 3-Thread - Flatlock Seam
3-thread - flatlock seam Needle position Figure 63 shows you the stitch pattern for this stitch. This stitch with a needle and 3 threads is used for fell or butt seams and for ornamental stitches with decorative thread. By changing the needle position Seam width switch you can obtain a narrow or a wide flatlock seam (flatlock). -
Page 27: 3-Thread Overcast Chain Stitch (Overlock)
3-thread overcast chain stitch (overlock) Needle position Figure 67 shows you the stitch pattern for this stitch. This stitch with a needle and 3 threads is used for sewing, for example, decorative edges. Seam width switch By changing the needle position you can obtain a narrow or a wide overcast chain seam. -
Page 28: 3-Thread Safety Stitch, Highly Elastic, Imitated
3-thread safety stitch, highly elastic, imitated Needle position Figure 71 shows you the stitch pattern for this stitch. This stitch with 2 needles and 3 threads is ideal for lightweight, extremely stretchy fabrics such as jersey and spandex. Seam width switch Adjust the thread tension selectors r t z u to the appropriate values (see table) then sew a test seam on the material being used. -
Page 29: 4-Thread Safety Stitch, Highly Elastic, Imitated
4-thread safety stitch, highly elastic, imitated Needle position Figure 75 shows you the stitch pattern for this stitch. This stitch with 2 needles and 4 threads is ideal for medium to heavy, stretchy fabrics such as double-knitted materials and swimwear. Seam width switch It is suitable for combining two materials and neatening the edges at the same time. -
Page 30: Roll Hemmings
Roll hemmings With this machine you can sew four different roll hemming types. When sewing roll hemmings, the fabric edge is folded over and provided with an overlock seam. Lightweight fabrics such as batiste, chiffon, organza and so on are best for these kinds of seams. Heavy fabrics or stiff materials are not suitable for roll hemmings. -
Page 31: 2-Thread Rolled Hem
2-thread rolled hem Figure 85 shows you the stitch pattern for this stitch. Needle position Adjust the thread tension selectors t u to the appropriate values (see table) then sew a test seam on the material being used. For this type of stitch insert the upper looper element in the upper looper o. Seam width switch F - 2 Stitch length... -
Page 32: Flatlock Decorative Seams
Flatlock decorative seams To produce flatlock seams, set up the thread tensions for a 3-thread overlock stitch. Sew a seam and then pull the fabric apart to smooth the seam. The flatlock seam can be used as a decorative assembly seam or as pure ornamental stitching (Fig. -
Page 33: Flatlock Seam As Decorative Seam
Flatlock seam as decorative seam • Adjust the movable upper blade i into a rest position (Fig. 92). The textile is not trimmed in this type of seam. • Fold the textile so that the two inside sides lie on each other. Fig. -
Page 34: Sewing Corners
Sewing corners Outer corners Cutting line 1. Cut away, before and after the corner, about 2 cm to the seam line (Fig. 97). 2. Sew a stitch further than to the marking "A" on the drawing and then stop (Fig. 97). Fig. -
Page 35: Tips And Tricks
Tips and Tricks Using pins Always insert pins to the left of the sewing foot a (Fig. 103). The pins are thus not in the cutting area of the blade i s and they can be easily removed afterwards. Attention! Appliance Damage! NEVER sew over pins or other hard materials. -
Page 36: Maintenance And Cleaning
Maintenance and Cleaning Attention! Before cleaning or carrying out maintenance, ALWAYS remove the plug from the mains power socket. This prevents an unintended starting of the machine. If you do not, you run a risk of serious injury! Cleaning and lubrication •... -
Page 37: Storage
Storage IMPORTANT: ALWAYS remove the plug from the mains power socket before putting the machine into storage. This prevents an unintentional starting of the appliance, and thus the risk of injury, as well as an overheating of it! When the machine is not in use, always cover it with the hood. This will protect the machine from dust. -
Page 38: Troubleshooting
Troubleshooting Problem Cause Solution • Needles are bent, blunt or damaged at the • Fit new needles. points. Needles break • Needles are not correctly inserted. • Insert the needles into the retainers correctly. • You have pulled the material too heftily. •...
Need help?
Do you have a question about the SON 90 A1 and is the answer not in the manual?
Questions and answers