Table of Contents
Advertisement
Quick Links
Advertisement
Table of Contents

Related Manuals for Silvercrest 100139


Summary of Contents for Silvercrest 100139
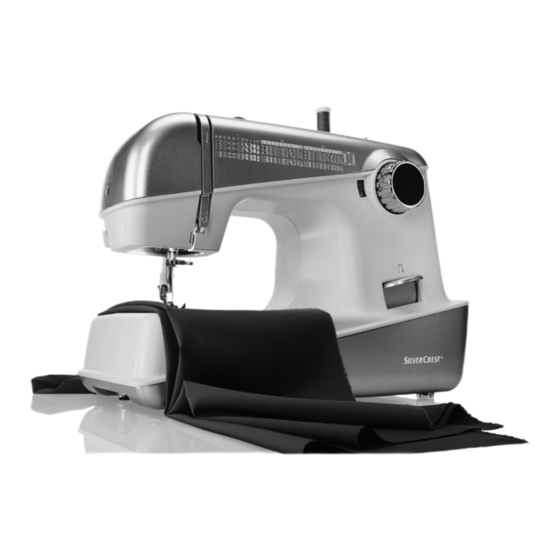
- Page 1 MACHINE À COUDRE SNMD 33 A1 MACHINE À COUDRE NAAIMACHINE Instructions d'utilisation et consignes de sécurité Bedienings- en veiligheidsinstructies NÄHMASCHINE SEWING MACHINE Bedienungs- und Sicherheitshinweise Operation and Safety Notes IAN 100139...
- Page 2 Avant de lire le mode d'emploi, ouvrez la page contenant les illustrations et familiarisez- vous ensuite avec toutes les fonctions de l'appareil. Vouw vóór het lezen de pagina met de afbeeldingen open en maak u vertrouwd met alle functies van het apparaat. Klappen Sie vor dem Lesen die Seite mit den Abbildungen aus und machen Sie sich anschließend mit allen Funktionen des Gerätes vertraut.
-
Page 4: Table Of Contents
Table of contents Introduction Introduction........................Page 72 Intended use........................Page 72 Sewing machine components..................Page 72 Accessories ........................Page 72 Technical data.........................Page 73 Important safety instructions ................Page 74 Getting ready Connecting machine to power source ................Page 75 Installing the snap-in sewing table..................Page 75 Inserting the needle ......................Page 76 Two-step presser foot lifter .....................Page 76 Attaching the presser foot holder..................Page 77... -
Page 5: Introduction
Introduction Introduction Congratulations on the purchase of your sewing machine. You have bought a top quality product which has been manufactured with great care. These Operating Instructions contain all you need to know about using your sewing machine. However, if you still have any questions, please contact your dealer. We hope you enjoy your sewing machine and wish you success. -
Page 6: Technical Data
Introduction Technical data Rated voltage 230 V ~50 Hz Power rating - Machine 70 Watt - Sewing light 100 mW - Total 70 Watt Dimensions - When handle is folded down Approx. 397 x 277 x 194.5 mm (W x H x D) Cable length - Power cable Approx. -
Page 7: Important Safety Instructions
Important safety instructions Important safety instructions When using an electrical appliance, the basic safety instructions should always be followed. Read all Operating Instructions before using this sewing machine. DANGER - To reduce the risk of electric shock: 1. The sewing machine should never be left unattended when plugged in. 2. -
Page 8: Getting Ready
Getting ready Connecting machine to power source Important: Unplug power cable when machine is not in use. Important: Consult a qualified electrician if in doubt about connecting the machine to the power source. Unplug power cable if you are not using the power supply. -
Page 9: Inserting The Needle
Getting ready Inserting the needle Important: Turn power switch (20) to off ("O"). Change the needles regularly, especially at the first signs of problems when sewing. Insert the needle as in the illustration. A. Loosen the needle clamp screw and tighten again after inserting the new needle. -
Page 10: Attaching The Presser Foot Holder
Getting ready Attaching the presser foot holder Important: Turn the main switch (20) to off ("O") when carrying out all the operations! 1. Install the presser foot holder Raise the presser bar (A) by lifting the two-step presser foot lifter (18) Attach the presser foot holder (B) as illustrated. -
Page 11: Winding The Bobbin
Getting ready Winding the bobbin Place the felt cushion (h) on the left thread spool pin (15). Place the spool of thread (m) on the same thread spool pin (15). Guide the thread from the spool into the thread guide (2), and up to the bobbin. Pull the thread from the inside through a hole of the empty bobbin (g). -
Page 12: Threading The Upper Thread
Getting ready Threading the upper thread Important: Set the main switch (20) to ("O"). Raise the presser foot bar by lifting the two-step presser foot lifter (18) and lift the thread lever (1) by turning the hand wheel (21) anti-clockwise. Follow the arrows and numbers on the sewing machine when threading. -
Page 13: Thread Tension
Getting ready Thread tension Upper thread tension (A) Basic upper thread tension setting: "AUTO" To increase the tension, turn the dial to the next higher number. To reduce the tension, turn the dial to the next lower number. 1. Normal thread tension 2. -
Page 14: Sewing Basics
Sewing basics Sewing / Useful applications Sewing (A) Once the sewing machine is correctly threaded and adjusted, lower the presser foot before sewing by lowering the two- step presser foot lifter (18). Press the control pedal (r) to start sewing. Stitching (B) At the end of seam, press down the reverse sewing lever (8). -
Page 15: How To Choose Your Pattern
Sewing basics How to choose your pattern straight stitch , turn the stitch Stitch width dial (4) Stitch length dial S1-S2 (5) selector dial (7) until it required letter "A" appears in the stitch display (6). You can Pattern adjust the needle position from left to selector dial (7) central by turning the stitch width dial (4). -
Page 16: Zigzag Stitching
Sewing basics Zigzag stitching Stitch length dial (5) Stitch width dial (4) Turn the stitch selector dial (7) to "B". The function of stitch width dial (4). The maximum stitch width for zigzag stitching is "5"; however, the stitch width can be reduced on any type of stitch. -
Page 17: Blind Stitch Foot
Sewing basics Blind stitch foot Stitch Stitch width Stitch length For hems, curtains, trousers, skirts, etc. Blind stitch for elastic fabrics. 1. Fold the fabric as illustrated with the left side uppermost. 2. Place the reversed fabric under the presser foot. Turn the handwheel (21) forwards by hand until the needle is fully to the left. -
Page 18: Buttonhole Foot
Sewing basics Buttonhole foot Stitch Stitch width Stitch length Stitch length 0.3~1 Preparation: Remove the presser foot and attach the buttonhole foot (d). Adjust the stitch length dial (5) to between "0.3" - "1". The density of the stitch depends on thickness of the fabric. Note: Always test sew a buttonhole. -
Page 19: Overlock Stitches
Sewing basics Overlock stitches Stitch Stitch width Stitch length E, F S1, S2 Note: Use new needles or ball point needles. Seams, sewing and neatening visible hems. Overlock stitch (A) For fine knits, jerseys, neck edges, borders. Standard overlock stitch (B) For fine knits, jerseys, neck edges, borders. -
Page 20: Stretch-Stitch
Sewing basics Stretch-stitch Stitch Stitch width Stitch length S1, S2 Triple straight stitch: (A) For hardwearing seams. The machine sews two stitches forwards and one stitch backwards. This gives triple reinforcement. Stitch Stitch width Stitch length S1, S2 Triple zig-zag: (B) For hardwearing seams, hems and decorative seams. -
Page 21: Monogramming And Embroidering With Embroidery Hoop
Sewing basics Monogramming and embroidering with embroidery hoop* Stitch Stitch width Stitch length * The embroidery hoop is not supplied with the machine. Attach the embroidery and darning plate (o) 1. Remove the presser foot and the presser foot holder. 2. -
Page 22: Scallop Stitching
Sewing basics Scallop stitching Stitch Stitch width Stitch length 0.3~0.5 You can produce a decorative edge with the scallop stitch 1. Sew the scallop stitch along the edge of the material. 2. If desired, trim around the scallop with scissors to create a scalloped edge. Be careful not to cut the thread. -
Page 23: Maintenance
Maintenance Maintenance Important: Disconnect the machine from the electricity supply by removing the plug from the mains socket. When cleaning the machine, it must always be disconnected from the electricity supply. Removing the stitch plate (A): Turn the handwheel (21) until the needle is fully raised. -
Page 24: Trouble Shooting Guide
Maintenance Trouble shooting guide Problem Cause Correction Upper thread 1.The machine is not threaded correctly. 1.Rethread the machine. breaks 2.The thread tension is too tight. 2. Reduce the thread tension (3). (lower number) 3.The thread is too thick for the needle. 3.Use a larger needle. -
Page 25: Disposal
Service-Address: sewingguide-service-gb@teknihall.com CROWN Service Center teknihall Elektronik GmbH Breitefeld 15 DE-64839 Münster IAN 100139 Manufacturer Please be aware that the following address is not a service address. Please first contact the service office stated above. Crown Technics GmbH Turmstraße 4... - Page 27 00800 555 00 666 ( gratis Servicenummer bei Reklamationen: 00800 555 00 666 ( kostenfrei Service number for complaints: 00800 555 00 666 ( free Version des informations Stand van de informatie Stand der Informationen Last Information Update 07/2014 Ident.-No.:072014 www.sewingguide.de 021VGJ0314(FR/NL/DE/GB) IAN 100139...
Need help?
Do you have a question about the 100139 and is the answer not in the manual?
Questions and answers