Advertisement
Quick Links
Operator's Manual
18 V Cordless Drill
241-0900
IMPORTANT:
WARNING! To reduce the risk of injury, user must read instruction manual.
Safety symbols in this manual are used to call attention to possible dangers.
The safety symbols and their explanations require the operator's full understand-
ing. The safety warnings do not, by themselves, eliminate any danger, nor are
they a substitute for proper accident-prevention measures.
This Safety Alert Symbol indicates caution, warning, or danger. Failure to
obey a safety warning can result in serious injury to the operator or to others.
To reduce the risk of injury, fire, or electric shock, always follow the safety pre-
cautions.
CHARGER BATTERY
BEFORE FIRST USE
Advertisement

Related Manuals for Performax 241-0900


Summary of Contents for Performax 241-0900
- Page 1 Operator’s Manual 18 V Cordless Drill 241-0900 CHARGER BATTERY BEFORE FIRST USE IMPORTANT: WARNING! To reduce the risk of injury, user must read instruction manual. Safety symbols in this manual are used to call attention to possible dangers. The safety symbols and their explanations require the operator’s full understand- ing.
-
Page 2: Table Of Contents
TABLE OF CONTENTS Safety Symbols................page 3 Safety Instructions..............page 5 Description................. page 11 Assembly..................page 13 Operation..................page 14 Maintenance................page 22 Troubleshooting................page 24 Warranty..................page 24 INTRODUCTION SAVE THESE INSTRUCTIONS! This cordless Drill has many features for making its use more pleasant and enjoyable. -
Page 3: Safety Symbols
SAFTEY SYMBOLS The purpose of safety symbols is to attract your attention to possible dangers. The safety symbols and the explanations with them deserve your careful attention and understanding. The symbol warnings do not, by themselves, eliminate any danger. The instructions and warnings they give are no substitutes for proper accident prevention measures. - Page 4 SAVE THESE INSTRUCTIONS Some of these following symbols may be used on this tool. Please study them and learn their meaning. Proper interpretation of these symbols will allow you to operate the tool better and more safely. SYMBOL NAME DESIGNATION/EXPLANATION Volts Voltage Amperes...
-
Page 5: Safety Instructions
SAFETY INSTRUCTIONS GENRAL SAFETY RULES WARNING: Read all safety warnings and instructions. Failure to follow the warnings and instructions may result in electric shock, fire and/or serious injury. Save all warnings and instructions for future reference. The term power tool in the warnings refers to your mains-operated (corded) power tool or battery-operated (cordless) power tool. - Page 6 3) PERSONAL SAFETY Stay alert, watch what you are doing and use common sense when operating a power tool. Do not use tool while tired or under the influence of drugs, alcohol, or medication. A moment of inattention while operating power tools may result in serious personal injury.
- Page 7 operation. If damaged, have the power tool repaired before use. Many accidents are caused by poorly maintained power tools. keep cutting tools sharp and clean. Properly maintained cutting tools with sharp cutting edges are less likely to bind and are easier to control. Use the power tool, accessories, tool bits, etc.
- Page 8 Use only the original battery pack and charger. Any attempt to use another battery pack will cause damage to the Drill; it could cause possibly explode or cause a fire or personal injury. Remove the battery pack from the Drill before performing any routine maintenance or cleaning.
- Page 9 SAFETY RULES FOR CHARGER WARNING: Read and understand all instructions. Failure to follow all instruc- tions listed below may result in electric shock, fire, and/or serious personal in- jury. Before using the battery charger, read all instructions and cautionary markings in this manual and on the battery charger, the battery, and the product using the battery to prevent misuse of the products and possible injury or damage.
- Page 10 The Cord Length (Feet) 25’ 50’ 100’ Cord Size (AWG) 16 16 16 NOTE: AWG = American Wire Gauge Do not operate the charger with a damaged cord or plug, which could cause shorting and electric shock. If damaged, replace by an identical charger at Authorized Service Center.
-
Page 11: Description
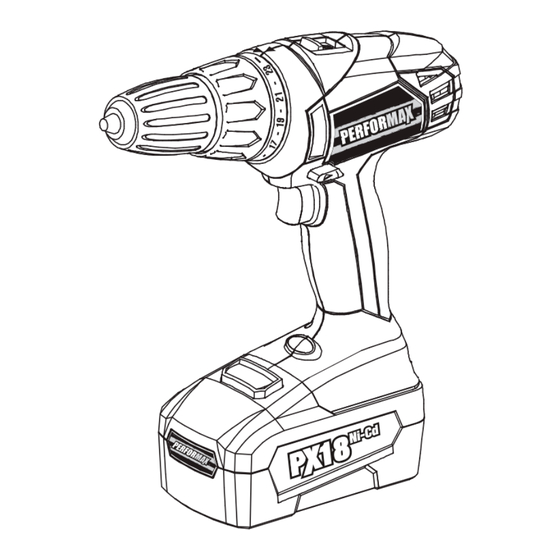
DESCRIPTION kNOW YOUR DRILL (Fig.1) Two-speed gear box switch Fig. 1 Torque adjustment ring Vents Direction of Rotation Variable-speed Selector (Forward/Center trigger switch Lock/ Reverse) LED Worklight Battery Release Button Bit Storage Battery Pack PRODUCT SPECIFICATION Motor 18 Volt DC Switch VSR (Variable Speed Reversible) No Load Speed... - Page 12 WARNING! The safe use of this product requires an understanding of the information on the tool and in this operator’s manual, as well as knowledge of the project you are attempting. Before use of this product, familiarize yourself with all operating features and safety rules. ADJUSTABLE TORQUE The drill has a 23+1 position clutch.
-
Page 13: Assembly
ASSEMBLY WARNING: If any part is broken or missing, do not attempt to plug in the power cord or operate the Drill until the broken or missing part is replaced. Fail- ure to do so could result in possible serious injury. WARNING: Do not attempt to modify this Drill or create accessories not rec- ommended for use with this Drill. -
Page 14: Operation
OPERATION COLD WEATHER OPERATION When the battery pack is very cold, it may “pulse” for the first minute of use to warm itself. Put the battery pack on a tool and use the tool in a light application. After about a minute, the battery pack will have warmed itself and will operate normally. - Page 15 LED FUNCTIONS OF CHARGER (Fig. 3) BATTERY GREEN LED INDICATOR ACTION PACK Fast charge will begin when Hot/Cold battery returns battery HI / LO TEMP. to desired temperature. Battery pack DEFECTIVE BATTERY Defective Flashing or charger is defective. BATTERY Charging Flashing Charging.
- Page 16 TO ATTACH BATTERY PACk (Fig. 4) Fig. 4 1. Lock the trigger switch on the drill by placing the direction of rotation (forward/ center lock/ reverse) selector in center (OFF) position 2. Align the raised rib on the battery pack with the grooves on the bottom of the drill, and then attach the battery pack to the drill.
- Page 17 DIRECTION-OF-ROTATION Fig. 5b SELECTOR (FORWARD/CENTER LOCk/REVERSE) (Fig. 5b) The direction of bit rotation is reversible and is controlled by a selector located above the trigger FORWARD REVERSE switch. With the drill held in normal operating position: 1. Position the direction-of-rotation selector to the left of the tool for forward rotation.
- Page 18 ADJUSTABLE TORQUE CLUTCH (Fig. 7) The torque clutch can be adjusted to Fig. 7 23+1 different settings. The higher To decrease torque the torque setting, the more force the drill produces to turn an object. When using the drill for different driving applications, it is necessary to increase or decrease the torque to help prevent the possibility of...
- Page 19 When using drill/driver in the LO speed range, the speed will decrease and the drill/driver will have more power and torque. When using drill/driver in the HI speed range, the speed will increase and the drill/driver will have less power and torque. Use LO speed for high power and torque applications and HI speed for fast drilling or driving applications.
- Page 20 4. Tighten the chuck jaws securely on the bit. REMOVING BITS (Fig. 11-12) CAUTION: Drill bits may be hot immediately after drilling operations. Use gloves or wait until the bit has cooled before touching the bit. 1. Lock the trigger switch by placing the direction of rotation selector in the OFF (center) position.
- Page 21 7. If the bit jams in the workpiece or if the drill stalls, stop the tool immediately. Remove the bit from the workpiece and determine the reason for jamming. NOTE: This drill is equipped with an electric brake. When the brake is functioning properly, sparks may be visible through the vent slots in the housing.
-
Page 22: Maintenance
4. Apply additional pressure for hard materials such as concrete. 5. When drilling holes in tile, practice on a scrap piece to determine the best speed and pressure. 6. Begin drilling at a very low speed to prevent the bit from slipping off the starting point. - Page 23 BATTERY PACk REMOVAL AND PREPARATION FOR RECYCLING To preserve natural resources, please recycle or dispose of batteries properly. This product contains Ni-Cad batteries. Local, state, or federal laws may prohibit disposal of Ni- Cad batteries in ordinary trash. Consult your local waste authority for information regarding available recycling and/ or disposal options.
-
Page 24: Troubleshooting
TROUBLESHOOTING PROBLEM CAUSE SOLUTION The Drill does not Battery is depleted Charge the battery work Sleeve is not released Release the sleeve Bit cannot be installed Bit does not fit the chuck Use the correct bit. Clean, clear vents. Do Be sure cooling vents are free Motor overheating not cover with hand...
Need help?
Do you have a question about the 241-0900 and is the answer not in the manual?
Questions and answers