Advertisement
Quick Links
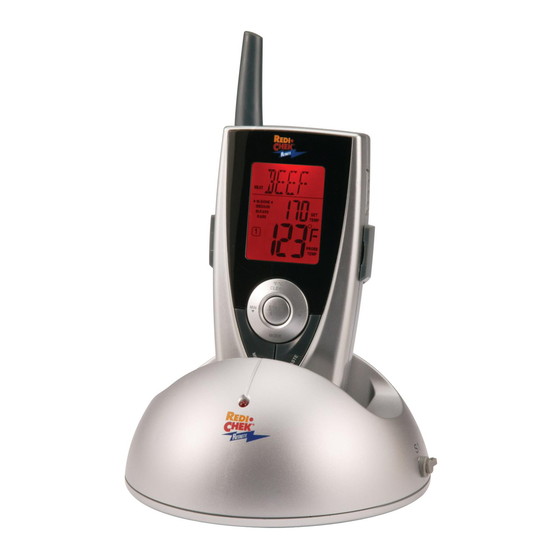
Model ET-901B VOICE ALERT REMOTE THERMOMETER
INSTRUCTION MANUAL
Congratulations on your purchase of the ET-901B Talking Remote Thermometer, a programmable
radio frequency food thermometer. You will now be able to remotely monitor the time and temperature
of food cooking in the oven or outdoors from anywhere in your home. The talking function is a voice
prompt to alert the user while the temperature is within 10°F range of the target temperature or the
temperature reaches the target temperature.
Receiver Features
10
Battery Compartment
LCD (Liquid Crystal Display) – Displays all icons, temperature. See LCD diagram for detailed informa-
tion.
CLIP - Removable clip allows you to be mobile. Clip the receiver unit to belt.
BATTERY COMPARTMENT - Holds 2 AAA batteries.
STAND - Swings out and allows you to stand the receiver on tabletop.
BUTTONS- See "Description of Bottons" later in these instructions.
Transmitter Features
FRONT
LED
BATTERY COMPARTMENT – holds 2 AAA batteries.
S1–plug in for stainless steel probe sensor
Putting the receiver inside the transmitter base
If you do not want to monitor your food remotely the unit can be used with the receiver docked inside
the transmitter base.
The receiver can be placed inside the transmitter base by aligning the long slot in the clip on the back of
the receiver with the tab of the transmitter base and allowing the receiver to tilt back. Do not force the
receiver onto the tab.
Your unit should be stored this way when not in use.
1
9
BATTERY COMPARTMENT
SIDE
1
2
Install Batteries
The transmitter and the receiver each use 2 AAA batteries. To install:
Receiver - remove belt clip/stand from back of the receiver by spreading at sides, it is a snap fit. Then
slide off battery cover and insert batteries.
Transmitter - Use a phillips head screwdriver to remove the four screws on bottom. Remove the cover
and insert the batteries. You will notice a black gasket inside the battery lid, this must be used to ensure
rain resistance.
Choose Mode
The ET-901B receiver has two modes: TIMER and THERMOMETER. Press the MODE button to alter-
nate between timer and thermometer modes. You can use the count-down timer function at the same
time as the thermemoter function.
Depending on the MODE, the UP and DOWN arrow buttons produce different functions.
LCD
Timer mode
SYNCHRONIZE THE TRANSMITTER AND RECEIVER AT EACH USE
With each use, you must "synchronize" the devices so the receiver reads the transmitter radio frequency
signal. This is done automatically as you turn the units on, but follow these procedures exactly or you
may not see temperature reading on the receiver.
Transmitter & Receiver are off.
1. Plug the stainless steel probe sensor into the plug in of the transmitter.
2. Turn the receiver on by sliding switch on the right side of the receiver from OFF to ON.
3. Turn transmitter on by pressing the button on the bottom of the transmitter from OFF to ON.
This needs to be done within 60 seconds of turning on the receiver in order for the receiver to
register the signal from the transmitter. If it doesn't beep within 5-10 seconds press button OFF
wait a few seconds and then press button back ON.
4. Registration is complete and the probe temperature appears where the "---" was flashing.
If within 60 seconds you do not see a temperature reading on the receiver, turn both receiver and
transmitter off ,and repeat procedure in exact order.
Choose Preset "taste" Temperature or Program Your Own
In Thermometer mode, you first choose a meat type then choose a "taste". These "taste" preset tem-
peratures which equal Rare, Medium Rare, Medium, and Well Done vary by the type of food selected.
The temperatures chosen are from USA FDA guidelines and not all foods will have a preset for every
"taste". (For example, Chicken has a preset only at 180F Well Done. Beef has presets for all four
tastes.)
You can override the presets and select your own target temperature using the UP or DOWN arrow
whenever you are in thermometer mode.
In thermometer mode, the main unit displays the food temperature measured by the remote sensor and
prompts the user about the cooking level.
The user firstly selects a food type (e.g. Turkey) and a cooking level (e.g. Well done). The main display
unit will automatically set the target temperature (170 °F).
Thermometer mode
2
Advertisement

Related Manuals for Maverick ET-901B


Summary of Contents for Maverick ET-901B
- Page 1 Choose Mode prompt to alert the user while the temperature is within 10°F range of the target temperature or the The ET-901B receiver has two modes: TIMER and THERMOMETER. Press the MODE button to alter- temperature reaches the target temperature.
- Page 2 90 days, from date of purchase. Should any repairs or servicing under this 10. [RESET] warranty be required, contact Maverick Customer Service by mail or phone for instructions on how to Reset to restore it to factory setting.