Advertisement
Quick Links
ET-737
Remote
Food
Thermometer
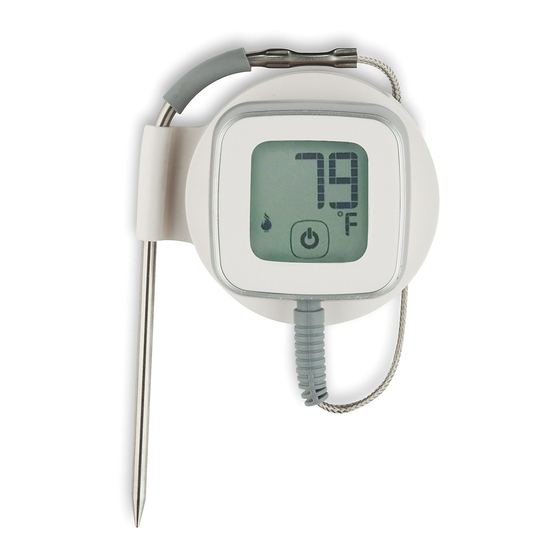
Thank you for selecting Maverick's ET-737 iChef Bluetooth
Remote Food Thermometer. Simply turn on the Thermometer,
download the Free SmartThermo App from the Apple Store
or Google Play Store, and follow the easy instructions that
will turn your iPhone, iPad, Android or Tablet into a roasting
thermometer with a 90 foot range.
Advertisement

Summary of Contents for Maverick ET-737 ICHEF
- Page 1 ET-737 Remote Food Thermometer Thank you for selecting Maverick’s ET-737 iChef Bluetooth Remote Food Thermometer. Simply turn on the Thermometer, download the Free SmartThermo App from the Apple Store or Google Play Store, and follow the easy instructions that will turn your iPhone, iPad, Android or Tablet into a roasting...
-
Page 2: Getting Started
Preheat oven to your desired roasting temperature. Reset Battery Button Door RESET Magnets Back of the ET-737 iChef Thermometer shown here Step 2: On the back of the iChef Thermometer, remove the pull-tab to engage the battery. See page 14 for Battery Replacement Installation. - Page 3 Current Temperature SmartThermo Indicator Logo Pairing Indicator Power On/OFF Food Probe Jack Probe Bluetooth Indicator Step 3: Remove protective plastic film from the iChef Thermometer screen. Insert the metal probe firmly into the Probe Jack at the bottom of the iChef Thermometer. At the bottom center of the screen, tap the On/OFF button.
- Page 4 Step 4: On your iPhone, iPad, Android or Tablet, go to Settings and turn on Bluetooth. Step 5: Go to the Apple App Store or Google Play Store to download the Free SmartThermo app. When searching for the app, make sure to type SmartThermo as one word with no spaces. Once you have successfully downloaded the SmartThermo app, open it.
- Page 5 Step 6: The SmartThermo screen (A) will appear on your device. It will automatically go to the next screen (B) that displays the current temperature. At top right of screen (B) tap Pair. SmartThermo...
- Page 6 Step 7: The Bluetooth screen (C) will now appear. Below the Bluetooth icon, tap Unbound. Step 8: now tap Search. When pairing is completed, the Bluetooth and Pairing icons will flash briefly on the iChef Thermometer screen in lower left and right corners. now you are back to screen (B).
- Page 7 Step 9: On top left of screen, tap the navigation Bar icon. This will bring you to screen (D). Tap Settings.
- Page 8 Step 10: You are now on the Settings screen (E). Tap to select C or temperature mode. Tap Profile. This brings you to screen (F). Select the type of Meat you are cooking. Most common meat options are listed as pre-set selections. To cook a meat / food selection not listed here, tap add at top right of screen to create additional meats / foods.
- Page 9 Step 11: now that you have chosen the type of meat you are cooking you can select your preferred level of doneness. Still on screen (F), under doneness, tap a pre-set doneness temperature from Well done to rare. You can also raise or lower the temperature by tapping the plus or minus boxes.
- Page 10 Step 13: On the top left of screen, tap the navigation Bar icon to return to screen (D). Tap on Home to return to the current temperature screen (B). Step 14: Insert the metal probe tip into the center of the meat you are cooking.
- Page 11 Step 15: You can now monitor your cooking progress on your smart device within a 90 foot range. When the set temperature has been reached, your smart device will alert you with the sound you have chosen and the finished temperature will flash on the iChef Thermometer.
- Page 12 Cook By Custom Temperature: Return to Settings Screen (E) and tap on Temperature. This will take you to the customized doneness temperature screen (H). Scroll to the custom temperature desired. Tap the arrow at top-left of the screen to return to Settings. Cook by Timer / Temperature: In addition to, or instead of the temperature setting, the timer may be set to determine doneness.
- Page 13 important iChef Thermometer information • The magnets on the back of the iChef will hold it securely to the exterior of the oven or cooktop. • To turn off the iChef, press and hold the On/OFF button for 3 seconds. •...
- Page 14 3. Replace the battery door, twisting clockwise to lock it. 4. Depress the rESET button using the tip of the metal probe. 5. On front display screen, tap the On/OFF button to turn it on. 3 VOLT BATTERY RESET Battery Door Back of the ET-737 iChef Thermometer shown here...
- Page 15 Sharing Photos: You can post your food photos through social media. Return to Settings and tap authorize. This will bring you to screen (K) where you can authorize social media. Go back to Settings and tap on the Camera button. This will take you to the camera function screen (L).
- Page 16 Maverick Limited 90-day Warranty Maverick Industries, Inc. warrants this product to be free of defects in parts, materials and workmanship for a period of 90 days from date of purchase. Should any repairs or servicing under this warranty be required, contact Maverick Customer Service by mail or phone for instructions on how to pack and ship the product to Maverick’s national Service...


Need help?
Do you have a question about the ET-737 ICHEF and is the answer not in the manual?
Questions and answers