Table of Contents
Advertisement
Quick Links
®
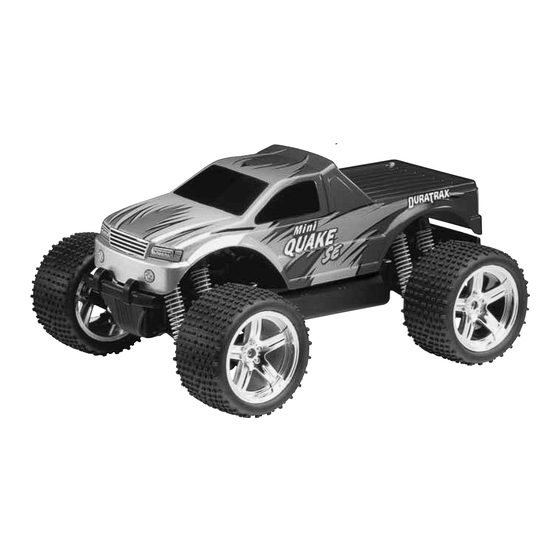
Length: 9.5" [240mm]
Width: 7.4" [185mm]
Height: 4.7" [120mm]
Ground Clearance: 1.25" [32mm]
Weight: 25 oz [725g] approx. running
weight with battery/motor/ESC
•
DuraTrax will warranty this kit for 90 days after the purchase date from defects in materials or workmanship. DuraTrax will either repair
or replace, at no charge, the incorrectly made part.
•
Make sure you save the receipt or invoice you were given when you purchased your model. It is your proof of purchase and we must
see it before we can honor the warranty.
•
To return your Mini Quake SE for repairs covered under warranty you should send your model to:
If the buyer is not prepared to accept the liability associated with the use of this product, the buyer is advised to return this
kit immediately in new and unused condition to the place of purchase.
READ THROUGH THIS MANUAL BEFORE STARTING CONSTRUCTION. IT CONTAINS IMPORTANT
INSTRUCTIONS AND WARNINGS CONCERNING THE ASSEMBLY AND USE OF THIS MODEL.
© Copyright 2005
ASSEMBLY AND OPERATION MANUAL
3002 N. Apollo Drive Suite 1
Champaign, Illinois 61822
Attn: Service Department
Phone: (217) 398-0007 9:00 am-5:00 pm Central Time M-F
E-mail: hobbyservices@hobbico.com
Warranty
Hobby Services
™
Technical Support Information
For technical assistance, contact:
DuraTrax Product Support
3002 N. Apollo Drive, Suite 1
Champaign, IL 61822
(217) 398-8970, Ext. 5
carsupport@duratrax.com
DTXZ1111 For Kit DTXC0011
Advertisement
Table of Contents

Related Manuals for Duratrax Mini Quake SE


Summary of Contents for Duratrax Mini Quake SE
- Page 1 ASSEMBLY AND OPERATION MANUAL Warranty • DuraTrax will warranty this kit for 90 days after the purchase date from defects in materials or workmanship. DuraTrax will either repair or replace, at no charge, the incorrectly made part. • Make sure you save the receipt or invoice you were given when you purchased your model. It is your proof of purchase and we must see it before we can honor the warranty.
-
Page 2: Table Of Contents
™ MAINTENANCE TIPS ............6 TUNING................6 We have engineered the Mini Quake SE to take the rough and tumble abuse that makes R/C fun. We are so confident of the quality and durability of the Stress-Tech plastic parts that we will replace any Stress-Tech plastic part you break during the first 12 months you own the vehicle. -
Page 3: Specification And Description Changes
3mm Set Screw ❏ 2. Locate the correct servo horn (30). There are multiple servo horns included with the Mini Quake SE to fit different ❏ 2. Install the included 16 tooth pinion (40) onto the motor brands of servos. NOTE: The correct servo horn should shaft and secure it to the motor shaft with a 3mm set screw (P). -
Page 4: Receiver Installation
❏ 8. Remove the remaining protective backing from the double-sided tape and install the servo into the chassis. TIP: Thoroughly clean the chassis with rubbing alcohol. This wil help ensure a good bond between the chassis and the double-sided tape. ❏... -
Page 5: Finishing The Mini Quake Se
Gently pull back on the throttle SPEED CONTROL INSTALLATION trigger. The Mini Quake SE should slowly move forward. If the Mini Quake SE goes in reverse, move the throttle reversing switch on the transmitter to the opposite position. After doing... -
Page 6: Maintenance Tips
PAINTING THE BODY TUNING RIDE HEIGHT ADJUSTMENT The Mini Quake SE body comes clear. Below are a few tips to follow when painting your Mini Quake SE body. The ride height of the Mini Quake SE is easily adjusted by using the included pre-load spacers (67). - Page 7 ❏ 12. Apply threadlocking compound on the diff bolt (73) BALL DIFFERENTIAL ASSEMBLY threads and install the diff bolt into the diff plate holder (69). ❏ ❏ 1. Install a 6x10 bearing (61) onto the diff outdrive 1 (44). 13. Carefully install the diff outdrive inner side 2 (75) onto the diff plate holder side 2.
- Page 8 Apply ball diff grease Using a 1.5mm hex wrench, gently tighten the differential bolt (73) until it becomes snug. Then back it off 1/16 of a turn. Note: Do not overtighten the bolt. It could damage the differential balls and differential plates.
- Page 10 3.8mm Ball Stud 3.8mm Ball Stud 4x7mm Bushing...
- Page 12 Tip: Squeeze a piece of paper to help set the proper mesh.
- Page 17 Apply CA glue to the inside of both the rim and the tire. SET LED...
- Page 18 Double Sided Tape...
- Page 20 OTHER ITEMS AVAILABLE FROM DURATRAX DTXR0292 Ultimate Drivers DTXR0140 Screwdriver Set Metric Hex Drivers DTXQ0100 DTXR0183 Ultimate Drivers DTXC2377 Metric Phillips Head Screw Set Phillips Screwdriver Kwik Trak Racing Cones DTXC2375 Kwik Ramp Portable Jump DTXC6997 Graphite Chassis DTXC2459 Power Shot Motor Cleaner...
Need help?
Do you have a question about the Mini Quake SE and is the answer not in the manual?
Questions and answers