Table of Contents
Advertisement
Quick Links
Length: 15.2" [385mm]
Width: 13" [330mm]
Height: 5.8" [147mm]
Weight: 3.3 lb [1500g]
Wheelbase: 11.6" [295mm]
• DuraTrax
®
will warranty this kit for 90 days after the purchase date from defects in materials or workmanship. DuraTrax
will either repair or replace, at no charge, the incorrectly made part. Exception: Specific parts covered under the
Graphite Parts and Stress Tech
• Make sure you save the receipt or invoice you were given when you bought your model! It is your proof of purchase
and we must see it before we can honor the warranty.
• To return your Evader ST Pro for repairs covered under warranty you should send your truck to:
If the buyer is not prepared to accept the liability associated with the use of this product, the buyer is advised to
return this kit immediately in new and unused condition to the place of purchase.
READ THROUGH THIS MANUAL BEFORE STARTING. IT CONTAINS IMPORTANT INSTRUCTIONS AND WARNINGS
CONCERNING THE ASSEMBLY AND USE OF THIS MODEL.
v1.0 © Copyright 2004
ASSEMBLY AND OPERATION MANUAL
™
Guarantee, see page 3.
3002 N. Apollo Drive Suite 1
Champaign, Illinois 61822
Attn: Service Department
Phone: (217) 398-0007 9:00 am-5:00 pm Central Time M-F
E-mail: hobbyservices@hobbico.com
®
PREB
UIL
T
PREB
UIL
T
Warranty
Hobby Services
Technical Support Information
For technical assistance, contact:
DuraTrax Product Support
3002 N. Apollo Drive, Suite 1
Champaign, IL 61822
(217) 398-8970, Ext. 5
carsupport@duratrax.com
DTXZ3104 For DTXC0027
™
Advertisement
Table of Contents

Related Manuals for Duratrax Evader ST Pro


Summary of Contents for Duratrax Evader ST Pro
- Page 1 • Make sure you save the receipt or invoice you were given when you bought your model! It is your proof of purchase and we must see it before we can honor the warranty. • To return your Evader ST Pro for repairs covered under warranty you should send your truck to: Hobby Services 3002 N.
-
Page 2: Table Of Contents
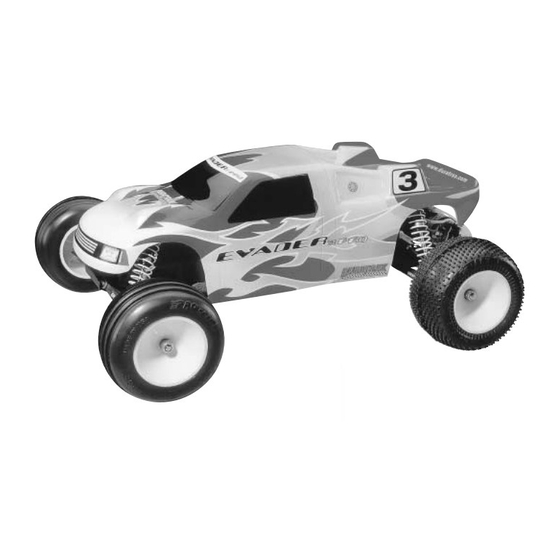
TABLE OF CONTENTS INTRODUCTION Thank you for purchasing the DuraTrax Evader ST Pro. This INTRODUCTION ..............2 manual contains the instructions you need to build, operate IMPORTANT SAFETY PRECAUTIONS ......2 and maintain your new electric R/C vehicle. Read over this HELPFUL HINTS ...............2 manual thoroughly before building or operating the Evader GRAPHITE &... -
Page 3: Graphite & Stress Tech Parts Guarantee
SPECIFICATION & DESCRIPTION PARTS GUARANTEE CHANGES We have engineered the Evader ST Pro to take the rough and All pictures, descriptions and specifications found in this tumble abuse that makes R/C fun. We are so confident of the instruction manual are subject to change without notice. -
Page 4: Prepare The Radio System
PREPARING THE RADIO SYSTEM STEERING SERVO INSTALLATION 1. Locate and remove from the parts bag two (2) steering servo mounts, one (1) servo arm (determine which servo arm is required for your radio system), one (1) 4-40 ball stud, one (1) foam washer, two (2) 3x8mm pan head screws and two (2) 4-40 x 5/16"... -
Page 5: Receiver Installation
4. Remove the two (2) 4-40 x 3/4" socket head machined 6. Install the servo brace onto the chassis using the two (2) screws from the upper plate and rotate the front of the truck 4-40 x 3/8" socket head machined screws and two (2) forward. -
Page 6: Electronic Speed Control Installation
OR COIL THE ANTENNA WIRE. Press fit the antenna tube into the hole in the chassis. Tip: Run the antenna wire through your fingers to straighten out the kinks before running through the antenna tube. Also, applying a small amount of soap and water to the antenna wire will help lubricate the wire for threading into the antenna tube. -
Page 7: Battery Installation
To set the gear mesh properly, slide the pinion until it fully meshes up against the spur then back it up slightly. Run a piece of paper between the two gears. If the paper is ripped, the mesh is too tight. If the paper is not tightly creased the gear mesh is too loose. -
Page 8: Ball Differential Break-In
BALL DIFFERENTIAL BREAK-IN broken or damaged parts before running the Evader ST Pro. Running of the Evader ST Pro with broken or damaged parts The ball differential has been adjusted at the factory for proper could result in damage to other parts. -
Page 9: Assembly Guide
ASSEMBLY GUIDE The following information has been provided to help maintain and tune the Evader ST Pro. Front Knuckle Arm, Hub Carrier, Axle 1. Attach the front hub carriers (28) to the front suspension arms (38) using the (95) front outer hinge pins. -
Page 10: Servo, Servo Plate, Upper Plate
Servo, Servo Plate, Upper Plate 1. Attach the servo mounting lugs (6) to the front of the servo mounts on the servo using two 3x8 self tapping screws (L). 2. Install a ball stud (81) into the steering servo horn (8). Install the ball stud into the hole furthest from the center. -
Page 11: Ball Differential
Bulkhead, Bulkhead Brace, Front Suspension Arm, Front Shock Tower, Front Bumper 1. Attach the front bulkhead (51) to the chassis using the hinge pin (103). 2. Secure the hinge pin in place using a 2mm set screw. 3. Attach and secure the front suspension arms (38 and 39) to the front bulkhead (51) using the (104) front inner hinge pins. -
Page 12: Slipper Clutch
Slipper Clutch 1. Install the inner slipper plate (86) onto the top shaft (83). Make sure the notch in the inner slipper plate keys onto the 2x10 spring pin in the top shaft. 2. Place the slipper pad (64) and outer slipper plate (85) onto the top shaft (83). Make sure the slipper pad (64) is properly centered between the two plates (85 &... -
Page 13: Gearbox
Gearbox Note: When installing the bearings, make sure they are fully seated. If the bearings are not fully seated the gearbox halves may not properly fit together or may cause binding. 1. Install a 5mm washer (X) onto each end of the top shaft (83) 2. -
Page 14: Shocks
76 (Rear) 75 (Front) 78 (Rear) 71 (Rear) 77 (Front) 70 (Front) 2. Slowly screw the cap down about half way. Push the piston part way down to slowly bleed off excess oil. 3. Tighten the cap a little 1. Fill to the top more and push the piston with oil. -
Page 15: Tuning Guide
Toe-out will increase steering into corners, but will decrease the overall stability during acceleration. The When tuning the Evader ST Pro make sure that you have front typically is set-up with 0 to -2 degrees of toe-in. -
Page 16: Battery Placement
RIDE HEIGHT sections. We have filled the shocks with 20 weight shock oil, The ride height of the Evader ST Pro affects how it jumps and which is a good choice for most driving conditions. handles. The ride height of the Evader ST Pro is adjustable through the threaded pre-load adjusters on the shock bodies.
Need help?
Do you have a question about the Evader ST Pro and is the answer not in the manual?
Questions and answers