Table of Contents
Advertisement
Available languages
Available languages
1545063
PORTABLE
AIR CONDITIONER
Use & Care Guide
For questions about features, operation/performance, parts
or service, call:
1-877-465-3566
In Canada, call for assistance, installation
and service, call:
1-877-577-4105
AIRE ACONDICIONADO
PORTÁTIL
Guía de instrucciones
Para preguntas sobre características, funcionamiento,
rendimiento, piezas
o servicio, llame al:
1-877-465-3566
En Canadá, para asistencia, instalación
o servicio, llame al:
1-877-577-4105
Advertisement
Table of Contents

Related Manuals for Whirlpool PORTABLEAIR CONDITIONER


Summary of Contents for Whirlpool PORTABLEAIR CONDITIONER
-
Page 1: Air Conditioner
PORTABLE AIR CONDITIONER Use & Care Guide For questions about features, operation/performance, parts or service, call: 1-877-465-3566 In Canada, call for assistance, installation and service, call: 1-877-577-4105 AIRE ACONDICIONADO PORTÁTIL Guía de instrucciones Para preguntas sobre características, funcionamiento, rendimiento, piezas o servicio, llame al: 1-877-465-3566 En Canadá, para asistencia, instalación... -
Page 2: Table Of Contents
TABLE OF CONTENTS AIR CONDITIONER SAFETY.............3 Using the Remote Control ............11 INSTALLATION REQUIREMENTS..........3 Changing Air Direction .............13 Identification of Parts..............4 Normal Sounds.................13 Tools and Parts ................4 PORTABLE AIR CONDITIONER CARE ........14 Location Requirements ...............5 Draining the Air Conditioner .............14 Electrical Requirements ..............5 Cleaning the Air Filter ..............14 INSTALLATION INSTRUCTIONS..........6 Cleaning the Outside..............14... -
Page 3: Air Conditioner Safety
AIR CONDITIONER SAFETY Your safety and the safety of others are very important. We have provided many important safety messages in this manual and on your appliance. Always read and obey all safety messages. This is the safety alert symbol. This symbol alerts you to potential hazards that can kill or hurt you and others. -
Page 4: Installation Requirements
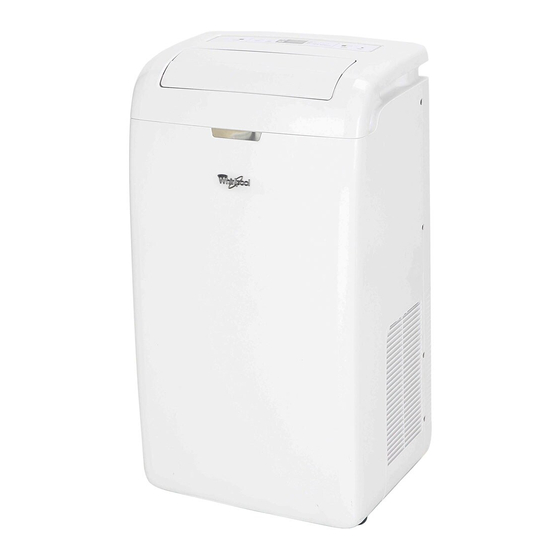
INSTALLATION REQUIREMENTS Idenfication of Parts Front Control panel Cold air outlet Signal receptor Remote controller Transport handle Hot air outlet Evaporator air intake Back Secondary drain port Power supply Primary drain port The figures in this manual are based on the external view of a standard model. Consequently, the shape may differ from that of the air conditioner you have selected. -
Page 5: Location Requirements
Location Requirements Electrical Requirements NOTES: ■ The portable air conditioner should be connected to a 115 V, ■ The flexible exhaust hose allows placement of the air 60 Hz, 15-amp fused grounded 3 prong outlet. conditioner between 19⁵⁄₈" and 64¹⁄₈" (60 cm and 163 cm) from window or door. -
Page 6: Installation Instructions
2. Press RESET (on some devices, a green light will turn on). WARNING 3. Press TEST (listen for click; Reset button will trip, and on some devices, a green light will turn off). 4. Press and release RESET (listen for click; Reset button will latch, and on some devices, a green light will turn on). - Page 7 4. Attach the window exhaust adapter to the flexible exhaust Rain Cover—Vertical Installation hose. Turn clockwise until securely locked into place. A. Flexible exhaust hose B. Window exhaust adapter Window Installation Your window slider kit has been designed to fit most standard vertical and horizontal window applications.
-
Page 8: Complete Installation
7. Insert ¹⁄₂" screw (provided) into the hole in the inner slider ■ If the window opening is too narrow for the window slider kit, remove the inner slider section from the window slider section that is closest to the end of the outer slider section of kit. -
Page 9: Portable Air Conditioner Use
4. Insert the foam seal behind the top of the lower window sash WARNING and against the glass of the upper window. Electrical Shock Hazard Plug into a grounded 3 prong outlet. Do not remove ground prong. Do not use an adapter. A. - Page 10 ■ Auto—automatically controls the fan speed depending on Mode the current room temperature and temperature control setting. 1. Press MODE repeatedly until you see the symbol glow for the NOTE: Auto fan speed cannot be selected in Fan Only mode. desired setting.
-
Page 11: Using The Remote Control
■ To change the temperature display from ºF to ºC, press both To set the Timer to turn on the air conditioner, changing the up and down Adjust buttons at the same time. the previous settings: 1. Turn off the air conditioner. 2. - Page 12 NOTES: ■ If the current room temperature is lower than 73ºF (23ºC), Fan Only mode is selected automatically. Press HIGH, MID or ■ Two AA batteries (included) power the remote control. LOW fan speed. Replace batteries after 6 months of use, or when the remote NOTE: Auto fan speed cannot be selected in Fan Only mode.
-
Page 13: Changing Air Direction
■ ■ Mid—for normal cooling If the current room temperature is below 79ºF (26ºC), the temperature will automatically increase 2ºF (1ºC) during the first hour after Sleep control is activated. ■ The set temperature will not increase during the last 7 hours of Sleep control. -
Page 14: Portable Air Conditioner Care
Cleaning the Air Filter WARNING Excessive Weight Hazard NOTE : Use two or more people to move and install air conditioner. Failure to do so can result in back or other injury. ’ Cleaning the Outside The air conditioner has a unique situation of self draining. You don't "... -
Page 15: Troubleshooting
TROUBLESHOOTING Before calling for service, try the suggestions below to see whether you can solve your problem without outside help. ■ Electrical overloading, overheating, cord pinching or Air conditioner will not operate aging can trip (Reset button will pop out) the power supply cord. -
Page 16: Assistance Or Service
ASSISTANCE OR SERVICE Before calling for assistance or service, please check You can find this information on the model and serial number “Troubleshooting.” It may save you the cost of a service call. If label. The model and serial number label is located on the you still need help, follow the instructions below. -
Page 17: Seguridad Del Aire Acondicionado
SEGURIDAD DEL AIRE ACONDICIONADO Su seguridad y la de los demás es muy importante. En este manual y en el aparato damos muchos mensajes importantes de seguridad. Lea y siga siempre todos los mensajes de seguridad. Este símbolo de alerta de seguridad Este símbolo le alerta sobre peligros potenciales que pueden causarle daños o muerte a Vd y a otros. -
Page 18: Identificación De Las Piezas
REQUISITOS DE INSTALACIÓN Identificación de las piezas Parte delantera Piezas proporcionadas Panel de control Salida de aire frío Receptor de la señal Mando a distancia Agarradero para su transporte Salida de aire caliente Toma de aire Parte trasera Puerto secundario de drenaje Conexión eléctrica Puerto principal de drenaje La s imágenes de este manual se basan en la visión externa de un modelo estándar. -
Page 19: Requisitos De Ubicación
Requisitos eléctricos Requisitos de ubicación NOTAS: El aire acondicionado portátil debe conectarse a 115V 60Hz, un El tubo de salida flexible permite la ubicación del aire enchufe de 15 amp con tres tomas. acondicionado entre 195⁄8" y 641⁄8" (60 cm y 163 cm) de Se recomienda el uso de un fusible o interruptor con tiempo de retardo. -
Page 20: Instrucciones De Instalación
2. Pulse RESET (en algunos aparatos, se enciende una luz verde). ATENCIÓN 3. Pulse TEST (oirá un clic, el botón de reinicio se dispara y en algunos dispositivos se apaga una luz verde). 4. Pulse y suelte RESET (oirá un clic, el botón de reinicio se asegurara y en algunos dispositivos se enciende una luz verde). - Page 21 4. Ajuste el adaptador de ventana al tubo tubo. Gire en el sentido Cubierta de lluvia—Instalación vertical de agujas del reloj hasta que esté asegurado en su lugar. A. Tubo de salida flexible B. Adaptador del tubo para ventana Instalación en la ventana El kit para ventanas correderas ha sido diseñado para ajustarse a la mayoría de ventanas verticales y horizontales.
-
Page 22: Instalación Completa
Si la abertura de la ventana es demasiado estrecha para 7. Inserte un tornillo 1⁄2" (incluido) en el agujero de la el kit, quite la sección deslizante interior del kit. sección interior más cercana a la sección exterior. A. Sección deslizante de la ventana interior B.Sección deslizante de la ventana exterior Con una sierra, corte la sección deslizante interior A. -
Page 23: Uso Del Aire Acondicionado Portátil
4. Introduzca el sello de espuma entre la parte trasera del marco ATENCIÓN de la hoja inferior y el cristal de la superior. Riesgos de descarga eléctrica Utilice un enchufe con tres tomas. No quite el cable a tierra. No use un adaptador. No use un alargador. -
Page 24: Temperatura
Auto - controla automáticamente la velocidad del ventilador, Modo dependiendo de la temperatura actual de la habitación y la temperatura establecida. 1. Pulse MODO repetidamente hasta que vea iluminado el NOTA: La velocidad auto no puede seleccionarse símbolo del programa elegido. en el modo Sólo Ventilador. -
Page 25: Uso Del Mando A Distancia
Para cambiar de ºF a ºC, pulse simultáneamente + y -. Programar el encendido, sin mantener los ajustes anteriores: 1. Apague el aire acondicionado. 2. Ajuste el modo Cooling, Dry o Fan Only. 3. Ajuste la velocidad del ventilador a Auto, High, Mid o Low. NOTA: La velocidad auto no puede seleccionarse en el modo Sólo Ventilador. - Page 26 NOTAS: Si la temperatura de la habitación está por debajo de los 73ºF (23ºC), el modo solo ventilador se selecciona automáticamente. Para su funcionamiento necesita dos pilas AA (incluídas). Ajuste la velocidad del ventilador a Auto, High, Mid o Low. Cambie las pilas después de 6 meses de uso y cuando el mando pierda potencia.
-
Page 27: Cambiar La Dirección Del Aire
Mid—para enfriamento normal Si la temperatura de la habitación es menor de 79ºF (26ºC), la temperatura aumentará automáticamente 2ºF (1ºC) durante la primera hora de modo nocturno. La temperatura no aumentará durante las últimas 7 horas de Low - para enfriamiento moderado. modo nocturno. -
Page 28: Cuidado Del Aire Acondicionado Portátil
CUIDADO DEL AIRE ACONDICIONADO PORTÁTIL Limpiar los filtros de aire Drenaje del aire acondicionado A .Puerta del panel del filtro B .Filtro de aire D .Puerto de drenaje principal A .Puerto de drenaje secundario 1. Pulse ON / OFF para apagar el aire acondicionado. C .Clip del tubo de drenaje B . -
Page 29: Problemas
PROBLEMAS Antes de llamar al servicio técnico, intente las sugerencias de aquí abajo para intentar resolver su problema sin ayuda externa. Exceso de aparatos conectados, sobrecalentamiento, un El aire acondicionado no funciona pellizco en el cable o la edad del aparato pueden provocar que salte la corriente en el cable. -
Page 30: Asistencia O Servicio
ASISTENCIA O SERVICIO Antes de llamar al servicio técnico, por favor lea «problemas». Puede Puede encontrar esta información en la etiqueta. La etiqueta está ahorrarle el coste de la llamada. Si aún necesita ayuda, siga las pegada en el aparato. siguientes instrucciones.
Need help?
Do you have a question about the PORTABLEAIR CONDITIONER and is the answer not in the manual?
Questions and answers
How do I change the preset settings on portable ACP122GPW ac unit?
where do i find an extension of the exhaust hose for my portable air conditioner Whirlpool ACP122GPW in Canada. I looked at Amazon but I need to know the size or the diameter.