Apogee ONE Quick Start Manual
Hide thumbs
Also See for Apogee ONE:
- User manual ,
- Owner's manual (42 pages) ,
- Quick start manual (16 pages)
Table of Contents
Advertisement
Quick Links
Advertisement
Table of Contents

Related Manuals for Apogee Apogee ONE


Summary of Contents for Apogee Apogee ONE
- Page 1 Apogee ONE QuickStart Guide V3, March, 2013...
-
Page 3: Table Of Contents
Contents Overview! ......................Introduction! Package contents! ONE Panel Tour! Optional Battery Power! Connecting to your Mac! ................System Requirements! Install ONE Software ! Connect to Headphones or Speakers! Configuring the Input! Connecting to your iPad! ................System Requirements! Install Maestro from App Store ! Connect to Headphones or Speakers! Configuring the Input! Adjusting Input &... -
Page 5: Overview
The first studio-quality audio interface and microphone for iPad, iPhone and Mac The Apogee ONE is the first studio quality microphone and USB audio interface for iPad, iPhone and Mac. ONE is designed for easily creating professional and amazing sounding recordings on your iPod touch, iPhone, iPad or Mac. -
Page 6: Package Contents
Overview - Apogee ONE QuickStart Guide Package contents The following items are included in the ONE box: • ONE • Breakout cable with: • 1 XLR Mic input • 1 1/4” Instrument input • Microphone stand clip • USB cable •... - Page 7 Overview - Apogee ONE QuickStart Guide...
-
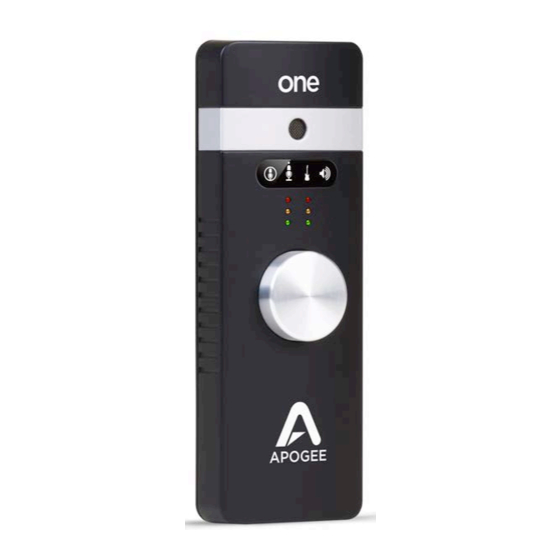
Page 8: One Panel Tour
Overview - Apogee ONE QuickStart Guide ONE Panel Tour Built-in microphone Stereo headphone out Input/output indicator Speaker out Input/output level meters Controller knob Mic/instrument input DC power - Select function Breakout cable included Power supply included - Set input level... -
Page 9: Optional Battery Power
ONE and insert 2 AA batteries (not included). Apogee highly recommends NiMH rechargeable batteries for the maximum amount of uninterrupted recording time. Alternatively, you can connect ONE’s included power supply to charge your iOS device and continuously power ONE... -
Page 10: Connecting To Your Mac
2. Go to http://www.apogeedigital.com/downloads.php. 3. Download the latest ONE software installer. 4. Once you have downloaded the package, double-click the Apogee icon to run the firmware updater. 5. After the firmware update has completed, double-click the open-box icon to run the software installer. -
Page 11: Connect To Headphones Or Speakers
Connecting to your Mac - Apogee ONE QuickStart Guide Choosing ONE for Mac Sound I/O After connecting ONE, installing the software and restarting your Mac, a dialog box will prompt you to choose ONE for Mac sound input and output. Click Yes. -
Page 12: Configuring The Input
Connecting to your Mac - Apogee ONE QuickStart Guide Configuring the Input ONE offers the following choices for up to 2 simultaneous inputs: • Built-in microphone • Built-in microphone + 1/4” instrument • XLR microphone • XLR microphone + 1/4” instrument •... - Page 13 Connecting to your Mac - Apogee ONE QuickStart Guide Open Apogee Maestro software (found in your Mac’s Applications folder), and select the Input tab. Select the Analog Level setting that corresponds to the microphone source you’d like to record. For example, if you have a microphone connected to the XLR connection on the breakout cable, select “Ext Mic”...
-
Page 14: Connecting To Your Ipad
Connecting to your iPad - Apogee ONE QuickStart Guide Connecting to your iPad System Requirements • iPhone 4, iPhone 4S, iPad, iPad 2, iPad (3rd gen.) • Connection: 30-pin dock connector • iPod Touch (5th gen.), iPhone 5, iPad (4th gen.), iPad Mini •... - Page 15 Connecting to your iPad - Apogee ONE QuickStart Guide 3. On the iPad/iPhone, open Settings and choose General > About > ONE, then choose "Find App for Accessory".
- Page 16 The App Store will open and navigate automatically to the Apogee Maestro app. 4. Once you've signed in to the App Store, click INSTALL to download Apogee Maestro. Note: it's possible to record through the built-in microphone and play back audio without installing Maestro.
-
Page 17: Connect To Headphones Or Speakers
Connecting to your iPad - Apogee ONE QuickStart Guide Connect to Headphones or Speakers Connect headphones to the 1/8” output jack on ONE’s front panel. Alternatively, you can connect ONE’s output to speakers by using an adapter cable. The cable should go from a... -
Page 18: Configuring The Input
Connecting to your iPad - Apogee ONE QuickStart Guide Configuring the Input ONE offers the following choices for up to 2 simultaneous inputs: • Built-in microphone • Built-in microphone + 1/4” instrument • XLR microphone • XLR microphone + 1/4” instrument •... - Page 19 Connecting to your iPad - Apogee ONE QuickStart Guide Open Apogee Maestro app, choose ONE from the main menu and select the Input tab. Select the Analog Level setting that corresponds to the input source you’d like to record. For example, if you have a microphone connected to the XLR connection on the breakout cable, select “Ext Mic”...
-
Page 20: Adjusting Input & Output Levels
Adjusting Input & Output Levels - Apogee ONE QuickStart Guide Adjusting Input & Output Levels Input level To change ONE’s input level (i.e the preamp gain of microphones and instruments): 1) Push the Controller Knob until the built-in 2) Turn the Controller Knob until the desired recording microphone, external microphone or instrument icon level is obtained. - Page 21 Adjusting Input & Output Levels - Apogee ONE QuickStart Guide Headphone/Speaker Output level To change ONE’s output level (i.e the listening level of connected headphones or speakers): 1) Push the Controller Knob until the speaker icon is lit 2) Turn the controller knob to the desired listening level.
-
Page 22: Software Setup
Software Setup - Apogee ONE QuickStart Guide Software Setup Mac OS: Using ONE with Logic 1) Go to the Logic Pro or Logic Express menu and 2) In the Core Audio pane of the Device tab, select choose Preferences > Audio. - Page 23 Software Setup - Apogee ONE QuickStart Guide 3) Set the I/O Buffer Size to 64. Click Apply Changes at the bottom of the Preferences window.
- Page 24 Software Setup - Apogee ONE QuickStart Guide Mac OS: Using ONE with Logic (continued) 4) Now close the Logic Pro Preferences window and 5) If you are recording a single microphone or select New > Empty Project > from the File Menu.
- Page 25 Software Setup - Apogee ONE QuickStart Guide 6) Logic will now ask you to name the project 7) Click the Record button in the transport control and save in on your hard drive. at the bottom of the Logic window.
- Page 26 Software Setup - Apogee ONE QuickStart Guide Mac OS: Using ONE with Avid Pro Tools (9 or greater) 1) Choose Setup menu > Playback Engine. 2) Choose ONE for Current Engine.
- Page 27 Software Setup - Apogee ONE QuickStart Guide 3) Set the Buffer Size to 64. Click OK. 4) The following dialog box will appear. Click Yes.
- Page 28 Software Setup - Apogee ONE QuickStart Guide Mac OS: Using ONE with Ableton Live 1) Choose Live > Preferences. Click on the Audio tab. 2) Select CoreAudio in the Driver Type menu. 3) Select ONE in both the Audio Input Device and Audio Output Device menus.
-
Page 29: Using One With Ios Apps
Software Setup - Apogee ONE QuickStart Guide Using ONE with iOS Apps ONE is designed to work with any iOS Core Audio compatible app on iPod Touch, iPhone or iPad. Simply download your favorite app, connect ONE and you’re ready to go! -
Page 30: Additional Support
Additional Support For more information: • Complete Apogee ONE User's Guide • Apogee KnowledgeBase and FAQs • Apogee Product Registration • How to contact Apogee Technical Support Visit: http://www.apogeedigital.com/support/... - Page 32 Apogee Electronics Corp. Santa Monica, CA www.apogeedigital.com Part #: 9500-0073-0000 Revision 3.0...
Need help?
Do you have a question about the Apogee ONE and is the answer not in the manual?
Questions and answers