Table of Contents
Advertisement
T H I S
M A N U A L
M U S T
B E
K E P T
INSTALLATION
GUIDE,
OPERATION
AND SERVICE
MANUAL
PROPANE & BUTANE
GAS FIRED STORAGE
WATER HEATERS
HI-FLO RANGE
Models
L32/143, L65/169,
L81/251, L62/309,
L54/399,
Permanent Pilot,
Piezo Ignition
'E'/'F' Series
STANDARD RANGE
Models
L24/31, L32/35, L40/36,
L63/71, L84/74
Permanent Pilot,
Auto Ignition 'G' Series
W I T H
T H E
A P P L I A N C E
October 2004
Part No. E133
Advertisement
Table of Contents

Related Manuals for andrews L32/143


Summary of Contents for andrews L32/143
- Page 1 INSTALLATION GUIDE, OPERATION AND SERVICE MANUAL PROPANE & BUTANE GAS FIRED STORAGE WATER HEATERS HI-FLO RANGE Models L32/143, L65/169, L81/251, L62/309, L54/399, Permanent Pilot, Piezo Ignition ‘E’/‘F’ Series STANDARD RANGE Models L24/31, L32/35, L40/36, L63/71, L84/74 Permanent Pilot, Auto Ignition ‘G’ Series...
- Page 2 the nation’s favourite PLUMBING & HEATING SUPPLIES FREE SHIPPING SECURE PAYMENTS on all orders over £100 to mainland UK shop online with confidence FINANCE AVAILABLE PRICE MATCH spread the cost with low interest rates always get the best deals available we have H U G E R E D U C T I O N S...
- Page 4 The attention of U.K. users is drawn to their responsibilities under the Health and Safety Regulations 1993. All installation and service on the Andrews Water Heater must be carried out by properly qualified personnel, and therefore no liability can be accepted for any damage or malfunction caused as a result of intervention by unauthorised personnel.
-
Page 6: Table Of Contents
Gas Control Valve User-Adjustable Control Thermostat Thermopile/Pilot Burner/Pilot Restrictor Burner SECTION 8 FAULT FINDING SECTION 9 PARTS LISTS AND ILLUSTRATIONS Standard Range Hi Flo Range L32/143, L65/169, L81/251 Hi Flo Range L62/309, L54/399 Unvented Systems Kit 24v Auto System Kit... - Page 7 SECTION 1 GENERAL AND SAFETY INFORMATION GENERAL The Andrews Water Heater has been designed for use with PROPANE or BUTANE GAS only and is manufactured to give an efficient, reliable and long service life. INFORMATION To ensure the continued, trouble-free operation of your heater at maximum efficiency, it is essential that correct installation, commissioning, operation and service procedures are carried out strictly in accordance with the instructions given in this manual.
-
Page 8: General And Safety Information
1993 Andrews Water Heaters should only be used in the manner and purpose for which they were intended and in accordance with the instructions in this manual. Although the heaters have been manufactured with paramount consideration to safety, certain basic precautions specified in this manual must be taken by the user. -
Page 9: Technical Data
SECTION 2 TECHNICAL DATA STANDARD ANDREWS MODEL NO. L24/31 L32/35 L40/36 L63/71 L84/74 RANGE Storage Capacity Recovery thro' 44ºC/80ºF gal/h Recovery thro' 56ºC/100ºF gal/h Heat Input Gross 11.0 11.0 22.0 22.0 Btu/h 32,414 37,532 37,532 75,064 75,064 Heat Input Net... -
Page 10: Hi-Flo Range
TECHNICAL DATA SECTION 2 Hi-Flo ANDREWS MODEL NO. L32/143 L65/169 L81/251 L62/309 L54/399 RANGE Storage Capacity Recovery thro' 44ºC/80ºF 1140 1403 1821 gal/h Recovery thro' 56ºC/100ºF 1122 1449 gal/h Recovery thro' 72ºC/130ºF 1117 gal/h Heat Input Gross 41.8 92.5 Btu/h 142.622 167,188 259,312 315,610 416,264... -
Page 11: Installation
⁄ in BSP (Hi-Flo only). 2 - 1 ⁄ in x 3in Nipples (L32/143 Model only). 1 - Warranty Card. The draught diverter must be assembled with the legs provided. ASSEMBLING Attach the legs to the draught diverter with the nuts and bolts provided. Fit the draught THE DRAUGHT diverter (1) as shown in Fig.1 to the water heater using the screws provided. -
Page 12: Gas Supply
Systems: Design and Installation plus the requirements of British Standards and Codes of Practice listed in Section 1 of this manual. Andrews water heaters are unregulated and a second stage regulator must be installed to give an inlet pressure to the appliance as follows: PROPANE: 37mbar (14.86 in wg) -
Page 13: Installation Of Lpg Supply
SUPPLY Use a minimum pipe size of 3/4 in bore. One cylinder All Standard Range Models Two cylinders Hi Flo Models L32/143, L65/169, L81/251 Three cylinders Hi Flo Model L62/309 Four cylinders Hi Flo Model L54/399 WARNING! - Page 14 INSTALLATION SECTION 3 Bulk Storage Vessel Installation Cylinder Installation Fig 3.
- Page 15 This will eliminate the risk of possible interference from nearby high voltage cables. A separate data sheet is available for Automatic Ignition Control System. Fig 4. Contact Andrews Water Heaters. FLUE FAN INTERLOCK 24V REMOTE TIMER 24V...
-
Page 16: Flue Systems
INSTALLATION SECTION 3 Detailed recommendations for flue installation are given in BS 6644, BS5440 Pt 1 and FLUE British Gas publication IM/11 - Flues for Commercial and Industrial Gas Fired Boilers and SYSTEMS Air Heaters. See also IGE/UP/10 Pt1. The flue connection is designed for BS 835 type heavy duty flue, but light quality flue pipe, mild steel or stainless steel sheet may be used using the appropriate adapter. - Page 17 *A minimum of 600mm of vertical flue directly above the draught diverter should be provided where possible on all natural draught flue installations. If this dimension cannot be achieved please contact Andrews Water Heaters. Please note this is not required where a common flue header is used on multiple installations.
-
Page 18: Air Supply And Ventilation
INSTALLATION SECTION 3 Minimum Heights from Roof to Base of Flue Terminal Not within 1.5m (5ft) of a Within 1.5m (5ft) of a vertical surface of a vertical surface of a structure ≠ on the roof structure ≠ on the roof Type of Roof Internal Route External... -
Page 19: Water Quality And Treatment
100 - 150ppm (7 - 10 degrees Clark) and above. This problem can be minimised by reducing the water temperature in the heater and by fitting suitable water pre-treatment equipment. When installing Andrews Water Heaters in hard water areas we would recommend that a water treatment specialist is consulted. -
Page 20: Water Connections - Hydrojet System
INSTALLATION SECTION 3 WATER CONNECTIONS Hydrojet System The upper “jet ports” direct the flow outward to begin the dynamic mixing action. The lower “jet ports” direct the flow inward to increase the turbulence. Tank Heater Casing All models now incorporate the new Mini Hydrojet system on cold inlet side connections. -
Page 21: Vented Systems, Standard Range
SECTION 3 INSTALLATION WATER VENTED SYSTEMS, STANDARD RANGE CONNECTIONS The water heater must be supplied from a cold water feed cistern and the hot water supply pipe must be fitted with an open vent pipe in accordance with BS 5546 and BS 6644. - Page 22 INSTALLATION SECTION 3 Fig 8. Fig 8a.
-
Page 23: Unvented Systems, Standard Range
CONNECTIONS Unvented Systems should be fitted by an Approved Installer When used in an unvented system, the Andrews Water Heater will supply hot water at a pressure of 3.5bar (50.8lbf/in ) provided that this pressure is available at the mains feed. - Page 24 INSTALLATION SECTION 3 WATER CONNECTIONS Fig 10. Fig 11.
-
Page 25: Vented Systems, Hi-Flo Range
SECTION 3 INSTALLATION WATER VENTED SYSTEMS, Hi-Flo RANGE CONNECTIONS The water heater must be fed from a cold water feed cistern or static water tank. A safety valve must be fitted as specified in BS 6644 Clause 9. (see also Section 2, Technical Data) The safety valve must be fitted either directly to an upper tank tapping or not further than 1 metre along the outlet flow pipe of size not less than the safety valve. -
Page 26: Water Connections
INSTALLATION SECTION 3 WATER CONNECTIONS L65/169 L81/251 Optional Rear Inlet/Outlet Tappings L32/143 only Fig 12. L65/169 L81/251 Fig 13. - Page 27 SECTION 3 INSTALLATION WATER CONNECTIONS Fig 14. Fig 15.
-
Page 28: Unvented Systems, Hi-Flo Range
CONNECTIONS Unvented Systems should be fitted by an Approved Installer When used in an unvented system, the Andrews Water Heater will supply hot water at a pressure of 3.5bar (50.8lbf/in ) provided that this pressure is available at the mains feed. - Page 29 SECTION 3 INSTALLATION WATER If higher flow rates are required for the cold water services, a suitable tee fitting should be fitted to the pipework, upstream of item C1. CONNECTIONS The pipework fitted to the tundish outlet should be at least 28mm diameter and should be terminated at a suitable drain (see Building Regulations 1992 Approved Document G3).
- Page 30 INSTALLATION SECTION 3 WATER CONNECTIONS Fig 18. Fig 19.
-
Page 31: Commissioning
SECTION 4 COMMISSIONING STANDARD CAUTION! DO NOT OPERATE THE WATER HEATER UNTIL THE STORAGE VESSEL IS COMPLETELY FILLED WITH WATER, WITH WATER RANGE RUNNING FROM ALL HOT TAPS. PERMANENT PILOT MODELS Open the main gas supply cock after all connections to the gas control are completed and test all connections, using proprietary leak detection fluid. - Page 32 COMMISSIONING SECTION 4 Shutting Off The Burner For long periods only (7 days or more) turn gas control knob to PILOT, depress slightly and turn clockwise to OFF. Turn off the gas service cock. For shorter periods, leave the heater under thermostat control. NOTE! If the pilot goes out for any reason, turn off heater and wait for 3 minutes before relighting.
-
Page 33: Hi-Flo Range
SECTION 4 COMMISSIONING HI-FLO RANGE Lighting the Burner Open the main gas supply cock after all connections to the gas control are completed and using a manometer, test all connections up to the gas control inlet. Purge air from pipework and ensure there are no loose connections to burner or pilot pipe. 1. - Page 34 COMMISSIONING SECTION 4 Fig 23. Checking Main Burner Pressure 1. Turn gas control knob clockwise to OFF. 2. Release bleed screw A and connect pressure gauge tube. 3. Light burner as described above. 4. With the main burner running, check that the burner pressure is as stated on the data plate and in Section 2, Technical Data.
- Page 35 SECTION 4 COMMISSIONING STANDARD Lighting the burner RANGE AUTO IGNITION Thermostat Control On/Off Switch MODELS Knob Gas Control valve Fig 25. 1. Ensure gas supply is on. 2. Set thermostat control knob to the required water temperature. (See below). 3. Ensure time switch if fitted is in the ON position. 4.
-
Page 36: All Models
COMMISSIONING SECTION 4 Checking main burner pressure 1. Turn gas supply OFF. 2. Release bleed screw A one turn and connect pressure gauge tube. 3. Light burner as described above. 4. By means of the external in-line regulator, set burner pressure for gas being used in accordance with the data plate. - Page 37 SECTION 4 COMMISSIONING USERS For your safety read before lighting the appliance SAFETY GUIDE WARNING 1. Always follow manufacturers instructions when lighting the appliance. Failure to so may result in damage to property, personal injury or loss of life. 2. Before lighting check all round the appliance area for gas. Be sure to check at low level because some gas (i.e.
- Page 38 This is known as stacking. To counter this condition, an upper thermostat phial is fitted (not on Model L32/143) which senses abnormally hot water and shuts down the main burner until the water cools.
-
Page 39: Servicing
SECTION 6 SERVICING INTRODUCTION Servicing must be carried out by a properly qualified person Whilst giving these instructions for the care of the Heater, it is recommended that checks are carried out by the installer or local gas authority, at least annually. Ensure good ventilation by keeping the heater free of extraneous materials and clear of dust and lint. -
Page 40: Burner Assembly Hi-Flo Range
SERVICING SECTION 6 The burner assembly should be checked and cleaned annually. BURNER NOTE! Models L62/309 and L54/399 are fitted with an anchor bracket between the ASSEMBLY burner manifold and heater body. Take out 2 screws to remove. HI-FLO RANGE 1. -
Page 41: Flue Ways
SECTION 6 SERVICING FLUE WAYS The flue ways should be checked and cleaned annually. 1. Depress catch under control knob and turn to OFF. Remove outer burner cover and slide STANDARD inner door to right. On L63/71 and L84/74 models, the inner cover must be lifted out. RANGE 2. -
Page 42: Magnesium Anode(S)
SERVICING SECTION 6 Magnesium sacrificial anode(s) is (are) fitted to the top of the storage vessel. MAGNESIUM The anode(s) will prevent corrosion of the storage vessel. Anode condition should be ANODE(S) checked annually and replaced if excessive wear is present. ALL MODELS 1. -
Page 43: Replacing Components, Hi-Flo Range
Please note that when replacing the gas control valve on heater models L32/143 & L65/169 a restrictor must be fitted at the bottom of the gas valve inlet thread. USER- NOTE! These instructions apply to all models but Model L32/143 is not fitted with a limit ADJUSTABLE sensor phial. -
Page 44: Thermopile/Pilot Burner/Pilot Restrictor
REPLACING COMPONENTS, Hi-Flo RANGE SECTION 7 1. Turn gas control knob and gas service cock to OFF and disconnect union joint on the THERMOPILE/ gas service cock. PILOT 2. Remove two wing nuts and remove front draught shield. BURNER/PILOT 3. Disconnect thermopile and pilot supply pipe from gas control valve. RESTRICTOR 4. -
Page 45: Fault Finding
SECTION 8 FAULT FINDING AUTO IGNITION FAULT ACTION UNITS STANDARD (a) Check gas service cock is open. NO IGNITION AT PILOT RANGE (b) Electrical ON/OFF switch is not ON. (c) Power to unit interrupted. (d) Thermostat set too low. (e) Check ECO for failure. Reset. (f) Check for 24V AC at intermittent pilot ignition control terminal No. - Page 46 FAULT FINDING SECTION 8 PERMANENT FAULT ACTION PILOT MODELS STANDARD AND PILOT LIGHTS BUT (a) Check for 24V AC at intermittent pilot ignition control MAIN BURNER terminal No. 3. Replace control if faulty. HI-FLO RANGES DOES NOT (b) Faulty Solenoid Coil. Replace if faulty. (a) Check gas service cock is open.
- Page 47 SECTION 8 FAULT FINDING PERMANENT FAULT ACTION PILOT MODELS THERMOPILE / (a) Check pilot connection for loose joints. STANDARD AND THERMOCOUPLE (b) Check correct ventilation is available. HI-FLO RANGES BURNS OUT (c) Check flue is clear and is correctly designed and flue terminal FREQUENTLY is correctly positioned.
- Page 48 If not reset to dimensions given below. NOISE If the whistling persists continue to reduce the settings until the whistling stops. Heater Model Air Shutter Dimension A in mm L32/143 L65/169 L81/251 L62/309 L54/399 LOCKING PIN BURNER...
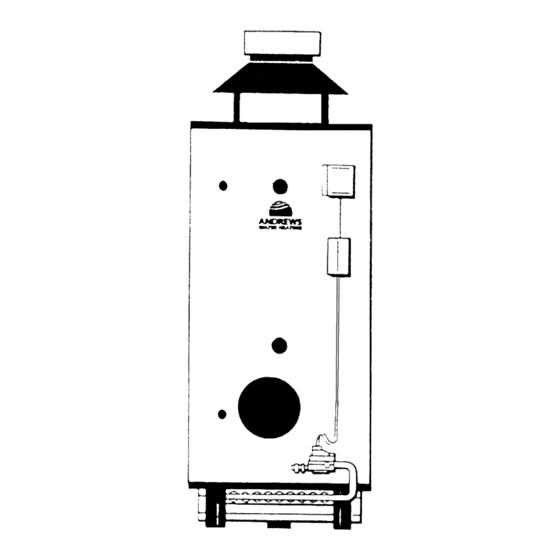
- Page 49 SECTION 9 PARTS LIST AND ILLUSTRATIONS L63/71 only STANDARD Models L24/31, L32/35, L40/36, L63/71 STANDARD Model L84/74...
- Page 50 PARTS LIST AND ILLUSTRATIONS SECTION 9 STANDARD MODELS L24/31 L32/35 L40/36 L63/71 L84/74 Model Ref. Part Numbers Description C654 C654 C654 C657 C657 Adaptor Ring C653 C653 C655 C656 C658 Draught Diverter C285 C285 C285 C285 C690 Hot Outlet Nipple C286 C292 C293...
- Page 51 SECTION 9 PARTS LIST AND ILLUSTRATIONS Hi-Flo Model L32/143 Hi-Flo Models L65/169, L81/251...
- Page 52 PARTS LIST AND ILLUSTRATIONS SECTION 9 HI-FLO MODELS Model L32/143 L65/169 L81/251 Ref. Part Numbers Description E023 C500 C501 Draught Diverter C342 C291 C553 Sacrificial Anode C334 C334 Flue Connector, 150mm, BS 835 C432 Flue Connector, 200mm, BS 835 C381...
- Page 53 SECTION 9 PARTS LIST AND ILLUSTRATIONS Hi-Flo Models L62/309, L54/399...
- Page 54 Drain Cock, BS 2879, 3/4" C103 C103 Socket Coupler, 3/4" C496 C497 Data Badge C543 Flue Baffle C540 Flue Baffle C235 C235 Andrews Label C487 C554 Top Cover C488 C488 Insulation Pad C490 E392 Flue Box Top Cover C299 C299 Cleanout Pad Seal...
-
Page 55: Unvented Systems Kit
SECTION 9 PARTS LIST AND ILLUSTRATIONS Unvented Systems Kit - Standard Range Unvented Systems Kit - Hi-Flo Range... - Page 56 PARTS LIST AND ILLUSTRATIONS SECTION 9 Unvented Ref. Part No. Description Systems Kit - B171 Unvented Systems Kit Complete Standard Range C780 Pressure Reducing Valve/Strainer C781 Check Valve / Expansion Vessel C782 Expansion Vessel C456 Temperature/Pressure Relief Valve C783 Tundish C772 Adaptor B173...
- Page 57 SECTION 9 PARTS LIST AND ILLUSTRATIONS 24 Volt Auto System Kit B252 With Timer B253 24 Volt Auto Part No. Description System Kit B252 24 Volt Auto System Kit Complete Standard Range E113 Intermittent Pilot Ignition Control E115 Transformer E116 Limit Thermostat E117 Control Thermostat...
- Page 58 NOTES...
- Page 59 NOTES...
- Page 61 Wednesbury One Black Country New Road Wednesbury West Midlands WS10 7NZ Tel: +44 (0)121 506 7400 Fax: +44 (0)121 506 7401 Email: andrews@andrews-waterheaters.co.uk Website: www.andrewswaterheaters.co.uk 10/04...
Need help?
Do you have a question about the L32/143 and is the answer not in the manual?
Questions and answers