
Subscribe to Our Youtube Channel
Related Manuals for Sartorius arium 611VF


Summary of Contents for Sartorius arium 611VF
- Page 1 Installation and Operation Manual arium 611VF Water Purification System 85030-513-68...
-
Page 2: Table Of Contents
Wall Mounting page 3. Water Inlet Connection Reject Water Connection If you have any questions about the correct use of arium 611VF, please contact us at the Initial Operation address below or your local Sartorius office: Cartridge Installation System Settings... -
Page 3: Safety Information
Severe electrical shock hazard which may ignite such materials. this manual: or danger of electrocution! – The arium 611VF is to be used with water feeds only. Sanitizing| – Use a properly grounded electrical cleaning agents should only be Warning! -
Page 4: Intended Usage
Using this system for any other purpose shall be considered improper usage. – arium 611VF may only be operated by trained personnel. – Operate arium 611VF only using original accessories or replacement parts. -
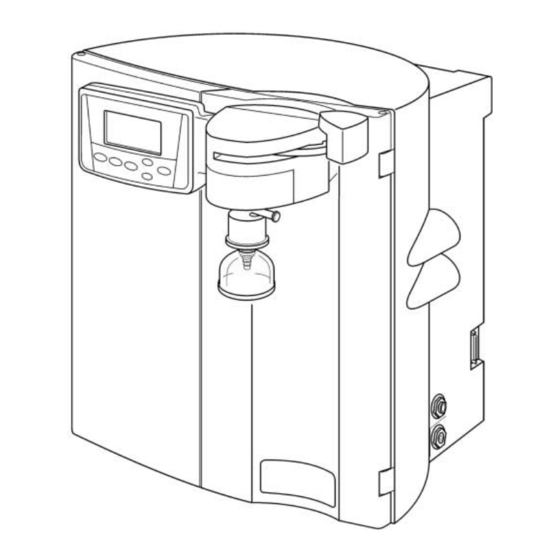
Page 5: Product Description
Product Description arium Systems The Sartorius arium 611VF is a water purification system designed to provide pyrogen-free, low TOC reagent grade water that exceeds ASTM Type I and NCCLS Type I standards. The system uses a deionization process with mixed... -
Page 6: Control Panel And Display
Control Panel and Display Display Operate arium 611VF using the – During Normal Operation the control panel that incorporates four display will show the water function keys and two control keys quality reading – according to for the cursor. the pre-selected measurement unit options: (MO + cm or µS/cm) - Page 7 Control panel and display of arium 611VF Flow chart of arium 611VF...
-
Page 8: Unpacking And Installation
Unpacking and Installation Unpacking Display|Dispenser Unit Installation Remove arium 611VF from its The Display|Dispenser unit has packaging. You will find the been designed to mount in 3 ways: accessories inside the arium At the top of the right door for... - Page 9 Mounting the upper display|dispenser unit Mounting the lower display|dispenser unit...
-
Page 10: Ultrafilter Installation
Ultrafilter Installation Caution! Danger of irreversibly damaging arium 611VF components and the filter cartridges! Tighten all union nuts made of plastic by hand. Do not use a wrench or pliers. Before starting up arium 611VF, you need to install the ultrafilter module in the housing cover. -
Page 11: Bench Mounting
• Place the arium 611VF on a flat that it occupies a minimum amount surface. of space. A clear wall area of 63 + 63 cm is required to mount •... -
Page 12: Water Inlet Connection
Water Inlet Connection Feed water is supplied to the system through this inlet (1). The arium system is supplied with two water supply adapters – one with 1” British thread and one with 4”-NPT. Caution! Do not draw water from the top of an open container or carboy to supply water to the 611 system. -
Page 13: Initial Operation
Initial Operation Cartridge Installation • Open both doors of the system. • Remove both cartridge packs from their packaging. One cartridge pack has a label with a blue dot and the number 1, the other cartridge has a red dot and the number 2. -
Page 14: System Settings
Prior to initial operation of the the date will be displayed in the This feature allows the user to arium 611VF, set date and time, DD.MM.YY format and time in select how measurement units the language for the display text the 24-hour format. -
Page 15: Set Point
Set Point Language The option “Set Point” allows the This feature allows the user to user to select a defined quality level select one of six languages for for the product water in MO + cm the display texts for convenient or µS/cm. -
Page 16: Initial Flush And Sanitization
Initial Flush and Sanitization System Sanitization • Unscrew the luer cap from the Prior to initial operation, cartridge To sanitize the system: connection of the red cartridge packs and the ultrafilter must be adapter. flushed to remove air and rinse •... -
Page 17: Ultrafilter Flush
Ultrafilter Flush Reset UV Timer Prior to Initial Prior to initial operation, the Operation Ultrafilter module has to be flushed. Prior to initial operation the The system offers a short (1 min) UV Timer must be reset. See the and a long UF flush (5 min). Activate the UV Bulb Timer section on page 28. -
Page 18: Further Options
Further Options Print Data Pump Protection If you have connected an appropri- If you are using a separate tank ate printer to the printer port (1) on for the feed water supply, you can your arium system, you have two connect the water tank and the print options: arium unit via port (2) with a pump... -
Page 19: Time|Volume Dispense
Time|Volume Dispense Note • The system will begin to dispense If you are using a filter with the water through the time dispense Note Timed Dispense feature, attach port. Time will count down as The arium 611 System must be the filter and rinse the filter for shown on the screen below. -
Page 20: Set Cell Constant
Set Cell Constant The resistivity and temperature cell constants are factory set! If you have to replace the cell, you will find the resistivity and temperature cell constants listed on the cell cable (1) located inside the arium system. To provide a more accurate reading, the cell constants should be entered in the system memory by the user. -
Page 21: Calibration Of The System
Calibration of the System This will take a few minutes The system can be calibrated using to complete: an optional N.I.S.T. calibration module available from Sartorius. Calibration Proceed as follows: In Process • Turn the power switch on the arium System to off (“O”) and disconnect... -
Page 22: Start Up|Operation
• After dispensing the water, pull Stop button. start Normal Operation with your the draw-off lever forward to close arium 611VF. Turn on the power the valve. While in the “Standby Mode” an switch (“I”), connect the feed water • Place the protective cap back on “Automatic UF-Flush Cycle”... -
Page 23: System Inactive Mode
System Inactive Mode If the Operate|Stop button is pressed while the system is on Nor- mal Operation the arium 611VF is deactivated. This mode is intended purely for troubleshooting and should not be used for prolonged periods of time. Otherwise the... -
Page 24: Maintenance And Servicing
(see figure on – Only qualified personnel may within the cartridges or piping. page 16): service and repair arium 611VF. Without Sanitization, the TOC – Disconnect arium 611VF from level in the water can increase • Unscrew luer end cap from the power supply outlet before significantly. -
Page 25: Cartridge Replacement
Cartridge Replacement Two screws are seated in the cover Cartridge pack life is directly related of each cartridge pack. The two to feed water quality and water screw heads must rise from the consumption. Cartridge packs need drillings of the safe guard slides to be replaced when product water with the upper ring of the spacers. -
Page 26: Ultrafilter Replacement
• Open the inlet water or reconnect cartridge as follows: with a bell. To replace the final the arium System to the feed water • Turn off arium 611VF and discon- filter assembly: supply. nect it from the AC power outlet. -
Page 27: Cell Cleaning
– Do not immerse the entire cell assembly in cleaning solution, only the electrode portion. • Turn off arium 611VF (“O”) and disconnect it from the AC power outlet. • Disconnect the feed water supply or the line to the arium unit. -
Page 28: Uv Bulb Replacement
To replace the ultraviolet bulb: The UV bulb consists of a quartz Make sure that the O-Ring on the • Turn off arium 611VF using the glass tube with integrated mercury new lamp is not dislocated. main power switch (“O”) and bulb. -
Page 29: Activate The Uv Timer
Activate the UV Timer The UV bulb should be replaced approximately every six months. A timer can be activated to display a message every 6 months to remind you that the UV bulb is ready to be replaced. To activate the timer after installing a new UV bulb: •... -
Page 30: Fuse Replacement
Fuse Replacement Caution! arium 611VF has two fuses for Danger of damage to components! the unit. First determine why the fuse blew and eliminate the cause. Then Warning! replace any defective fuses with Severe electrical shock hazard new ones. or danger of electrocution! •... -
Page 31: Appendix
Solutions Pump not operating, control panel not lit No electrical power to arium 611VF. Ensure that the arium 611VF power cord is connected to a live power source and completely plugged into electrical outlet. The power entry plug fuse is defective. Identify and eliminate problem, replace the fuse (see section on Fuse Replacement on page 29). -
Page 32: Specifications
23.6 kg Clearance requirements Sides: 10 cm minimum for cable and tubing connections Front: 40 cm minimum for opening the doors Inlet water requirements arium 611VF requires water pretreated by: - distillation - deionization or - reverse osmosis Distilled water: >... -
Page 33: Accessories And Replacement Parts
When requesting any customer service or replacement parts or in any correspon- dence about arium 611VF, be sure to state the complete model number and the serial number that are on the Specification Plate label on the rear panel of the unit. -
Page 36: Weender Landstrasse
Sartorius AG. The status of the information, specifications and illustrations in this manual is indicated by the date given below. Sartorius AG reserves the right to make changes to the technology, features, specifications, and design of the equipment without notice.
Need help?
Do you have a question about the arium 611VF and is the answer not in the manual?
Questions and answers