Table of Contents
Advertisement
Advertisement
Table of Contents

Related Manuals for Tivax MiTraveler

Summary of Contents for Tivax MiTraveler
- Page 1 User Manual Product Model: MiTraveler...
-
Page 2: Table Of Contents
Content Content………………………………………………………………………………………3 1. Appearance Description..…………………………………………………………………3 2. Getting Started……………………………………………………………………………4 2.1 Battery Recharge..………………………………………………………………………4 2.2 Memory Card……………………………………………………………………………4 2.3 Hot Plug of Memory Card and External Flash Disk……………………………………5 2.4 Storage Space……………………………………………………………………………5 2.5 Power on and Power off…………………………………………………………………6 2.6 Vibration…………………………………………………………………………………7 2.7 Screen Rotation.…….……………………………………………………………………7 2.8 Network Connection………………………………………………………………………8 3. - Page 3 9.4 Positioning and Security………..…………………………………………………………23 9.5 Application..………………………………………………………………………………23 9.6 SD card &Device storage…………………………………………………………24 9 . 7 S e a r c h … … … … … … … … … … … … … … … … … … … … … … … … … … … … … 2 4 9.8 Language &...
-
Page 4: Content
1. Appearance Description... -
Page 5: Content
2. Getting Started Battery Recharge MiTraveler has one built-in battery, which should be fully charged (for at least 8 hours) before the initial use. Power Adaptor Connect the power adaptor to the power source and the other to the equipment jacket to recharge. -
Page 6: Hot Plug Of Memory Card And External Flash Disk
Close all files in the card, Touch the menu icon and select Setting → SD card & device storage → SD 1 → Unmount SD1. The system will show “Memory device safe to remove". Press the card and the card will pop out. Take it out and the upper left screen will show "Removed memory device”. -
Page 7: Power On And Power Off
2GB and the flash disk and memory card are subject to the specific capacity supporting 32GB maximum. **For detailed information, please refer to 9.6 TF Card (TF card 1, Micro SD card) and Equipment Memory** Power on/off 1. Power on: Press the Power Button on top for 2 seconds. -
Page 8: Vibration
Slide the Power Off icon upward hit to shut down the equipment and it will be vibrating for once; slide the Cancel icon downward to exit power off interface. 3. Sleep mode: Press the power icon (1 second) and the system will enter sleep mode - the LCD screen will fade. -
Page 9: Network Connection
The screen will automatically rotate in responding to the direction of the device. If you hold it vertically, the screen will be vertical and if you hold it horizontally, the screen will be horizontal. The screen rotation will be done in 2 seconds and be refreshed back to normal after rotating back. -
Page 10: Touch Screen
USB Keyboard The unit support external USB keyboard to input text and number. Some buttons on the unit and some function keys on keyboard may not work if an external USB keyboard was connected. 3.2 Touch Screen The touch screen responds to finger touch as well as the stylus (touch pen) included with the device. -
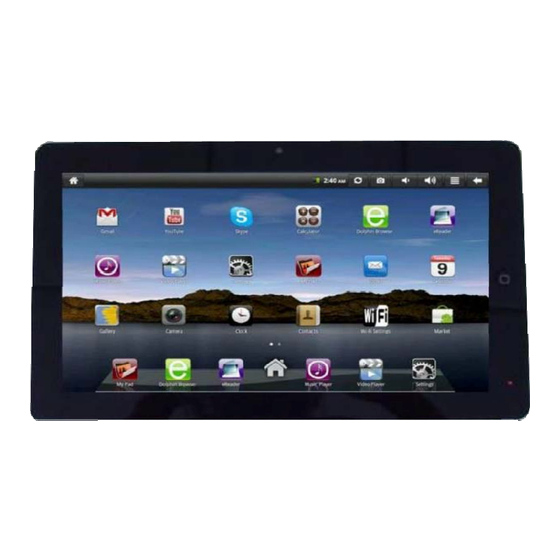
Page 11: Main Interface
Update: Start Media scanner Camera Icon : camera Volume Icon : Adjust unit volume Volume Icon : Adjust unit volume Menu Return 3G Icon: will show if 3G network service was using to connect network Cable Network Icon : will show if Ethernet cable was using to connect network 4.2 Main Interface The main interface application page of the tablet palmtop has two main Views: 1.Widget mode... -
Page 12: Shortcut
Touch the icon the Application Icon Mode will shown as follows: 4.3 Shortcuts On the widget mode, tap the Menu icon on the top, a shortcut menu will pop up at the bottom of the screen. The shortcut menu includes: Add Widget, Wallpaper, Notifications, Settings. -
Page 13: Window Widgets
4.4 Window Widget If you want to add the shortcut into the main screen, Tap Menu on the Widget Mode interface, then tap Add Widget-Shortcut. Choose a shortcut and add it into the main screen. Click the shortcut icon on the main screen and it will execute the corresponding operation. 4.5 Desktop Gadget You can add, delete or install desktop widget, add or delete application icons, move or change icon positions, drag between the shortcut bar and the operation area and add or delete... - Page 14 Delete download history record: Too many history records will slow down website browsing or cause system failure. To delete history, tap "Menu" icon when browser was open. Then tap the More icon on reference menu: Tap the download option to pop up: When the file download is finished, delete the download history record by touch the Clear list and select to delete download history.
-
Page 15: Application Software Management
6. Application Software Management 6.1 Install and Uninstall Install from memory card or USB drive Please go to APK Manager,Select “Install” and then select the file with the extension name .apk in the memory card. Select “Install” to install the software. Install application from internet You can use App Market to search any application you want, after download finish it will automatic install... -
Page 16: E-Mail
You can Go to or use MARKET download instant message software http://Android.com/market from website, such as Fring, QQ, MSN, Skype etc… 7.2 E-mail Tap the E-Mail icon to go to E-mail interface and you can: 1. Set up your E-mail account; 2. - Page 17 Copy Files: Store files in the devices or copy files between the memory card and external flash drive. Copy files from the memory card to the flash disk: 1.Select the file you want to copy, press and hold an icon – the function list will be shown: 3.
-
Page 18: Electronic Photo Frame
Delete Files: Select the file you want to delete, press and hold the icon to display the function list. Select “Delete” and a confirmation dialog box will be displayed. Click “Yes” to delete the file. 7.3 Software Installation: If you want to install the software in the document browser, just click the installation file with the extension name .apk and a prompt box will display. -
Page 19: Camera
list" 7.7 Camera Touch the icon to enter camera mode and the interface is shown as follows: 1.Touch the icon at the bottom right and you can save your photos in DCIM/Camera directory in TF card. 2. Move the icon on the right and you can switch camera mode to film mode. -
Page 20: Shortcut Configuration
To adjust the volume------click 8.2 Shortcut Configuration Connect to Wireless Network Click Wi-Fi icon to enter the wireless network interface shown as follows: Connect to Cable Network: Click cable network icon to enter cable network interface and manually set your IP shown as follows:... - Page 21 Connect to 3G Network:...
-
Page 22: Battery Hints
First, you need to buy a 3G wireless card from your 3G service provider. The equipment at present supports: Huawei EVDO: EC122 EC169C WCDMA: E1750 E1752 K3765 Since our company is continuously committed to improving product quality and the software edition is always updating which will support more models in the future, please refer to the finished products. -
Page 23: Personal Setting
2. Reduce display brightness: press settings → display → brightness (reduce the brightness); 3. Reduce Network search. 4. Wi-Fi application: set the Wi-Fi switch button to close status (close Wi-Fi). 9. Personal Setting Click the Setting icon on the shortcut menu and the desktop icon for personal setting 9.1 Wireless and Network... -
Page 24: Positioning And Security
Volume To set the volume of music and video, please press Settings → Sound → Volume. Notification ringtone To set default notice tone, please press Settings → Sound → Notification ringtone. Audible selection To set operation tone, please press Settings → Sound → Audible selection Haptic feedback To set vibration to the soft keyboard and UI activities, please press Settings →... -
Page 25: S E A R C
9.6 Search Set up web search and device search If you want to show web suggestions, please press Settings → Search→ Google search You can choose " show web suggestions" and " Don't show suggestion from Google as you type" On "Searchable items",you can select or cancel from Web, Apps Contacts and Dolphin Broswer 9.7 Language &... -
Page 26: Hdmi
Settings → About device → Status. Legal information To check the law information, please press Settings → About device → Legal information. 10. HDMI You can switch the video to play it on the HDMI display equipment (such as TV with a HDMI interface) by HDMI. -
Page 27: Close Application
Tap the application you want to close. A pop-up window will be displayed. Tap “Stop” to close that application. 12.2 Mandatory Power off 1. Press and hold the power button for 7 seconds and the device will be powered off. 2. - Page 28 This warranty shall be void upon transfer of ownership of this product and is effective only when used in the United States. Michley/Tivax agrees to repair or replace this unit at no charge, within the warranty period, providing that the product is delivered to Michley/Tivax in its original package or equivalent, fully insured, with all shipping charges prepaid and a return authorization number listed on the outside of the packaging.
- Page 29 General Information: info@tivax.com 1-888-33-Tivax (1-888-338-4829) Customer Support: support@tivax.com www.tivax.com...
Need help?
Do you have a question about the MiTraveler and is the answer not in the manual?
Questions and answers