
Related Manuals for Orion 26RTV


Summary of Contents for Orion 26RTV
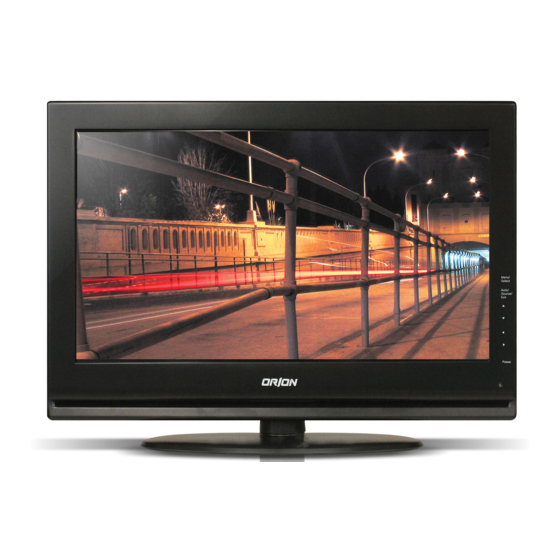
- Page 1 Installation and User's Guide LCD VALUE SERIES (26 inches) http://www.orionimages.com All contents of this document may change without prior notice, and actual product appearance may differ from that depicted herein...
-
Page 2: Warning
Installation and User's Guide 1. SAFETY INSTRUCTION Follow this safety instruction to use the monitor properly and prevent the damages. This safety instruction has “Warning” & “Caution” as below Warning - If the user does not follow this instruction, it may cause the serious damage to the user. Caution - If the user does not follow this instruction, it may cause the slight damage to the user or cause some damages to the monitor. - Page 3 Installation and User's Guide Warning Do not install this monitor on the outside For cleaning do not use liquid cleaners. and near water. If may cause damage to Never touch the power plug with wet-hands. the product, electric shock and fire. When lightning and thundering, unplug the Unplug this product from the wall outlet, when monitor from the wall outlet and never touch...
- Page 4 Installation and User's Guide Cautions Install this monitor some distance Place this product on a stable place. From the wall and do not install unless If not, it may fall, causing serious Proper ventilation is provided. Damages to the monitor and people. The openings must not be blocked by When carrying this monitor, be careful curtain, rug or other similar surface.
- Page 5 Installation and User's Guide Cautions Install this monitor about 50cm far from Do not press the LCD panel with hands or the eyes and an angle of 0~15 degrees the sharpened material hardly. below eyes. Too close installation may cause having weak sight. For cleaning, unplug the monitor from the Do not use the chemical liquid for cleaning.
-
Page 6: Fcc Statement
Installation and User's Guide 2. FCC RF INTERFERENCE STATEMENT NOTE This equipment has been tested and found to comply with the limits for a Class A digital device, pursuant to Part 15 of the FCC Rules. These limits are designed to provide reasonable protection against harmful interference in a residential installation. -
Page 7: Table Of Contents
Installation and User's Guide TABLE OF CONTENTS 1. SAFETY INSTRUCTION 1-1 Warning 1-2 Caution 2. FCC STATEMENT 3. INSTALLATION 3-1 Parts 3-2 How to Install 4. OSD MENU SETTING 5-1 Mode Setting 5-2 Menu Setting (VIDEO, S-VIDEO, HDMI Mode) 5-3 Menu Setting (VGA Mode) 5. -
Page 8: Installation
Installation and User's Guide 3. INSTALLATION 3-1 Parts LCD Monitor Adapter VGA Cable Power Cable Battery Remote Controller User Manual... -
Page 9: How To Install
Installation and User's Guide 3-2 How to Install KEY BUTTON SHORT KEY FUNCTION OSD Key Function Activates and exit the OSD Select the scan mode of the screen Move the OSD menu and auto adjustment of RGB source Select input source, and select the OSD menu Decrease the level of volume and move the previous menu Increase the level of volume and select rhe OSD menu Turns the power ON or OFF. - Page 10 Installation and User's Guide CONNECTION HDMI VIDEO-2 IN / OUT HDMI signal input VIDEO-2 signal input / looping out S-VIDEO VGA (PC RGB) signal input S-VIDEO signal input DC12V AUDIO (VIDEO) DC adapter input Stereo audio input for VIDEO or S-VIDEO VIDEO-1 IN / OUT AUDIO (PC) Stereo audio input for VGA...
-
Page 11: Mode Select Menu
Installation and User's Guide REMOTE CONTROLLER MODE SELECT MENU VIDEO1 VIDEO2 Select VIDEO1 mode Select VIDEO2 mode S-VIDEO VGA (RGB) Select S-VIDEO mode Select VGA mode POWER MUTE HDMI VIDEO1 VIDEO2 S-VIDEO Select HDMI mode AUTO COLOR TEMP HDMI SCAN MODE OSD CONTROL MENU VOL- VOL+... -
Page 12: Osd Menu Setting
Installation and User's Guide 4. OSD MENU SETTING 5-1 Mode Setting INPUT Use SOURCE button and then button to move the source. VIDEO1 Press the button to select the source. VIDEO2 S-VIDEO Press the MENU/EXIT button to exit the INPUT menu. √... -
Page 13: Menu Setting (Video, S-Video, Hdmi Mode)
Installation and User's Guide 5-2 Menu Setting (VIDEO, S-VIDEO, HDMI Mode) PICTURE Press the MENU/EXIT key to access menu. PICTURE PICTURE Use the & arrow to highlight a selection. CONTRAST SCREEN BRIGHTNESS Press the /SELECT to choose an item. COLOR TINT SHARPNESS 4. - Page 14 Installation and User's Guide COLOR TINT PICTURE PICTURE PICTURE PICTURE CONTRAST CONTRAST BRIGHTNESS BRIGHTNESS SCREEN SCREEN COLOR COLOR TINT TINT SHARPNESS SHARPNESS SETUP SETUP ▶ ▶ COLOR TEMP ◀ MEDIUM COLOR TEMP ◀ MEDIUM GREEN GREEN SETUP SETUP BLUE BLUE ▼/▲...
- Page 15 Installation and User's Guide SCREEN Press the MENU/EXIT key to access menu. SCREEN PICTURE Use the & arrow to highlight a selection. ▶ SCAN MODE ◀ UNDER SCREEN Press the /SELECT to choose an item. SETUP 4. Use the & arrow to highlight a selection. 5.
- Page 16 Installation and User's Guide SETUP Press the MENU/EXIT key to access menu. SETUP PICTURE Use the & arrow to highlight a selection. ▶ INPUT ◀ VIDEO1 LANGUAGE ◀ ENGLISH ▶ SCREEN SOUND MUTE ▶ ◀ Press the /SELECT to choose an item. ▶...
-
Page 17: Sound Mute
Installation and User's Guide SOUND MUTE BUTTON LOCK SETUP SETUP PICTURE PICTURE ▶ ▶ INPUT ◀ VIDEO1 INPUT ◀ VIDEO1 LANGUAGE ◀ ENGLISH ▶ LANGUAGE ◀ ENGLISH ▶ SCREEN SCREEN SOUND MUTE ▶ SOUND MUTE ▶ ◀ ◀ ▶ ▶ BUTTON LOCK ◀... - Page 18 Installation and User's Guide DEFAULT SETUP PICTURE ▶ INPUT ◀ VIDEO1 LANGUAGE ◀ ENGLISH ▶ SCREEN SOUND MUTE ▶ ◀ ▶ BUTTON LOCK ◀ ▶ NOISE REDUCTION ◀ SETUP OSD TIME DEFAULT ▶ SETUP ▼/▲ : MOVE ◀/▶ : ADJUST ▶...
-
Page 19: Menu Setting (Vga Mode)
Installation and User's Guide 5-3 Menu Setting (VGA Mode) PICTURE Press the MENU/EXIT key to access menu. PICTURE PICTURE Use the & arrow to highlight a selection. CONTRAST BRIGHTNESS SCREEN Press the /SELECT to choose an item. COLOR TINT SHARPNESS 4. -
Page 20: Color Temp
Installation and User's Guide COLOR TEMP PICTURE PICTURE CONTRAST BRIGHTNESS SCREEN COLOR TINT SHARPNESS SETUP ▶ COLOR TEMP ◀ MEDIUM GREEN SETUP BLUE ▼/▲ : MOVE ◀/▶ : ADJUST ▶ : ENTER MENU : EXIT VER : *.* Default setting is MEDIUM and switch to WARM, USER and COOL color temperature options USER - Default setting of RED, GREEN, BLUE is 50% and adjustable from range of 0 to 100%... - Page 21 Installation and User's Guide SETUP Press the MENU/EXIT key to access menu. SETUP PICTURE Use the & arrow to highlight a selection. INPUT ◀ RGB PC ▶ ▶ SCREEN LANGUAGE ◀ ENGLISH Press the /SELECT to choose an item. ▶ SOUND MUTE ◀...
- Page 22 Installation and User's Guide RGB SETUP Press the MENU/EXIT key to access menu. RGB SETUP PICTURE Use the & arrow to highlight a selection. H-POSITION 100% SCREEN V-POSITION Press the /SELECT to choose an item. CLOCK PHASE AUTO ADJUST ▶ SETUP 4.
-
Page 23: Auto Adjust
Installation and User's Guide CLOCK PHASE RGB SETUP RGB SETUP PICTURE PICTURE H-POSITION H-POSITION 100% 100% V-POSITION V-POSITION SCREEN SCREEN CLOCK CLOCK PHASE PHASE AUTO ADJUST ▶ AUTO ADJUST ▶ SETUP SETUP ▶ ▶ POWER SAVING ◀ POWER SAVING ◀ AUTO REPEAT ▶... - Page 24 Installation and User's Guide AUTO REPEAT RGB SETUP PICTURE H-POSITION 100% V-POSITION SCREEN CLOCK PHASE AUTO ADJUST ▶ SETUP ▶ POWER SAVING ◀ AUTO REPEAT ▶ ◀ SETUP ▼/▲ : MOVE ◀/▶ : ADJUST ▶ : ENTER MENU : EXIT VER : *.* Default setting is OFF and switch to ON auto repeat mode...
- Page 25 Installation and User's Guide VGA / HDMI Mode Tables VGA / DVI Mode MODE RESOLUTION VERTICAL FREQUENCY (Hz) 720X400 640X480 60 / 72 75 SVGA 800X600 50 / 60 / 72 / 75 1024X768 50 / 60 / 75 WXGA 1366X768 HDMI Mode MODE...
-
Page 26: Features
Installation and User's Guide 5. FEATURE General Features 26RTV Screen Size 26.0 inches Resolution 1366*768 pixels Pixel Pitch 0.422*0.422 mm Brightness 300 cd/m^2 Contrast Ratio 3000:1 Display Aspect Ratio 16:9 Viewing Angle (H/V) 178/178 degrees Display Color 16.7 million Response Time 6.5 ms... -
Page 27: Limited Warranty
Installation and User's Guide 6. 2Year Limited Warranty All ORION Images products carry a limited warranty from ship date against defects in materials and workmanship. ORION Images is not liable for improper installation that results in damage to mounts, adapters, display equipment or personal injury.
Need help?
Do you have a question about the 26RTV and is the answer not in the manual?
Questions and answers