
Subscribe to Our Youtube Channel
Related Manuals for Spirit MS300


Summary of Contents for Spirit MS300
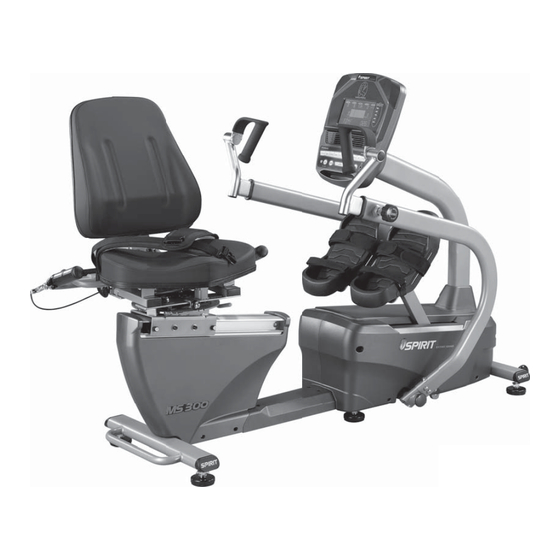
- Page 1 MS300 Rehabilitation Seated Stepper USER’S MANUAL PLEASE READ THIS ENTIRE MANUAL CAREFULLY BEFORE OPERATING YOUR NEW SEMI-RECUMBENT STEPPER AND SAVE IT FOR FUTURE USE.
-
Page 2: Table Of Contents
Table of Contents Product Registration…………………………………………………………………………. Important Safety Instructions………………………………………………………………… Important Electrical Information……………………………………………………………… Important Operation Instructions…………………………………………………………….. Features……………………………………………………………………………………….. Operation of Your New Stepper…………………………………………………….….…… MS300 Assembly Instructions………………………………………………………………. MS300 Drawing & Parts List………………………………………………………………… Maintenance…………………………………………………………………………………… Specifications………………………………………………………………………………….. Manufacturer’s Limited Warranty…………………………………………………………….. 32 MS300... -
Page 3: Product Registration
We appreciate your support and we will always remember that you are the reason that we are in business. Please complete and mail your registration card today and enjoy your new MS300. Yours in Health and Wellness,... -
Page 4: Important Safety Instructions
■ Do not use any after market parts on this device, other than those recommended by Spirit. ■ Do not attempt any servicing or adjustments other than those described in this manual. All... -
Page 5: Important Electrical Information
Make sure the user warms up and cools down properly to avoid over taxing the ● cardio vascular system. Allow three to five minutes of warm up and cool down during each exercise session. MS300... -
Page 6: Features
6. Lifting Handle for transport 7. Leveling Glides The Spirit MS300 is an easy product to set up and use, from the adjustments to the intuitive interface. This section explains how to set up, adjust and operate your MS300 from Spirit Medical Systems Group. - Page 7 Leveling the MS300: Once the MS300 is assembled, and placed on a flat level floor, it may be necessary to • adjust the leveling glides on the bottom of the unit to ensure proper stability of the MS300. Use a 1/2” wrench to loosen the top nut of the levelers. Make sure the two center levelers are screwed all the way in.
- Page 8 Seat Belt adjustment: Simply snap the buckles together and adjust the strap to the desired fit. • Rotating Handle: • Handles rotate to allow wrist patients to use upper body without discomfort. MS300...
-
Page 9: Operation Of Your New Stepper
You may now begin to use the MS300. The console will automatically power down after 20 minutes of inactivity. Press any key to wake the console up again. Always disconnect the main power when the MS300 is not in use. MS300... -
Page 10: Console Operation
The Set Up key function will allow you to set seat and arm adjustments for various patient heights and customize the settings of the MS300. When the Set Up key is pressed the first option in the menu appears. Use the up/down arrows to scroll through the menu and press the enter key to select an option. - Page 11 Manual button then the Enter button and follow the directions in the message window. 1. Press the Manual key then press the Enter key. 2. The message window will prompt you to enter the Age, Weight and Time for the program. MS300...
-
Page 12: Preset Programs
The Hill program simulates going up and down a hill. The resistance in the pedals and upper body arms will steadily increase and then decrease during the program. PLATEAU The Plateau program provides a steady state exercise with warm up and cool down periods. MS300... - Page 13 5. When the program ends you may press Start to begin the same program again or Stop to exit the program, or you can save the program you just completed as a custom program by pressing the User keys and following the instructions in the message window. MS300...
- Page 14 10. During the Facility program you will be able to scroll through the data in the message window by pressing the Enter key. Running a saved program: Press User key then Enter Enter Time then press start to begin program. MS300...
- Page 15 41 vs. 34 watts. The graph reflects the higher wattage of the left leg. If the power is equal in both legs only two dots would be lit on the bottom center of the graphic screen. Press the Enter key to view the Symmetry data. MS300...
- Page 16 (estimated transmitter battery life is 2500 hours). If your chest strap has a replaceable battery the replacement battery is Panasonic CR2032. Erratic Operation: Caution! Do not use the MS300 for Heart Rate Control unless a steady, solid Actual Heart Rate value is being displayed. High, wild, random numbers being displayed indicate a problem.
- Page 17 9. When the program ends you may press Start to begin the same program again or Stop to exit the program or you can save the program you just completed as a custom user program by pressing a User key and following the instructions in the message window. MS300...
-
Page 18: Ms300 Assembly Instructions
ASSEMBLY INSTRUCTIONS FOR MS300 1) Hardware STEP 1. #129- M6 x 40L (2PCS) #132- 3/8" x 2" (4PCS) #135- 5/16" x 1-1/4" (1PCS) #185-5/16" x 19 x 1.5T (4PCS) #170-3/8" x 19 x 1.5T (6PCS) #173-8.5 x 26 x 2T (2PCS) #181-M5 x 15L (12PCS) #140-3/8"... - Page 19 #122-M6 x 25L (4PCS) #167-10 x 25 x 2T (2PCS) #190-3/8" x 7T (2PCS) #197-3/8" x 1-3/4" (2PCS) STEP 4. #143-M5 x 12L (4PCS) #216-3/8" x 5/8" (8PCS) #217-3/8" x 19 x 1.5T (4PCS) #218-3/8" x 23 x 2.0T (4PCS) MS300...
- Page 20 5. Assemble the rubber isolators (82) and pedals (28) to the pedal foot plates with six M5 phillips screws (181) per side. 6. Press the four stabilizer end caps (31) into the stabilizer tubes. May tap in with a rubber mallet. MS300...
- Page 21 (170) from the left side of the mast and secure with the two 3/8” nylon nuts (190). Install the two 8mm x 12mm bolts (153) and curved washers (184) through the front and rear holes in the mast. MS300...
- Page 22 1. Slide the seat back assembly (94) into the seat back angle adjustment bracket and secure with the two 3/8” x 1-3/4” bolts (197), 3/8” washers (167) and 3/8” nuts (190). 2. Assemble the seat cushion (93) onto the seat frame with four M6 bolts (122). MS300...
- Page 23 2. Install the left and right arms (3&4) and secure with the 3/8” x 5/8” bolts (216) and use the 3/8” flat washers (217) on the sides of the arms and the 3/8” curved washers (218) on the front and rear of the arms. Tighten the bolts very securely so the arms do not loosen up during use. MS300...
-
Page 24: Ms300 Drawing & Parts List
MS300 Exploded View Drawing MS300... - Page 25 MS300 Parts List Item # Part Number Description Qty. CC010056 Main Frame Console Mast CC060069 Swing Arm (R) CC030058 CC030059 Swing Arm (L) CC040041 Pedal Plate (R) Pedal Plate (L) CC040042 CC060079 Handle Slider (R) CC060080 Handle Slider (L) Drive Pulley...
- Page 26 P100124-KF P180041-KF End Cap P100172-KF Shroud ( R ) Shroud ( L ) P100171-KF P100170-KF Top Cover P100169-KF Console Mast Cover Bottom Step Cover P190044-KF P040166 Slide End Cap Spacer P050021-A1 Transportation Wheel B130264-Z3 Shroud Bracket B070065-Z3 Sensor Bracket MS300...
- Page 27 Hand Pulse Wire, Left E030070 Hand Pulse Wire, SMP-2V+300mm P040157 Powder Metal Sleeve Square End Cap P040039-A1 P120031 Pedal Foam Cushion J032005-ZI Socket Head Cap Bolt, M5xP0.8x25 Socket Head Cap Bolt, M6x1.0x15L J032503-ZI J032504-Z1 Socket Head Cap Bolt, M6x1.0x20L MS300...
- Page 28 Phillips Head Screw, M5×P0.8×70 J552002-Z1 Flat Head Phillips Screw, M5x0.8x12L J552005-Z1 Flat Head Phillips Screw, M5 × 25 Phillips Screw, M5 × 0.8 × 10L J562001-Z1 J602501-ZQ Flat Head Phillips Screw, M6 × 10L J082514-Z1 Eye Bolt, M6xP1.0x57L J Bolt, M8xP1.25x80L J083010M-Z1 MS300...
- Page 29 J210083-Z1 Flat Washer, 45mm × 21.8mm J031007Z-Z4 Socket Head Cap Bolt, 3/8"×UNC16×1-3/4" J139311-Z1 Nyloc Nut, M12×P1.75×8T J129621-Z1 Nut, M6x5T J129171-Z1 Nut, M5×P0.8×4T J590004-Z4 E-Clip, 5mm C-Clip, 10mm J310003-Z4 J310005-Z4 C-Clip, 16mm J310002-Z4 C-Clip, 17mm Inner Snap Ring, 28mm J670001-Z4 MS300...
- Page 30 Hand Pulse Cable, Upper E030216 E030217 Hand Pulse Cable, Lower F080048 Power Adapter, 12VDC Power Adapter Line Cord E061004 N060014 Foot Strap, Narrow N060015 Foot Strap, Wide N060016 Seat Belt P040050 Round End Cap CC030049 Swivel Handle B020119-Y3 Swivel Handle Range Limiter MS300...
-
Page 31: Maintenance
• • • • CALORIES window shows reflector sensor #2 signal • • • • TIME window show Left step position counter • • • • STEPS window show Right step position counter • • • • PULSE window show speed sensor signal (on or off) MS300... -
Page 32: Specifications
90~260 VAC, 47~63 Hz Resistance: Isokinetic with 20 levels of effort. Work Load: 5 watts up to 750 watts. Readouts: Time and Segment time remaining, SPM, Steps, Watts (Left and Right), METs, Symmetry Index, Heart Rate, Calories, Work Level MS300... -
Page 33: Manufacturer's Limited Warranty
5. Products that have been; sold, transferred, bartered, or given to a third party. 6. Products that are used as store display models. 7. Products that do not have a warranty registration on file at Spirit. Spirit reserves the right to request proof of purchase if no warranty record exists for the product. - Page 34 © 2013 All Rights Reserved. www.spiritmedicalsystems.com/ MS 300 s ’ I140407-A1, Rev . 1...
Need help?
Do you have a question about the MS300 and is the answer not in the manual?
Questions and answers