Table of Contents
Advertisement
Quick Links
CAT5 Smart KVM Extender – Quick Start Guide
1.
Introduction
To take advantage of the full range of features, we recommend you read the softcopy User
Guide after performing the Quick Start procedure. It's in PDF format on the supplied CD or
on our website www.minicom.com in the Support section.
The CAT5 Smart KVM Extender (KVM Extender) system from Minicom is an advanced
KVM switch that performs the following functions:
Extends KVM control over a computer* up to a distance of 110m / 360ft
Gives 2 users at 2 workstations control of 1 computer*
A 2-port KVM switch for 1 or 2 users
* Throughout this guide 'computer' also means a KVM switch
2.
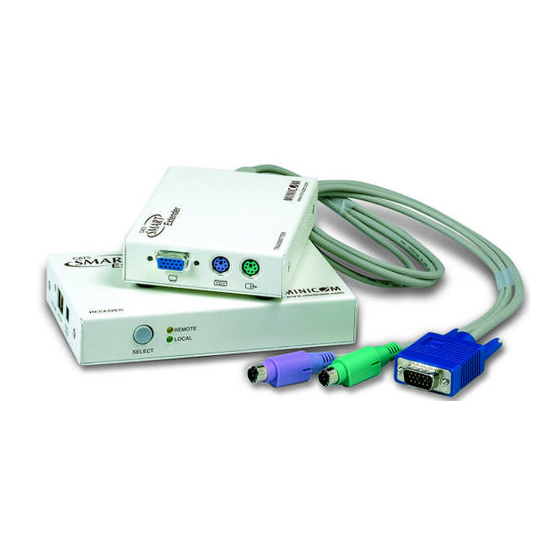
System components
The KVM Extender system consists of:
Transmitter
Receiver
3 in 1 CPU cable
1 Power adapter for the Receiver
A Shielded CAT5 FTP (Foil Twisted Pair) Solid Wire 2x4x24 AWG cable with RJ-45M
connectors connects the KVM Extender system.
1111 W. 35th Street, Chicago, IL 60609 USA
www.tripplite.com/support
Copyright ©2012 Tripp Lite. All rights reserved.
Advertisement
Table of Contents

Related Manuals for Tripp Lite Cat5 Smart KVM Extender


Summary of Contents for Tripp Lite Cat5 Smart KVM Extender
-
Page 1: System Components
Guide after performing the Quick Start procedure. It’s in PDF format on the supplied CD or on our website www.minicom.com in the Support section. The CAT5 Smart KVM Extender (KVM Extender) system from Minicom is an advanced KVM switch that performs the following functions: ... -
Page 2: The Kvm Extender Units
CAT5 SMART KVM EXTENDER The KVM Extender units The figures below illustrate the Transmitter and Receiver units. Built-in KVM Monitor Mouse Yellow cables Power LED Side A Side B 6VDC SYSTEM Power Green Keyboard System cable connector Control LED Figure 1 Transmitter side panels... -
Page 3: Pre-Installation Instructions
QUICK START GUIDE Pre-installation instructions Disconnect all computers from the power supply. Place cables away from fluorescent lights, air conditioners, and machines that are likely to generate electrical noise. The KVM Extender cables The Transmitter comes with built-in KVM cables that connect to the computer’s Video card, Mouse and Keyboard ports. -
Page 4: Giving 2 Users Access To 1 Computer
CAT5 SMART KVM EXTENDER P 110 Transmitter To System port To User CAT5 S M A R T Mouse Extender CAT5 FTP cable port Up to 110m / 360ft To User MINICOM TRANSMITTER www.m inicom.com To User Monitor port Keyboard port... -
Page 5: Operating The Kvm Extender
QUICK START GUIDE P 110 User 2 P110 User 1 To Computer CAT5 SM A R T Monitor port CAT5 FTP cable Extender To Computer Up to 110m / 360ft Mouse port To Computer MINICOM TRANSMITTER www .minicom.com Keyboard port Transmitter CAT5 S M ART... -
Page 6: Locking Kvm Control
CAT5 SMART KVM EXTENDER Timeout When there are 2 workstations in the system you can gain control at either workstation when the other workstation is idle for 1 second. This timeout period can be altered in the Settings mode to between 1-99 seconds, as explained on page 6. -
Page 7: Changing The Timeout Period
QUICK START GUIDE Changing the Timeout period At the Receiver you can change the Timeout period. To do so: Press T followed by a 2-digit number of between 01-99 seconds. The 3 keyboard LEDs blink and the new setting is now functional. Enabling/disabling lock control By default both users can lock control. -
Page 8: Replacing A Mouse Type
CAT5 SMART KVM EXTENDER Mouse driver settings when replacing a computer Type the letters Wheel mouse or Intellimouse 2 or 3 button mouse 5-button mouse Set the mouse mode to IN when the computer has an operating system that supports Wheel mouse functionality: (Windows 98 and Linux*).
Need help?
Do you have a question about the Cat5 Smart KVM Extender and is the answer not in the manual?
Questions and answers