Black Box ServSwitch KV1400A User Manual

Black Box ServSwitch KV1400A User Manual

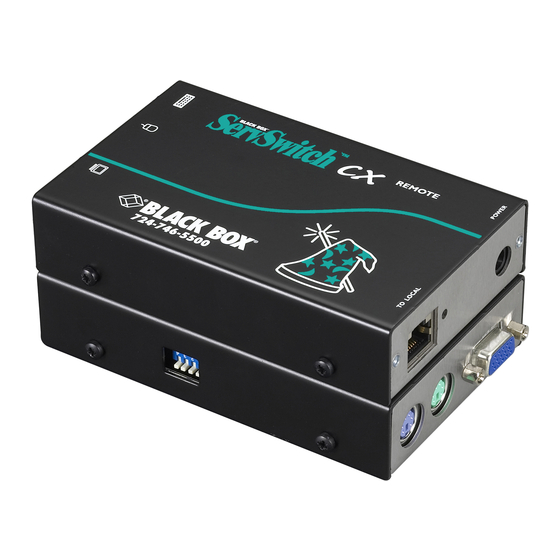
Servswitch cx remote extender
Hide thumbs Also See for ServSwitch KV1400A:

Advertisement

®
NETWORK SERVICES
ServSwitch
Order toll-free in the U.S.: Call 877-877-BBOX (outside U.S. call 724-746-5500)
CUSTOMER
FREE technical support 24 hours a day, 7 days a week: Call 724-746-5500 or fax 724-746-0746
SUPPORT
Mailing address: Black Box Corporation, 1000 Park Drive, Lawrence, PA 15055-1018
INFORMATION
Web site: www.blackbox.com • E-mail: info@blackbox.com
®
CX Remote

USER GUIDE

November 2007
KV1400A
KV04-REM
KV1401A
KV04A-REM
KV1402A
KV04AS-REM
KV1403A
KV04U-REM
KV1404A
KV04AU-REM
KV04AUS-REM
contents

Advertisement

Table of Contents
loading

Summary of Contents for Black Box ServSwitch KV1400A

  • Page 1: User Guide

    Order toll-free in the U.S.: Call 877-877-BBOX (outside U.S. call 724-746-5500) CUSTOMER FREE technical support 24 hours a day, 7 days a week: Call 724-746-5500 or fax 724-746-0746 SUPPORT contents Mailing address: Black Box Corporation, 1000 Park Drive, Lawrence, PA 15055-1018 INFORMATION Web site: www.blackbox.com • E-mail: info@blackbox.com...
  • Page 2: Table Of Contents

    Contents ® Welcome Special configuration Introduction..................2 Configuration................10 Server.Access.Module.supplied.items..........3 What.are.hotkeys?............10 Optional.item................3 Entering,.using.and.exiting.configuration.mode....10 Password.setting..............11 Installation & Operation Mouse.switching.control.(USB.models)........11 Hot.plugging.PS/2-style.connections.and.mouse.restoration...12 Connections..................4 Which.restore.setting.do.I.use?........12 Cable.length.advice..............4 Microsoft.and.Logitech.-specific.mouse.settings....12 Connections.at.each.SAM.(local).unit........5 Video.compensation.(sharpness.and.brightness)....13 Connections.at.the.ServSwitch.CX.Remote.(PS/2).module..6 Video.skew.adjustment.(AS.and.AUS.models.only).....14 Connections.at.the.ServSwitch.CX.Remote.USB.module..7 Miscellaneous.settings.
  • Page 3: Introduction

    Welcome ® Introduction Thank you for choosing from the Black Box Special circuitry within the remote module ServSwitch CX Remote extender range. These allows you to make adjustments to the compact modules allow you to remotely control sharpness and brightness settings to suit your VIDEO own preferences.
  • Page 4: Server.access.module.supplied.items

    CX Remote module supplied items Server Access Module supplied items ® Server Access Modules (SAMs): PS/2 keyboard and mouse, video KV1400A ServSwitch CX Remote USB keyboard and mouse, video KV1401A Single remote link PS/2 keyboard and mouse, video, audio KV1402A...
  • Page 5: Installation & Operation

    Installation & Operation ® Connections Cable length advice Installation of the ServSwitch CX Remote modules is straightforward and minimal The ServSwitch CX Remote modules support twisted-pair structured cabling configuration is required in most cases. Each of the (up to) two moulded SAMs within categories 5, 5e and 6.
  • Page 6: Connections.at.each.sam.(Local).Unit

    Connections at each SAM (local) unit ® 1 Where possible ensure that power is disconnected from the system(s) to be 4 For each cable run, attach the cable connector to the connected. For SAMs with PS/2 keyboard and mouse connections, see Hot.
  • Page 7: Connections.at.the.servswitch.cx.remote.(Ps/2).Module

    Connections at the ServSwitch CX Remote (PS/2) module ® 1 Place the CX Remote module adjacent to the remote user location. 3 Attach the connector of the cable run leading from the SAM to the socket of the CX Remote module. TO LOCAL 2 Attach the video monitor, keyboard and mouse connectors to the sockets of the CX Remote module.
  • Page 8: Connections.at.the.servswitch.cx.remote.usb.module

    Connections at the ServSwitch CX Remote USB module ® 1 Place the ServSwitch CX Remote USB module adjacent to the remote user 3 Attach the connector of each cable run leading from the SAMs (and/or location. ServSwitch CX digital switch) to the sockets of the TO LOCAL  TO LOCAL ...
  • Page 9 ServSwitch CX Remote module switches ® Certain aspects of operation can be affected by the switches on the ServSwitch CX Remote module. Determines configuration Switch  of hotkeys in conjunction OFF: Normal operation. with switch  ON: (Before power is applied) Places the ServSwitch CX Remote module into Reserved for flash upgrade mode so that the internal software can be changed.
  • Page 10: Operation

    Operation ® Locking and unlocking the system General use In situations where the computer systems (and their local SAMs) can be locked In use, the ServSwitch CX Remote module should be transparent - the system away, the ServSwitch CX Remote module offers a viable security system to deter and its peripherals should operate exactly as normal, the only difference being unauthorised use.
  • Page 11: Special Configuration

    Special configuration ® Configuration Entering, using and exiting configuration mode You can alter the way that the ServSwitch CX Remote module operates to suit your requirements. This is done using the Configuration mode and you can To enter and use configuration mode: affect the following settings: 1 Simultaneously press the currently configured •...
  • Page 12: Password.setting

    Password setting Mouse switching control (USB models) ® Password protection allows you restrict access to the system only to authorised In order to allow a 3 button mouse (or scroll wheel mouse) to be used to change personnel. A password first needs to be set and then, using the keyboard channels, it is first necessary to enable the feature using the process described Selecting.and.using.
  • Page 13: Hot.plugging.ps/2-Style.connections.and.mouse.restoration

    Hot plugging PS/2-style connections and mouse restoration ® To restore mouse operation when hot plugging: For computer systems that use PS/2-style keyboard and mouse connections, it is strongly recommended that you switch off the computer system before 1 Carefully connect the SAM to the system and its keyboard, mouse, monitor and audio output (if used).
  • Page 14: Video.compensation.(Sharpness.and.brightness)

    Video compensation (sharpness and brightness) ® Using the in-built ServSwitch CX Remote controls you can adjust the picture 3 While viewing the displayed screen image, use the following keys to adjust sharpness and brightness to improve the remote picture quality. the controls: Sharpness: Video compensation is best carried out when viewing high contrast images with...
  • Page 15: Video.skew.adjustment.(As.and.aus.models.only)

    For best results, much easier to discover which, if any, colours are being adversely affected by the “skew” program supplied on the disk or available from Black Box technical the cable link. support is the most accurate way of setting skew as the red, green and blue lines are rendered exactly on the screen as single pixel wide lines.
  • Page 16: Miscellaneous.settings

    Miscellaneous settings 3 As appropriate, press either the R, G or B keyboard keys to ® select the appropriate colour channel. Corresponding The following are configuration settings within the modules that are not covered keyboard indicators will flash rapidly to show which in other sections of this guide.
  • Page 17: Performing.flash.upgrades

    The KVM Firmware Uploader utility and optional cables for both module types Leave the video monitor are available from Black Box technical support. The utility also allows you to connected to the computer so that you can check progress check the current revision of the ServSwitch CX Remote (USB) firmware.
  • Page 18 To connect a ServSwitch CX Remote USB module for upgrade To use the KVM Firmware Uploader utility ® 1 Remove power from the ServSwitch CX Remote module. If one or both 1 Locate the KVM Firmware Uploader utility application (either on a supplied SAMs also need to be upgraded, ensure that they are connected to the CD-ROM or from a download) and select the KVMUploader icon to run the ServSwitch CX Remote in the usual manner.
  • Page 19 IMPORTANT: Check that the ‘Intended Target Units’ field matches the ‘Unit Connected’ field. If these fields do not match then you may have an incorrect upgrade file, check with Black Box before proceeding. Check also that the ‘New firmware version’ is greater than the ‘Current firmware version’.
  • Page 20: Further Information

    Further information ® Safety information Getting assistance • For use in dry, oil free indoor environments only. • Email in the US: techsupport@blackbox.com • Do not use to link between buildings. techhelp@blackbox.co.uk in the UK: • Ensure that all twisted pair interconnect cables are installed in compliance with all applicable wiring regulations.
  • Page 21: Radio.frequency.energy

    Radio Frequency Energy ® A Category 5 (or better) twisted pair cable must be used to connect the units in order to maintain compliance with radio frequency energy emission regulations and ensure a suitably high level of immunity to electromagnetic disturbances. All other interface cables used with this equipment must be shielded in order to maintain compliance with radio frequency energy emission regulations and ensure a suitably high level of immunity to electromagnetic disturbances.
  • Page 22: Fcc.requirements.for.telephone-Line.equipment

    FCC requirements for telephone-line equipment Certification notice for equipment used in ® 1 The Federal Communications Commission (FCC) has established rules which Canada permit this device to be directly connected to the telephone network with The Canadian Department of Communications label identifies certified standardized jacks.
  • Page 23: Normas.oficiales.mexicanas.(Nom)

    Normas Oficiales Mexicanas (NOM) electrical ® safety statement Instrucciones de seguridad 15 En caso de existir, una antena externa deberá ser localizada lejos de las 1 Todas las instrucciones de seguridad y operación deberán ser leídas antes de lineas de energia. que el aparato eléctrico sea operado.
  • Page 24 ® © 2007 Black Box Corporation All trademarks are acknowledged. Black Box Corporation, 1000 Park Drive, Lawrence, PA 15055-1018, United States of America Tel: +1-724-746-5500 Fax: +1-724-746-0746 Documentation by: www.ctxd.com...
  • Page 25: Blackbox.subsidiary.contact.details

    BlackBox subsidiary contact details ® Country Web Site/Email Phone United States www.blackbox.com 724-746-5500 724-746-0746 Austria www.black-box.at +43 1 256 98 56 +43 1 256 98 56 support@black-box.at Belgium www.blackbox.be +32 2 725 85 50 +32 2 725 92 12 support.nederlands@blackbox.be support.french@blackbox.be support.english@blackbox.be Denmark...

Table of Contents