Table of Contents
Advertisement
Advertisement
Chapters
Table of Contents

Related Manuals for IRiver B20


Summary of Contents for IRiver B20
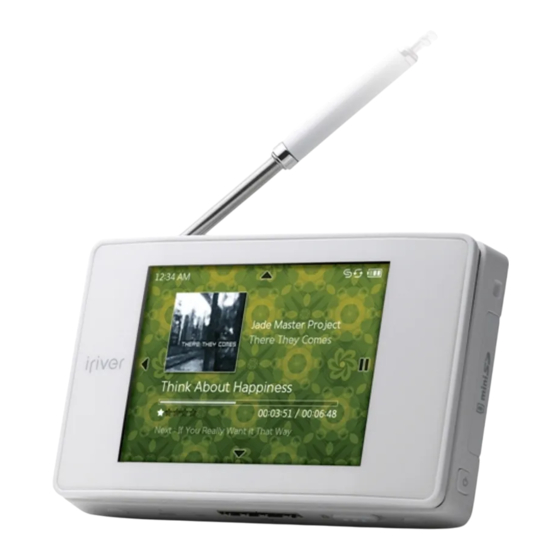
- Page 1 User’s Guide...
-
Page 2: Table Of Contents
Chapter 1 Chapter 3 Chapter 4 Getting Started Using the B20 Setting up the B20 Components Extras ׀Recording Date & Time Locating the Controls Extras ׀Alarm Clock Sound LCD Display Extras ׀Flash Games Display ... -
Page 4: Using Iriver Plus
Chapter 1 Getting Started Components Locating the Controls LCD Display Installing Software... -
Page 5: Components
Chapter1 Getting Started Components Components are subject to change without notice and may vary from images shown. Earphones Quick Start Guide & Warranty Card Installation CD USB Cable... -
Page 6: Locating The Controls
Chapter1 Getting Started Locating the Controls Antenna Volume + Necklace iriver Volume - connection loop D-Click System™ Smart Mini SD card slot Speaker Power Earphone jack RESET MIC USB jack HOLD... -
Page 7: Lcd Display
Chapter1 Getting Started LCD Display While recording voice While listening to FM radio Current status Frequency indicator PRESET On/Off Current time Battery Elapsed recording time Current frequency Channel number Recorded file name Remaining recording time... - Page 8 Chapter1 Getting Started LCD Display While playing music while watching DMB or listening DAB service Album information Play mode Signal level Album picture Equalizer Rating Progress bar Current broadcasting channel File name/information Next file Playing time...
-
Page 9: Installing Software
3 and Windows Media Player 11 are integrated programs that efficiently manage music and picture files. Using iriver plus 3 and Windows Media Player 11, you can save music and picture files from PC to the iriver B20. -
Page 10: Chapter 2
Using HOLD Connecting Products Connecting Earphones to the B20 Using Antenna Charging the Battery Inserting/Removing Mini SD Card Recommended Types of Mini SD Card Connecting the B20 to your PC Copying File/Folder (Case sensitive) Disconnecting the B20 from your PC... -
Page 11: Turning On/Off The Player
Chapter2 Basic Operations Turning on/off the Player 1. Press the [ ] button on the product to turn it on. 2. Press and hold the [ ] button on the product to turn it off. Note This product has an automatic power saving function to save battery power. Based on the setting in power saving mode, the product will be automatically turned off after designated period without operation. -
Page 12: Iriver D-Click System
Basic Operations iriver D-Click System™ 1. The B20 has an unique operating system named iriver D-Click System™. To operate the product, press down on the edge of the screen in one of four directions. Up: Moves to the previous sub-menu. -
Page 13: Using Hold
Chapter2 Basic Operations Using HOLD 1. Slide the HOLD switch to right to enable the HOLD function. Note Volume control is available while the HOLD function is turned on. -
Page 14: Basic Operations
Note It may case a malfunction. Check if the B20 is connected to a high-power USB 2.0 port. Some low-power If signal reception performance is poor, pull out and USB ports built in some peripheral devices such as certain keyboards and USB reorient or relocate the receiving antenna. -
Page 15: Connecting Products
Mini SD card is not enclosed with the product. If you insert a Mini SD card improperly, it can cause a Please purchase it separately. malfunction of the product or the card cannot be removed. The B20 supports a Mini SD card up to 2GB. -
Page 16: Connecting The B20 To Your Pc
1. Press the [ ] button on the product to turn it on. 3. If it is properly connected, the LCD will be shown as below. 2. Turn on your PC and connect the B20 to it using the USB cable. -
Page 17: Copying File/Folder (Case Sensitive)
Chapter2 Basic Operations Connecting Products Copying File/Folder (Using as a removable disk) Copying file/folder to the product Deleting file/folder from the product 1. After selecting the file/folder in your PC, drag & 1. After selecting the file/folder, click it with the right drop it to the drive which appears as the product. -
Page 18: Disconnecting The B20 From Your Pc
Chapter2 Basic Operations Connecting Products Disconnecting the B20 from your PC 1. Click the icon on the taskbar to disconnect the 2. Click the [Stop] button to confirm disconnection. product using the “Safely Remove Hardware” menu. Note The icon on the taskbar may be hidden in some operating systems. Click “Show hidden icons” to display the hidden icon. - Page 20 Chapter 3 Using the B20 Extras ׀Recording FM Radio Pictures Recording Listening to FM radio Selecting Picture Additional Features Scanning FM Radio Station 25 Viewing Picture Additional Features Additional Features Extras ׀Alarm Clock Now Playing Videos Set Alarm Time...
-
Page 21: Using The B20
Chapter3 Using the B20 Extras ׀Recording Recording Additional Features 1. Select [Extras-Recordings] in the [Home] menu. In Standby mode, press and hold [RIGHT] to display the additional features. Saved Recordings: Displays the list of recorded files. 2. In Standby mode, press [RIGHT] to start recording Press [UP/DOWN] to select the file and press [RIGHT] to play it. -
Page 22: Extras ׀Alarm Clock
Chapter3 Using the B20 Extras ׀Alarm Clock Set Alarm Time Additional Features 1. Select the [Extras-Alarm Clock] in the [Home] menu. Press and hold [RIGHT] to display the additional features. Show Icons: Selects whether the icons will be displayed 2. -
Page 23: Extras ׀Flash Games
Chapter3 Using the B20 Extras ׀Flash Games You can play various contents and flash games. Playing Flash Games 1. Select [Extras – Flash Games] in the [Home] menu. 3. Refer to the picture below to check the common key functions in flash games. -
Page 24: Extras ׀Text
Chapter3 Using the B20 Extras ׀Text You can read text file conveniently. Selecting Text Additional Features 1. Select [Extras-Texts] in the [Home] menu. While reading text, press and hold [RIGHT] to display the additional features. 2. In text list, press [UP/DOWN] to select the file and press [RIGHT] to display the text file. -
Page 25: Extras ׀Browse Device
Chapter3 Using the B20 Extras ׀Browse Device You can manually check and play various media saved in B20. Browsing Device Deleting file 1. Select [Extras-Browse Device] in the [Home] menu. 1. After selecting the file, press and hold [RIGHT]. -
Page 26: Fm Radio
Chapter3 Using the B20 FM Radio Listening to FM radio Additional Features 1. Select [FM Radio] from the [Home] menu. Save Preset/Delete Preset: Stores the current frequency to the channel. 2. Press [Up/Down] to select the broadcasting station. If the frequency is already stored, the existing channel will be deleted. -
Page 27: Now Playing
Chapter3 Using the B20 Now Playing Displaying Now Playing Music Screen 1. Select [Now Playing] in the [Home] menu. 2. The screen of currently playing music will be displayed. Note You can display the same screen by pressing and holding [RIGHT] in the menu screen. -
Page 28: Music
- File Tree: Browses music file by folder. be displayed. When a Mini SD card is inserted, you can display the file (folder) list by selecting [Internal Memory /External Memory]. You can manage your playlist using iriver plus 3 or Windows Media Player 11. -
Page 29: Dmb/Dab
Chapter3 Using the B20 DMB/DAB Using DMB/DAB Service Scanning DMB/DAB Service 1. Select the [DMB/DAB] from the Main menu. While using DMB/DAB service, press the [ / ] button to 2. Press [Up/Down] to select the broadcasting station. control the volume. -
Page 30: Dmb/Dab
Saved DMB/DAB Recording: Displays the list of recorded files. broadcasting service provider. Press [UP/DOWN] to select the file and press [RIGHT] to play it. EPG is available in several countries. Check iriver When a Mini SD card is inserted, you can display the homepage for more details. -
Page 31: Pictures
2. Press [UP/DOWN] to browse picture using the Play All, Pictures Playlists or Pictures menu. Select [Pictures] to Show Icons: Selects whether the icons will be displayed or display thumbnails and file names in B20. not in Pictures screen. Image Delay: Selects the time each picture is displayed 3. -
Page 32: Videos
Max. play time is subject to change depending on video type. Note Be sure to use iriver plus 3 when you transfer video file. Otherwise, unexpected errors might be happened during When a Mini SD card is inserted, you can display the video playback. -
Page 33: Playing Other Contents
2. Select [Tools > Portable Device > Recovering Podcast] to Podcast Manager. start the recovery process. Use the application with the Podcast icon on iriver plus 3. 3. When the recovery process is successfully completed, disconnect and reconnect the product from/to your PC. -
Page 34: Playing Audible File
Chapter3 Using the B20 Playing Other Contents Playing Audible file What is Audible? Playing Audible file A leading company in audio entertainment and educational 1. Select [Music > Book Information] in the [Home] menu. programming, Audible provides various audio programs more 2. - Page 36 Chapter 4 Setting up the B20 Date & Time Smart Key Advanced Language Sound A-B Repeat Sort Custom EQ Home Text Scroll Speed SRS WOW HD Play/Pause Rebuild Library Fade-In Shuffle Antenna Type Display Orientation Display DMB/DAB Band Start/Stop Recording...
-
Page 37: Date & Time
Chapter4 Setting up the B20 Setting up the B20 You can configure your own settings in the B20. The menu configurations are subject to change with different firmware versions. Date & Time Display Date & Time: Sets the current time and date. -
Page 38: Smart Key
Chapter4 Setting up the B20 Setting up the B20 Smart Key Timer Configures function to be assigned to the Smart Key. Auto Power off: Automatically turns the power off after designated time without operation. A-B Repeat: Plays between point A and B repeatedly. -
Page 39: Advanced
Connection Type: Select the type for transferring file to PC. Antenna Type: Sets the antenna type to use. - MSC (UMS): Using iriver plus 3, transfers file with the MSC connection type. Mass Storage Class (MSC) is a traditional UMS type. -
Page 40: Chapter 5
Copyrights/Certification/ Trademarks/Limited Liability Adding Media to Library Safety Instructions Ripping Songs from a CD Product Safety Transferring Media to the iriver B20 Other important things to remember - Using iriver plus 3 - Using Windows Explorer Troubleshooting Initializing Disk Please check out! -
Page 41: Adding Media To Library
Adding Media to Library Ripping Songs from a CD 1. When you run iriver plus 3 for the first time, the Add Media 1. Insert an audio CD into the CD drive and run iriver plus 3. Wizard will start. -
Page 42: Using Windows Explorer
1. After connecting the product to the USB jack of your PC 1. Connect the product to the USB jack of your PC using the using the USB cable, run iriver plus 3. USB cable. 2. Select the checkbox beside the file to transfer and click [ ]. -
Page 43: Initializing Disk
1. After connecting the product to the USB jack of your 1. After connecting the product to the USB jack of your PC using the USB cable, run iriver plus 3. PC using the USB cable, run iriver plus 3. -
Page 44: Adding Media To Library
Chapter5 Other Information Using Windows Media Player 11 To connect the product to Windows Media Player 11, select [Settings > Advanced > Connection type] and set it to [MTP]. Adding Media to Library Ripping Songs from a CD 1. When you run Windows Media Player 11 for the first time, 1. -
Page 45: Transferring Media To The Iriver B20
Chapter5 Other Information Using Windows Media Player 11 Transferring Media to the iriver B20 1. After connecting the product to the USB jack of your PC using the USB cable, run Windows Media player 11. 2. After selecting the file in your PC, drag & drop it to the right pane. -
Page 46: Initializing Disk
2. After selecting [iriver clix], click the right mouse button and 2. Copy the file to the iriver clix and disconnect the cable to select [Format]. Click [OK] when the message to confirm activate the upgrade process. -
Page 47: Copyrights/Certification/Trademarks/Limited Liability
Other Information Copyrights/Certification/Trademarks/Limited Liability Copyrights Certification iriver Limited has all the rights of the patent, trademark, literary MIC, FCC, CE property and intellectual property related to this manual. You Class B Digital Device (Residential Communication Device) may not copy or reproduce any part of this manual unless This equipment has been tested and found to comply with the limits authorized by iriver Limited. -
Page 48: Safety Instructions
Chapter5 Other Information Safety Instructions Product Safety Do not display a same image on the screen for certain Never dismantle, repair, or rebuild your player without amount of time since it may cause ghost effect. permission. Do not place objects inside the device other than CD’s. It may cause damage and malfunction. -
Page 49: Other Important Things To Remember
Chapter5 Other Information Safety Instructions Other important things to remember Do not use headphones / earphones while cycling, driving, Keep the antenna away from electric sources such as or operating any motorized vehicle. power outlet. It is dangerous and is illegal in some areas. It may cause injury. -
Page 50: Please Check Out
Chapter5 Other Information Troubleshooting Please check out! The player will not power on! The quality of DMB/DAB service is subject to change depending on the conversion status provided by broadcasting service provider. Check whether the battery is discharged. Charge the product using USB cable and check it again. The LCD display is turned off frequently. - Page 51 Windows Media Player 11 cannot be installed. Check whether you are currently using Windows® XP. Windows Media Player 11 only supports Windows® XP. If you are using other than Windows® XP, transfer files using iriver plus 3 or removable disk.
- Page 52 Chapter5 Other Information Federal Communications Commission (FCC) Caution : Any changes or modifications in construction of this device which are not expressly approved by the party responsible for compliance could void the user’s authority to operate the equipment. This device complies with part 15 of the FCC Rules. Operation is subject to the following two Conditions : (1) This device may not cause harmful interference, and (2) this device must accept any interference received, including interference that may cause undesired operation.
Need help?
Do you have a question about the B20 and is the answer not in the manual?
Questions and answers