Table of Contents
Advertisement
Advertisement
Table of Contents

Subscribe to Our Youtube Channel
Related Manuals for Atari 65XE


Summary of Contents for Atari 65XE
- Page 1 ATARI 65XE PERSONAL COMPUTER OWNER'S MANUAL...
-
Page 2: Important Information
IMPORTANT INFORMATION Like any electrical appliance, this ATARI 65XE Computer uses and produces radio- frequency energy. If it is not installed and used according to the instructions in this guide, the equipment may cause interference with your radio or television reception. - Page 3 ATARI 65XE PERSONAL COMPUTER...
- Page 4 Once you have the ATARI 65XE set up and working, look at the Resources section of the manual. You'll find that there are unlimited resources for the ATARI Computer owner—from books and programs to users groups and magazines.
-
Page 5: Table Of Contents
Using Software ..............Expanding Your System ............. PART 2: PROGRAMMING WITH ATARI BASIC ..27 Editing with the ATARI 65XE Keyboard ......... Writing a Simple BASIC Program: NEW,LIST,PRINT,RUN ..........35 Creating an Interactive Loop: GOTO,DIM,INPUT ............41 Using Random Numbers and Mathematical Functions: R N D , + , - , * , / .......... -
Page 6: Part 1:Getting Started
Part 1 Getting Started... -
Page 7: Meeting The Atari 65Xe
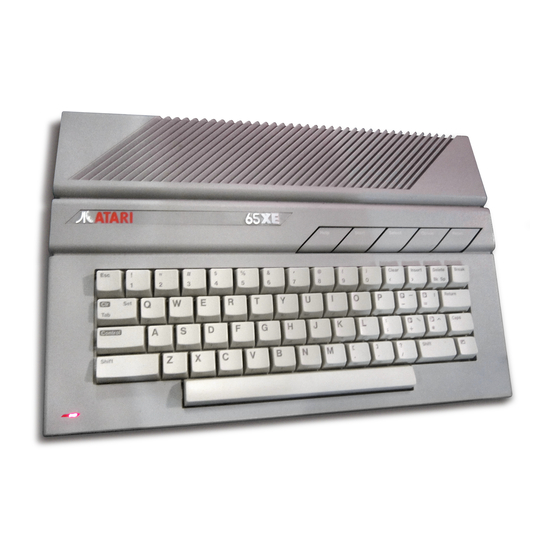
Meeting the ATARI 65XE Peripheral Television Cartridge Monitor Channel Power Controller Ports Peripheral Port Connects peripheral equipment, such as disk drives, program recorders, printers, and modems. Cartridge Slot Allows the use of plug-in cartridges for quick and easy program loading. - Page 8 Television Jack Provides a plug for the connecting cable from the TV Switch Box. Power Adapter Plug Connects the computer to the AC power supply. On/Off Switch Controller Ports Connects touch tablets, numeric keypads, joysticks, and paddle controllers.
-
Page 10: Hooking It Up
Hooking It Up When you unpack your ATARI 65XE, make sure you have the following items: • ATARI 65XE Computer • AC Power Supply • TV Switch Box (NOT FOR EUROPEAN COUNTRY) • Connecting cable from computer to TV Switch Box •... - Page 11 75-OHM round variety with a screw-on connector, attach it to the threaded 75-OHM connector labeled ANTENNA on the side of the TV Switch Box. If the antenna cable is a flat twin-lead 300-OHM cable, attach it to the 300-OHM screw terminals on the side of the TV Switch Box. 2.
- Page 12 If your television has two VHF screw terminals, attach the twin-lead cable labeled TV at the bottom of the Switch Box directly to the ter- minals on your television. Note: If the terminal connections on your television are different from those shown, refer to the television manual or contact a service center.
- Page 13 Turn on your power switch on the com- puter. In a few seconds you will see the word READY. The Ready prompt tells you that ATARI BASIC is ready for your instruc- tions and that your computer is hooked up properly. If the Ready prompt does not show up on your screen, try adjusting your television picture controls.
-
Page 14: Checking It Out
Checking It Out When you turn on your ATARI 65XE, it automatically tests itself. But you can run three separate tests just to insure that your computer is working properly. Running all three tests after setting up your com- puter for the first time is recommended. To run the tests, turn the computer on while you are holding down the key. - Page 15 ROM is tested. If the bars turn green, the ROM is okay, and you may proceed. Red means stop; the ROM is out of order, and you must contact your ATARI retailer. During the RAM test, 48 squares—each representing a RAM section- are tested.
- Page 16 LOADING SOFTWARE CARTRIDGES After you have tested your ATARI 65XE, you may want to load a soft- ware cartridge. To load a software program, make sure that the com- puter is turned off, hold the cartridge so that the label is facing up,...
- Page 17 (For more information about software cartridges, see Using Software.) If you don't want to use ATARI BASIC (the programming language that is built into your ATARI 65XE), you can temporarily disable the language in several ways: plug in a software cartridge; hold down the key when you turn on the computer;...
-
Page 18: Understanding Your Keyboard
Understanding Your Keyboard Although the ATARI 65XE keyboard looks and works much like a type- writer, some special keys allow you to reach into a bag of special editing tricks. Some of the keys,like are used in combination with other keys. These double-key combinations provide extra commands and functions without increasing the size of the keyboard. - Page 19 Usually tells the computer to Stops the computer in the middle begin running a game or a pro- of an activity and returns the pro- gram. Consult the software gram to the opening screen. manual. Pressing produces the same effect as turning the com- puter off and on again—with two exceptions.
- Page 20 Prints special gra- types uppercase characters phics characters when used with without leaving the lowercase the alphabet keys in ATARI BASIC. mode. Sounds the buzzer. (The TV Inserts a space between char- speaker must be turned up for acters in ATARI BASIC, although the buzzer to be heard.)
- Page 21 Used when entering a series of commands that require pressing the key, such as creating graphics characters in ATARI BASIC. Most keys on the 65XE will automatically repeat when they are held down for more than half a second.
-
Page 22: Introducing Atari Graphics
Introducing ATARI Graphics The ATARI 65XE keyboard has 29 built-in graphics characters. They can be used to brighten up a chart or to create a work of art. To display the graphics characters on your screen, press the and any of the keys shown below. If you intend to use several... -
Page 24: Adding An International Character Set
Ordinarily when you type pages in a foreign language, you go back and laboriously add accent marks, cedillas, and other diacritical marks by hand. You are spared that trouble with the ATARI 65XE Computer, which has an international character set. -
Page 26: Exploring Atari Basic
Appendix A: Sample Programs includes programs of varying levels of difficulty to give you some practice before you start writing your own programs with ATARI BASIC. Appendix B: BASIC Reserved Words offers a list of the commands used in ATARI BASIC and a brief... - Page 27 ATASCII code. Whenever Error messages appear on the screen, you can refer to Appendix D: Error Messages to find out what went wrong. Check Appendix F: Resources for the names of other valuable sources of information about ATARI BASIC.
-
Page 28: Using Software
Note: Some software programs written for the earlier ATARI 400/800 models may not work with your ATARI 65XE. If you have a disk drive, this problem can be remedied with a Translator Disk. The disk is available from ATARI Customer Relations, P.O. -
Page 29: Saving Your Work
LOADING SOFTWARE CARTRIDGES Loading ready-to-use commercial software cartridges into the ATARI 65XE is a simple operation. Software that comes in a cartridge is in- serted into the Cartridge slot at the back of the computer console. First make sure that the computer is turned off. Inserting or removing a cartridge while the computer is on can damage the computer and the cartridge. -
Page 30: Expanding Your System
Expanding Your System Your ATARI 65XE Computer is the center of a powerful and versatile system. Whatever job you need to do or game you want to play, the 65XE has a peripheral to help. The most popular peripherals are il- lustrated below. - Page 31 PRINTER As an ATARI Computer owner, you have a variety of printers to choose from. To print out everyday reports and letters and your programs, you can use an inexpensive dot-matrix printer. For printing high-quality business letters, a letter-quality printer might be better.
-
Page 32: Part 2: Programming With Atari Basic
Part 2 Programming with ATARI BASIC... -
Page 34: Editing With The Atari 65Xe Keyboard
A A A A A A A A A A A A A A A A A A A A A A A A A A A A A A A A A A You are using the built-in auto repeat function of the ATARI 65XE keyboard. - Page 35 To return to uppercase letters, press the key and type more A's. You should see this: AAAAAAA Try typing a word—a word beginning with A, such as ATARI. Type in the following words, switching between upper- and lowercase letters with the key:...
- Page 36 To practice this function, type ! ! ! ATARI 65XE ! ! ! Position the cursor on top of the first letter A in ATARI. Holding down key, press the key 11 times. You should see this:...
- Page 37 Press the space bar once and type THIS IS AN in the blank spaces as shown below: ! ! ! THIS IS AN ATARI 65XE ! ! ! To add blank lines, rather than individual blank spaces, hold down the key, then press the key.
- Page 38 INVERSE VIDEO Type the word ATARI. Find the Inverse Video key and press it just once. Type ATARI again. Press the Inverse Video key again and type ATARI again. Your screen should look like this: ATARI ATARI Inverse Video creates blue letters on a white background, the inverse of the normal screen colors.
- Page 39 MISCELLANEOUS KEYS Another important key is the Escape key , When you press it once, nothing happens. When you press it twice or more, this graphic appears on the screen: . Press and try again. In later sec- tions you will need to use the key.
-
Page 40: Writing A Simple Basic Program
Writing a Simple BASIC Program: NEW, LIST, PRINT, RUN Once you know your way around the computer keyboard, it's easy to write your first program. To begin, clear the screen and make sure the cursor is on the left-hand margin. NEW: CLEARING THE COMPUTER'S MEMORY Type in the word NEW, then press NEW tells the computer to get ready for a new set of instructions by... - Page 41 RUN: EXECUTING INSTRUCTIONS To make the computer execute your program, you have to type RUN. The RUN command tells the computer to carry out its instructions. Type RUN and press to see what happens: I HEARD OF A POET NAMED SAM The computer's first and only instruction, line 10, was to print the words inside the quotation marks.
- Page 42 15 PRINT "WHOSE POEMS WERE THE TALK OF THE LAND. " I HEARD OF A POET N A M E D 5AM WHOSE POEMS WERE THE TALK OF THE L A N D . I MET HIM ONE DAY, AND TO MY DISMAY, The computer automatically inserted line 15 between lines 10 and 20.
- Page 43 Press . (In this case, you can press regardless of the cursor's position on the line, even if it is in the middle of the word PRINT.) No new Error message appears this time. Clear the screen and run the program. The screen should not show any Error messages.
- Page 44 ? : ABBREVIATION FOR PRINT You can save time and effort by substituting a question mark (?) for PRINT. Try the next program line below: 70 ? "THAT R A N FROM DUSK UNTIL DAWN. " LIST The program runs the same with ? as with PRINT. The question mark is just a convenient shortcut.
- Page 45 PRINTING GRAPHIC SYMBOLS You can also use graphic symbols in PRINT statements to produce simple artwork. To set off the poem, type the lines below. Use to create the graphics: 58 PRINT " " 115 PRINT " " PRINT " ":CLEARING THE SCREEN You can make your program look even better by making sure the screen is clear when you start.
-
Page 46: Creating An Interactive Loop
Creating an Interactive Loop GOTO, DIM, INPUT Loops tell the computer to go back and repeat instructions in the program automatically. The GOTO command saves you the trouble of typing the same instruction lines over and over again. The DIM and INPUT commands allow you to interact with your computer on a question-and-answer basis. - Page 47 The comma acts like a tab. Each time the computer moves down to the next line and prints CONGRATULATIONS!, it moves to the next tab position. The result is a barber-pole effect. Remember to break the loop with the key. Semicolon: Computer Glue A semicolon produces another kind of effect.
- Page 48 "variable" in RAM memory. If the answer is composed of letters, numbers, or both, it is called a "string variable." Your ATARI 65XE Computer needs to know how much space you will need for an answer so that it can reserve space for it.
- Page 49 Line 10 tells the computer to save enough space in its memory for an answer that is a maximum of 100 characters. The variable in this program has been named ANSWER. The variable is going to store letters and numbers, so it is a string variable. String variables are designated by a dollar sign after the last letter of the variable name.
- Page 50 space after the N of ON or forgot the period and the space before TOO BAD!. Those spaces are important. Practice with another string variable input: 30 DIM NAME$ (1) 170 PRINT "BY THE WAY.. WHAT IS YOUR NAME"; 180 INPUT NAME$ 190 PRINT "WELL, ";...
- Page 51 INPUT LOOPS To repeat your conversation with the computer, add a loop command to the program again. A GOTO statement at the end will make the computer repeat the program from the beginning. For program readability, use a REM statement to show where the main conversation portion of the program begins.
-
Page 52: Using Random Numbers And Mathematical Functions: R N D
Using Random Numbers and Mathematical Functions: RND, +,-, *,/ Initially computers were developed to process numbers quickly and easily. To take advantage of the computer's ability to calculate a math answer in a few milliseconds, you must know how to speak to a computer. NUMBERS Type the statement below and press PRINT 10... - Page 53 These numbers are large or small enough that the computer prefers to rewrite them in scientific notation. Familiarity with scientific notation is not essential for understanding the computer, or even this chapter. Scientific notation expresses a large number as a number between 0 and 10 multiplied by a power of 10.
- Page 54 The same answer appears for each example as soon as you press . The spacing in math problems is unimportant to the com- puter. Try out problems of your own. Make long problems that com- bine subtraction and addition functions. The multiplication sign—the asterisk (*)—is located on the Right Arrow key .
- Page 55 Order of Mathematical Execution Computations in parentheses Exponential functions Multiplication In order of appearance Division from left to right Addition In order of appearance from left to right Subtraction RANDOM NUMBERS The computer can perform other functions that your calculator most likely cannot do.
- Page 56 The number in the parentheses is called a "dummy variable." It does not matter what number is used as the dummy variable, but it is im- portant that the parentheses appear and that they enclose something (any number or letter). For typing ease, 0 is usually placed in the dummy variable position.
- Page 57 The program generates random numbers that are always one less than the number by which it is multiplied. The first line 10 generates the numbers 0, 1, and 2. To generate random numbers 0, 1, 2, and 3, the program would be written this way: 10 PRINT INT ( R N D ( 0 ) * 4 ) To generate only the numbers 1, 2, and 3, the program should look like this:...
- Page 58 MATH PROGRAMS The computer's mathematical functions can be used for work pur- poses, as well as for play. If you were a chef who prepared food for banquets, you might need a computer to expand your recipes. For instance, suppose that you are trying to figure out how many pounds of sea scallops to buy to serve Coquilles St.
-
Page 60: Making Decisions And Solving Problems
Making Decisions and Solving Problems: IF-THEN,FOR-NEXT The IF-THEN and FOR-NEXT commands enable you to write programs that mimic the way humans approach a decision or a problem. Especially useful for games and logic puzzles, the commands let you, the programmer, make the choices for the computer. IF-THEN COMMANDS To practice the IF-THEN statement, type in the following program: 1 REM *** BRNPROBE . - Page 61 30 PRINT 40 PRINT "YOUR GUESS"; 50 INPUT GUESS 60 PRINT 70 IF GUESS=SECRETNUM THEN PRINT "YOU GOT IT ! " : END 80 IF GUESS<SECRETNUM THEN PRINT "TOO LOW. TRY AGAIN. " : GOTO 40 90 IF GUESS>SECRETNUM THEN PRINT "TOO HIGH.TRY AGAIN.":GOTO 40 Lines 80 and 90 evaluate the guess as greater than or less than the secret number.
- Page 62 Every beginner encounters many bugs and makes many mistakes. To become a better programmer, study this manual, refer to the ATARI BASIC Reference Guide, and perhaps have a more experienced person look over your shoulder occasionally.
- Page 63 10 FOR X=1 TO 4 20 PRINT "POTATO" 30 NEXT X POTATO appears on the screen four times. Change line 10 to read like this: 10 FOR X=1 TO 7 When you run the program this time, the screen shows POTATO seven times.
- Page 64 Starting Point List the program. The first number in the FOR line is the starting point for the count, and the last number is the stopping point. Even negative numbers can be the starting point for the count. Try these variations for line 10: 10 FOR JKL=1 TO 5 10 FOR JKL=0 TO 5...
- Page 65 The computer can count backward in increments also: 10 FOR JKL=500 TO 0 STEP -20 10 FOR JKL=500 TO 0 STEP -3 10 FOR JKL=0 TO -500 STEP -50 You can also instruct the computer to start and stop at any number you desire: 10 FOR JKL = 500 TO 300 STEP -10 10 FOR JKL=25 TO 0 STEP -1...
- Page 66 Delay Loops Erase all the PRINT statements so that absolutely nothing is in the FOR-NEXT sandwich loop, except the FOR and the NEXT statements. Run the program and see what happens: LIST Nothing happens. Change the number in line 10 and watch carefully again: 10 FOR JKL=1 TO 500 The Ready prompt takes a few seconds to appear.
-
Page 67: Sample Programs
Sometimes the delay loop is sandwiched on the same program line: 10 FOR DELAY=1 TO 300:NEXT DELAY LIST Sample Programs The programs below use FOR-NEXT loops in a variety of ways. The first program uses the FOR-NEXT loop as a simple delay loop to leave the word HI on the screen long enough to be read before line 30 clears the screen: 1 REM *** DLAYLOOP ***... - Page 68 1 REM *** C L O C K R C K *** 5 PRINT " " 10 FOR X = 1 TO 9 20 PRINT X; 30 PRINT " O'CLOCK" 40 FOR DELAY=1 TO 500:NEXT DELAY 50 IF X=3 OR X=6 OR X=9 THEN PRINT "ROCK! " : FOR PAUSE=1 TO 500:NEXT PAUSE 60 NEXT X 70 PRINT:PRINT "WE'RE GOING TO ROCK"...
-
Page 70: Producing Sound And Graphics
SOUNDING OFF Your ATARI 65XE can play up to four sounds at one time. The four sound registers, or voices, are numbered 0, 1, 2, and 3. To select the first voice, you type SOUND 0; for the second, SOUND 1; for the third, SOUND 2;... - Page 71 The number 10 produces a pure tone without distortion. To put in a little distortion, change the 10 to 06: SOUND 1 , 5 0 , 0 6 , 8 The computer sounds as if it's ready for takeoff. Type END before the neighbors start complaining.
- Page 72 10 REM * SOUND EFFECTS WITH FOR-NEXT LOOP 20 VOICE=0:PITCH=0:TONE=10:VOL=8 30 FOR PITCH=0 TO 255 40 SOUND VOICE,PITCH,TONE,VOL 50 NEXT PITCH R U N Varying the volume in a program produces a variety of sounds. Change VOL = 8 to VOL = 0 and press .
- Page 73 Resources section of this guide. COLORFUL GRAPHICS Your ATARI 65XE has 16 graphics modes encompassing 128 colors. To get you started, this section presents 6 different modes and some of the most essential graphics commands.
-
Page 74: Graphics Mode
0 and 14. The higher the luminance number, the lighter and brighter the color. Color registers are another important element in ATARI graphics. The color registers can be thought of as paint cans. Each register can hold any of the 128 colors. Because there are five registers, a maximum of five different colors can be displayed. - Page 75 Change the 7 to an 8 and watch the color get lighter yet. The following program shows all 128 colors and luminances: 10 REM ** 128 ATARI COLORS 20 REM ** 16 COLORS 30 FOR COLOR =0 TO 15...
- Page 76 To print large text on the screen in graphics modes 1 and 2, use PRINT #6; followed by quotes and then the text that you want to print. This statement is a variation on the PRINT command that you learned earlier.
- Page 77 Now you have LARGE colorful text. To return the screen to its original colors, press the button or type SETCOLOR 2,9,4. You will not lose your program when you press in ATARI BASIC. However, that feature may not apply to other languages or programs.
- Page 78 Graphics Mode 3 The graphics mode 3 screen is a grid consisting of 40 columns and 24 rows (20 if you use the text window). Enter and run the following program: 10 GRAPHICS 3 20 COLOR 1 30 PLOT 0,0 In the upper left corner is an orange block.
- Page 79 Run the program. A light green line goes across the top of the screen. After plotting a pixel, use the DRAWTO command to plot a second pixel and draw a connecting line between the two. Line 40 tells the computer to plot a pixel at column 39, row 0, and then connect them. Now type DRAWTO 39,19...
- Page 80 Type GR.0, list the program, and change COLOR 2 in line 20 to COLOR 1. COLOR 1 selects register 0, and orange is the default color for register 0. To change the color in register 0, use the SETCOLOR command. Add the following line: SETCOLOR 0,4,6 When you run the program, the orange lines change to a pinkish color.
- Page 81 You can learn a great deal more about ATARI graphics, including how to use other graphics modes and create animated characters. Refer to Appendix F: Resources to locate books, magazines, and users groups that can help you further explore the world of ATARI BASIC and your ATARI 65XE Computer.
-
Page 82: Part3 Appendices
Part3 Appendices... -
Page 84: Sample Programs
Your ATARI Computer can work miracles with a little help from your imagination and the right programming techniques. These sample programs will show off the versatility of your ATARI 65XE and motivate you to try writing some programs yourself. Just type in each program exactly as written, pressing at the end of every line. - Page 85 10 DATA ATARI,DISK DRIVE, M O N I T O R , C O M P U T E R , T O U C H T A B L E T , P R I N T E R , K E Y B O O R D...
- Page 86 PLAYERS AND MISSILES This program uses a technique called Player Missile Graphics to create a pink monster that moves across your screen in front of a blue vertical bar. If you want to make the monster scoot behind the blue bar, simply change line 150 to 150 POKE 6 2 3 , 4 .
- Page 87 TYPE-A-TUNE This program assigns musical note values to the keys on the top row of the keyboard. Press only one key at a time. MUSICAL VALUE Insert Clear B (or A#) A (or G#) F#(or G ) E (or D#) (or C#) 10 DIM C H O R D ( 3 7 ) , T U N E ( 1 2 ) 20 GRAPHICS 0:? :? "...
- Page 88 HIGHER MATH Your ATARI Computer is a fancy calculator. When you enter two numbers into the program below, the computer will tell you their greatest common denominator. For example, if you enter 690911 and 11214017, you'll soon discover that their greatest common denominator is 53147.
- Page 89 COMPUTER BLUES This program generates random musical notes to "write" some very interesting melodies for the programmed bass. 1 GRAPHICS 0:? :? " COMPUTER BLUES":? 2 PTR=1 3 THNOT=1 5 CHORD=1 6 PRINT "BASS TEMPO (1=FAST)"; 7 INPUT TEMPO 8 GRAPHICS 2+16:GOSUB 2000 10 DIM BASE(3,4) 20 DIM LOW(3) 25 DIM LINE(16)
- Page 90 550 R E T U R N 7 0 0 S O U N D 0 , 0 , 0 , 0 710 S O U N D 1,0,0,0 720 BDUR=BDUR+1 730 IF B D U R < > 1 THEN 800 740 B D U R = 0 : B A S S = 0 750 THNOT=THNOT+1 760 IF THNOT<>5 THEN 800...
- Page 91 UNITED STATES FLAG This program involves switching colors to set up the stripes. It uses graphics mode 7 plus 16 so that the display appears as a full screen. Note the correspondence of the COLOR statements with the SETCOLOR statements. For fun and experimentation purposes, add a SOUND statement and use a READ/DATA combination to add "The Star Spangled Banner"...
- Page 92 440 REM ADD 6TH STAR EVERY OTHER LINE 450 X=5+5*14:GOSUB 1000 460 K=7 470 NEXT I 500 REM IF KEY HIT THEN STOP 510 IF PEEK(764)=255 THEN 510 515 REM OPEN TEXT W I N D O W WITHOUT CLEARING SCREEN 520 GRAPHICS 7+32 525 REM CHANGE COLORS BACK 530 SETCOLOR 0,4,4:SETCOLOR l,0,14...
- Page 93 To print words spelled backward, just type in this short program. After you run it, a question mark will appear on your screen. Enter a word or a short sentence and let your ATARI 65XE do all the work. 10 DIM A$(180) 20 PRINT "Enter a word or short sentence and press...
- Page 94 PROTECTING YOUR PROGRAM Ever wonder how you could protect your programs from prying eyes and quick fingers? A couple of programming tips can help keep pilferers out of your programs. First type in this program: 10 FOR X=1 TO 50:POKE 710,X: NEXT X:GOTO 10 To protect the program, add another program line to disable the key.
- Page 95 SEA GULL OVER OCEAN This program combines graphics and sounds. The sounds are not "pure" sounds; they simulate the roar of the ocean and the gull's cry. To get the symbols in line 20, use 10 DIM BIRD$(4) 20 BIRD$="\/--" 30 FLAG=1:ROW=10:COL=10 40 GRAPHICS l:POKE 756,226:POKE 752,1 50 SETCOLOR 0,0,0:SETCOLOR 1,8,14...
- Page 96 KINETIC ART Put colors in motion with a program that creates a rainbow of continually moving lines. 10 REM KINETIC ART BY NEIL HARRIS 20 GRAPHICS 10 30 DIM A(3,50) 35 FOR L=0 TO 3:FOR M=0 TO 50:A(L,M)=0:NEXT M:NEXT L 40 HUE=INT(RND(1)*8+1):POKE 704+HUE,INT(RND(1)*8)*16+INT(RND(1)*4+4) 50 X1=INT(RND(1)*80):X2=INT(RND(1)*80)
-
Page 98: Basic Reserved Words
B. BASIC Reserved Words Note: The period is mandatory after all abbreviated keywords. RESERVED BRIEF SUMMARY WORD ABBREVIATION OF BASIC STATEMENTS Returns the absolute (unsigned) value of the variable or expression. Returns the memory address of a string variable. Functions as a logical operator. The expression is true only if both subexpressions joined by AND are true. - Page 99 COLOR Chooses the color register to be used in color graphics work. Performs the same function as DIM. CONT CON. Stands for "continue." Causes a program to restart execution on the next line after being stopped by the key or encountering STOP. Returns the cosine of the variable or expression in degrees or radians.
- Page 100 Returns the length of the specified string in bytes or characters. (One byte contains one character.) Assigns a value to a specific variable name. (LET is optional in ATARI BASIC and can be omitted.)
- Page 101 LIST Displays or otherwise outputs the program list. LOAD Inputs from a disk into the computer. LOCATE LOC. Stores in a specified variable the value that controls a specified graphics point. Returns the natural logarithm of a number. LPRINT Commands the line printer to print a specified message.
- Page 102 PEEK Returns the decimal form of the contents of a specified memory location (RAM or ROM). PLOT Plots a single point at a specified X,Y location. POINT Used with disk operations only. POKE POK. Inserts the specified byte into the specified memory location.
- Page 103 RESTORE RES. Allows data to be read more than once. RETURN RET. Returns the computer from a sub- routine to the statement immediately following the one in which GOSUB appears. Returns a random number between 0 and 1, but never 1. Executes the program;...
- Page 104 STOP STO. Causes the program to stop but does not close files or turn off sounds. STR$ Returns a character string equal to the numeric value given. (For example, STR$(65) returns 65 as a string.) THEN Used with IF. If the expression is true, the THEN statements are executed.
-
Page 106: C.atascii Character Set
Control Q Notes: 1. ATASCII stands for ATARI ASCII. Letters and numbers have the same values as those in ASCII, but some of the special characters are different. 2. Except as shown, the characters from 128 to 255 are the reverse colors of 1 to 127. - Page 107 European ATASCII Hexadecimal Decimal Character Character Code Keystrokes Code Control R Control S Control T Control U Control V Control W Control X Control Y Control Z Esc Esc Esc Control - Esc Control = Esc Control + Esc Control * Space bar Shift 1 Shift 2...
- Page 108 European Hexadecimal Decimal ATASCII Code Character Character Code Keystrokes Shift ; < > Shift / Shift 8...
- Page 109 Decimal European Hexadecimal ATASCII Code Code Character Character Keystrokes Shift , Shift + Shift . Shift * Shift - Control .
- Page 110 European ATASCII Hexadecimal Decimal Character Keystrokes Character Code Code Control ; Shift = Esc Control < Esc Shift < Esc Delete Bk Sp Esc Tab Control , Control A Control B Control C Control D Control E Control F...
- Page 111 Decimal European Hexadecimal ATASCII Code Code Character Keystrokes Character Control G Control H Control I Control J Control K Control L Control M Control N Control O Control P Control Q Control R Control S Control T Control U Control V Control W Control X Control Y...
- Page 112 European Decimal Hexadecimal ATASCII Character Code Code Character Keystrokes Shift 4 Shift 5 Shift 6 Shift 7 Shift 9 Shift 0 Shift ; < > Shift / Shift 8...
- Page 113 Decimal Hexadecimal ATASCII European Code Code Character Keystrokes Character Shift , Shift + Shift . Shift * Shift -...
- Page 114 European Decimal Hexadecimal ATASCII Code Code Character Keystrokes Character Control Control ; Shift = Control 2...
- Page 115 European Hexadecimal Decimal ATASCII Code Code Character Keystrokes Character Esc Control Delete Bk Sp Esc Control >...
-
Page 116: Error Messages
D. Error Messages ERROR CODE NUMBER ERROR CODE MESSAGE Insufficient Memory: Not enough RAM memory is left to store the statement or the new variable name, or to dimension a new string variable. Value Error: A value expected to be a positive integer is negative;... - Page 117 (The Error message is reported at the NEXT statement, not at FOR.) Line Length Error: The statement is too complex or too long for BASIC to handle. GOSUB or FOR Line Deleted: A RETURN or NEXT statement was encountered, but the corresponding GOSUB or FOR has been deleted since the last RUN command.
- Page 118 Invalid Command: The command is invalid for this device. Device or File Not Open: No OPEN command has been specified for the device. Bad IOCB Number: The device number is illegal. IOCB Read-Only Error: A WRITE command has been sent to a read-only device. EOF: The computer has reached the end of the file.
- Page 119 Drive Number Error: The user specified the wrong drive number. Too Many OPEN Files: No sector buffer is available. Disk Full: No free sectors are available. Unrecoverable System I/O Error: The DOS version on disk may be damaged. File Number Mismatch: The disk file may be damaged.
-
Page 120: Troubleshooting
MEMORY TEST appear on the TV screen, your computer may need service. For the location of the nearest ATARI Service center, contact your ATARI retailer or ATARI Customer Relations, P.O. Box 61657, Sunnyvale, CA 94088. - Page 121 Q. I just tried the computer's built-in ATARI BASIC. I typed in a program, but it won't run. Why not? A. Make sure you pressed after each program statement before typing RUN. When you press , you are telling the computer that you are entering information.
-
Page 122: Resources
F. Resources ATARI Computer users don't have to work or play in isolation. Most of the problems that you might encounter have already been worked out by others. Much of this experience is documented, so plenty of support is available. The resources listed here are a few of the many aids that can guide you into new, rewarding directions in home computing. - Page 123 MAGAZINE ATARI EXPLORER. Every issue of the ATARI EXPLORER is designed to help you get more out of your ATARI Computer. Subscribe immediately and save 50 cents off the cover price—6 issues for $15.00. Or save 25 percent by subscribing for 18 issues for $39.95. Send a check or a money order to ATARI EXPLORER, P.O.
-
Page 124: Atari 65Xe Specifications
POKEY chip—sound generator and control ANTIC chip—screen and input/output ports FREDDY chip—memory system control Memory: 64K RAM 24K ROM (operating system plus ATARI BASIC programming language) Display: 11graphicsmodes 256 colors (128 displayable at one time) 320 x 192, highest graphics resolution... -
Page 126: Index
Index... - Page 128 48 LIST, 35, 36 alphanumeric variables, 45 NEW, 35 arrow keys, 15, 31, 47, 48, 49 PLOT, 73 ATARI BASIC (see BASIC) POKE, 19 Audio-Visual Test, 10 PRINT, 37, 38, 39,40, 41, 42, 43, auto repeat, 29 44, 71, 72 PRINT#6;, 71, 72, 73...
- Page 129 installation of your computer, 5-8 instruction line END, 56, 65, 66 limit, 29, 39 erase numbering, 35, 36 computer's memory, 35 INT, 51 program lines, 38 screen, 31 international characters, 19 spaces and lines, 32 Inverse Video, 33, 40 Error message, 29, 35, 37-38, 44, 46, to change colors in graphics 56, 68 modes, 71, 73...
- Page 130 register color, 69, 71, 73, 74, 75 nested FOR-NEXT loops, 62 NEW, 35 sound, 65 NEXT, 58 REM, 46 (see FOR-NEXT) Reset key, 9, 11, 14, 34, 72 numbers, 47 RETURN (see GOSUB) numeric variables, 45, 52, 55, 58 Return key, 16, 35 Right Arrow key, 15, 31, 48, 49 RND, 50-52 ROM, 9, 10, 23...
- Page 131 Tab key, 33 clear tabs, 33 set tabs, 33 test programs, 9-11 text mode, 69, 70 text window, 70, 72 THEN (see IF-THEN) TRAP, 56, 62, 68 Up Arrow key, 15, 31, 47, 48 uppercase, 29-30 to change colors in graphics modes, 71, 73 variables, 43 dummy, 51...
- Page 132 Atari Explorer magazine. Every issue is filled with educational articles, reviews, tutorials, and tips to help you and your family get the most from your computer. The Atari Explorer is an adventure into the world of computers for business, education, and entertainment.
- Page 133 NO POSTAGE NECESSARY IF MAILED IN THE UNITED STATES BUSINESS REPLY CARD FlRST CLASS PERMIT NO.7283 SUNNYVALE,CA POSTAGE WILL BE PAID BY ADDRESSEE ATARI EXPLORER P.O. BOX 3427 SUNNYVALE, CA 94088-3427...
- Page 134 ATARI Printed in Taiwan C072018-001 REV. B K.l.2.1987 ©1987 Atari Corp. All Rights Reserved.
Need help?
Do you have a question about the 65XE and is the answer not in the manual?
Questions and answers