Table of Contents
Advertisement
Quick Links
Advertisement
Table of Contents

Subscribe to Our Youtube Channel
Related Manuals for Humminbird 531324-1_D


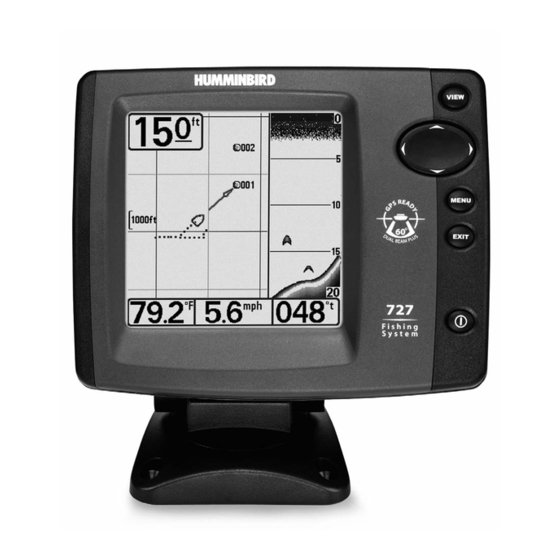
Summary of Contents for Humminbird 531324-1_D
-
Page 1: Handheld Gps Connection Kit
Handheld GPS Connection Kit Handheld GPS Connection Kit 531324-1_D... -
Page 2: Thank You
Thank You! Thank you for choosing Humminbird®, America’s #1 name in fishfinders. Humminbird® has built its reputation by designing and manufacturing top-quality, thoroughly reliable marine equipment. Genuine Humminbird® accessories offer the opportunity to upgrade and expand the capabilities of your Humminbird® product. Your Humminbird® is designed for trouble-free use in even the harshest marine environment. -
Page 3: Table Of Contents
Table of Contents How GPS Works Connecting a Handheld Receiver to the Fishing System Handheld GPS Connection Kit Direct-connect Cable Installation (AS HHGAR082, AS HHMAG344) ... 3 Bare Wire Cable Installation (AS-HHGPS) ...4 Views Combo View ... 7 Track View ... 8 Bird’s Eye View... - Page 4 Table of Contents Sonar Window (Combo View Only) ... 28 Waypoint [Name] (Most Recently-Created Waypoint) ... 29 Navigation Menu Tab Current Track ... 30 Saved Tracks... 31 Waypoints... 32 View Orientation... 33 North Reference... 34 Grid Rotation ... 34 Trackpoint Interval ... 34 Track Min Distance (Advanced)...
- Page 5 NOTE: Entries in this Table of Contents which list (with PC Connect Cable Only) require the purchase of a separate accessory. You can visit our website at www.humminbird.com to order these accessories online or contact our Customer Resource Center at 1-800-633-1468.
-
Page 7: How Gps Works
+/- 10 meters, depending on conditions. This means that 95% of the time, the GPS receiver will read a location within 10 meters of your actual position. Some GPS Receivers also use information from WAAS (the Wide Area Augmentation System), EGNOS (the European Geostationary Navigation Overlay Service), and MSAS (the MTSAT Satellite Augmentation System) satellites if they are available in your area. -
Page 8: Connecting A Handheld Receiver To The Fishing System
Handheld GPS Receiver to your Fishing System control head via an additional NMEA data cable which you must purchase from your Handheld GPS Receiver manufacturer. The Humminbird cable part numbers that are compatible with your Handheld GPS Receiver are shown in the chart below. Your Handheld GPS... -
Page 9: Handheld Gps Connection Kit
NOTE: You may have purchased either a direct-connect NMEA data cable, or one that requires splicing to an additional NMEA data cable (made by the manufacturer of the Handheld GPS receiver) to complete the connection to the Handheld GPS receiver. -
Page 10: Bare Wire Cable Installation (As-Hhgps)
3. Your NMEA Cable allows you to connect your Handheld GPS Receiver to an external 12 VDC power supply. If you choose to run your Handheld GPS Receiver from an external 12 VDC power supply, connect the black wire to ground (-) and the red wire to positive (+) 12 VDC power. - Page 11 Handheld GPS Receivers have a different voltage input than 12V. The Fishing System control head can provide a maximum of 100mA to a Handheld GPS Receiver. The voltage provided is typically 1 volt lower than the boat battery voltage supplied to the Fishing System control head.
- Page 12 NMEA sentences RMC and GGA to determine current position, heading, speed, time and date. In addition, the GSA and GSV sentences are used to monitor GPS satellite location and usage. 6. If the NMEA output of your Handheld GPS Receiver can be configured, confirm the following settings on your GPS Handheld Receiver: •...
-
Page 13: Views
Views Sonar Views The following views will be added to the view rotation when a Handheld GPS Receiver is connected to the Fishing System: Combo Bird's View Navigation views: View Track View When the VIEW key is pressed, the display cycles through the available views. When the EXIT key is pressed, the display cycles through the available views in reverse order. -
Page 14: Track View
Depth Track Scale Water Surface Temperature Track View Track View displays the current track (also known as the position history or breadcrumb trail) showing where the boat has been, along with saved tracks, waypoints, and the current route (when navigating). Depth Track Scale Water... - Page 15 Depth Track Scale XTE: Cross Track Error. Distance of Boat from Route DTG: Distance to Go to Waypoint Water Surface Temperature Depth Track Scale Latitude and Longitude Position of Cursor Distance to Go To Cursor Bearing to Cursor Panning: Use the 4-WAY Cursor Control key to move the track around on the display in the direction of the key being pressed.
-
Page 16: Bird's Eye View
latitude/longitude coordinates of the cursor, are displayed at the bottom of the view. Pressing the EXIT key moves the cursor back to the original position of the boat. Bird’s Eye View Bird’s Eye View shows a 3D perspective view of the track from a point above and behind the boat (the eye point). -
Page 17: View Orientation
Depth XTE: Cross Track Error. Distance of Boat from Route DTG: Distance to Go to Waypoint Water Surface Temperature View Orientation When your Fishing System control head is in Track or Combo View, you can choose the orientation of the view by selecting North-Up or Course-Up on the Navigation Main Menu. When North-Up orientation is selected, True North is shown at the top of the display. -
Page 18: Introduction To Navigation
Introduction to Navigation Use your Fishing System to establish waypoints at areas of interest and navigate to those waypoints via a route (representing the shortest intended distance between waypoints). You can also view and save tracks, which represent the actual path of the boat. Waypoints, Routes and Tracks Waypoints are stored positions that allow you to mark areas of interest or navigation points. -
Page 19: Save, Edit Or Delete A Waypoint
Save, Edit, or Delete a Waypoint Save your current position as a waypoint: On any view, press the MENU key to display the X- Press Menu. Select Mark and press the RIGHT Cursor key to save the current position of the boat as a waypoint. -
Page 20: Navigate To A Waypoint Or Position
To make it easier to view a waypoint to edit, select Sort By and press the LEFT or RIGHT Cursor keys to select a sort order: • Name shows the waypoints alphabetically • Time shows the most recently-created waypoint first •... -
Page 21: Add A Waypoint Target Or Trolling Grid
Add a Waypoint Target or Trolling Grid Waypoint Target Track Scale Track View with Target Track Scale Waypoint Trolling Grid Track View with Grid NOTE: Only one waypoint can have either a target or a grid at one time. If you apply a target or a grid to a new waypoint, the original waypoint will lose its target or grid. -
Page 22: Save Or Clear A Current Track
Save or Clear a Current Track Save the current track: From the Navigation X-Press press the RIGHT Cursor key. The track will remain on the display, but will change from black to gray. To remove the track completely from the display, see Edit, Delete or Hide Saved Tracks. NOTE: When you save a track, a name is automatically assigned. -
Page 23: The Menu System
Main Menu Tabs - Less frequently-adjusted menus are grouped into the Main Menu System. The Main Menu System is organized under the following tab headings to help you find a specific menu item quickly: Alarms, Sonar, Navigation (if the GPS Receiver is attached), Setup, Views, and Accessories. - Page 24 User Mode (Normal or Advanced) - An Advanced Mode is provided for users who desire the highest level of control over the Fishing System, and Normal Mode is provided for users who desire greater simplicity and fewer menu choices. Additional Advanced menu choices will be displayed throughout the menu system when you navigate to specific menus while in Advanced Mode.
-
Page 25: Start-Up Options Menu
Start-Up Options Menu See the following paragraphs for more information about each of these choices. Normal Operation Use Normal operation for on the water operation with a transducer connected. In addition, your Fishing System uses advanced transducer detection methods to determine if a transducer is connected. -
Page 26: Simulator
Simulator NOTE: To get the full benefit of the Simulator, it is important to select Simulator manually from the Start-Up Options menu as opposed to letting the Fishing System enter Simulator automatically (as it will if a transducer is not connected and you do nothing during power up). Manually selecting Simulator from the Start-Up Options menu allows you to pre-configure your Fishing System for on the water operation. -
Page 27: System Status
System Status Use System Status to view system connections and to conduct a unit self-test. Exit System Status by powering your Fishing System off. The following screens are displayed in turn when you press the VIEW button when using System Status: •... -
Page 28: Pc Connect (With Pc Connect Cable Only)
GPS Diagnostic View shows a sky chart and numerical data from the GPS receiver. The sky chart shows the location of each visible GPS satellite with its satellite number and a signal strength bar. A dark grey bar indicates that the satellite is being used to determine your current position. -
Page 29: Sonar X-Press™ Menu (Sonar Views Only)
Advanced User mode. The Mark menu selection will be added to the Sonar X-Press Menu when a Handheld GPS Receiver is connected to the Fishing System. See your Fishing System Operations Manual for information on the standard Sonar X-Press Menu choices. -
Page 30: Navigation X-Press™ Menu
The Navigation X-Press Menu will be added to the menu system when a Handheld GPS Receiver is connected to the Fishing System, and will contain the following choices: • Mark • Waypoint 001 (Only When Active) •... -
Page 31: Waypoint 001 (Only With An Active Cursor On A Waypoint)
Waypoint [Name] (Only with an Active Cursor on a Waypoint) Waypoint [Name] allows you to view the Waypoints submenu for the waypoint under your cursor. To View the Waypoint [Name] Submenu: 1. Move the cursor onto an existing waypoint and press the MENU key once, or use the Cursor to Waypoint to select a waypoint from a list of saved waypoints. -
Page 32: Zoom
Zoom Zoom allows you to change the scale of the Bird’s Eye, Track and Combo Views. To Zoom: 1. Highlight Zoom on the Navigation X-Press 2. Press the LEFT or RIGHT Cursor keys to increase or decrease the Zoom level. Go To Go To allows you to start Navigation towards a waypoint. -
Page 33: Clear Current Track
Clear Current Track Clear Current Track allows you to clear the current track being displayed and start a new track at the present position. To Clear Current Track: 1. Highlight Clear Current Track on the Navigation X-Press 2. Press the RIGHT Cursor key to initiate clearing the current track. 3. -
Page 34: Remove Target (Only If A Target Is Active)
Remove Target (Only if a Target is Active) Remove Target removes the waypoint target from the display. This menu choice will only appear when a target has already been applied to a waypoint. See Navigation Menu Tab: Waypoints for more information. To Remove a Target: 1. -
Page 35: Waypoint [Name] (Most Recently-Created Waypoint)
Waypoint [Name] (Most recently-created waypoint) Waypoint [Name] allows you to view the waypoints submenu for the most recently created waypoint. NOTE: You must have created a waypoint at least once since you last powered up the Fishing System for this menu choice to appear. To view the Waypoint [Name] Submenu: 1. -
Page 36: Navigation Menu Tab
NOTE: Menu choices will vary depending on system settings. The Navigation Menu Tab will be added to the menu system when a Handheld GPS Receiver is connected to the Fishing System, and the following menu choices will appear in the menu tab: •... -
Page 37: Saved Tracks
To view the Saved Tracks Submenu: 1. Highlight Saved Tracks on the Navigation main menu. 2. Press the RIGHT Cursor key to view the Saved Tracks submenu. The Saved Tracks Submenu contains the following menu choices: Edit allows you to select a saved track and change its Name, Visibility, Style and Color. Select Edit and press the RIGHT Cursor key to display the list of saved tracks. -
Page 38: Waypoints
To view the Waypoints Submenu: 1. Highlight Waypoints on the Navigation main menu. 2. Press the RIGHT Cursor key to view the Waypoints submenu. The Waypoints Submenu contains the following menu choices: Create allows you to create a new waypoint and edit it immediately. The current boat position will be used as the default, but you can set the coordinates to any valid position. -
Page 39: View Orientation
Cursor To allows you to move the cursor quickly to a waypoint from the list of saved waypoints. Select Cursor To and press the Right Cursor key to view the saved waypoints list. Use the UP and DOWN Cursor keys to choose a waypoint from the list, and press the Right Cursor key again to initiate the cursor to that waypoint. -
Page 40: North Reference
To change the North Reference setting: 1. Highlight North Reference on the Navigation main menu. 2. Press the LEFT or RIGHT Cursor keys to change the North Reference setting. (True, Magnetic, Default = True) grid in degrees, where a setting of 0° displays a standard North, South, East, West alignment. See Navigation Menu Tab: Waypoints for more information on how to set a Grid. -
Page 41: Track Min Distance (Advanced)
Track Min Distance allows you to set a minimum distance of travel before a trackpoint is added to the track. The Track Min Distance menu choice is only available when User Mode is set to Advanced (see The Menu System: User Mode). NOTE: Track Min Distance works in conjunction with Trackpoint Interval. -
Page 42: Course Projection Line
extending from the bow of the boat that projects your current course, and shows where the boat will go if you continue on your present course. To change the Course Projection Line setting: 1. Highlight Course Projection Line on the Navigation menu. 2. -
Page 43: Alarms Menu Tab
The alarm will be silenced, and will not be triggered again until a new instance of the alarm condition is detected. The following menu choices will be added to your Alarms Menu Tab when a Handheld GPS Receiver is connected to the Fishing System: • Off Course Alarm •... -
Page 44: Arrival Alarm
distance to the destination waypoint, or has entered the Arrival Alarm Circle, based on the menu setting when navigating. Arrival Alarm allows you to set how close the boat must be to the destination waypoint before the Arrival Alarm will sound. To change the Arrival Alarm setting: 1. -
Page 45: Setup Menu Tab
Advanced User mode and what accessories are attached to the unit. The following menu choices will be added to your Setup Menu Tab when a Handheld GPS Receiver is connected to the Fishing System: • Units - Distance •... -
Page 46: Units - Distance
To change the Units - Distance setting: 1. Highlight Units - Distance on the Setup menu. 2. Press the LEFT or RIGHT Cursor keys to change the Units - Distance setting. (Domestic: Statute Miles, Nautical Miles; International: Meters/Kilometers, Meters/Nautical Miles, Feet/Statute Miles, Feet/Nautical Miles; Default: Domestic = Statute Miles, International = Meters/Kilometers) To change the Units - Speed setting: 1. -
Page 47: Local Time Zone (Advanced)
Local Time Zone selects your time zone in reference to the time reported by the GPS receiver when Time+Date is selected as a Digital Readout on the Sonar View (see Select Readouts in your Fishing System Operation Manual). This menu choice is available only when in Advanced User Mode (see The Menu System: User Mode.) -
Page 48: Time Format (Advanced, International Only)
Time Format changes the time format used by the unit. This menu choice is available only when in Advanced User Mode (see The Menu System: User Mode) International Models Only. Time Format selects a 12 hour or 24 hour format for the time of day displayed when Time + Date is selected as a Digital Readout on the Sonar View (see Select Readouts in your Fishing System Operation Manual). -
Page 49: Nmea Output (Advanced)
NMEA Output turns the NMEA* output on or off. This menu choice is available only when in Advanced User Mode (see The Menu System: User Mode.) NMEA Output should be turned On if you connect the NMEA Output wires of the GPS Receiver cable to another NMEA-compatible device, such as an autopilot. -
Page 50: Accessories Menu Tab
Accessories Menu Tab (no accessories attached) NOTE: Accessories to enable WeatherSense® and the SmartCast® Wireless Sonar Link require separate purchases. You can visit our website at www.humminbird.com or contact our Customer Resource Center at 1-800-633-1468 for additional details. Accessories Menu Tab... -
Page 51: Troubleshooting
Troubleshooting Before contacting the Humminbird® Customer Resource Center, please read the following section. Taking the time to review these troubleshooting guidelines may allow you to solve a performance problem yourself, and therefore avoid sending your unit back for repair. Fishing System Doesn’t Power Up If your Fishing System doesn’t power up, use the Installation Guide that also comes with it for... -
Page 52: Display Problems
Display Problems There are several main conditions or sources of possible interference that may cause problems with the quality of the information displayed on the control head. Look in the following table for some symptoms of display problems and possible solutions: Problem The control head loses power at high speeds. -
Page 53: Finding The Cause Of Noise
Finding the Cause of Noise Electrical noise usually affects the display with many black dots at high speeds, and high sensitivity readings. One or more of the following sources can cause noise or interference: Possible Source of Noise Other electronic devices The boat’s engine Cavitation from the boat’s propeller... -
Page 54: Fishing System Accessories
Universal Sonar 2 features new temperature sensing and the performance of DualBeam PLUS™ technology (available with all Humminbird® DualBeam PLUS™ models). An expanded view and greater bottom detail gives you a totally new perspective of the water below, along with optimal sonar performance to help you find fish. - Page 55 With the new InterLink™ Network Connection, you can now share GPS position, waypoints, routes and your current track between two Humminbird® Fishing Systems in real time. Mark a waypoint at the console, and it’s instantly available on the second unit. No matter where you’re at on the boat, you’ll have access to your critical fishing and navigation information.
-
Page 56: 1-Year Limited Warranty
This warranty is effective for one year from the date of original retail purchase. Humminbird® products found to be defective and covered by this warranty will be replaced or repaired free of charge at Humminbird’s option and returned to the customer freight prepaid. -
Page 57: Humminbird® Service Policy
We reserve the right to deem any product unserviceable when replacement parts are no longer available or impossible to obtain. This Service Policy is valid in the United States only. This applies only to Humminbird® products returned to our factory in Eufaula, Alabama. This Service Policy is subject to change without notice. -
Page 58: Returning Your Unit For Service
Before sending your unit in for repair, please contact the factory, either by phone or by email, to obtain a Repair Authorization Number for your unit. NOTE: Please do not return your Humminbird® to the store for service. Please have your product model name and serial number available before calling the factory. - Page 59 Notes...
-
Page 60: Contact Humminbird
Contact Humminbird® Contact the Humminbird® Customer Resource Center in any of the following ways: By Telephone (Monday - Friday 8:00 a.m. to 4:30 p.m. Central Standard Time): 1-800-633-1468 By e-mail (typically we respond to your e-mail within three business days): cservice@johnsonoutdoors.com...
Need help?
Do you have a question about the 531324-1_D and is the answer not in the manual?
Questions and answers