Table of Contents
Advertisement
PORTABLE
KEROSENE-HEATER
"OWNER'S MANUAL"
DuraHeat
®
MODEL : DH 1050
Before the first use of this heater, please read this OWNER'S MANUAL very
carefully. This OWNER'S MANUAL has been designed to instruct you as to the
proper manner in which to assemble the heater, maintain the heater, store the
heater, and most importantly, how to operate the heater in a safe and efficient
manner, please keep this manual for future reference.
World Marketing of America, Inc.
12256 William Penn Hwy
Mill Creek, PA 17060
1- 800 - 776 - 9425 (9AM - 4PM EST)
MON.- FRI. ONLY
www.yourheater.com
Advertisement
Table of Contents

Subscribe to Our Youtube Channel
Related Manuals for DuraHeat DH 1050


Summary of Contents for DuraHeat DH 1050
- Page 1 “OWNER’S MANUAL” DuraHeat ® MODEL : DH 1050 Before the first use of this heater, please read this OWNER'S MANUAL very carefully. This OWNER'S MANUAL has been designed to instruct you as to the proper manner in which to assemble the heater, maintain the heater, store the heater, and most importantly, how to operate the heater in a safe and efficient manner, please keep this manual for future reference.
-
Page 2: Cautions - Safety Guide
NEVER LEAVE THE HEATER UNATTENDED WHILE BURNING! CAUTIONS - SAFETY GUIDE - TO MANUFACTURER’S INSTRUCTIONS MAY WARNING!! RISK OF EXPLOSION / RISK OF FIRE RESULT IN CONDITIONS WHICH CAN PRODUCE use any fuel other than water-clear 1-K ! NEVER BODILY INJURY AND/OR PROPERTY DAMAGE. kerosene. - Page 3 WICK REPLACEMENT UNPACKING AND ASSEMBLY EXTINGUISHING THE HEATER KEROSENE (1-K ONLY) AUTOMATIC SAFETY SHUT-OFF DEVICE FUELING YOUR HEATER LONG TERM STORAGE OF YOUR HEATER AUTOMATIC IGNITION SYSTEM TROUBLE SHOOTING GUIDE CHECKING THE IGNITION SYSTEM PARTS LIST ADJUSTING THE WICK EXPLODED PARTS DRAWING...
-
Page 4: Unpacking And Assembly
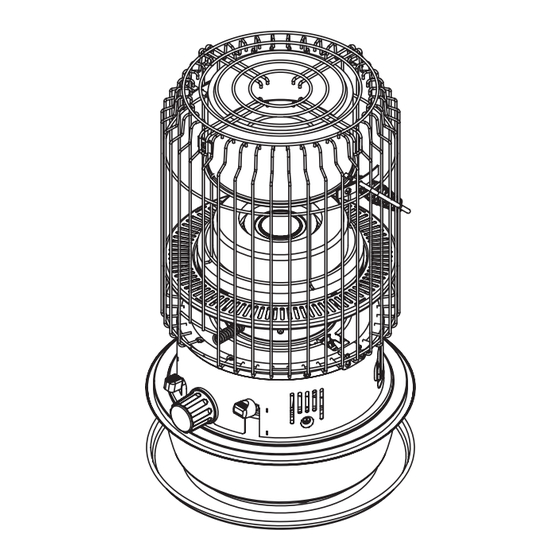
NEVER LEAVE THE HEATER UNATTENDED WHILE BURNING! UNPACKING AND ASSEMBLY CAUTION: "RISK OF BURNS" DO NOT OPERATE HEATER WITHOUT THE PROTECTIVE GUARD OR GRILLE. 1. REMOVE THE HEATER AND ALL PACKING MATERIALS FROM THE BOX. (Fig.2) NOTE : Save the shipping carton and packing materials for future storage. -
Page 5: Kerosene (1-K Only)
Replace the battery cover to the heater. Battery Cover Battery C) Now your heater is completely ready to use. Fig. 6 KEROSENE (1-K ONLY) It is EXTREMELY IMPORTANT to the operation of this heater that you use the proper grade of kerosene. -
Page 6: Fueling Your Heater
Premature ignition can destory your wick. IMPORTANT NOTICE REGARDING FIRST IGNITION OF HEATER The first time you light your heater there may be some odor due to the burning off of oils used in the manufacturing process. To avoid this you may wish to burn the heater outside on a calm and windless day. -
Page 7: Automatic Ignition System
NEVER LEAVE THE HEATER UNATTENDED WHILE BURNING! AUTOMATIC IGNITION SYSTEM For safety and convenience, this heater features an automatic ignition system. 2 "C" cell batteries, included with the heater, provide the power for the igniter which lights the wick once it has been raised to its maximum height. To use the automatic ignition system: Make sure the batteries have been installed. -
Page 8: Adjusting The Wick
NEVER LEAVE THE HEATER UNATTENDED WHILE BURNING! WICK FlLAMENT IGNITER 1~2mm Fig. 13 Fig. 14 Fig. 15 To replace the igniter plug (Fig. 16); Remove the batteries. Remove the 2 Guard Bracket by removing 4 Screws and lift off the Guard grill assembly. - Page 9 WICK MAINTENANCE / HOW TO CHECK THE CONDITION OF YOUR WICK Failure to clean your heater’s wick may result in low heat output, cause your heater to burn with an annoying odor and could damage or destroy the wick adjusting assembly. It can also make it very difficult to light the wick.
-
Page 10: Wick Replacement
WICK REPLACEMENT The wick in your heater needs replacing if, after repeated cleanings, any of the following conditions still exist: slow to light, hard movement of the wick adjuster knob, kerosene odor while burning, low heat output, slow warm up, damaged wick. - Page 11 NEVER LEAVE THE HEATER UNATTENDED WHILE BURNING! . Remove the screw on the wind . Remove the screw on the safety . Unscrew & remove 4 wing nuts. cover and remove the wind cover. shut off assembly and remove the safety shut off assembly. .
- Page 12 NEVER LEAVE THE HEATER UNATTENDED WHILE BURNING! . Slide the wick adjuster . Sung 4 wing nuts on the . Replace the safety shut-off assembly down the draft tuve. mounting stud, but do not assembly. Position the adjuster shaft to tighten.
-
Page 13: Extinguishing The Heater
NEVER LEAVE THE HEATER UNATTENDED WHILE BURNING! EXTINGUISHING THE HEATER To extinguish the heater, push down on the manual shut-off knob(Fig.18) with one hand while holding the wick adjuster knob in the other hand. You will feel the pressure of spring action attempting to turn the wick adjuster knob in a counter-clockwise direction in your hand. -
Page 14: Long Term Storage Of Your Heater
"Carbon Removal Dry Burning" procedure described on page 8 again. LONG TERM STORAGE OF YOUR HEATER Carefully following the instructions for storage given below will insure that your heater will operate efficiently and safely next season (Fig.19/ Fig.20). -
Page 15: Troubleshooting Guide
NEVER LEAVE THE HEATER UNATTENDED WHILE BURNING! TROUBLE SHOOTING GUIDE TROUBLE CORRECTIVE ACTION Heater Will Not Light ; 1. Fuel tank is empty 1. Fill tank with water-clear 1-K kerosene. 2. Drain tank. Remove wick assembly & replace wick. 2. Water present in kerosene Reinstall wick assembly. -
Page 16: Parts List
GRILL FRONT WS-CV21 GRILL REAR WS-CV22 TOP GRILL PS-CV23R3 HANDLE HANGER PS-CV24R1 PS-CV35 SPECIFICATIONS Model No. DH 1050 Type of Heater Convection Heat Output Max. 10,500 BTU/hr Fuel Tank Integral Tank Capacity 1.2 U.S. gallons Continuous Combustion Time Approx. 12~15 hr Max.
Need help?
Do you have a question about the DH 1050 and is the answer not in the manual?
Questions and answers