
Related Manuals for X-Digital System XDS PRO4

Summary of Contents for X-Digital System XDS PRO4
-
Page 1: Satellite Receiver
XDS PRO4 Satellite Receiver User’s Guide PRO4 & PRO4-SG Copyright © 2006 X-Digital Systems, Inc. - Page 2 Receiver”. Every effort has been made to make this document as complete and accurate as possible, but no warranty or fitness is implied. The information is provided on an “as is” basis and X-Digital Systems shall have neither liability nor responsibility to any person or entity with respect to any loss or damages arising from the information contained in this document.
-
Page 3: Table Of Contents
TABLE OF CONTENTS INTRODUCTION ...................... 5 Important Information ..................5 Hardware Upgradeability ..................5 Hardware Versatility ................... 5 Network Management System ................6 GETTING STARTED ....................7 Unpacking the Receiver ..................7 2.1.1 List of Contents ................... 7 Safety Precautions ....................7 2.2.1 Excessive Temperature ................ - Page 4 Proxy Server Configuration ................22 DNS Server Configuration ................22 RECEIVER WEB INTERFACE ................23 The General Menu .................... 23 6.1.1 The Status Tab ..................24 6.1.2 The Tuner Tab................... 25 6.1.3 The Setup Tab ................... 26 *The Programming Menu ................. 27 6.2.1 *The Programs Tab ...................
-
Page 5: Introduction
Hardware Versatility The XDS PRO4 can deliver audio received via satellite over any one of its four balanced output ports. Additionally, content can be received and stored locally for later use. This content can originate from a real time satellite broadcast, from a high speed satellite IP distribution channel, or can be retrieved via the Internet over the Ethernet port, if so configured. -
Page 6: Network Management System
Network Management System The PRO4 satellite receiver has been specifically designed so that its output can be controlled via one central web application. This application is called the Network Management System, or NMS. From the NMS, the receiver can be monitored and managed, and the user can set a schedule of live and delayed programs for each output port. -
Page 7: Getting Started
2 GETTING STARTED Please take a few minutes to read through the User‟s Guide prior to setting up and using the unit. If you are in a hurry, there is a Quick Start section below, but please be sure to consult this section at your earliest convenience. -
Page 8: Proper Ventilation
2.2.2 Proper Ventilation Air vents on the side and rear of the receiver are provided to ensure proper air flow through the receiver unit. In order to ensure proper operation the PRO4 receiver should be located such that its ventilation is not impeded. In a rack environment, at least two inches on the sides and at least 5 inches in the rear should be provided. -
Page 9: Foreign Objects
If a foreign object is inserted into the receiver, immediately power down the receiver and contact X-Digital Systems technical support. Do not open the receiver, as doing so will void the receiver‟s warranty. -
Page 10: Dc Voltage Requirement
2.4.1 DC Voltage Requirement You may need to have the PRO4 receiver supply DC voltage to either an LNB or a block down-converter (used after an LNA). If this is the case, the user must change the receiver‟s LNB on/off settings using the front panel display. For directions on how to use the front panel display, see Chapter 4 of this manual. -
Page 11: Quick Start
3 QUICK START This quick start is designed to get your XDS PRO4 receiver up and running as quickly as possible. Please refer to the full Quick Start Guide packaged with your receiver. General Guidelines Review this guide in its entirety before installing your XDS receiver. Also, follow these instructions before calling support. -
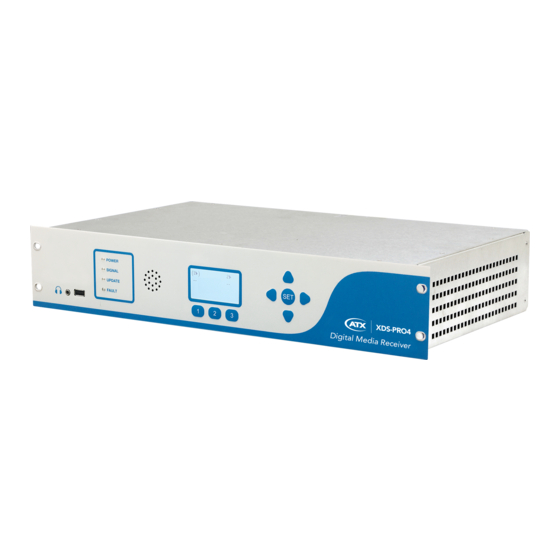
Page 12: Front Panel Operations
4 FRONT PANEL OPERATIONS The PRO4 Receiver‟s Front Panel is equipped with a 128x64 pixel LCD display, four status LEDs; which indicate power, signal, update, and fault; and eight buttons: 1, 2, 3, left (◄), right (►), up (▲), down (▼), and SET. Using this interface a user may navigate through the PRO4‟s hierarchical menu to view, modify, and save receiver settings. -
Page 13: The Lcd Display And User Interface
The LCD Display and User Interface The PRO4 Receiver comes equipped with a 128x64 pixel LCD on its front panel which allows the user to view, modify, and save receiver settings. The navigation of the PRO4 receiver‟s menu hierarchy is simple: To cycle through the possible sub-menus, press the ◄... -
Page 14: The Status Sub-Menus
XDS PRO4 XDS PRO4 XDS PRO4 XDS PRO4 Setup Status Audio Ports 4.2.1 The Status Sub-Menus From the Status menu, the user can navigate through five sub-menus, each of them offers various status-related information. From any of these sub-menus pressing the ▲ button will being you back to the main menu options. -
Page 15: The Setup Sub-Menus
XDS PRO4 Status Active Faults Fault History Environment 5: Tuner not Locked Temp: 39 °C Fan: HIGH Storage Status Power Status Total: 3884MB 1.2V=1.21 Avail: 3683 MB 5.0V=5.09 Used: 4% 4.2.2 The SETUP Sub-Menus By navigating from the Main Menu to Setup, the user reaches the Setup sub-menus. The different sub-menus available under Setup are: Serial Number: displays the receiver‟s serial number. -
Page 16: The Setup:network Sub-Menus
XDS PRO4 Setup Setup Setup Setup Serial Number M&C Ports Network XDSP-00000000 115K,8,None,1 Setup Setup Setup Factory Defaults Alarms Version 0FFBDFFF Setup Setup Tuner Relays 4.2.2.1 The SETUP:NETWORK Sub-Menus Starting from the Main Menu and navigating to Setup option and pressing ▼, and then navigating to Network option and pressing SET, a user will have access to the Network sub-menus. -
Page 17: The Setup:tuner Sub-Menus
To modify any of these numeric values: use◄ or ► to select which part of the IP to change. Make a digit larger using ▲, and to make a digit smaller using ▼. Press SET whenever you are done editing and want to commit a setting. Setup Network Setup Network... -
Page 18: The Audio Ports Sub-Menus
Setup Tuner Setup Setup Frequency Symbol Rate Setup Setup LNB Power 4.2.3 The AUDIO PORTS Sub-Menus From the Audio Ports sub-menus, users can change the settings for each of the four ports as well as headphones port. To choose which of these five ports to modify scroll between them using ◄... -
Page 19: The Audio Ports:setup Sub-Menus
XDS PRO4 Audio Ports Audio Port A Audio Port B Audio Port C Audio Port D Headphones 4.2.3.1 The AUDIO PORTS:SETUP Sub-Menus Each of the five audio ports (Audio Port A-D, and Headphones) have their own identical setup sub menus. From these menus, users may modify the station call number, the current program played on the audio port, the current commercial spot played on the audio port, and a couple miscellaneous audio settings (stereo or mono). - Page 20 Audio Port # Audio Port # Audio Port # Audio Port # Spot Station Program Audio Port # Settings 1226 R830002-1060 XDS Pro Users Guide 1/11/2010 Rev A...
-
Page 21: Ethernet Setup
5 ETHERNET SETUP The XDS PRO4 Satellite Receiver is specifically designed to receive audio broadcasts via satellite transmissions. It is also equipped with an “internet” only mode in which it can receive audio data and receiver updates via its Ethernet port. For this feature to be functional, the receiver must be connected to a network router or directly connected to an internet connection. -
Page 22: Assigning A Subnet Mask
Assigning a Subnet Mask The subnet mask is used to determine where the network number in an IP address ends and the node number in an IP address begins. A node is any device on a network that needs a unique IP address to communicate (computer, server, router, PRO4 Receiver, etc.). -
Page 23: Receiver Web Interface
6 RECEIVER WEB INTERFACE The XDS PRO4 receiver includes an on-board web interface that will publish itself on your local area network once you have followed the steps in Chapter 5. From this web interface you can view most of the receiver‟s internal settings as well as the contents of the receiver‟s hard drive. -
Page 24: The Status Tab
6.1.1 The Status Tab The Status Tab displays basic attributes about the receiver‟s current output, its surroundings, errors, and current power levels. On this tab you will see: A description of the Headphones output including Program, PID, and the volume. A list of current faults affecting the receiver, as well as a history of past faults complete with a clear button to wipe the slate clean. -
Page 25: The Tuner Tab
6.1.2 The Tuner Tab The Tuner Tab presents the user with tuner related data. This data include: The frequency the tuner is tuned to. The tuner‟s symbol rate. The locked or unlocked status of the tuner. The acquisition state of the tuner: acquiring, tracking, or fade. Eb/No, or energy per bit relative to noise floor (see section 4.2). -
Page 26: The Setup Tab
Below is an image of the tuner tab. 6.1.3 The Setup Tab The Setup Tab shows even more detailed and specific receiver facts: The receiver‟s serial number. The receiver‟s addressing value. The receiver‟s firmware version. The date that the current receiver‟s firmware was designed. Station assignments for each of the four audio ports (i.e. -
Page 27: The Programming Menu
*The Programming Menu From the Programming Menu, the user is able to view all of the programs and recordings the receiver is equipped to receive and re-broadcast. 6.2.1 *The Programs Tab Each receiver is identified by the Network Management System as authorized to receive and broadcast particular radio programs. -
Page 28: The Recordings Tab
Below is an image of the programs tab. 6.2.2 *The Recordings Tab In the Recording Tab, every program which has been stored on the receiver‟s internal storage drive is listed. For each recording, you are given a link to download the recording to your computer‟s local hard drive, the date that it was recorded, and the length of the recording. -
Page 29: The Content Menu
*The Content Menu The Content Menu lists all of the files which the receiver‟s internal storage currently holds. 6.3.1 *The Audio Tab The Audio Tab displays all audio type files which have been stored for later use by the receiver. The file name (along with download link), ISCI code, received date, file size/duration and buttons to delete(X) or play(►) are displayed for each file. -
Page 30: The All Tab
6.3.3 *The All Tab The All Tab simply displays all files which the receiver is currently storing. Here is what the Content tabs look like: 1226 R830002-1060 XDS Pro Users Guide 1/11/2010 Rev A... -
Page 31: Affiliate Web Interface
7 AFFILIATE WEB INTERFACE Your XDS PRO4 Receiver must always be connected to the internet to allow configuration, activation, setup, monitoring of signal quality, program schedules, audio content and accountability. The XDS PRO4 Satellite Receiver is capable of communicating with and being configured by an internet-accessible Network Management System. -
Page 32: Changing The Receiver"S Time Zone
the schedule grid. If you wish to edit a different week use the arrow links to navigate forwards or backwards in time. Once you are viewing the correct station schedule and the correct week, you are ready to modify the schedule. Click the time on the left had side of the grid that you wish to modify or add a program to. -
Page 33: Monitor And Control Interface
Open HyperTerminal from the Start Menu: Start > All Programs > Accessories > Communication > HyperTerminal. In the Connection Description dialog, enter “XDS PRO4 Console” as the connection Name, and select a connection Logo. Press “OK”. In the Connect To dialog, select “COM1” in the “Connect using” drop down list. -
Page 34: Console Commands
Console Commands Tasks are performed through the console via commands. The syntax for any command is the name of the command, followed by a comma separated list of one or more option command arguments. Below is a list of all commands available along what command arguments are required and what the command does. - Page 35 The HELP Command: This command prints all of the commands available to the current profile. There are no options for this command. This command is available to all profiles. The LOGS Command: This command deals with the receiver‟s internal logs. There are three possible options to be used with this command: SHOW: This option will display the receivers log file to the console screen.
- Page 36 command. Below is a table which will help to interpret the binary code given by the receiver: Error Value Error Name Error Value Error Name 0x00000001 FPGA Load Error 0x00010000 Recorder Overflow 0x00000002 DSP Load Error 0x00020000 Temp Warning 0x00000004 Ethernet Failure 0x00040000 Temp Critical...
- Page 37 Table 4. Tuner Command Parameters The VER Command: This command, which takes no options, simply displays the receiver‟s firmware version to the console. This command is available to all profiles. The VOL Command: This command sets the volume of the receiver‟s headphone output.
-
Page 38: Specifications
9 SPECIFICATIONS The following specifications are divided into sections corresponding to the various functional blocks within the receiver. Receiver Interface Specification image display capability, backlighting Keypad full 8 key-pad, menu buttons, arrow keys, enter key Status LEDs power, signal, update, and fault indications Monitor and Control Interface RS-232C compatible, DB-9 female Web Interface... -
Page 39: M&C Interface Connector Pin-Outs
M&C Interface Connector Pin-Outs The Monitor and Control (M&C) port allows basic configuration of the XDS receiver via an asynchronous RS232C electrical interface. It uses the following protocol settings: 115.2K baud, 8 data bits, No Parity, 1 stop bits, and no hardware flow control. In addition to the asynchronous interface, the M&C connector provides a status relay output and four optical inputs. -
Page 40: Relay Outputs
Relay Outputs There are two DB-37 connectors on the rear panel which together contain a total of 32 mappable relay (or contact) closures. The following tables provide the pin-outs for the two relay connectors. FUNCTION FUNCTION RLY1A RLY1B RLY2A RLY2B RLY3A RLY3B RLY4A... -
Page 41: Analog Audio Output
FUNCTION FUNCTION RLY1A RLY1B RLY2A RLY2B RLY3A RLY3B RLY4A RLY4B Ground Ground RLY5A RLY5B RLY6A RLY6B RLY7A RLY7B RLY8A RLY8B Ground RLY9B RLY9A RLY10B RLY10A RLY11B RLY11A RLY12B RLY12A Ground Ground RLY13B RLY13A RLY14B RLY14A RLY15B RLY15A RLY16B RLY16A Table 10. Relay Port B Pin-Out Only Pins 1 through 5 operate when a PRO4-SG is in MX3 framing mode Connection DB-37M... -
Page 42: Analog Audio Input
Connection DB-9M Format Balanced Pair L, R Range -10 to +4dBu nominal (+22 max) Performance 0.1% THD 85dB dynamic range Table 13. Analog Audio Output Analog Audio Input The receiver has one analog audio input port. The following table has the pin-out of the analog input port. -
Page 43: Digital Audio Output
*Digital Audio Output The receiver has a single digital audio output port that provides AES/EBU versions of the first two analog audio ports (Ports A and B). The Port A audio is located on the pair of CH0 signals while the Port B audio is located on the pair of CH1 signals. The following table contains the pin-out of the digital audio port. -
Page 44: Pad/Async Output Port
*PAD/ASYNC Output Port The PAD port (Program Associated Data) relays information which is carried along with the audio data received. i.e. song and artist information, or relay cues to trigger events. Below is a pin-out table for the PAD port. FUNCTION P0_TX P1_TX... -
Page 45: Rf Input Parameters
RF Input Parameters 9.12 Data will be demodulated and then de-multiplexed by PID (Program ID). On demand, the de-multiplexed data will be transmitted via the Ethernet switch to any of the devices requesting such data. Connection 75 ohm F-type connector Frequency Input Range 950 to 2150 MHz Input Level...
Need help?
Do you have a question about the XDS PRO4 and is the answer not in the manual?
Questions and answers