Table of Contents
Advertisement
Quick Links
Advertisement
Table of Contents

Related Manuals for ReSound MINI BTE 60


Summary of Contents for ReSound MINI BTE 60
- Page 1 USER GUIDE MINI BTE 60 BTE 61 BTE 70 BTE 71 BTE 80 BTE 90...
- Page 2 ReSound hearing instrument will allow you to derive maximum hearing benefit. This instruction covers the following ReSound BTE products: mINI BTE 60, mINI BTE 61, BTE 70, BTE 71, BTE 80 and BTE 90 your hearing instrument is model:...
-
Page 3: Table Of Contents
Contents page your ReSound BTE Hearing Instrument your ReSound mini BTE Hearing Instrument Programme Selector your Programme Environments Directionality Stand-by Function On/Off Function SmartStart Volume Control Direct Audio Input (DAI) Inserting and removing the Instrument low Battery Warning Changing the Battery... - Page 4 ReSound BTE Hearing Instruments 1. Programme Selector 2. Battery Compartment & On/Off Switch 3. Sound Outlet 4. 1 microphone Sound Inlet 5. 2 microphone Sound Inlet 6. Volume Control (optional) 7. Direct Audio Input (DAI) (optional)
- Page 6 8. left/Right indicator (Right=Red, left=Blue) 9. Battery lock 10. model 11. manufacturer...
-
Page 8: Your Resound Bte Hearing Instrument
ReSound mini 60 Hearing Instrument 1. Programme Selector 2. Battery Compartment & On/Off Switch 3. Sound Outlet 4. 1 microphone Sound Inlet 5. 2 microphone Sound Inlet 6. Volume Control left/Right indicator (Right=Red, left=Blue) 8. Battery lock 9. model 10. -
Page 9: Hearing Instrument
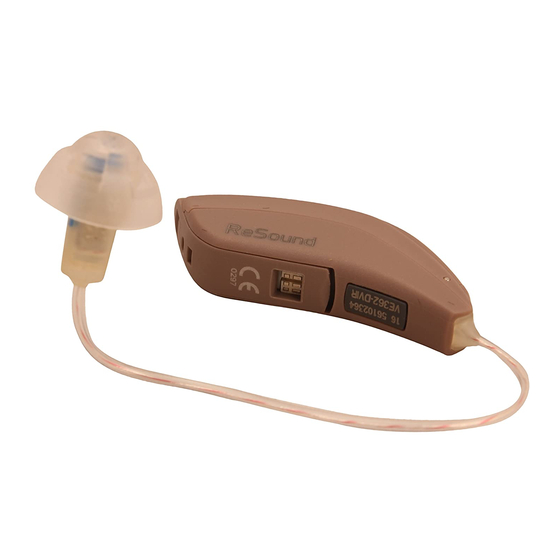
ReSound mini 60 Thin Tube Hearing Instrument 1. Programme Selector 2. Battery Compartment & On/Off Switch 3. Thin Tube Adaptor 4. 1 microphone Sound Inlet 5. 2 microphone Sound Inlet 6. Thin Tube with standard dome Volume Control 8. left/Right indicator (Right=Red, left=Blue) 9. -
Page 10: Programme Selector
Programme Selector your hearing care professional has most likely programmed multiple programmes into your instrument. you can select programmes simply by depressing the programme selec- tor once. you will then hear one or more “beeps”, indicating which programme you have selected. your hearing instru- ment will switch programmes as follows: Examples: 4 programmes: 1 →... -
Page 11: Your Programme Environments
ReSound metrix BTE instruments are all equipped with a telecoil in their standard version. Directionality The ReSound instrument is equipped with two micro phones and thus offers adaptive directionality. That is a function which enables better speech understanding in noisy situations. -
Page 12: On/Off Function
On/Off Function your ReSound BTE is equipped with an on/off switch inte- grated into the battery compartment. When the battery compartment is fully closed, the instrument is turned on in its functional mode and programme 1 will be activated. Par- tially open the battery door until it snaps into the off-position. -
Page 13: Volume Control
Volume Control... -
Page 14: Direct Audio Input (Dai)
Direct Audio Input (DAI) The ReSound mini BTE and BTE models 70-DI, 70-DVI and 80-DVI offer you the possibility of direct, undisturbed connection to facilities such as television, radio and remote microphone via the Direct Audio Input socket. Often, this will improve sound quality. - Page 15 Direct Audio Input (DAI) - 61 and 71 Using the Direct Audio Input socket enables direct, undisturbed connection to facilities such as: Television - Radio - Remote microphone. How to connect the Audio boot to the hearing instrument: Pay close attention to the illustrations on how to connect and disconnect the audio boot below 1.
-
Page 16: Inserting And Removing The Instrument
Inserting and removing the instrument ( - with ear mould) Inserting the instrument • With the battery door opened in the off position take the ear mould between thumb and index finger and position its ‘point’ in your ear canal. Now, slide the ear mould all the way into your ear with a gentle, twist- ing movement. -
Page 17: Low Battery Warning
Inserting and removing the instrument (with FlexTubeThin Tube) Inserting the instrument • Hang the instrument over the top of the ear. • Grasp the FlexTube/Thin Tube where it bends and push the dome into your ear canal. dome should be placed far enough into the ear that the sound tube lies flush with your head. -
Page 18: Changing The Battery
Changing the Battery Open the battery compartment by turning the instrument off, and then using your fingernail to open it completely. After removing the old battery, insert the new one with the “+” (flat) side facing the “+” on the battery door. It should fit in like a puzzle piece. -
Page 19: Battery Warning Information
Battery Warning Information Batteries contain dangerous substances and should be disposed of carefully in the interest of your safety and for the environment. • Do NOT attempt to recharge batteries which are not specifically designated rechargeable as they may leak or explode. -
Page 20: Daily Maintenance
Daily maintenance Keep your hearing instrument clean and dry. Wipe the case with a soft cloth or tissue after use to remove grease or moisture. If the instrument has been exposed to high humidity or perspiration, enclose it (with the ear mould) in a sealed container together with a drying agent (dessicator) overnight. -
Page 21: Cleaning The Ear Mould And Replacing Sound Outlet Filter
Cleaning the Ear mould and replacing Sound Outlet Filter The ear mould should be cleaned regularly. Remove the ear mould and the silicone tubing from the hearing instrument before you clean it. lukewarm water should be enough to clean wax off the ear mould. If ear wax is stuck in the sound canal of the ear mould, the cleaning loop or a syringe with lukewarm water can easily be used to “push”... -
Page 22: Sound Outlet Filter
Sound Outlet Filter your ReSound hearing instrument is equipped with a filter. This filter is located at the top of the sound outlet and prevents moisture and debris from get- ting into the hearing instrument. If the hearing instrument seems... - Page 23 Cleaning the FlexTube/Thin Tube and dome The FlexTube/Thin Tube feeds the amplified sound from the hearing instrument into the ear. It is important that the FlexTube/Thin Tube and the dome fit correctly into your ear. If the FlexTube/Thin Tube or the dome irritate your ear in any way and prevent you from wearing your hearing instru- ment, please contact your hearing care professional.
- Page 24 How to mount the Standard Dome We recommend that your hearing care professional changes the dome for you, since failure to change the domes in accordance with the instructions could result in injury. If you choose to change the dome yourself: 1.
- Page 25 The Tulip-Dome should be directed with the sound outlet hole facing either down towards your shoulders or up towards your hair. (3) The sound outlet hole can turn both ways; the direction of the sound outlet hole affects the length of the sound tube according to the entrance of your ear canal.
-
Page 26: Telephone Use
Telephone Use your hearing instrument is equipped with an induction coil (telecoil) which picks up magnetic emanations from a hear- ing instrument compatible telephone. your hearing care professional can activate the telecoil. By selecting the tel- ecoil programme, the hearing instrument will only pick up the sounds coming from the telephone. -
Page 27: Using Assistive Listening Systems
Do not attempt to open the case of the hearing instrument since this would invalidate the warranty. If your ReSound hearing instrument requires service, please contact your hearing care profes- sional for assistance. -
Page 28: Troubleshooting Guide
TROUBlESHOOTINg gUIDE SymPTOm CAUSE No sound • Not turned on • Dead battery • Battery improperly inserted • Blocked ear mould or tube • Blocked sound outlet filter Not loud • Loose ear mould enough • Blocked ear mould or dome • Change in hearing • Excessive ear wax • Blocked sound outlet filter • Volume set too low Whistles • Loose ear mould • DFS needs re-initialization Sound not clear • Weak battery or distorted • Poorly fitting ear mould or dome • Hearing instrument damaged • Hearing instrument settings not optimal... - Page 29 POSSIBlE REmEDy • Turn on • Replace battery • Insert battery properly • Clean ear mould or tube blockage • Change filter or consult your hearing care professional • Reinsert carefully • Clean ear mould or dome • Consult your hearing care professional • Consult your physician • Change filter or consult your hearing care professional • Consult your hearing care professional • Remove and reinsert • Consult your hearing care professional • Replace battery • Consult your hearing care professional • Consult your hearing care professional • Consult your hearing care professional...
-
Page 30: General Precautions
general Precautions • Consult a physician if you find a foreign object in your ear canal, if you experience skin irritation or if excessive ear wax accumulates with the use of the hearing instrument. • Different types of radiation, e.g. from NMR, MRI or CT scanners, may damage the hearing instrument. There- fore, do not wear the hearing instrument during these or other corresponding scanning procedures. -
Page 31: Technical Data
Technical Data maximum Output (2cc Coupler / IEC 60118-7) 60-DI 126 dB SPl (Typical) 60-DI Thin Tube 127 dB SPl (Typical) 60-VI 126 dB SPl (Typical) 60-VI Thin Tube 127 dB SPl (Typical) 61-DI Classic 132 dB SPl (Typical) 61-DI Thin Tube 123 dB SPl (Typical) 70-D 127 dB SPl (Typical) -
Page 32: Key Word Index
Key Word Index Assistive listening (tele-loop) systems Battery change Battery compartment 4,8,14 Cerumen/earwax Cleaning the instrument 16,17 Directionality Direct audio input (DAI) Ear mould / Dome 17,19,20,21 Environmental programmes low battery warning maintenance On/off switch Programme Selector SmartStart Sound outlet filter Stand-by mode Technical data Telecoil use... - Page 34 Tel.: 0 1869 343 500 Tel.: (free) 0800 900 126 Fax: 0 1869 343 466 Fax: (free) 0800 007 695 www.gnresound.co.uk www.gnresound.co.nz Any issues relating to the EU medical Device Directive 93/42/EEC should be directe d to gN ReSound A/S...