Advertisement
Table of Contents
- 1 Table of Contents
- 2 Preface
- 3 Display
- 4 Confirmation Key
- 5 Menu Structure
- 6 Messages
- 7 Messages
- 8 Alarm Settings
- 9 Alarm Clock
- 10 Alarm Clock
- 11 Status Display and Battery Condition Indication
- 12 Alarm Options
- 13 Communication
- 14 Settings
- 15 Settings
- 16 Switching on and off
- Download this manual
See also:
User Manual
Advertisement
Table of Contents

Related Manuals for SwissPhone DE920


Summary of Contents for SwissPhone DE920
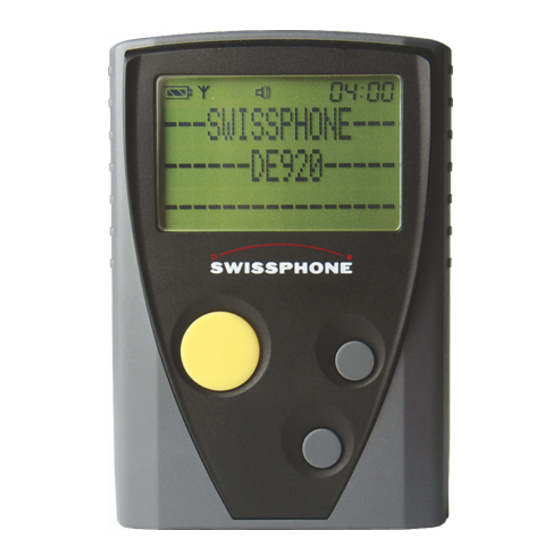
- Page 1 Operating instructions Swissphone DE920, DE920 Ex, DE940 Alphanumeric POCSAG pager...
-
Page 2: Table Of Contents
Contents Preface ............Display . -
Page 3: Preface
Preface We would like to congratulate you on your new receiver. In purchasing the new Swissphone DE920/DE920 Ex/DE940 you have decided on a device of the highest quality. The Swissphone DE920/DE920 Ex/DE940 is a convincing product thanks to the most effective combination of an attractive design, simplest of operation and highest of quality. - Page 4 WARNING – Changes or modifications not expressly approved by the party responsible for compliance could void the user’s authority to operate the equipment. The device complies with the regulations of the R&TTE European Directive (99/05/EU). You will find a copy of the certificate of conformity on our website www.swissphone.com.
- Page 5 Important information for DE920/DE 920 Ex/DE940 • Do not open device or remove labels! Important information for DE920 Ex • For explosion prevention reasons, no anti-scratch plastic film may be placed on the DE920 Ex display.
-
Page 6: Display
Display Discrete alerting Loud alerting Silent alerting Field strength indication message Alarm clock on Battery condition Clock indication Menu text Position of the menu selection Press scroll key to select Further menus the next menu... -
Page 7: Confirmation Key
Keys Confirmation key (Read messages, confirm alarm, confirm menu selection) Return key Scroll key (Alternatively, display user and status (Display main menu, scroll information, scroll back. Holding down the through menus and reports, return key will display the selected menus change settings) or exit selected message) - Page 8 “Changing the Power Source”). Important information for DE920 Ex The rechargeable battery of the DE920 Ex may only be replaced by certified service centres! If a non-certified service centre opens the device (including opening the battery cover), the explosion protection will be invalidated! For further information, please contact your specia-...
-
Page 9: Menu Structure
Menu structure Starting position: stand-by mode MESSAGE ALERT ALARM CLOCK STATUS Read Loud On / Off Status info Message selection Discrete Selection User info Delete Silent Set time Message selection HH:MM Delete all Snoozer Protect Number * time delay Message selection... - Page 10 By pressing the confirmation key, the message selection for “Read messages” is displayed directly. By pressing the scroll key, the main menu is displayed. ALERT OPTIONS COMMUNICATION SETTINGS SWITCH OFF (only DE940) Profile Set time Are you sure? Callback Selection HH:MM Selection Alertpattern...
-
Page 11: Messages
Messages Individual messages received are alerted, displayed and stored in the memory. Single new (unread) messages are also identified by means of the envelope icon. The individual saved mes- sages are displayed from left to right in the menus “read”, “delete” and “protect” by means of icons, based on the time they were received. - Page 12 Reading messages Starting position: stand-by mode – Press the confirmation key to display messages. The cursor is then on the most recent mes- sage. Sub-adress Time and date of the messages Main adress received Start of the message Protected message Unread message with Free memory space priority...
- Page 13 Reading messages with the confirmation key You also have the possibility of directly scrolling through and reading all messages directly with the confirmation key. Simple operation If your receiver is configured for simple operation, then you get directly into the most recent message by using the confirmation key.
- Page 14 Title of the message folder 1 to 2 message folders The DE920/DE920 Ex/DE940 can show a maximum of two message folders, depending on how it has been programmed. When selected the title of the message folder is displayed in the menu list.
- Page 15 Deleting individual messages Starting position: stand-by mode – Press the scroll key and the “MESSAGES” menu is displayed – Press the confirmation key – With the scroll key, select the “Delete” menu and press the confirmation key – With the scroll key, select the message, which is to be deleted –...
-
Page 16: Messages
Protecting messages Protected messages are not overwritten by more recent messages and therefore remain until they are deleted. Starting position: stand-by mode – Press the scroll key and the “MESSAGES” menu is displayed – Press the confirmation key – With the scroll key, select the menu “Protect” –... -
Page 17: Alarm Settings
Alarm settings differentiate essentially between messages with and without priority. This depends on how the particular receiver address (RIC) is configured. In the alarm options menu the Swissphone DE920/DE920 Ex/DE940 can be configured to “loud” (loud alerting with vibrator), “discrete” (mini beep with vibrator), or “silent” (vibrator only) and “off”... - Page 18 Symbol Alerting Alerting of messages with priority Loud Standard signalling Doubled standard signalling Discrete 10 seconds vibration 10 seconds vibration then doubled standard then mini beep signalling Silent 10 seconds vibration 10 seconds vibration then doubled standard signalling 10 seconds vibration then doubled standard signalling Acoustical alerting Vibration...
-
Page 19: Alarm Clock
Alarm clock Starting position: stand-by mode – Press the scroll key and the “MESSAGES” menu is displayed – With the scroll key, select the “ALARM CLOCK” menu – Press the confirmation key Switching the alarm clock on and off Starting position: “ALARM CLOCK” menu –... -
Page 20: Alarm Clock
– With the scroll key, select the number of repeats and the time interval in minutes and confirm respectively Switching-on with alarm clock If the alarm clock is switched on and the receiver is switched off, the Swisspone DE920/ DE920 Ex/DE940 will be switched on at the alarm time set and the alarm clock will sound. -
Page 21: Status Display And Battery Condition Indication
Number of read messages Date Alarm time Number of unread messages – If the scroll key is pressed, the Battery condition indication is displayed, otherwise the SWISS- PHONE DE920/DE920 Ex/DE940 receiver goes into the stand-by mode after the release time... - Page 22 Upon pressing the scroll button in the status display, you will see the battery display. It shows the remaining operating time in hours (approx. the number of hours the DE920/DE920 Ex/DE940 will still work with the inserted battery) as well as the battery type used.
-
Page 23: Alarm Options
Alert options Starting position: stand-by mode – Press the scroll key and the “MESSAGES” menu is displayed – With the scroll key, select the “ALERT OPTIONS” menu – Press the confirmation key User profiles Starting position: “ALERT OPTIONS” menu – Press the confirmation key to select the “Profile” menu –... - Page 24 Call reminder Starting position: “ALERT OPTIONS” menu – Press the scroll key to select the “Call reminder” menu – Press the confirmation key – With the scroll key select between “loud” and “discrete” – Press the confirm key EA monitor This function is only activated if your system supports “express alerting”.
- Page 25 DynGo system This function is only activated if your device supports DynGo. Starting position: menu “ALERT OPTIONS” – With the scroll key, select the “DynGo system” menu – Press the confirmation key and the DynGo program is displayed Acoustic field strength alarm Starting position: “ALARM OPTIONS”...
-
Page 26: Communication
Communication In the “COMMUNICATION” menu, you configure how the DE940 communicates via Bluetooth with a connected mobile phone. Starting position: stand-by mode – Press the scroll key and the “MESSAGES” menu is displayed – With the scroll key, select the “COMMUNICATION” menu –... - Page 27 Starting position: “COMMUNICATION” – Press the confirmation key – With the scroll key, select the “Pairing” menu – Press the confirmation key Text “Searching” is shown on the display and the DE940 searches for Bluetooth-enabled devices in its vicinity. After a short period, you will see the Bluetooth name of the mobile phone found in the vicinity on the display.
-
Page 28: Settings
Settings Starting position: stand-by mode – Press the scroll key and the “MESSAGES” menu is displayed – With the scroll key, select the “SETTINGS” menu – Press the confirmation key Setting the clock Starting position: “SETTINGS” menu – Press the confirmation key to select the “Set time” menu –... -
Page 29: Settings
The type of re-chargeable battery installed (NiHM or NiCd) can be configured there (not applica- ble to DE920 Ex). On rare occasions, it may happen that a battery, which has already been used is identified as a re-chargeable battery when it is installed, or the other way round. In such cases, you can overwrite the automatic identification of the re-chargeable battery. - Page 30 Battery level indication 80 % – 100 % 33 % – 80 % 13 % – 33 % 0 % – 13 % When it is switched on, the battery icon is always visible on the display and indicates the amount of energy still available.
- Page 31 – With the scroll key, switch ECO on or off – Press the confirmation key Changing the power source (only DE920/DE940, not applicable to DE920 Ex) Remove the clip holster and open the cover on the back of the receiver. Insert the power source supplied into the compartment and in doing so pay ensure that the polarity is correct.
- Page 32 WARNING: Keep batteries out of reach of children under 3 years old. The Swissphone DE920/DE940 receiver is automatically switched on when the battery is inserted. A test is done whilst all loads in the device are activated temporarily. The device then is ready to receive messages.
- Page 33 The rechargeable battery of the DE920 Ex CAN NOT BE REPLACED by the user! The rechargeable battery of the DE920 Ex may only be replaced by certified service centres! If a non-certified ser- vice centre opens the device (including opening the battery cover), the explosion protection will...
-
Page 34: Switching On And Off
If the alarm clock is switched on and the receiver is switched off, the Swissphone DE920/ DE920 Ex/DE940 will be switched on at the alarm time set and the alarm clock will sound. In order to set the alarm clock, please refer to “Setting the alarm clock”. - Page 36 Swissphone Telecom AG, Fälmisstrasse 21, CH-8833 Samstagern, Switzerland Customer Service: © SWISSPHONE Telecom AG Reserves the right to make technical changes without prior notification.
Need help?
Do you have a question about the DE920 and is the answer not in the manual?
Questions and answers